4 Ways To Bring A New Look To Your Home

Your Home

One of the best ways of boosting your mood when you are at home is by changing up the décor. A fresh space, even if it’s the same home, can help you feel more relaxed and give you a greater sense of peace. Many believe restyling a home is expensive, but it doesn’t have to cost a lot. The key is to spend money in areas that count.

Install a Home Lift

Home Lift

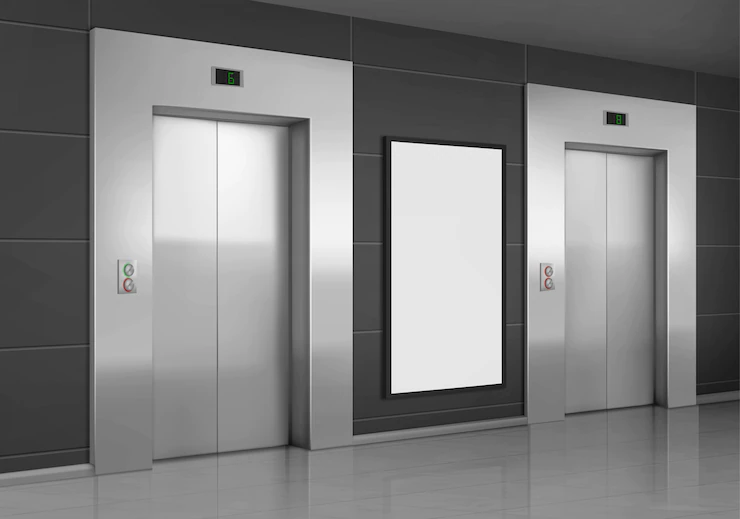
Bringing a new look into your home doesn’t have to mean bringing in impractical décor. In fact, some of the best things to add are both functional and stylish. A home lift allows you to move between floors with ease, and today’s lifts also come in many different styles, so you can find something to go with any home. The right domestic lifts UK business can help you choose something stylish.

Change Up Your Bookshelves

Bookshelves can add a lot of personality and color to your room, and they also offer insights into your personality. Still, getting everything into a pleasing arrangement can be harder than it sounds. You’ll want to start by picking out the books you know you will want on your shelf. Consider skipping those with tattered covers. They can be stored out of sight, like in a basement. If there are dust jackets, consider removing those for a more classic look.

Create a mix of horizontal and vertical rows of books and leave room between these stacks for another décor. Place stacks on different areas, such as the middle or left. You can then mix in eye-catching accessories, such as candlesticks, vases, or sculptures. You can use these items to hold up stacks of books if they are sturdy enough. Some items can be by themselves, and others can be grouped together for a pleasing look. Small items can even go on top of horizontal stacks of books.

Rethink Your Art

Rethink Your Art

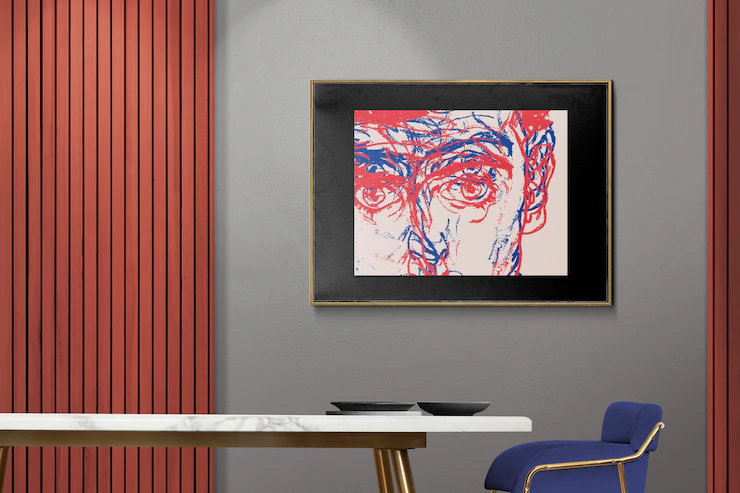
If you have had the same art on your walls for decades, it might be time to refresh it. Take some time to go through what you have on the walls and see what can be moved around. Have a room in mind and go through the house to see what might work for that specific room.

It’s easy to get so used to the art on your walls that you no longer notice it. Moving things around helps make your home look luxurious and also helps you appreciate the pieces even more.

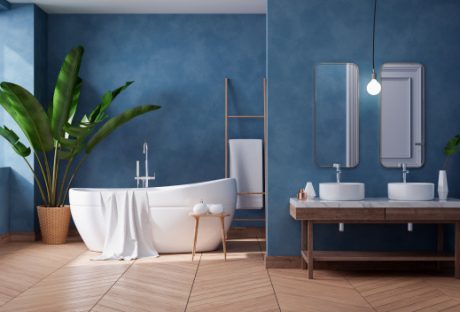
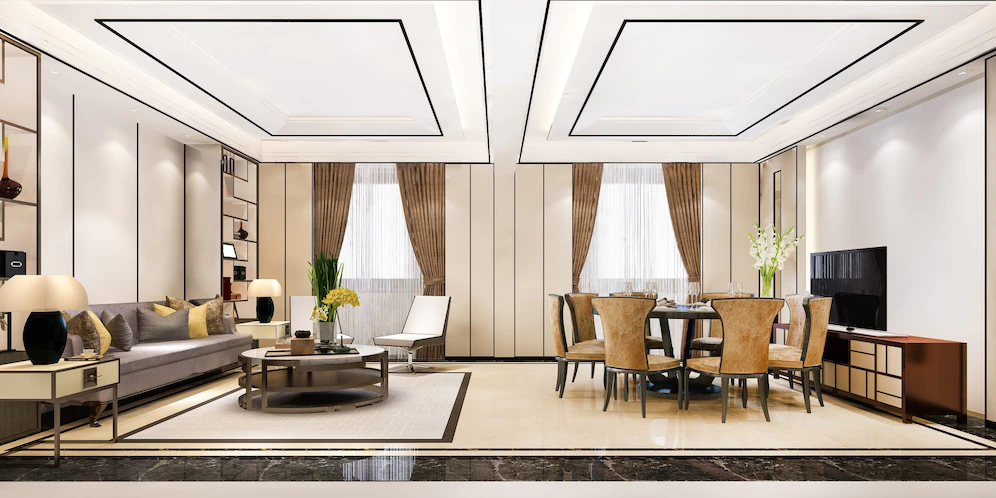
Change the Look of Your Furniture

Your Furniture

You don’t have to buy new pieces of furniture to get a new look. Investing a bit of energy and time allows you to give your home a new look. As you move pieces around, consider what you can do without. Having fewer pieces is often more, and a smaller collection makes the room feel bigger since there will be more open space.

Consider putting pieces around the perimeter of the room instead of the middle of the room, as items in the middle can visually cut the space in half. Redecorating is just as much about taking away pieces as it is about adding new ones.

Additional:

  • 6 Expert Tips for Finding The Right Home to Buy
  • 5 Home Decor Ideas for the Times when Kids’ Grow Up
  • What To Leave Behind Once You Have Sold Your Home
  • Leather Furniture is An Essential Improvement for Any Home or Office

Content Rally wrapped around an online publication where you can publish your own intellectuals. It is a publishing platform designed to make great stories by content creators. This is your era, your place to be online. So come forward share your views, thoughts and ideas via Content Rally.

View all posts

Leave a Reply

Your email address will not be published. Required fields are marked *

Related

Fixer-Upper Improvement Ideas

Top Fixer-Upper Improvement Ideas That Make A Huge Impact

Real estate investors understand that fixer-upper properties carry huge potential. Yes, they may look bad initially, but their property value will steadily increase with the right improvements and renovations. Buyers know this and take advantage by acquiring such properties for less and investing enough in the renovations to increase the value.  Renovating a fixer-upper is a huge financial endeavor. It’s labor-intensive, and it might take some time before things look good as envisioned. Homeowners who want to improve their fixer-uppers must work with a reputable and experienced contractor to address issues that may crop up during the project. They must also look for a good skip-hire company to help eliminate the waste produced by the project. If you’re looking for such a company, you can check out betaskips.co.uk to determine how they can assist you. They can provide adequate-sized skips at reasonable rates, so you wouldn’t have to worry about waste disposal.  Checkout Top Six Fixer-Upper Improvement Ideas That Make A Huge Impact Here are some home improvement ideas that can make a huge impact. 1. Replace the front door If your front door isn't stable and the door frame isn't secure enough, it's time to replace them. A good front door will help you save energy costs and improve security and kerb appeal. You can also repaint the door with a suitable colored paint that will reflect your personality.  2. Paint the exterior Chipped, peeling, or faded exterior paint doesn’t look good and will greatly affect the property value. Potential buyers look into such details and will be discerning when it comes to that. It will be best to paint the exterior walls with good weather-proof paint to ensure durability and better kerb appeal. It will take a bit of change to finish the job, but it will be worth it.  3. Light up the property One of the best ways to improve a fixer-upper is to ensure that it has adequate lighting fixtures inside and outside the house. For example, you can use strings of LED lights or strips for the front and back yard. You can also use solar-powered lamps to illuminate pathways. Inside the house, make sure that you have enough lighting fixtures in every room to guarantee safety. 4. Repaint the cabinets If your budget doesn't accommodate new cabinetry, you can repaint the existing ones with a color scheme that would make them pop. It will help improve the design cohesion and will also define the area. Bright-colored paint will brighten up the space and energize people.  5. Install a backsplash  Backsplashes may be a minor installation, but they can help make the kitchen area look better. When cooking, these backsplashes will also protect the walls from messy and greasy splashes. Install ones that complement the countertops or tiles for design unity.  6. Install better windows Another way to improve property valuation is to install more secure windows. Typically windows in fixer-uppers have rotted frames and aren't properly secured from theft, so it would be better if you had a professional window installer replace them with newer ones. Endnotes If you buy a fixer-upper house, you will spend some money getting them into shape. You might spend a lot, but the results will be worth it in the long run.  Read Also: Ideas for Modern Flooring Designs for Home Improvement Plans Important Things to Know Before Starting a Home Improvement Project Home Sweet Home Improvement: How to Find the Best Home Improvement Loans

READ MOREDetails
Toilet Flush Button

Toilet Flush Button: Understanding The Nuts And Bolts

Though our bathrooms play a critical role in daily life, they're often forgotten until a problem arises. Of all its components, one that stands out is the toilet flush button's use - and understanding. This article looks closely at its workings, maintenance needs and replacement considerations. The Fundamentals Of The Toilet Flush Button What Exactly Is A Toilet Flush Button? A toilet flush button is the mechanism responsible for initiating the flushing process in your toilet system. Situated on the tank's exterior, we press or push this component when using our toilet to flush out its contents into the sewage system. By activating this flush button, we begin an action chain within our bathroom that sends water from its tank into our bowl to flush away its contents into sewer lines. How Does The Flush Button Work? The magic of the toilet flush button lies in its ability to control a more complicated mechanism. Pressing it lifts a lever connected to a chain inside the tank; that chain connects to a flapper (or flush valve seal), covering up drain holes at the bottom. When the flapper is raised, water stored in the tank begins rushing from its source into the bowl through its drain hole and siphon tube into the sewage system. As soon as this process completes, however, the flapper falls back down, sealing off its drain hole once more - and replenishing its supply in readiness for another flush cycle. Maintenance Of The Toilet Flush Button Regular Cleaning Regular cleaning of your toilet flush button is vital to its optimal operation, as dirt can clog the switch and make it less responsive, leading to inconvenient situations for users. A non-abrasive cleaner and soft cloth should be used for exterior cleaning; internal components should be checked regularly to avoid build-up and potential mechanical problems. Checking For Wear And Tear Given how often flush buttons are used, wear and tear are inevitable. Look for signs of damage, such as cracks or looseness. If the control becomes less responsive when pressed or sticks down without returning up when released, this may indicate internal components need to be reviewed for potential problems. Troubleshooting Common Problems Is The Button Hard To Press, Or Is It Sticking A toilet flush button that is difficult to press or sticks down often points to a problem with the connected lever or chain inside the tank. It could be that the chain is too tight or too slack, or the lever needs to be aligned or fixed. A careful inspection and adjustment of these components usually solve the issue. The Button Doesn't Activate The Flush If the button doesn't activate the flush, the issue could be that the switch is no longer effectively connected to the lever, or the flapper isn't lifting. A look inside the tank should reveal the issue. The button, lever, or flapper may need to be replaced. Replacing The Toilet Flush Button When Should You Replace The Button? As with any mechanical component, toilet flush buttons have a finite lifespan. Over time and through regular use, their controller may wear out or become damaged, requiring replacement. Signs to replace it include physical damage to its housing and sticky buttons or ones that no longer activate flushing actions. Looking for a portable toilet rental might also be necessary if you need to fix your toilet for a couple of days. Toilet Flush Buttons: More Than Meets The Eye Though seemingly simple, toilet flush buttons are critical in maintaining sanitation in homes and public spaces. Understanding their inner workings helps us better appreciate their importance, maintain them properly, and effectively troubleshoot any potential issues with them. So next time you press one, remember its critical function while giving it some love and consideration. Conclusion: Understanding how a toilet flush button works may initially seem complicated, but understanding its mechanics is crucial to efficient bathroom operations and sanitation practices. Knowing their inner workings could save us from future inconvenience or repair costs. Maintaining the toilet flush button regularly is vital to prolonging its lifespan and guaranteeing reliable performance within a plumbing system, thus streamlining home maintenance. By periodically inspecting it for signs of wear and tear, individuals can identify and address potential issues early on and prevent more significant ones from developing into larger problems later. By taking proactive measures like this one, individuals save both time and money on costly repairs and ensure an effortless toilet operation experience. Maintaining a flush button is an accessible DIY project for anyone, provided they possess basic knowledge and the appropriate tools. Even if it eventually succumbs to wear or damage despite regular maintenance efforts, replacing the button remains straightforward, making this an achievable DIY project for homeowners. Read Also : Mirror Decorating Ideas To Style Your Bathroom Using Feng Shui In Your Bathroom Design The Different Kinds Of Toilets

READ MOREDetails
Drywall

Elevate Your Home With Unique Ceiling Textures

Drywalls are those construction materials that are used to create walls and ceilings in your home. Not all that, but drywalls also come in handy if you want to create design features like eaves, arches, or any mind-blowing architectural requirements!!! Do you know the best part about drywalls? These are super easy to install, highly durable, and only require simple repairs when damaged. So, drywall is a flat component composed of calcium sulfate dihydrate, typically between thick sheets of backer paper, and facer, used to construct interior ceilings. Let’s talk about the ceiling textures and the drywall options you can choose for your home!!! The Ceiling Textures And Your Drywall Options Decorating your home can be a real challenge for many !!! Therefore, choosing the right drywall finish or texture can prove to be a hard nut to crack. And it’s very natural to get in a state of indecision if you are handpicking it for your new home or renovation project. There are so many options that it feels like you are “searching for a pearl in an ocean.” Making up your mind about whether or not to go texturing your ceiling can be a tough job. And even if you choose to texture your ceilings, there are chances you’ll be confused about which one to go for!!!! And remember, getting the drywall right is the first step of tiling projects?”. But No Need to Worry!! This article will guide you in choosing the perfect texture and drywall option for your ceilings to look more elegant than ever!! 1. Sheetrock Texture: Old Is Gold Sheetrock ceiling texture is a drywall ceiling texture that has been famous since 1917. The reason this drywall texture is so awesomely renowned is because of the artistic look that it gives to your ceiling And the best part is you don’t need to use any sort of spray paint in this case. You can achieve this texture by using your artistic hand technique and without using any special brushes. This texture is perfect for any room. There are no restrictions on the use of this ceiling texture. 2. Stipple Brush Texture: A Test Of Your Skill This texture is not as easy as it seems. You need skills to create this texture. To create this texture, you need a roller and slap brush. The fascinating fact about this texture is it can cover the bumps and holes on your ceiling. And if you have the skills, then this texture can surely make your ceiling look gorgeous than ever!! 3. Swirl Texture: Creativity Taken To A New Level To achieve this texture, you need either a roller or sprayer. You can also do this by using a technique called “the basic swirl” method. But one thing that you need to keep in mind is while creating this texture, you’ll need a lot of patience to get the best result. And the difficult part is you need to create the pattern before the mud dries. So, make sure to have a helping hand by your side. Overall, the texture can really give that awesome look on your ceilings if you do it in the right way!!! 4. Orange Peel Texture: A Color Of Choice The name suggests all the colors of orange skin, but sometimes it’s also called “an eggshell” ceiling texture. If you really love this color, then this can be on the top of your favorite lists. To create this texture, you need to apply thin mud to the ceiling using a spray gun set at very high pressure. The more artistic mind you have, the more artistic look it has got!!!! 5. Smooth Textures: Choice Of Many If you are someone who wants the best at a cheap cost, then this texture is just the right choice for you. Moreover, you don’t need to have many skills to create this texture design. The look of this texture is just mind-blowing, and if you are someone who likes things to be consistently gorgeous, then this is the texture you can have for your ceiling. This texture is effortless to remove and is also perfectly suited for any room. 6. Tree Bark Texture: Beauty Of Nature If you are someone who loves nature and wants to bring the reflection of nature inside your home, then this textured style is just the option you can have. This ceiling has the look of a tree. You can create this texture just by using a heavy roller. The texture might look simply, but it’s very artistic and can surely catch the eyes of many. If you have a farmhouse, then this texture will double the beauty!!!!! 7. Slap Brush Texture: Slap The Beauty Out Artistic, gorgeous, beautiful, and elegant are the nicknames you can give to this texture. A complete package of beauty!!!! To get this texture, you’ll need a brush with very stiff bristles and thin mud. Firstly, you have to cover your ceiling with mud using a roller, then take the brush and slap the ceiling from the edge. This can be a hard nut to crack because if you don’t get it right on the first shot, the whole ceiling might end up looking messy. 8. Popcorn Texture: Cottage Cheese This texture, also known as the “cottage cheese” or “acoustic” ceiling texture, is probably one of the most famous ceiling textures ever!!! If you look closely, you’ll see it’s kind of a look-alike of “popcorn.” That’s why it’s called “popcorn texture.” To achieve the correct texture, you need to use a sprayer to apply to your ceiling. This contains Styrofoam with mud which gives that puffy effect. But it will require you to have a lot of skill to achieve this effect. That’s because the “popcorn texture” is both challenging to apply and remove. I hope this article will help you to know about the needs of ceiling textures and drywall options. And now I believe you’ll be able to get yourself the perfect texture for your ceilings. How Can I Remove Old Ceiling Textures Safely? Removing old ceiling textures can be a big job, but it doesn’t have to be intimidating! If you want to update your ceiling and get rid of that outdated texture, I’m here to help. No matter if you have popcorn, stipple, or another type of texture, this process takes a little bit of care, but don’t worry! Here’s a step-by-step guide on how to remove an old ceiling texture without breaking your back or the bank. Step 1: Test For Asbestos Before you get out any tools…safety first!  Remember, many older ceilings (especially those with popcorn texture installed prior to 1980) contain asbestos. Before doing anything else, have your ceiling tested for asbestos. You can hire a pro to test the ceiling or buy a self-test kit. If asbestos is present, halt all work and consult pros immediately. Asbestos removal is not a do-it-yourself job because it poses serious health risks if mishandled. Step 2: Clear The Room If there’s no asbestos present, it’s time to get the room ready. Cover all the furniture. You’d be amazed at how far a fine mist of water, compound, and paint can travel! Also, plastic should be removed from the floors, and tape should be around any ceiling fans or lights that are not being removed. I can personally tell you we didn’t do this. We found dried white dust on our bedspread when we were stripping the wallpaper in our bedroom, and we had to clean up all the residual dust a little too late. It was wild! Step 3: Soften The Texture For Better Finish Here’s where the fun starts! To make that texture easier to remove, you’ll need to soften it. Fill a spray bottle with warm water and mist the ceiling. You don’t want to drench it. If you put too much water on the ceiling, it could end up damaging the drywall underneath. Allow the water to sit for about 15–20 minutes or so, giving it time to penetrate and loosen up that texture material. Don’t rush this step. It’ll only cause more work for you in the long run. Step 4: Clean Your Work Grab a wide putty knife or scraper and start scraping off the texture. Do small sections at a time, and scrape at a shallow angle so that you don’t gouge the drywall underneath. If it’s not coming off well, spray some more with the water bottle and let it sit for a little longer. This step can be kind of messy and time-consuming, but have patience because, in the end, you will have a nice smooth ceiling. Step 5: Patch & Sand Once the texture is gone, you may notice a few dings or dents in the ceiling. Don’t worry! Just fill them with some joint compound, sand it smooth, wipe away any dust and you’re ready for a new ceiling. And that’s it! A fresh, smooth ceiling in no time! Read Also: Here’s How to Turn Your Garage into a Bedroom on a Budget! Turn your attic into a living space

READ MOREDetails