Published on: 18 January 2021
Last Updated on: 24 December 2024
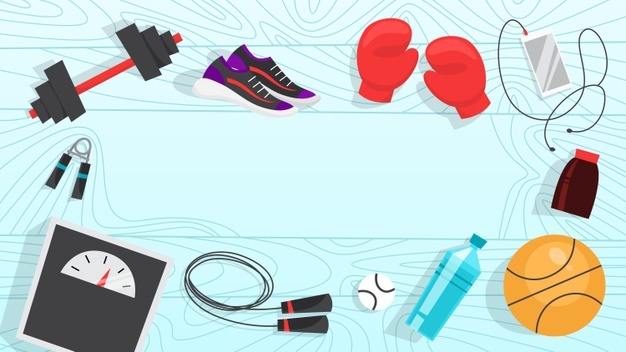
It’s difficult to choose the right workout gear. There are so many factors to consider, and the list of available gear is endless! Here are six steps you can take to make sure you’re choosing the right workout gear no matter what you’re going after.
Here are the 6 Steps for Choosing the Best Workout Gear:
1. Choose the right materials
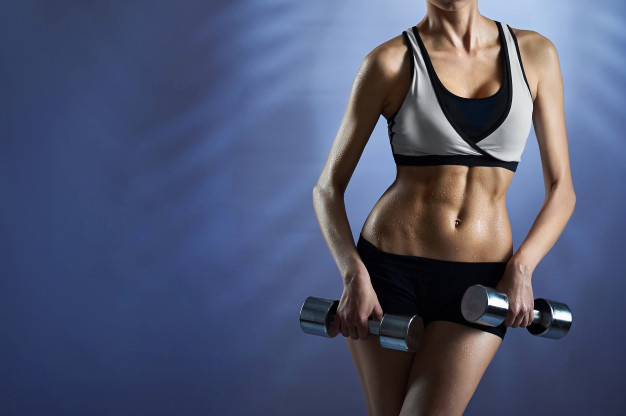
When it comes to workout gear, choosing the correct materials is one of the most important steps. The materials that your workout gear is made of can determine how comfortable you are when you work out, how sweaty you get, and more.
Firstly, avoid cotton workout clothes. Cotton doesn’t ‘wick away’ sweat like some other materials, and instead becomes wet quickly and doesn’t dry. This can lead to skin irritations and general discomfort, among other issues. Instead, choose materials like polyester, spandex, or polypropylene. These materials ‘wick’ sweat away instead of leaving it on you.
2. Consider the weather
Consider the time of year and the climate while you’re exercising. Choose warmer clothing if you’re going to be exercising outside during the fall or winter. Adding a well-fitting hoodie to your workout gear during these colder months is a great way to stay warm while you’re sweating it out.
Of course, during the summer you should try to avoid wearing heavier clothing or clothing that won’t wick sweat away easily. Exercising outside doesn’t need to be uncomfortable.
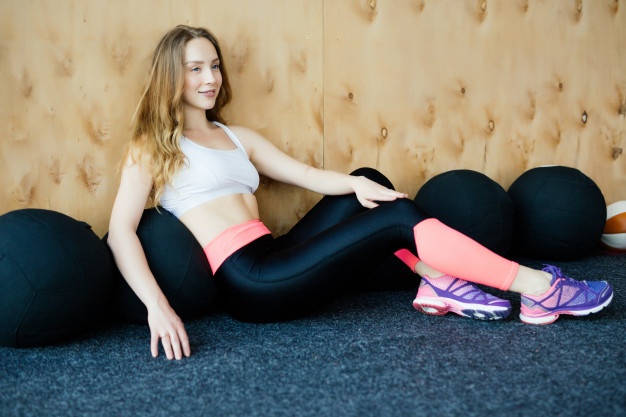
3. Choose the well-fitting gear
The fit of your workout gear is more important than you might think, whether you’re exercising on a machine or not. Choosing exercise clothes that fit you well and sit close to your body is important. You won’t get caught in machines, and materials that wick away sweat will have an easier time getting it away from your body.
That doesn’t mean you need to wear tight clothing. You should always choose clothing that is comfortable and somewhat loose. Yoga pants, workout shorts with liner, leggings, and other fitted clothes are great as well! Just make sure that you don’t wear clothing with loose legs or arms while working with exercise equipment, as it’s easy for the fabric to get stuck and you might get injured.
4. Be stylish
Even when you’re working out, your gear is an expression of your personality. Make sure that you choose the gear that you like. Choose something stylish and fun! Whether you’re looking at patterned workout pants or a hoodie with a unique style for those cold-weather workouts. Represent your favorite sports team or your favorite charity with logos, stickers, and branded workout gear (as long as it fits your other requirements!). Style doesn’t stop when you enter the gym!
5. Supportive shoes are key
Shoes are an important piece of your workout gear, so you have to get them right! You should choose shoes that are supportive all the way around, whether that means supporting your foot’s arches or keeping your ankles straight and secure.
Choose shoes that are breathable and comfortable on your feet. Adequate cushioning throughout the shoe is recommended, as it can help absorb the shock from certain high-motion workouts. Again, choose shoes that fit your style but asl o offer the most support, cushion, and comfort.
6. Accessorize!
There’s more to workout gear than just clothing and shoes. From your gym bag to your water bottle and more, there are a million ways to express yourself with your workout gear. If you like to listen to music while you work out, make sure to choose sweat-resistant or waterproof headphones that won’t fall out of your ears with lots of motion.
Your water bottle can be just about anything you want it to be, but don’t discount this step while choosing your workout gear. It’s important to stay hydrated, and a reusable water bottle is a great way to do that.
When it comes to choosing any accessories, consider that you’ll be moving, sweating, and more while using them. Represent your personality and have fun with your style!
Conclusion
Workout gear is difficult to shop for because there are so many options. From your accessories to your clothes, shoes, and more, it’s important to do research and investigate how you’ll use the gear, what it’s made of, and more. Don’t forget to have fun with your looks and style!
Read Also:
Abdul Aziz Mondol is a professional blogger who is having a colossal interest in writing blogs and other jones of calligraphies. In terms of his professional commitments, he loves to share content related to business, finance, technology, and the gaming niche.
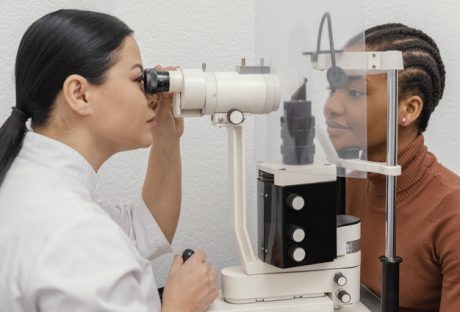
Every year millions of individuals experience eye problems. There are some issues that result in permanent vision loss, whether some can be corrected with the help of glasses or contact lenses.
Research says that between the years 2010 and 2050, the number of individuals with eye diseases will double. And those eye diseases include glaucoma, diabetic retinopathy, cataracts, and AMD or Age-related Macular Degeneration.
Care For Your Eye In 5 Medically Proven Ways
So, from the above information, now it is clear that we need to take care of our vision. However, we also need to face the fact that with age, our vision will become poorer, but we need to make it healthy as much as possible.
1. Opt For Regular Eye Exams
Though your vision is fine and it seems that your eyes are functioning properly, there is only one option to be 100% sure. And only a medical expert can assure you of that. An eye test not only determines if there is any need for glasses, but it also helps to treat some eye diseases effectively if it is detected at an early stage.
Those who have crossed the age limit of 60 years must go through a comprehensive dilated eye exam in order to check whether there are any issues with the retina, macula, optic nerve or not. So, contact any ophthalmology clinic in dubai today.
2. Eat Right
Our health conditions majorly depend on what we eat. You may have heard thousands of times that eating carrots is good for your eye. But there are plenty more foods that will help you to have a healthier vision. Dark leafy greens like spinach, kale, collard greens have zeaxanthin and lutein.
These antioxidants prevent forming cataracts. A diet plan with grapes on it helps to prevent AMD and also keeps our retina clean. Tuna, sardines, mackerel, halibut, and salmon are enriched with omega-3 fatty acids, which are really beneficial for the eyes.
3. Wear Proper Protection
Apart from being a fashion accessory, there is a more important purpose of wearing sunglasses. Sunglasses protect our eyes from harmful UV or ultraviolet rays that are emitted by the sun. In 2016, the Vision Council published a report.
As per that, three-quarters of people in the United States were actually concerned about eye issues, which can arise from the UV rays. So, do not forget to put on sunglasses each time you are exposed to the sun. Also, whenever you are purchasing sunglasses, make sure that it blocks 99 to 100% of UVA and UVB radiations.
4. Give Your Eyes Rest Regularly
When we work all day sitting in front of a computer screen, we often forget to blink. And at the end of the day, we end up with fatigued eyes. Research says that by the year 2050, half of the world population will be short-sighted if things will go on like this.
There is a 20-20-20 rule for that. For every 20 minutes, which you are spending staring at a computer screen, look at any object for 20 seconds that is 20 feet away from you. This will reduce eye strain. You also can use some protective eyeglasses to keep your eyes healthy.
5. Keep Your Weight Under Control
Being obese or overweight will put you at high risk of developing diabetes or any other systematic disorder. This eventually may lead to loss of vision. No time is too late to put your weight under control.
So, develop healthy eating habits and also exercise daily in order to prevent any vision complications. The University of Melbourne in Australia has conducted research. Eye damages due to obesity, High blood pressure, and diabetes can be reversed by losing weight.
Final Tips
Follow all the above-mentioned tips to take proper care of your eyes. No one can deny the fact that as we'll grow old, our vision will become weak, but you also need to keep it healthy as much as possible in the long run.
Read Also:
Are you aware of Belviq – a Weight-Loss Drug?
Seven Best Meal Replacement Ideas For Weight Loss
The Science Behind Blue Light Glasses
In the ever-evolving landscape of healthcare, where patient care takes centre stage, the attire of medical professionals has undergone a remarkable transformation. Gone are the days when nursing uniforms were monotonous and drab; the contemporary nurse scrubs not only exude professionalism but also offer a unique opportunity to reflect one's personality. This paradigm shift has revitalised how nurses present themselves and fostered a positive impact on patient interactions and overall workplace ambience.
The Evolution Of Nursing Attire: From White To Vibrant
Traditionally, nurses were often seen in crisp white uniforms, a symbol of purity and devotion to the profession. However, these uniforms were far from practical, and prone to stains and discomfort. The need for more functional attire became evident as the healthcare industry embraced modernisation. This led to the introduction of nursing scrubs – comfortable, easy to move in, and hygienic.
But it didn't stop there. The evolution of medical scrubs into a canvas for self-expression has ushered in a new era. The once-uniform sea of solid blues and greens has given way to a spectrum of colours, patterns, and styles. Today's nursing scrubs are available in many shades, allowing nurses to choose colours that resonate with them and brighten their spirits. From calming pastels to bold hues, these scrubs reflect the diverse personalities of the healthcare workforce.
Personalisation: The Modern Approach To Professional Attire
In a field where compassion and human connection are paramount, allowing nurses to infuse their style into their work attire has yielded numerous benefits. When nurses feel comfortable and confident in their wear, it radiates through their interactions with patients. This newfound freedom to personalise scrubs has enhanced the sense of individuality and fostered a sense of camaraderie among healthcare teams. For instance, choosing Light Pink Scrubs can subtly blend softness with professionalism, adding a personal touch to everyday workwear while maintaining essential functionality and adherence to institutional standards.
Embracing one’s culture, interests, and even hobbies through scrubs has become a way for nurses to create a more welcoming and relatable environment for their patients. A nurse adorned with cheerful floral scrubs might unknowingly bring a smile to a patient’s face, providing a momentary distraction from their ailment. Conversely, a nurse in scrubs featuring subtle geometric patterns might emanate a sense of calm and professionalism that some patients find reassuring.
Fostering Unity in Diversity
The newfound diversity in medical scrubs is not just about personal expression but also about inclusivity. Hospitals and healthcare facilities are made up of individuals from various cultures, backgrounds, and walks of life. Allowing nurses to wear scrubs that resonate with their identity fosters a sense of belonging and promotes an inclusive work environment.
By embracing their cultural heritage or personal beliefs through their scrubs, nurses can communicate acceptance and open-mindedness without uttering a word. This silent yet powerful display of diversity in the workplace contributes to a harmonious atmosphere where every nurse feels valued for their unique contributions.
Maintaining Professionalism Amidst Personalisation
While introducing personalisation into nursing uniforms has undoubtedly injected a fresh sense of identity and approachability, balancing personal expression and maintaining a professional appearance is essential. Many healthcare institutions have established guidelines to ensure that personalisation does not compromise hygiene or give rise to inappropriate choices.
In conclusion, the evolution of nurse scrubs from simple uniforms to personalised attire is a reflection of the changing dynamics in the healthcare industry. The modern nursing scrub is more than just a piece of clothing; it's a medium through which nurses convey their personalities, create connections, and foster an inclusive environment. By striking a harmonious balance between personal expression and professionalism, nursing uniforms have transcended their functional purpose to become a symbol of unity, compassion, and care. As the healthcare field continues to evolve, one thing remains clear – nursing scrubs will keep evolving alongside, reflecting the diverse and dynamic individuals who proudly wear them on their path to healing and making a difference.
Read Also:
Health Tips For Hard Working Men
3 Top Tips to Keep Your Eyes Healthy
Health Tips For Hard Working Men
From sunrise to sunset, an energetic pulse in the Morayfield region keeps its community moving forward. A significant component of this vitality is attributed to the high-energy fitness culture that thrives here. Among these, one standout facility offers many fitness services that are nothing short of a revolution. Let's delve into this journey of a transformative fitness culture that incorporates the best of Les Mills, Yoga, Pilates, HIIT training, and more, all facilitated by top-notch instructors.
Unveiling The Unique Fitness Services
In Morayfield, fitness is not merely a pastime or a hobby; it permeates every facet of life, creating a lifestyle where health and well-being are not just aspirations but a daily reality. This community has wholeheartedly embraced fitness as an integral part of their day-to-day routine, ingraining it into the fabric of their existence. This deep-rooted passion for fitness is fuelled by the region's commitment to variety, innovation, and achieving tangible results. The fitness services that have blossomed here are a testament to this commitment.
The Les Mills Extravaganza
Nothing quite like the Les Mills experience when discussing fitness classes that pack a punch. These classes have a global reputation for delivering engaging, fun, and effective workouts. In Morayfield, enthusiasts can enjoy an impressive selection of these classes, including favourites like BODYPUMP, CXWORX, SPRINT, RPM and more. Let's explore them in detail:
BODYPUMP: A Full-Body Workout
A typical BODYPUMP class involves using light to moderate weights with lots of repetition for a total body workout. The result? You'll burn calories, tone muscles, increase strength and endurance, and boost your metabolism.
CXWORX: Core Training Like No Other
Are you looking to work on your core strength? Then, CXWORX is for you. This class will challenge your torso and sling muscles that connect your upper body to your lower body, thus improving functional strength and assisting in injury prevention.
SPRINT: High-Intensity Cycling
SPRINT is a short, intense style of training that returns rapid results with minimum joint impact. The workout is based on the science of high-intensity interval training (HIIT), which is proven to produce immediate results.
RPM: Indoor Cycling At Its Finest
RPM is an indoor cycling class set to the rhythm of motivating music. It burns a lot of calories and gets you fit. This class caters to all fitness levels, from the beginner to the elite athlete.
Going Beyond Les Mills: Yoga, Pilates And HIIT Training
While Les Mills classes have their unique charm and effectiveness, the fitness world of Morayfield goes way beyond that. Yoga, Pilates, and HIIT training sessions are also offered here, each bringing unique benefits and variety to the fitness landscape.
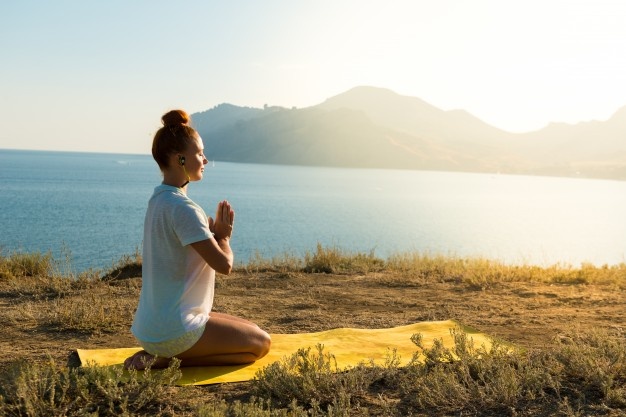
Yoga: Uniting Mind, Body, And Spirit
Yoga classes in Morayfield are perfect for those looking for a holistic approach to fitness. The courses are designed to improve flexibility, build strength, promote better breathing, reduce stress, and improve heart health.
Pilates: Strength, Flexibility, And Balance
The Pilates classes here are suitable for all fitness levels. They focus on core strength, flexibility, balance, and overall body strength. Pilates is an excellent way to shape your body, reduce stress levels, and develop an understanding of how your body works.
HIIT Training: Maximize Your Results In Minimum Time
High-Intensity Interval Training (HIIT) is a fantastic way to maximise your workout if you're short on time but want effective results. These sessions involve brief, intense bursts of physical activity followed by short recovery periods. The result is a super-efficient workout that boosts metabolism and burns fat.
The Very Best Instructors In The Area
What sets the Fitness cartel in Morayfield apart isn't just the variety of classes available and the quality of the instructors leading them. Passionate, experienced, and dedicated to helping clients reach their fitness goals, these instructors make every class exciting, challenging, and fun. They're trained to provide expert guidance, allowing beginners to seasoned athletes to improve their performance and achieve their fitness goals.
Conclusion
The world of fitness in Morayfield is diverse, challenging, and immensely rewarding. There's something for everyone, from Les Mills classes to Yoga, Pilates, and HIIT training. Paired with the best instructors in the area, it's no wonder this region is buzzing with energy and enthusiasm for fitness. Embark on this unique fitness journey in Morayfield, and experience how transformative and fun staying in shape can genuinely be. The promise is not just of a healthier body but a revitalised spirit and an exhilarating sense of achievement.
Read Also:
Seeking a Healthy Career: 10 Tempting Medical Careers to Check Out
8 Awesome Health Benefits Of Dark Chocolate
Different Types Of Blood Circulation Exercise


 When it comes to workout gear, choosing the correct materials is one of the most important steps. The materials that your workout gear is made of can determine how comfortable you are when you work out, how sweaty you get, and more.
Firstly, avoid cotton workout clothes. Cotton doesn’t ‘wick away’ sweat like some other materials, and instead becomes wet quickly and doesn’t dry. This can lead to skin irritations and general discomfort, among other issues. Instead, choose materials like polyester, spandex, or polypropylene. These materials ‘wick’ sweat away instead of leaving it on you.
When it comes to workout gear, choosing the correct materials is one of the most important steps. The materials that your workout gear is made of can determine how comfortable you are when you work out, how sweaty you get, and more.
Firstly, avoid cotton workout clothes. Cotton doesn’t ‘wick away’ sweat like some other materials, and instead becomes wet quickly and doesn’t dry. This can lead to skin irritations and general discomfort, among other issues. Instead, choose materials like polyester, spandex, or polypropylene. These materials ‘wick’ sweat away instead of leaving it on you.
 Consider the time of year and the climate while you’re exercising. Choose warmer clothing if you’re going to be exercising outside during the fall or winter. Adding a well-fitting hoodie to your workout gear during these colder months is a great way to stay warm while you’re sweating it out.
Of course, during the summer you should try to avoid wearing heavier clothing or clothing that won’t wick sweat away easily. Exercising outside doesn’t need to be uncomfortable.
Consider the time of year and the climate while you’re exercising. Choose warmer clothing if you’re going to be exercising outside during the fall or winter. Adding a well-fitting hoodie to your workout gear during these colder months is a great way to stay warm while you’re sweating it out.
Of course, during the summer you should try to avoid wearing heavier clothing or clothing that won’t wick sweat away easily. Exercising outside doesn’t need to be uncomfortable.
 Even when you’re working out, your gear is an expression of your personality. Make sure that you choose the gear that you like. Choose something stylish and fun! Whether you’re looking at patterned workout pants or a hoodie with a unique style for those cold-weather workouts. Represent your favorite sports team or your favorite charity with logos, stickers, and branded workout gear (as long as it fits your other requirements!). Style doesn’t stop when you enter the gym!
 Shoes are an important piece of your workout gear, so you have to get them right! You should choose shoes that are supportive all the way around, whether that means supporting your foot’s arches or keeping your ankles straight and secure.
Choose shoes that are breathable and comfortable on your feet. Adequate cushioning throughout the shoe is recommended, as it can help absorb the shock from certain high-motion workouts. Again, choose shoes that fit your style but asl o offer the most support, cushion, and comfort.
Shoes are an important piece of your workout gear, so you have to get them right! You should choose shoes that are supportive all the way around, whether that means supporting your foot’s arches or keeping your ankles straight and secure.
Choose shoes that are breathable and comfortable on your feet. Adequate cushioning throughout the shoe is recommended, as it can help absorb the shock from certain high-motion workouts. Again, choose shoes that fit your style but asl o offer the most support, cushion, and comfort.