Published on: 24 May 2021
Last Updated on: 03 January 2025
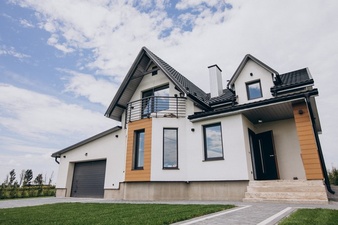
Probably you are busy on the web looking for actual home designs that fall within your budget. Or a way to build your dream house without inflating the cost beyond your savings. You are not alone, and many people planning to build their home on a budget are stuck looking for a solution to find a way to own a home making sure quality is not compromised.
Well, the first step for you is to look for a real estate developer to guide you through the process because they know a thing or two more than you do. So, instead of sitting there searching online for solutions that don’t make sense, here are ways to build your home below and still end up with a quality house when everything is complete.
1. Build smaller:
The first step of minimizing expenses when building your house is to cut your overall housing needs. You don’t want to end up with unfinished structure after your money diminishes; therefore, plan for a small house because it will need few materials and the same with spending.
Also, a small house will require you to install few cooling and healing resources to maintain the house temperature.
But before reducing everything, including the size of your house, first, know what your house requires and the family. Planning earlier before you start spending will avoid overspending or going beyond the allocated budget. Never assume that you only need a few items to complete the house just because the house is small.
So, try to balance everything, and this is achievable if you work with a professional to guide the items and the required materials.
2. Look for reclaimed materials:
Looking for reclaimed materials helps you to stay within your budget and void costly things. It saves you money, and you may end up getting high-quality and stunning building materials similar to new ones.
You can even look for old houses that are no longer in use and see whether they can sell some of the valuable materials from the houses. Many people who use this approach save thousands of dollars that would have purchased new materials.
If you get a good deal with reclaimed materials, you may end up expanding your house if the budget becomes reasonable.
However, compare what you are buying with the market prices for you may spend more than expected.
3. Use natural building techniques:
Natural building techniques can save you a great deal of money. For instance, you can use Cordwood in your house to save on purchasing costly materials. It can replace sheathing, studs, insulation, drywall, siding, and finish coverings. For Cordwood, you only need a beam frame built within a post to make your house walls stand.
Even choosing natural methods does not mean you escape from spending too much money. And that's why budgeting before starting the building process saves you the headache later.
4. Look for cheap or free materials and services:
Going for this option does not mean using used items to build your house. You can look for building materials for low cost or discounts in the market and still get good deals for items that would have cost you a fortune. For services, enquire from family and friends.
They can recommend people they know or service providers they have worked with within the past. That means you get a good opportunity to negotiate building services to amount you feel will not press you financially.
5. Keep water usage areas together:
Trying to combine water usage areas is a great way to save you money. This may save you excess money on plumbing materials spread all over your house. So, the ideal approach is to clump your bathroom, laundry, and kitchen as close as possible to minimize piping needs. You should include the clumping idea in the plan before the house building begins.
6. Forget the costly finishes:
If your budget does not allow you to spend further, you can skip some finishes for a later date. For instance, you can postpone countertops and floor installation until you save money for specifically that work.
Your entire focus should be on building a strong foundation that will guarantee your house stability. Building a house is a lifetime affair; therefore, you need something solid that will shelter you for many years to come, even on a budget.
7. Do-it-yourself as much as you can:
If you can handle most of the building work, it will save on materials and labor. This is where you have to bring your expertise and at the same time know your limit to avoid shoddy work that may end up costing you more to rectify.
Alternatively, rather than hiring many people to handle the project, you can work with architecture and follow their guidelines to save those extra dollars. Some of the task involved does not require a professional to handle them, but observation and application.
Conclusion:
You don’t have to spend a fortune to own a house. There are many options available that you can apply for and end up with a good-looking house. The idea is to build your dream house without spending much money.
Content Rally wrapped around an online publication where you can publish your own intellectuals. It is a publishing platform designed to make great stories by content creators. This is your era, your place to be online. So come forward share your views, thoughts and ideas via Content Rally.
House flipping is an investment strategy involving the purchase, enhancement, and profitable sale of homes. It requires funding, dedication, and an understanding of market trends, along with careful planning and budgeting.
Here, we offer a few beginner tips for flipping success.
What Are The Pros And Cons Of Flipping?
House flipping is a high-risk, high-reward endeavor, but you can minimize the risk by working with the pros at Carmody Construction and weighing the pros and cons.
Profit potential. With planning and proper implementation, house flips can bring high profits quickly.
A more robust real estate portfolio. Flipping success can expand your portfolio, giving you a better reputation among potential clients and lenders.
They are boosting the local economy. Flippers help with neighborhood economic revitalization by enhancing homes and increasing property values.
Personal fulfillment. House flipping offers opportunities for creative expression, which can be rewarding for owners and buyers.
Sharper skills. Becoming a house flipper will help you sharpen skills that can be used in other areas, including team management and negotiation.
And now, the disadvantages:
High risk. House flipping is a significant financial risk. For instance, a sudden market downturn or high renovation costs can lead to sizable financial losses.
Tax consequences. Flipped houses are subject to capital gains taxes, and it’s essential to weigh profit potential against tax liabilities.
Time spent. Flips require dedication—finding, financing, renovating, and selling homes takes time.
Surprise repair costs. Older homes often have hidden problems, which can increase an initial investment and cut into profits.
Market volatility. Changing market trends may affect flip profitability.
Read on to learn the basic steps in a successful house flip.
Budgeting And Planning
The process starts with a plan that outlines goals, identifies risks, and estimates a budget for acquisition, enhancement, and sale. A detailed budget should consider expenses such as financing costs, property purchases, renovation, market changes, and promotions, and it will reduce the risk of unexpected losses.
Finding Financing
Flippers have various financing options, from personal savings to loans, and choices directly affect profits. While paying cash will help you avoid high interest, it’s not always possible. Cash-out refinancing, HELOCs (home equity lines of credit), and hard money lending are all viable alternatives.
Learning About The Market
When flipping houses, analysis of market trends, property prices, and housing demand will give you valuable insights. By learning about the community in which you’re planning the flip, you’ll find an appropriate property, target the right market segment, and turn a profit.
Finding And Choosing A Property
As you search for a potential flip, consider factors like location, condition, and market demand. Choose a home with a focus on its appreciation potential, renovation costs, and curb appeal. Above all, align your choices with your budget.
Making An Offer
Successful negotiation requires proposing a below-market price and backing the offer with sound reasoning. The lower the purchase price, the higher the profit. Be firm, fair, and willing to walk away when negotiating with sellers.
Renovation
Flipping a house requires renovations because most buyers want livable, ready-made homes. Before selling, make necessary upgrades and repairs to increase the property’s value. Set a timeline, maintain oversight, and consider working with contractors on the most challenging jobs.
Selling For A Profit
When selling a home, focus on the renovations you’ve done. Use home staging, competitive pricing, digital listings, and professional photography to present your flip in the best light. These tactics and working with a local real estate agent will simplify the process.
Our Thoughts
House flipping is a profitable effort when planned carefully. Despite what we see on TV, instant success is rare—and mistakes are inevitable. When flippers find the best financing, work with the right partners, and follow these tips, they’re more likely to succeed.
Starting A Career With House Flipping
We know that investing is an effective option of side hustle. Around 61% of Americans actively invest. A recent Gallup survey finds that real estate is another popular long-term investment option for Americans.
That’s why house flipping is a credible career option, too.
However, you need accurate market intel to be a successful house flipper. Moreover, the real estate market in the US could be more predictable. So, you need to make flipping decisions wisely.
A common trend in house flipping is making decisions based on the location.
Steps To A Successful House-Flipping Career
House flipping can be a lucrative career once you’re greasy with the market.
So, let’s check out the steps to set up your house-flipping career:
Research your market well and find plausible locations to start house flipping
Set the right budget
Seek small-scale investments for your first house-slipping project
Pro Tip: Don’t consider going to other cities to invest in house flipping. Firstly, that will be a costly affair. Secondly, it might turn out to be risky. Try that only when you have abundant experience.
Prefer local search
You only have the best knowledge about the real estate status quo of your residual address. So, forego plans to house flip in faraway cities.
Most beginners start by exploring properties in their residence cities for house flipping.
How Does That Benefit Your Career As A House Flipper?
That’s easy.
You know the best rates at which homes are sold in your locality. Moreover, you can predict which properties will attract the best deals.
In real estate, the quality of a property is not everything. What matters more is the peripheral community. And nobody can judge the pros and cons of your surrounding community.
Some extravagant factors in the community might appeal to prospective factors. At the same time, you might also know any eccentricities in the community.
Is your locality in the vicinity of a popular entertainment source? Does it have other amenities?
Or it's a tourism hotspot!
Focusing on such factors and finding a reason to invest in local properties is better.
Role Of Real Estate Agents In Your Career
I found a home, but you must go overboard with your budget to claim it.
Dont.
Instead, work with a real estate agent. Most agents have access to real estate MLS systems.
It is a database that lists all available real estate in your locale. It also marks the prospective future listings.
End Statement
House flipping can be a rewarding career. However, it requires tactical moves with hard work. Often, conditions may not be suitable for you.
But don’t wait for the tailwind. Work hard and find an ideal property even under adverse circumstances.
Read Also:
10 Best Ways To Find Cheap Homes To Flip
How To Secure Your Dream Home With A VA Loan
Maximizing Your Home Sale: Essential Tips And Home Inspection
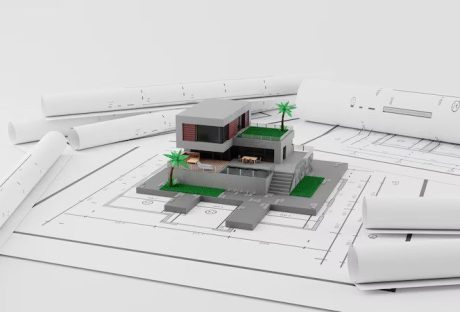
Revit modeling is a process that uses Building Information Modeling (BIM) software to create and manage information about a building project. This advanced technology is rapidly becoming an industry standard for designing and constructing buildings.
Revit modeling is used in various industries to develop accurate, high-quality, and detailed building designs. This process provides significant advantages over traditional design methods.
Improved Collaboration
Collaboration is a critical component of any building project. Effective collaboration between designers, engineers, and architects ensures the project is completed on time, within budget, and meets client expectations.
Real-time Collaboration
Revit modeling allows real-time collaboration between team members working on the same project. With the software's cloud-based capabilities, designers, engineers, and architects can simultaneously work on the same model, making real-time changes.
Enhanced Communication
Revit modeling enhances communication between team members, reducing the likelihood of errors and misunderstandings. The software provides a shared platform for team members to share design ideas, make revisions, and collaborate on the project. This ensures that everyone is on the same page throughout the design process.
Streamlined Design Process
Leverage the expertise of revit modelling services to streamline your design processes by providing a central location for all project-related information. This will equip your team with accessibility to the same information, eliminating the likelihood of errors and ensuring everyone works from the exact design specifications.
Time-Saving
Time is of the essence in any building project, and Revit modeling offers several advantages that save time in the design process.
Automated Processes
Revit modeling automates many design processes, including generating 2D and 3D models, creating floor plans, and producing material takeoffs. By automating these tasks, designers and engineers can save significant time compared to traditional design methods. This automation also reduces the likelihood of errors and ensures the design meets the required standards.
Rapid Revisions
Revit modeling offers a streamlined approach to making revisions. The software allows for quick and easy modifications to the design, with changes automatically reflected throughout the model. This feature reduces the time needed for revisions and ensures that all team members work with the most up-to-date design version.
Consistent Documentation
Revit modeling ensures consistent documentation throughout the design process. The software automatically generates and updates project documentation, including construction documentation, specifications, and schedules. This feature reduces the likelihood of errors and ensures all team members work with the same documentation.
Cost-Effective
Revit modeling offers several cost-effective advantages that help to reduce project costs while improving overall project outcomes.
Reduced Design Errors
Revit modeling reduces the likelihood of design errors compared to traditional design methods. The software automatically checks for design errors, such as clashes and interferences, reducing the need for manual checking. This helps to reduce project costs by preventing costly errors.
Efficient Material Management
Revit modeling offers efficient material management capabilities that help to reduce project costs. The software helps designers prevent the over-ordering of materials, reducing project costs.
Enhanced Project Accuracy
Revit modeling offers enhanced project accuracy compared to traditional design methods. The software allows for accurate design modeling and simulations, ensuring the project meets the required standards. Project stakeholders can ensure accuracy and efficiency in the design process by utilizing Revit modeling solutions.
Visualization and Analysis
Revit modeling offers several advantages in visualization and analysis that help to improve the design process and overall project outcomes.
Simulations and Analysis
Revit modeling offers simulations and analysis capabilities that help to improve project outcomes. The software allows designers to simulate various design scenarios, such as lighting, ventilation, and energy consumption. This feature helps to optimize the design and identify potential issues before construction, reducing the likelihood of costly errors and rework.
Efficient Design Modifications
Revit modeling offers efficient design modification capabilities that help designers and stakeholders make informed design decisions. The software allows for rapid and accurate design modifications, enabling stakeholders to evaluate different design options and make informed decisions about the project.
3D Modeling and Visualization
Revit modeling offers 3D modeling and visualization capabilities that help designers and stakeholders visualize the project realistically. With 3D modeling services, stakeholders can visualize the project and identify potential issues before construction, reducing the likelihood of costly errors and rework.
Conclusion
Revit modeling is a valuable tool for building projects and can help to ensure project success. Using Revit modeling in the design process, project stakeholders can optimize the design, reduce costs, and ensure that the project meets the required standards.
It offers 3D modeling and visualization capabilities, simulations and analysis, and efficient design modifications, improving the design process and overall project outcomes.
Read Also:
Latest Trends of Graphic Design in London
Divorce In Modern Society
What are the Benefits of Eco-friendly reusable carry bags?
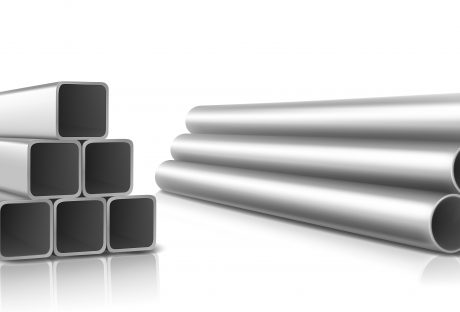
In terms of selecting the suitable material for use in industry, two of the most commonly selected products are stainless steel sheets versus carbon steel plates.
The large difference between applications and industries has been widely attached to these due to their durability, versatility, and different performance circumstances.
But both differ significantly in properties and cost-effectiveness; Thus, This will help determine the best-suited material according to specific requirements. So, let's have a closer look at carbon steel vs stainless steel.
Stainless Steel
Stainless steel has carbon, iron, and a minimum of 10.5% of chromium. Chromium is the actual key that reacts with oxygen to form a passive layer to protect the steel from corrosion. This is what reduces the chance of stainless steel rusting.
This is very important if you are looking for outdoor furnishings, or installed something in a wet environment. The higher the content of chromium, the better the resistance to corrosion.
You have to pay attention to the grade of stainless steel when you are buying any appliance and other costly items. Not all materials are created equally.
Stainless steel that a 10.5% chromium is going to cost less than those that have 16% chromium. Moreover, the difference is reflected in service life and maintenance costs.
Main Features of Stainless Steel Sheets
Stainless steel sheets are known for their corrosion resistance that comes with the chemical composition that contains chromium. This makes them be used in most areas where they are usually soaked with moisture, chemicals, and extreme temperatures.
Furthermore, it has an aesthetically pleasing finish, which explains why extensive usage in buildings, kitchen appliances, and medical equipment has been witnessed.
Some advantages of stainless steel sheets include:
Corrosion Resistance: They are even corrosion and oxidation-resistant during these extreme conditions.
Low Upkeep: Stainless steel needs little maintenance, saving time and resources.
Aesthetic Appeal: The outward finish of the finished products is improved through their aesthetic appeal.
Durability: These are very strong and robust, withstanding even high-stress conditions.
To those that produce the highest grade material in the market, these Stainless steel sheet suppliers mainly provide customized products according to a client's needs.
Carbon Steel
Carbon steel is made from iron and 0.12 to 2.00% carbon. The elaborate definition includes alloy steels, which also have 10.5% of alloy content. even though the percentage of carbon is less than two points, it makes a huge difference in the physical appearance and charecteristics like hardness.
When people discuss carbon steel, they refer to the high quality of quality steel used in tools and knives. Carbon steels that have high quality are quite hard, and that is what makes them good at retaining their shape, and resisting abrasion.
They can tolerate significant force before they get deformed. Hard metals are also brittle when extreme tensile strength is applied. High-carbon steels generally crack and do not bend.
Low carbon steel is more easily available than high carbon as they have a low production cost, the ductility is great, and it is also easy to manufacture. Low-carbon steels get deformed under stress but do not break.
Moreover, it is easy to weld and machine the low-carbon steel because of its ductility. They are mostly used in bolts, seamless tubes, automobile body panels, steel plates, and fixtures.
Characteristics of Carbon Steel Plates
Carbon steel plates, In contrast, are priced based on strength and are quite less expensive. This composition is basically made of iron and carbon with just trace elements of practically all other elements. Carbon steel sheets are, therefore, cheaper compared to stainless steel sheets but much less resistant to corrosion.
Some advantages of carbon steel plates include:
High Strength: They can carry heavy loads, making them highly applicable in structural operation.
Cost-Effective: It is relatively cheaper than stainless steel.
Versatility: commonly used in construction work, manufacturing, and heavy machinery.
Elastomer: This may be easily modified through cutting, welding, and other processes.
Generally, Carbon steel plate suppliers serve most industries whenever they require something less costly yet robust.
Carbon Steel vs Stainless Steel: The Difference
Thinking of carbon steel vs stainless steel, but there is no necessary reason to think one is superior to the other. It is all about context.
Every material has its own advantages and disadvantages. The main objective is to match the steel to the requirements. Let’s look at the basic difference at a glance.
Stainless steelHigh carbon steelRust resistantVulnerable to rustLess brittleBrittleLess water-resistantWater-resistant
Applications And Industry Scenarios
Both materials are indispensable in their respective domains. While stainless steel sheets are preferred for applications requiring aesthetics and corrosion resistance, Carbon steel plates dominate in industries demanding strength and economy.
For instance, stainless steel is widely used in pharmaceutical and food processing because of its hygienic quality. On the other hand, carbon steel plates are widely used as a material in shipbuilding pressure vessels and structural frameworks.
About PipingMaterial.ae
PipingMaterial.ae is a prominent online portal where the buyer can contact the best manufacturers and suppliers of industrial-grade material.
This site has thus facilitated sourcing on a business level with verified suppliers of stainless steel sheets and carbon steel plates to ensure quality and reliability.
Whether there's a demand for stainless steel high-performance or even robust carbon steel solutions, PipingMaterial.ae bridges the industrial needs of customers with the genuine stockiest suppliers.
Conclusion
According to particular needs, stainless steel sheets are to be ordered or carbon steel plates are to be ordered. Stainless steel can be a better option than carbon steel regarding corrosion and aesthetic characteristics.
Conversely, carbon steel offers higher strength beyond the competition at an economic cost. With proper advice from trusted vendors on sites such as PipingMaterial.ae, businesses may make proper choices to maximize performance and minimize cost for their projects.
To conclude in the debate of carbon steel vs stainless steel, context is the main focus. You have to decide which one you want depending on the purpose of your need.
Read Also:
Is Steel/Iron Ore A Good Career Path In 2021?
Is Metal Fabrications A Good Career Path In 2023?
Dangers Of Chemical Spills On Humans, Buildings, And Environment


 The first step of minimizing expenses when building your house is to cut your overall housing needs. You don’t want to end up with unfinished structure after your money diminishes; therefore, plan for a small house because it will need few materials and the same with spending.
Also, a small house will require you to install few cooling and healing resources to maintain the house temperature.
But before reducing everything, including the size of your house, first, know what your house requires and the family. Planning earlier before you start spending will avoid overspending or going beyond the allocated budget. Never assume that you only need a few items to complete the house just because the house is small.
So, try to balance everything, and this is achievable if you work with a professional to guide the items and the required materials.
The first step of minimizing expenses when building your house is to cut your overall housing needs. You don’t want to end up with unfinished structure after your money diminishes; therefore, plan for a small house because it will need few materials and the same with spending.
Also, a small house will require you to install few cooling and healing resources to maintain the house temperature.
But before reducing everything, including the size of your house, first, know what your house requires and the family. Planning earlier before you start spending will avoid overspending or going beyond the allocated budget. Never assume that you only need a few items to complete the house just because the house is small.
So, try to balance everything, and this is achievable if you work with a professional to guide the items and the required materials.
 If you can handle most of the building work, it will save on materials and labor. This is where you have to bring your expertise and at the same time know your limit to avoid shoddy work that may end up costing you more to rectify.
Alternatively, rather than hiring many people to handle the project, you can work with architecture and follow their guidelines to save those extra dollars. Some of the task involved does not require a professional to handle them, but observation and application.
If you can handle most of the building work, it will save on materials and labor. This is where you have to bring your expertise and at the same time know your limit to avoid shoddy work that may end up costing you more to rectify.
Alternatively, rather than hiring many people to handle the project, you can work with architecture and follow their guidelines to save those extra dollars. Some of the task involved does not require a professional to handle them, but observation and application.