The Best eSIM Plans For Budget Travelers In The USA 

Published on: 24 November 2023 Last Updated on: 24 July 2024
Best eSIM Plans

Hey there, fellow adventurers! If you’re dreaming of epic road trips, exploring new cities, or just having a blast while traveling, you’re in for a treat. We’re diving into the world of eSIM plans, those magical cards that keep you connected without breaking the bank. So, buckle up, grab your favorite snack, and let’s explore the best eSIM plans for budget travelers in the USA!

What’s An eSIM, Anyway?

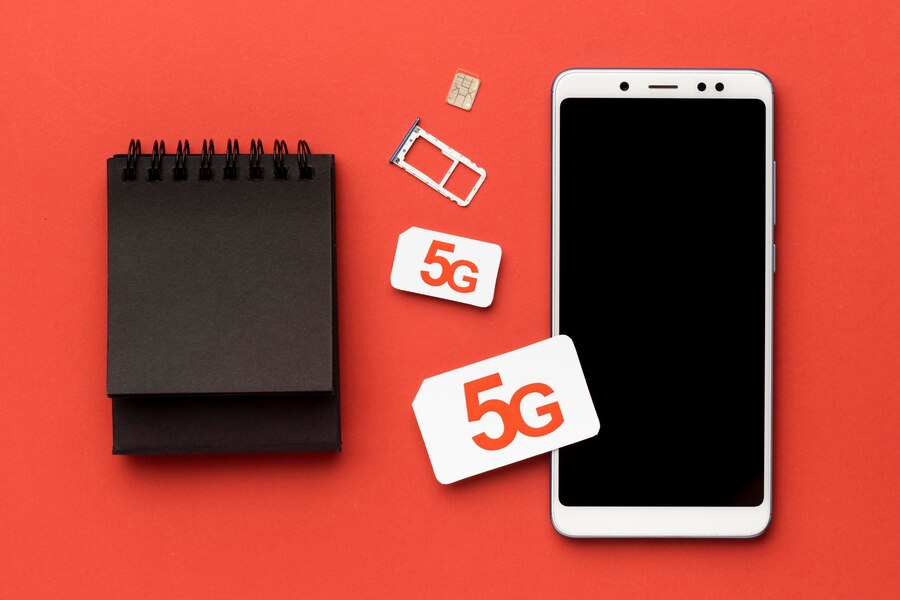
Okay, before we jump into the cool stuff, let’s chat about eSIMs. They’re like your regular SIM card but smaller and way more high-tech. Instead of a physical card you can touch, eSIMs live in your phone’s digital world. Just imagine it as a tiny wizard that magically connects you to the internet wherever you go!

Why Choose eSIMs For Budget Travel?

Now, you might wonder, why bother with eSIMs when there are traditional SIM cards? Well, friend, eSIMs are the superheroes of the connectivity world. They’re super easy to use, and you can switch between different plans without swapping cards. This flexibility makes eSIMs a budget traveler’s best friend when looking for the cheapest esim plan usa.

Key Benefits That Make eSIMs Perfect 

The convenience of activating plans remotely and only paying for the data you use makes eSIMs a great choice for finding the cheapest esim plan usa.

  • No Roaming Charges: You can switch between affordable local data plans at each destination rather than paying expensive roaming fees.
  • Flexibility: Pause or renew plans anytime. Only pay for the data you actually use.
  • Convenience: Activate plans remotely in just a few taps without locating a store.
  • Multi-network capabilities: Use dual SIM functionality to manage multiple plans or providers.
  • Enhanced security: Reduced risk of SIM card theft or damage compared to physical SIM cards.

Clearly, the flexibility and convenience offered by eSIMs give budget-conscious travelers the freedom to stay connected anywhere in the world without incurring expensive international roaming charges.

Top eSIMPlans For Budget Travelers 

T-Mobile Connect Prepaid eSIM

T-Mobile has your back with its Connect Prepaid eSIM plan. It’s like having a secret weapon for staying connected on a budget. With this plan, you get a chunk of data and unlimited talk and text – perfect for sharing all those awesome travel stories with your pals. Plus, T-Mobile’s got a strong network, so you won’t be left stranded without a signal.

Google Fi – Your Travel Buddy

Google Fi is like that buddy who knows all the cool spots in town. It works with multiple networks, jumping between them to find the best signal. And the best part? You only pay for the data you use. So, if you’re chilling at a beach or hiking a trail and not using much data, your wallet stays happy too!

FreedomPop – Freedom To Explore

If you’re all about freedom (it’s in the name, after all), then check out FreedomPop’s eSIM plans. They offer free plans with a decent amount of data each month. Yes, you heard it right – free! Of course, if you need more data or extra perks, there are affordable options to choose from. It’s like having your very own treasure chest of data at your fingertips.

Airalo – Global Adventures Await

For the globetrotters out there, Airalo’s eSIM plans are a dream come true. They offer eSIMs for multiple countries, so you can stay connected wherever your wanderlust takes you. No need to stress about buying a new SIM card every time you cross a border – just keep exploring!

Tips For Choosing The Right eSIM

Now that you’ve got the lowdown on some awesome eSIM plans, how do you choose the one that suits your travel style? Here are a few tips to help you make the best decision:

  1. Check Coverage Maps: Before you commit to an eSIM plan, make sure to check the coverage maps. You wouldn’t want to find yourself in a dead zone with no bars and no way to share that breathtaking sunset pic!
  2. Data, Data, Data: Think about how much data you really need. If you’re a social media guru, you might want a plan with more data. But if you’re more of a “disconnect and enjoy the moment” type, a smaller data plan could be just right.
  3. Flexibility Matters: Look for eSIM plans that let you change or cancel without too much hassle. Life on the road can be unpredictable, and you want a plan that rolls with the punches.

Key Takeaways

  1. eSIMs are like Digital Magic Cards: eSIMs are like those tiny magic cards that live in your phone and connect you to the internet wherever you go. No more hunting for SIM card trays – just tap, and you’re good to go!
  2. Budget-Friendly Adventures with T-Mobile: T-Mobile’s Connect Prepaid eSIM is your budget superhero. It gives you data, unlimited talk, and text – all the essentials for sharing your cool travel stories without spending too much.
  3. Google Fi – Pay for What You Use: Google Fi is like your travel buddy. It works with different networks, finds the best signal, and the best part? You only pay for the data you use. So, your wallet stays happy while you enjoy your adventures.
  4. FreedomPop – Free Data Treasure Chest: FreedomPop’s eSIM plans are all about freedom. They have free plans with a good amount of data each month. If you need more, they’ve got affordable options. It’s like having a treasure chest of data without breaking the bank.
  5. Airalo – Stay Connected Globally: Airalo is for the global explorers. They offer eSIMs for different countries, so you can stay connected wherever you travel. No stress about buying new SIM cards – just keep exploring!

Conclusion

So, there you have it – the scoop on the best eSIM plans for budget travelers in the USA. These eSIMs are like your trusty sidekick, helping you stay connected without spending too much money. Whether you’re road-tripping or flying across the globe, these digital magic cards are ready for your adventure. Happy travels!

Frequently Asked Questions (FAQs)

What’s the difference between eSIMs and regular SIM cards? 

eSIMs are like tiny digital wizards that live in your phone, while regular SIM cards are physical cards you insert. eSIMs are super easy to use – just a few taps on your phone, and you’re connected!

Why choose eSIMs for travel? 

eSIMs are perfect for travel because they’re flexible and don’t require swapping cards. You can switch plans easily, and some even work globally, saving you the trouble of buying new SIM cards in every country.

How do I know which eSIM plan is right for me? 

Check coverage maps to make sure your eSIM works where you want to go. Think about how much data you need – more for social media lovers, less for those who prefer to disconnect and enjoy the moment.

Can I change or cancel my eSIM plan easily? 

Look for eSIM plans that offer flexibility. Life on the road can be unpredictable, so having a plan that lets you change or cancel without much hassle is a plus.

Do all eSIM plans work the same way? 

No, each eSIM plan is a bit different. Some offer more data, some are free with basic features, and some work globally. Choose the one that fits your travel style and budget the best!

Read Also:

Ankita Tripathy loves to write about food and the Hallyu Wave in particular. During her free time, she enjoys looking at the sky or reading books while sipping a cup of hot coffee. Her favourite niches are food, music, lifestyle, travel, and Korean Pop music and drama.

View all posts

Leave a Reply

Your email address will not be published. Required fields are marked *

Related

Alexa device issue

How To Troubleshoot The Alexa Not Responding Issue? [Fixed]

Alexa is a virtual assistant, which works with an echo dot in order to fulfill all the demands of its users. With its thousands of attractive features, Alexa has made the life of its users super easy and also entertaining at the same time.  With its hi-tech features, Alexa can do almost everything from controlling smart home lights to set reminders, playing songs, jokes, news, quizzes, and much more things. But due to some reasons, you may find your Alexa not responding to the commands that you are giving it.  Do not worry if you are facing the Alexa not responding issue. Here we have the most effective and easiest troubleshooting steps to fix this issue.  Troubleshoot The Alexa Not Responding Issue: Here are the troubleshooting steps that you need to follow for solving the Alexa not responding issue with your echo dot. There are a bunch of reasons for what you may be facing this Alexa not working issue.  So, let’s head towards the troubleshooting steps.  1. Check The Microphone Button There are many instances when we find that the reason behind Alexa not responding is because the microphone is damaged or we forget to turn the button on. The microphone button is one of the most common reasons for this issue.  So, check the microphone button first. If the issue persists and it seems that everything is totally fine there. You can step to the next process.  2. Reboot The Device This is one of the most effective and easiest ways in the whole troubleshooting process of Alexa is not responding issue. There is not much trouble, all you need to do is just restart the device and the issue will get resolved. But this restarting has a definite name called power drain, and it is more than just powering off the power button and power on it again.  Here is the step-by-step guide for the power drain process. First, you need to check the power light. In case it is showing blue light, that means the device is able to hear you but simply the Alexa device is unresponsive to your commands.  Disconnect the power cable from the power source for at least 30 seconds. Wait for a little while, and after that, connect the power cord again with the power outlet. Now, when your device is ready completely, try to give it any command again. If the issue is resolved, then it is fine. But in case the issue of Alexa not responding continues, head to the next step.  3. Echo Dot Hard Reset In case the above described troubleshoot does not work for your echo dot. Here is the step-by-step guide to hard reset. You will find the reset button at the bottom of the device. You can use a pin to press the button. As soon as you press the button, the device will power off. Here, you need to wait for a little and then power the device on again. All the settings of the device will then reset to the original.  4. Disable And Enable Alexa Privacy If Alexa not responding after all the above-mentioned troubleshooting steps, now is the time to enable Alexa privacy and in order to do so, follow the below steps. You will find a button at the end of Alexa’s nucleus screen. You need to press the button. This button is to enable the privacy of Alexa. If you press the button again, the device will hear you again. Give a command to Alexa in order to check whether the issue is resolved or not.  5. Check Your WiFi Connection Behind the “Alexa not responding” issue, there is a huge chance that maybe your wifi connection is not working properly. That is why Alexa is finding it difficult to respond to your commands.  Well, let me tell you that if you do not have a proper internet connection, there will be no use for this Alexa device. So, check the router now. In case you find anything wrong, contact your network service provider.  6. Try Changing The Position  In case you have placed your echo dot device far from your router or in someplace where it is having issues connecting with the router. This can be the main reason why you are experiencing “Alexa not responding.”  Make sure that you are placing Alexa within the wifi range. The place should be accessible to yours as well so that your echo dot device can connect with the network properly and also can hear you clearly.  7. Set Echo And Smartphone On The Same Network Always keep in mind that the smartphone that you are using and Alexa have to be connected within the same network. In case they are connected with different routers or your phone is not connected with the router’s network, you will face the “Alexa not responding issues.” Connect both of them on the same router’s network in order to resolve the issue.  8. WiFi Congestions If you have connected a lot of devices within the same router’s network, it may create the “Alexa not responding” issue. Due to excessive wifi congestions, your echo dot is not able to respond to your given commands. Remove or disconnect some other devices, and then try to give your device command and check if the issue is resolved.  Still Alexa Not Responding? All the steps that I have told you in this troubleshooting guide are enough for resolving Alexa not responding to voice issue. But if you face the same problem after performing all the troubleshooting steps. You should contact Alexa customer care. Call on the Alexa helpline number and ask for help.  More Resources:  Benefits Of Having A Cordless Vacuum Cleaner At Home What is type c cable, and is it worth buying

READ MOREDetails
The Timeless Appeal of Leather: Why Firefighters Trust Leather Radio Straps

The Timeless Appeal of Leather: Why Firefighters Trust Leather Radio Straps?

Leather, a material with an ageless allure, has been used across centuries and sectors. Its robustness, flexibility, and adaptability make it a preferred choice in numerous applications. This is particularly true in firefighting, where dependability and resilience are critical. Among the vital gear for firefighters, the leather radio strap stands out, exemplifying the timeless charm and practicality of leather. Unmatched Durability in Extreme Conditions Firefighters are often thrown into some of the most challenging environments. Their gear must withstand high temperatures, abrasive substances, and rugged use. It's in these circumstances that the leather radio strap proves its worth. Crafted from top-quality leather, these straps are designed to endure the demands of firefighting, offering a safe and readily accessible spot for a radio - an indispensable device for communication during crises. Unlike other materials, leather does not easily crack or fade, even when subjected to harsh elements. This durability implies that a leather strap can serve for several years, if not decades, with minimal upkeep. User-Friendly and Comfortable Leather radio straps also score high on their ease of use. They are engineered to glide effortlessly over turnout gear, ensuring radios and other accessories are always within arm's reach. Furthermore, they secure the radio microphone, preventing it from swinging or becoming an obstruction during pivotal moments. Comfort is another aspect where the leather radio strap excels. A well-constructed radio strap positions the mic comfortably on the chest, particularly for firefighters laden with backpack-style bags and other hefty equipment. Shielding from Thermal Hazards: The Leather Radio Strap Advantage A leather radio strap isn't just a handy tool for communication; it's also a line of defense against the thermal hazards firefighters face. When worn beneath the turnout coat, it offers several protective benefits: Strategic Positioning: The radio is located below the coat line, significantly less exposed to extreme heat and flames. This positioning not only maintains the functionality of the radio but also extends its lifespan. Upright Orientation: This strategic placement ensures the radio remains upright even when a firefighter crawls. It eliminates the need to fumble around for the device, making it easier to use and access in various situations. Thermal Resistance: Leather itself is a material known for its thermal resistance. It can withstand high temperatures without melting or deforming, protecting the radio from overheating or suffering heat damage. Insulation Properties: Beyond its heat-resistant qualities, leather also provides some insulation. It can help keep the radio stable, preventing rapid temperature changes that could affect its performance. In essence, a leather radio strap is more than just a carrier for radio; it's a shield against the intense thermal hazards that firefighters regularly encounter. This added level of protection further underscores why leather straps are such an essential part of a firefighter's gear. Read Also: Your Wrist, Your Chat: Setting Up WhatsApp On Apple Watch Rugged Aesthetic Appeal: The Distinctive Charm Of Leather Radio Straps Beyond their functional attributes, leather radio straps also carry a significant aesthetic appeal. Here's why these straps are more than just practical gear: Timeless Elegance: Leather is a material that never goes out of style. Its classic appeal transcends trends, making it a timeless choice for professionals who value functionality and aesthetics. Rugged Charm: Leather straps have a rugged charm that embodies firefighting's tough and resilient nature. This rustic look perfectly aligns with the image of bravery and strength that firefighters represent. Unique Patina: Leather develops a distinctive patina - a natural aging process that enhances its look. Each scratch, mark, or blemish adds to the strap's character, making each unique and personal. Telling a Story: Leather straps carry the stories of their wearers. They bear the marks of fires battled, lives saved, and experiences shared. Over time, they become a testament to the wearer's journey and achievements. In short, the aesthetic appeal of a leather strap is a blend of timeless elegance, rugged charm, and personal storytelling. It is a piece of gear that serves a crucial role in a firefighter's life and contributes to their unique identity and style. Trusting The Timeless: Why Leather Radio Straps Are A Firefighter's Best Ally In conclusion, the timeless charm of leather and its durability and versatility make it the go-to material for firefighter radio straps. It's not just about fashion; it's about placing trust in a material that can endure the test of time and harsh conditions. The leather radio strap is more than just an accessory; it symbolizes the resilience and bravery of those who don it. When it comes to reliable firefighting gear, there's no doubt that leather stands unrivaled by time. Learn More About: Care And Maintenance Of Men’s Vintage Rolex Watches How To See Someone’s Imessages Without Their Phone? WhatsApp Not Working: Why It Happens And How To Fix It

READ MOREDetails
MySQL

Top 10 MySQL GUI MacOS

Databases are the primary data storage location for all software applications. For instance, when someone conducts a web search, logs into an account, or completes a transaction, a database system maintains the information so users can retrieve it whenever they choose. A relational database, on the other hand, organizes data into tables, rows, and columns. Furthermore, it combines tables and creates a link between the data, making it simple to acquire insights into the relationship between multiple data points. Among the different relational databases, MySQL is the most popular. It supports different OS like Linux, Windows, and even macOS (Apple). In addition, it powers several popular web applications, including Twitter, Netflix, Uber, and Facebook. There are several MySQL GUI for macOS. However, this blog article will discuss the top 10 MySQL GUI Clients for MacOS. 10 Most Popular MySQL IDE for MacOS 1. dbForge Studio for MySQL dbForge Studio for MySQL is a MySQL GUI for macOS. It is used to create, maintain, and design databases. dbForge Studio for MySQL allows you to build and execute queries, develop and debug stored procedures, and manage database objects. Furthermore, it has a user-friendly UI and consists of intelligent coding features like code completion, enabling you to write SQL queries easily and effectively. PROS Code completion Automatic run-time query Visual Query Builder, which helps you create queries using drag-n-drop Simple to debug Simple backup and restoration CONS The free edition has limited functions It is compatible with only MySQL and MariaDB dbForge Studio for MySQL cannot be used offline. Price: 30-day free trial, $179.95 for a perpetual license of the premium edition. 2. TablePlus TablePlus is a native MySQL GUI application with an easy-to-use interface. Its native architecture enables speedier processing of SQL queries. As a result, you can quickly build, query, edit, and save databases. Furthermore, TablePlus has an appealing user interface that enables you to manage numerous relational databases at the same time, such as MySQL, PostgreSQL, SQLite, Microsoft SQL Server, Redshift, MariaDB, and others. PROS It executes queries in split seconds It consists of a simple UI It only consumes a little space - about 180MB to install no code query features you can connect to multiple databases simultaneously code formatting features CONS The free version limits you to 2 opened tabs and 2 opened windows No rollback button Price: $79, $99, and $49 for basic, standard, and custom license, respectively. 3. DBeaver DBeaver is a graphical database administration tool for database developers and administrators. It is a free and open-source tool that supports popular DBMSs like MySQL, PostgreSQL, MariaDB, SQLite, and Oracle. Aside from MacOS, it also works on Windows, Solaris, and Linux. DBeaver is highly functional and user-friendly. It consists of the typical features one should expect from a GUI database management tool. Features like code completion, code formatting, data editing, database analysis, SQL editor, and so on PROS Can connect and work on different databases simultaneously It has easy navigation through the Schema object tree It saves coding time through code completion CONS The free edition has limited functions It consumes a lot of RAM space You cannot install it without Java Price: The community edition is free, and the Enterprise edition is $10/month. 4. Sequel Ace Sequel Ace is a popular Mac database management tool for MySQL and MariaDB databases. It serves as a replacement for the longtime MacOS tool - Sequel Pro. Sequel Ace allows easy writing of custom queries, easy accessibility to all your databases, and a filtering system to find what you need quickly. PROS It rarely crashes It is fast and easy to install It has flexible connectivity CONS It does not support multiple result tabs for multiple queries The query editor window is slow 5. SQLPro Studio SQLPro Studio is a high-end database management software for Postgres, MySQL, Oracle databases, and Microsoft Management Studio. It is well-known for its smart features, such as syntax highlighting, the ability to execute several queries simultaneously, autocomplete, keyword inclusion, and exporting files as CSV, among others. PROS The table filters are easy to use It can install plugins You can easily connect it to local Docker containers CONS It is a little bit slow It does not have NoSQL DB management It crashes randomly. Price: $99.99 per year. 6. DataGrip DataGrip is a multi-engine database management tool. It is compatible with MySQL, PostgreSQL, Microsoft SQL Server, Oracle, Sybase, SQLite, and so on. DataGrip is characterized by many amazing features, such as code auto-completion, bug detection, and version control integration, among others. In addition, it provides a query console for performing and profiling queries. PROS The interface is user-friendly and very easy to understand. The support is substantial, and the tool deployment is highly authentic You can manage multiple databases simultaneously. CONS It consumes too many computer resources, which slows down its performance. If you plan using of MySQL DB only, its functionality is poorly Price: $199 per year 7. Beekeeper Studio Beekeeper Studio is an open-source SQL editor and database management tool for MacOS, Linux, and Windows. It has a friendly user interface and is very easy to understand. Also, Beekeeper studio is GPL licensed, which makes it free to use. The tool is characterized by various smart features, such as a tabbed interface for multitasking, keyboard shortcuts, query history, code auto-completion, and syntax highlighting, among other features. PROS It has keyboard shortcuts It enables users to multi-task You can use the tool without the internet You can save your queries to visit them later CONS It takes a while to load multiple tables in a database The UI could be better Price: $99 8. Adminer Adminer is a PHP-based database data editing tool that is both simple and user-friendly. It is appropriate for general users because it allows for high-level data manipulation. Adminer was previously known as phpMyAdmin. It does, however, have a simpler and more user-friendly layout. PROS The security features are top-notch It is fast in executing queries It restricts the number of connection attempts to prevent cyberattacks CONS The user interface could be more user-friendly It is not easy to move database schemas across the workspace Price: it is free 9. Navicat Navicat is a graphical front-end database administration tool that allows you to connect to several databases simultaneously, including MySQL, MariaDB, SQL Server, Oracle, PostgreSQL, and SQLite. Navicat allows you to create and manage database objects, move data between databases, synchronize, and deploy updates. Furthermore, its efficient functionality allows you to quickly complete complex jobs, such as importing a large number of file data into a database table without interruption. PROS It is beginner friendly It runs SQL queries very fast You can easily move data across different tables and databases. CONS The subscription is very costly It has a short free trial period (14-day free trial) Price: $69.99 monthly subscription, $1399 for a permanent license. 10. Querious Querious is a new MySQL database management software for MacOS. It is precise and simple to use, giving you complete control of your work. Furthermore, Querious is beginner-friendly and comes with smart features that enable users to view, edit, search and structure their data how they deem fit. PROS A simple user interface It executes queries quickly Complete control over user privileges It rarely crashes CONS Autosuggestion can only suggest table names It only supports MySQL It is available only on MacOS Price: $25. Read Also: Quality Of E-Commerce Data Entry Services- Whether You Should Invest In Them? Is Computer Software Prepackaged Software A Good Career Path? Best Practices For Replicating Data

READ MOREDetails