Published on: 16 March 2016
Last Updated on: 04 September 2024
When it comes to bi-fold doors, a lot of people prefer using their own handyman skills instead of hiring one. The thing is that though you can easily fix up a problem like adjusting the height or making the door a bit less creaky using your skills, it is not really possible for everyone to actually install the entire door themselves. In this reference, you should remember that though you actually try to save up a bit on the cost of the door, you purposely cause yourself more harm because if the door is not set right, it might just crash causing injuries and damage.
Remember that an average price of the bi-fold doors can be in between $50 to $150. And if you actually hire someone for this purpose, you can pay a similar amount for the installation. So, it is tempting to implement the entire process yourself. But the problem is that if you go wrong here, then it could just cause more damage than good.
It is really not that hard because these bi-fold doors just need a tiny bit of patience. Doing so can help you get the benefit of installing the entire door yourself, with minimal supervision. You should remember that, if there is any remote chance that your handyman skills are not that good, you should hire an expert. Here’s a few aspects to evaluate-
One of the first things you should do here is understand where you need a new door. In most cases where you have bi-fold doors that have been around for years, a bit of adjustment and fitting tricks tend to do the job. You can try lubricating the door using some oil or simply get ahead with the adjustment using some of the tips that are mentioned at the end of this article.
But there is a long list of things that can go wrong in this reference. One of the major problems that individuals face here is the door or the fitting not opening the right way. It is vital that the height along with the width be measured accurately, so that when you adjust these bi-fold doors, your setting is just right.
Another aspect is that you can try tipping panels. The first step is to consider the size of the door and ensure that you cover all the steps of taking down the door correctly. Any mistakes here, then you have trouble setting them back again. You should also ensure that the alignment and fastening is done properly so that in post repairs, there is no risk in using these bi-fold doors. Also, the hardware needed for this process should be kept alongside because a little lapse here means you are holding the door with no screwdrivers to put things back in place.
Adjusting the doors
When you adjust the bi-fold doors, ensure that you first loosen the screw that sits on the top of the bracket and then slide the same slightly. This should be done along with tracks to leave enough room between the top and your door. Then again tighten the screw and close the door to check.
For the floor bracket, you have to shift the pins on either door bottoms. In one case you have to loosen a screw that slides the bracket in and out.
To adjust the height, you have to just screw the bottom pin using a wrench and pliers. This can be done without taking off the door too.
Abdul Aziz Mondol is a professional blogger who is having a colossal interest in writing blogs and other jones of calligraphies. In terms of his professional commitments, he loves to share content related to business, finance, technology, and the gaming niche.
Plants and humans have a long mutual understanding relationship since the beginning of this civilization. Mother Nature has provided us a diverse range of flora that caters to our various requirements of nourishment, clothing, commercially important products, oilseeds and other such things for the growth of mankind.
Not just that, there are other plants that are known to bring good luck, positive vibes, improved health and a host of other such benefits. These good luck plants need to be a part of every home due to their significance and importance. You need to grow these auspicious plants and also send good luck plant to other people. Check out these five best good luck plants that can help in transforming your home environment completely.
The Lucky bamboo plant:
It is one of the most importantly good luck plants that has a great significance in Chinese tradition. This lucky bamboo plant is a part of Feng Shui and is quickly adopted by the people in modern times. This good luck plant helps in keeping the family together and is an effective home décor item. If you are unable to find this lucky bamboo plant in your local nursery, you can easily buy good luck plants online through various stores.
The Four Leaf Clover plant:
This good luck plant is a native of the USA and consists of four miraculous leaves. The plant is a mutant variety of the normal clover plant that is found at rare places. The four-leaf clover is said to bring good luck or fortune and this sentiment is based on a 17th-century belief. According to the ancient belief, finding a four-leaf clover is said to bring a good thing for the person.
Read More: How To Grow Tomatoes From Seed
The Tulsi or The Holy Basil plant:
Tulsi is one of the good luck plants that can be widely seen in numerous homes of Hindu families. It is considered as the wife of “Lord Krishna” and is meant as very sacred or pure. This good luck plant is said to possess magical medicinal properties and removes the negative energy from the homes. The significance of the basil plant is also mentioned in the religions like Islam and Christianity which considers it as a “divine plant”. You can even send good luck plant of basil to your close friends and relatives as an ideal gift.
The Snake plant:
This good luck plant is believed to absorb certain poisonous gases from the internal air of our home. Snake plant releases a large amount of water vapor and helps in maintaining the humidity in our surroundings. If you are thinking about how to get this plant, here is the solution for you. You can easily buy this plant from an online good luck plants store without any need to step outside.
The Money plant:
Money plant is an important member of the good luck plant family. It can be easily grown in a jug of water and are seen as creepers in various homes. You need to point the shoot of this money plant in the upward direction in order to bring wealth and good luck to your home.
So, visit your nearest plant nursery or buy good luck plants online from a store to enhance the internal appeal and aura of your homes. Involve these good luck plants as a home décor item and experience their multiple benefits yourself.
Read More:
3 Amazing Flower Street Garden – How To Design
Does Organic Gardening Improve Soil Quality?
How To Choose The Right Containers For Your Container Garden
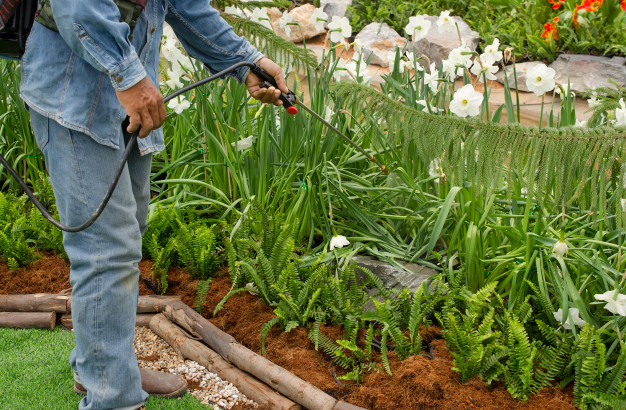
Pests can be a menace and a mood killer. They dampen your spirits of developing a beautiful garden with their destructiveness. Many gardeners make frequent visits to the stores to buy insecticides to try and save their gardens. But did you know your home is full of natural insecticides that you could use to control the pest? Several items that you use in your home can also be used to control pests in the garden.
So, if you are tired of the frequent visit to the stores or don’t have the time, here are several home items and products you can use to control pests in your garden.
DIY Ways to Control Pests in Your Garden:
One Hot Pepper Spray:
Mix one gallon of water and about three spoons of hot pepper; if you are using fresh peppers, chop about ten peppers. Simmer the mixture or about 15 minutes and then let the mixture settle for 2 hours.
Add a few drops of dish soap to the mixture. The soap helps the mixture acquire a sticky solution that can easily adhere to the plants.
Garlic-Mint Insect Spray:
To make this homemade pesticide, blend some mint leaves with garlic gloves. Add cayenne pepper and dishwashing soap. Boil the mixture and let it settle for 12hours. It should be ready to chase the bugs away.
Apple Cider Vinegar Fruit Fly Trap:
Flies are irritant and spread diseases very fast. Instead of waiting until it’s morning to buy some bug spray, you can easily make a homemade fly trap using basic kitchen products.
Fill a bottle with apple cider vinegar and add a few pieces of chopped apple. The bottle top should be funneled shaped or have a shaker that allows the flies to get in but restrict them from easily getting out.
Coffee Grounds:
Do not throw away used coffee grounds if you have a pest problem in your house. Despite making you a cup of coffee, coffee grounds can be used as homemade pesticides.
If there is an infestation of ants in your garden, place the coffee grounds in the spot they are originating from. Coffee grounds are fatal to many species of ants. Coffee grounds can also be used to control bugs, snails, and slugs.
Eggshells:
If a population of slugs and snails are wreaking havoc on your recently planted seedlings, you can easily win the war with eggshells. Eggshells make the ground rough, and the snails find it challenging to slither. Crash eggshells into tiny pieces and then spread the pieces on the ground. The shells also add value to your garden by adding calcium and other minerals to the soil when they degrade.
Dust Mite Oil Repellent:
You can easily make a pesticide to control mites and aphids that invade your home and garden with some few basic home items. To do this, mix either lavender, eucalyptus, peppermint, clove or rosemary oil with water. Pour the mixture into a spray bottle.
Mites and aphids hate the smell of this mixture and will stay away from the sprayed area. You can add lemongrass and basil to repel lice and fleas as well.
Egg Deer Repellent:
Yes, a deer is also a pest. They can be a big problem for your garden, especially if you live near game reserves. However, you can keep the deer away from your plants by using a mixture of eggs and water. Mix several eggs with water and blend the mixture until it forms a solution. Pour the mixture into a spray bottle and then spray the solution on the leaves of your plants. The deer will be repelled by the smell and will stay away from your garden.
Bananas and Tin Foil:
Aphids are some of the most destructive pests in the garden. They can easily destroy a whole garden if they are not controlled. It is one of the best ways to Control Pests.
To control aphids collects banana peels and chop them up into small pieces. Place the peels under the soil around the base of the plants. Aphids are repelled by the peels, and the peels add nutrients to the soil when they decompose.
Foil can also be used to chase way aphids. The foil reflects sun rays to the underside of the leaves when placed at the base of the plants. The heat and light will chase away the destructive pests.
Some people might wonder, “what if I meet banana spiders while spraying the garden?” Well, the best thing to do is to leave them alone. Banana spiders are pest controllers and will help you reduce pests in your garden. Majority of banana spiders are harmless to humans.
Pests should no longer be a big problem if you use the home remedies above. Frequent visits to the store to buy pesticides will also be a thing of the past.
Read Also:
What You Should Expect From A Pest Control Visit
5 Tips To Keeping Animals Away From Your Garden
5 Essential Tips To Designing A Beautiful Front Yard Garden
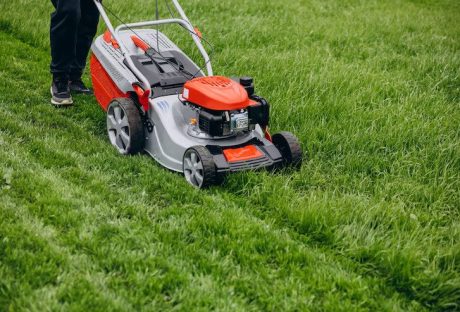
Achieving a lush and inviting lawn is something all homeowners dream of! While it can be tricky to properly take care of your outdoor space, one of the most important steps to having a magnificent lawn is fertilizing.
Lawn fertilization services in Texas make your garden thrive, providing — you with the essential nutrients needed for vivid colors, growth, and most importantly — health.
Here Are Three Prime Keys To Achieving Optimal Lawn Nourishment
To support you along this process, here is our guide: three tips for successful lawn fertilization to make your outdoor area the envy of the block.
1. Uncover your lawn's essential needs
It's essential to understand your grass type in order to achieve optimal lawn care. Take some time to figure out what type of grass is growing in your yard, as each one requires its own maintenance. A quick way to identify the type includes examining the shape of the blades, their color, and the growth pattern. With this knowledge, you can take proper steps in maintaining a healthy lawn all year round.
Maintaining a lush, healthy lawn may require fertilizer specific to the type of grass in your yard. Warm-season grasses like Bermuda and Zoysia, as well as cool-season grasses like fescue and Kentucky bluegrass, have varying dietary needs. Knowing your lawn's grass type is essential for choosing the right fertilizer and following an appropriate application schedule.
To ensure the soil's quality, it is vital to perform a soil test. Doing so will provide insight into what nutrients your soil is lacking, what adjustments need to be made to reach optimum growing conditions, and what type of plants would thrive best in the environment.
2. Adhere to the right fertilizer application techniques
Utilizing fertilizer correctly is essential to enabling efficient nutrient uptake and averting any potential damage to your yard or nature. To guarantee the appropriate use of fertilizer, here is a breakdown of the key guidelines:
All times demand that you employ the most appropriate spreader to ensure success.
To achieve optimum results in your yard maintenance, it may be worthwhile to consider investing in a spreader. Typical models include drop or broadcast spreaders, both designed for specific lawn sizes and structures. According to manufacturer guidelines, you should set up the spreader for precise product application.
3. Accurately apply the prescribed rates
The right amount of fertilizer is important for effective results. Don't be tempted to apply more than the recommended rate based on the nutrient content and area size. Over-application can cause over-fertilization, leading to nutrient burn and environmental damage. Make sure to pay close attention to the instructions on the packaging for optimal effects.
Utilizing fertilizer at the correct moment is an essential element to consider for optimal plant growth. Applying the correct amount in the proper timeline will help your garden to flourish and thrive.
For your lawn to reach its full potential, timing is of the essence when it comes to fertilization. During the times your grass is actively growing—fall and spring for cool-season cultivars, late spring and summer for warm-season types—apply the necessary fertilizers for the best results.
Should you attempt to fertilize lawns that are not actively growing, your actions would be in vain; not only will the nutrients be wasted, but there's a risk of doing harm to the grass. Therefore, be sure to fertilize only when the conditions are right.
Read Also:
The Best Riding Lawnmowers: These Lawnmowers are for You
Natural ways to get rid of flea in your lawn
How To Prepare Your Lawn For Fall