DIY Ways to Control Pests in Your Garden

Published on: 06 June 2019 Last Updated on: 12 September 2024
Control Pests

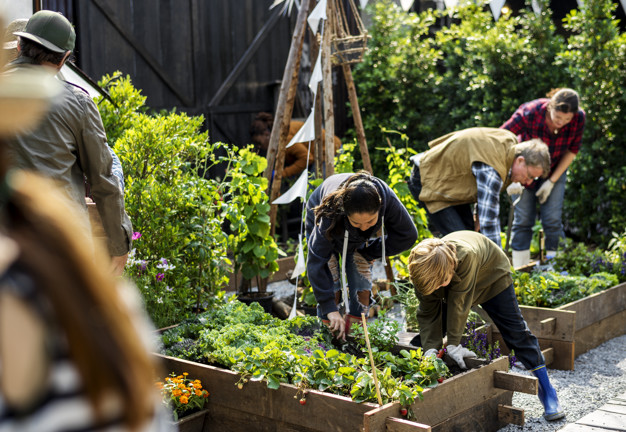
Pests can be a menace and a mood killer. They dampen your spirits of developing a beautiful garden with their destructiveness. Many gardeners make frequent visits to the stores to buy insecticides to try and save their gardens. But did you know your home is full of natural insecticides that you could use to control the pest? Several items that you use in your home can also be used to control pests in the garden.

So, if you are tired of the frequent visit to the stores or don’t have the time, here are several home items and products you can use to control pests in your garden.

DIY Ways to Control Pests in Your Garden:

One Hot Pepper Spray:

Mix one gallon of water and about three spoons of hot pepper; if you are using fresh peppers, chop about ten peppers. Simmer the mixture or about 15 minutes and then let the mixture settle for 2 hours.

Add a few drops of dish soap to the mixture. The soap helps the mixture acquire a sticky solution that can easily adhere to the plants.

Pests

Garlic-Mint Insect Spray:

To make this homemade pesticide, blend some mint leaves with garlic gloves. Add cayenne pepper and dishwashing soap. Boil the mixture and let it settle for 12hours. It should be ready to chase the bugs away.

Apple Cider Vinegar Fruit Fly Trap:

Flies are irritant and spread diseases very fast. Instead of waiting until it’s morning to buy some bug spray, you can easily make a homemade fly trap using basic kitchen products.

Fill a bottle with apple cider vinegar and add a few pieces of chopped apple. The bottle top should be funneled shaped or have a shaker that allows the flies to get in but restrict them from easily getting out.

Coffee Grounds:

Do not throw away used coffee grounds if you have a pest problem in your house. Despite making you a cup of coffee, coffee grounds can be used as homemade pesticides.

If there is an infestation of ants in your garden, place the coffee grounds in the spot they are originating from. Coffee grounds are fatal to many species of ants. Coffee grounds can also be used to control bugs, snails, and slugs.

Eggshells:

If a population of slugs and snails are wreaking havoc on your recently planted seedlings, you can easily win the war with eggshells. Eggshells make the ground rough, and the snails find it challenging to slither. Crash eggshells into tiny pieces and then spread the pieces on the ground. The shells also add value to your garden by adding calcium and other minerals to the soil when they degrade.

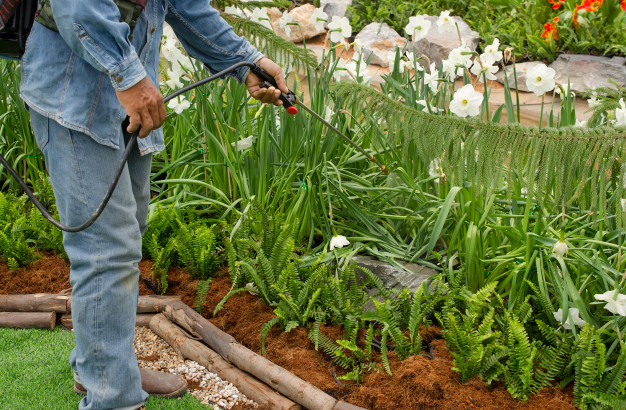
Dust Mite Oil Repellent:

You can easily make a pesticide to control mites and aphids that invade your home and garden with some few basic home items. To do this, mix either lavender, eucalyptus, peppermint, clove or rosemary oil with water. Pour the mixture into a spray bottle.

Mites and aphids hate the smell of this mixture and will stay away from the sprayed area. You can add lemongrass and basil to repel lice and fleas as well.

Egg Deer Repellent:

Yes, a deer is also a pest. They can be a big problem for your garden, especially if you live near game reserves. However, you can keep the deer away from your plants by using a mixture of eggs and water. Mix several eggs with water and blend the mixture until it forms a solution. Pour the mixture into a spray bottle and then spray the solution on the leaves of your plants. The deer will be repelled by the smell and will stay away from your garden.

Bananas and Tin Foil:

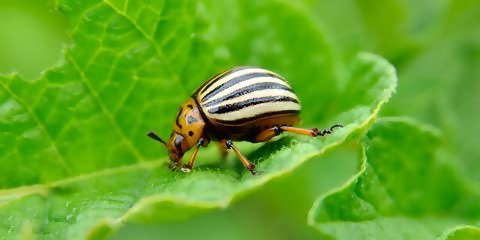
Aphids are some of the most destructive pests in the garden. They can easily destroy a whole garden if they are not controlled. It is one of the best ways to Control Pests.

Aphids

To control aphids collects banana peels and chop them up into small pieces. Place the peels under the soil around the base of the plants. Aphids are repelled by the peels, and the peels add nutrients to the soil when they decompose.

Foil can also be used to chase way aphids. The foil reflects sun rays to the underside of the leaves when placed at the base of the plants. The heat and light will chase away the destructive pests.

Some people might wonder, “what if I meet banana spiders while spraying the garden?” Well, the best thing to do is to leave them alone. Banana spiders are pest controllers and will help you reduce pests in your garden. Majority of banana spiders are harmless to humans.

Pests should no longer be a big problem if you use the home remedies above. Frequent visits to the store to buy pesticides will also be a thing of the past.

Read Also:

Content Rally wrapped around an online publication where you can publish your own intellectuals. It is a publishing platform designed to make great stories by content creators. This is your era, your place to be online. So come forward share your views, thoughts and ideas via Content Rally.

View all posts

Leave a Reply

Your email address will not be published. Required fields are marked *

Related

Settle

Are You Ready to Settle Down?

There comes a time in the life of every adult when they start asking themselves big questions. Are you in the right job? Do you want to move to? Are you ready to commit? Like every big decision, it usually takes a lot of thinking and contemplating. But what if you can't decide? After a year, or maybe two, is it time for you and your partner to settle down with each other? Read on to see if you’re ready to take the leap into a lifelong commitment. Are You Ready to Settle Down: Sharing a Home: If you've been together for some time now, it’s reasonable to start thinking about living together. It’s believed that this prepares you for the possibility of marriage in the future. When you spend all of your free time in the same place, you get to know your partner in ways you didn't even imagine. Are you ready for that? If the answer is yes, the first thing to do is find a home for both of you. Try to have an honest talk with your partner about what your home should be like. Is it big or small? City or suburbs? When making a choice about the big stuff, you can pop over to these guys and do some research to get some help deciding. But don't wait too long! If you contemplate too much, your dream home might be gone! Do You Have A Pet? Let's say you have already been living together for a while. You pay the bills, buy groceries, and of course, binge-watch your favorite TV show together. Now, take a look around your place. Do you see a plant? If your answer is yes, congratulations! You are halfway on becoming a serious, grown-up couple. How about we take it a step further, by getting a pet together? It could be a cat, a dog or, hey, even a fish. Have you already made this step? If not, would you want to do that? People say that having a pet is similar to having a baby. You have to walk it, feed it, and take care of it. This can take up a lot of time. If you and your special someone feel ready for this step, that is a good sign for your relationship. It means you are moving forward and growing up as a couple. Still Not Sure? Listen, making such a huge decision can be overwhelming for some. This is one of those things you don’t want to rush. It’s okay to take your time and figure everything out. The worst thing you can do is hurry onto things and regret it after a few months. So make a list. Write down the pros and cons regarding your partner and things you see working in the future. We know it sounds silly, but trust us, it works. Sometimes answering the smallest questions can show you what you really want. See which list is longer and try to be fair and honest with yourself. Otherwise, it may not work out for the best. Result: If you feel ready after reading this, congratulations! You are prepared for a long and happy life together. You can start planning your life as a couple and share the ups and downs together. If not, no worries. Every person is different, and we all have unique ways of making big decisions. So don't beat yourself up. The most important thing is that you find that special someone in your life. When the right time comes, you will know. Read Also: The Need To Settle End Of Tenancy Issues Before Leaving Motivational Tips To Kick Start Your Packing Process For The House Move

READ MOREDetails
how to harvest spinach

How to Harvest Spinach the Right Way: A Step-by-Step Guide 

Being a gardener, I know Spinach is one of the most popular and versatile leafy greens you can grow in your garden. It's rich in vitamins, minerals, antioxidants, and fiber and can be used in salads, soups, smoothies, and more. But how do you harvest spinach the right way so that you can enjoy it fresh and crisp and make it last longer? In this article, I will show you how to harvest spinach, so it keeps growing. I will also explain how to harvest spinach seeds, how to store and freeze spinach, and the health benefits of spinach. Additionally, I will also share some tips and tricks on how to grow spinach successfully and how to use it in delicious recipes. Whether you're a beginner or an expert gardener, this guide will help you make the most of your spinach harvest. So, keep on reading till the end to learn more, and thank me later!  Driven by Benefits: Why are People Growing Spinach? Spinach is not only tasty but also healthy. It's low in calories and high in fiber, vitamins, minerals, antioxidants, and phytochemicals. It can help improve various aspects of health, such as: Eye Health Spinach is rich in lutein and zeaxanthin. These are carotenoids that protect the eyes from age-related macular degeneration, cataracts, and glaucoma. Spinach also contains vitamin A, which is essential for vision and eye health. Blood Pressure Spinach is high in potassium, magnesium, and nitrates, which are compounds that help lower blood pressure and relax the blood vessels. Spinach also contains folate. This helps prevent homocysteine, an amino acid that can damage the blood vessels and increase the risk of cardiovascular diseases. Bone Health Spinach is a good source of calcium, magnesium, and vitamin K, which are important for bone health and density. Spinach also contains vitamin C, which helps the body absorb calcium and produce collagen, a protein that strengthens the bones and connective tissues. Immune System Spinach is loaded with vitamin C, which is a powerful antioxidant that boosts the immune system and fights off infections and inflammation. Spinach also contains vitamin E, which enhances the immune response and protects the cells from oxidative stress. Digestion Spinach is high in fiber, which helps regulate digestion and prevent constipation, diarrhea, and bloating. Fiber also feeds the beneficial bacteria in the gut. This improves the digestion and absorption of nutrients. It also supports the immune system. Skin And Hair Spinach is rich in vitamins A, C, E, and iron, which are essential for healthy skin and hair. Vitamin A helps maintain the moisture and elasticity of the skin and prevents acne and wrinkles. Vitamin C helps produce collagen, which keeps the skin firm and smooth. On the other hand, vitamin E helps protect the skin from sun damage and aging. Iron helps deliver oxygen to the skin and hair cells and prevents anemia, which can cause hair loss and pale skin. How To Harvest Spinach So It Keeps Growing One of the best things about spinach is that it's a cut-and-come-again crop. This means you can harvest it multiple times throughout the season if you do it correctly. Here are the steps to follow to harvest spinach so it keeps growing: Choose the right time to harvest The best time to harvest spinach is when the leaves are young and tender. This is usually about 40 to 50 days after planting. You can also harvest baby spinach leaves earlier, about 25 to 30 days after planting. You should harvest spinach before it starts to bolt. This is when it produces flowers and seeds and becomes bitter and tough. Spinach usually bolts when the days get longer and warmer. So, you should harvest it more frequently in the spring and summer. Use a sharp knife or scissors to cut the leaves You can either cut the whole plant at the base, leaving about an inch of stem, or cut individual leaves from the outer part of the plant, leaving the inner leaves to grow. You should cut the leaves about an inch above the soil, to avoid damaging the crown and the roots. Moreover, you should also avoid cutting too many leaves from one plant, as this will weaken the plant and reduce the yield. A good rule of thumb is to leave at least half of the leaves on each plant. Wash and dry the leaves  You should wash the spinach leaves as soon as possible after harvesting, to remove any dirt, bugs, or pesticides. You can use a colander or a salad spinner to rinse the leaves under cold water. After this, pat them dry with a paper towel or a cloth. Additionally, you should remove any damaged or yellow leaves, and trim any tough stems. Enjoy or store the leaves You can eat the spinach leaves fresh, or store them in the refrigerator or freezer for later use. We'll explain how to store and freeze spinach in the next sections. How to Harvest Spinach Seeds? If you want to save some spinach seeds for the next season or share them with your friends and family, you must let some spinach plants bolt and produce flowers and seeds. Here are the steps to follow to harvest spinach seeds: Select the best plants to save seeds from It would be best if you chose healthy, vigorous, and productive plants with the desired characteristics. Some of these are the flavor, size, color, and disease resistance. Apart from these, you should also avoid saving seeds from hybrid varieties, as they will not produce true-to-type plants. You should look for open-pollinated or heirloom varieties, which will produce plants that are similar to the parent plants. Isolate the plants to prevent cross-pollination Spinach is a wind-pollinated crop, which means that it can cross-pollinate with other spinach plants or related plants, such as beets, chard, or quinoa, within a distance of up to a mile. This can result in seeds that have different traits than the parent plants. To prevent cross-pollination, you should isolate the plants you want to save seeds from, by either planting them far away from other spinach plants or related plants, or covering them with a mesh bag or a cage. Let the plants flower and set seeds You should let the plants bolt and produce flowers, which are small and yellow, and then wait for the seeds to form and mature. The seeds are round and black, and they are enclosed in a spiny husk. The seeds are ready to harvest when they are dry and hard, and the husks are brown and brittle, usually about four to six weeks after flowering. Harvest and clean the seeds  You should cut the seed stalks and place them in a paper bag or a bucket, and then shake or rub them to release the seeds from the husks. Furthermore, you should then winnow the seeds, which separates the seeds from the chaff or the husks and other debris. You can do this by blowing or fanning the seeds or using a screen or a sieve. You should end up with clean and shiny seeds. Store the seeds It would be best if you stored the spinach seeds in a cool, dry, and dark place, such as a jar, a tin, or a plastic bag. You should also label the seeds with the variety name and the date of harvest. Besides, you can store the spinach seeds for up to five years, but they will germinate better if you use them within two to three years. How to Store and Freeze Spinach? Spinach is best eaten fresh, as it loses its flavor and texture quickly. However, if you have a large harvest, or you want to preserve spinach for later use, you can store or freeze it. Here are the best ways to store and freeze spinach: Store spinach in the refrigerator  You can store fresh spinach in the refrigerator for up to a week if you keep it in a perforated plastic bag or a container with a lid. However, you should avoid washing the spinach before storing it, as this will make it wilt faster. You should wash the spinach just before using it. Freeze spinach raw You can freeze raw spinach without blanching it, which is a process of briefly cooking and cooling the vegetables to stop the enzyme activity that causes them to spoil. However, freezing raw spinach will result in a mushy and watery texture and a loss of flavor and nutrients. To freeze raw spinach, you should wash and dry the leaves, and then pack them in freezer bags or containers, leaving some space for expansion. You can freeze raw spinach for up to six months, and use it in smoothies, soups, or casseroles. Freeze spinach blanched You can freeze blanched spinach, which will retain its color, texture, flavor, and nutrients better than raw spinach. To freeze blanched spinach, you should wash and trim the leaves, and then blanch them in boiling water for one to two minutes, depending on the size of the leaves. You should then drain and cool the leaves, and squeeze out the excess water. You can then pack the leaves in freezer bags or containers, leaving some space for expansion. Furthermore, you can freeze blanched spinach for up to a year, and use it in salads, sandwiches, or quiches. Things to Keep in Mind: How to Grow Spinach Successfully? Spinach is a cool-season crop that grows best in the spring and fall, when the temperatures are between 40°F and 75°F. It can tolerate light frost but not heat or drought. Spinach also prefers moist, fertile, and well-drained soil with a pH of 6.0 to 7.0. Here are some tips and tricks on how to grow spinach successfully: Choose the right variety There are many types of spinach, but the most common varieties are savoy, semi-savoy, and flat-leafed. Savoy spinach has dark green, crinkly leaves that are great for salads and wraps. Semi-savoy spinach has slightly curled leaves that are more resistant to diseases and bolting. Flat-leafed spinach has smooth, broad leaves that are easy to clean and process. You can also choose spinach varieties based on their maturity time, bolt resistance, flavor, and color. Bloomsdale, Tyee, Space, Melody, and Red Kitten are popular spinach varieties. Sow the seeds  You can sow spinach seeds directly in the garden, or start them indoors and transplant them later. The best time to sow spinach seeds is in early spring, as soon as the soil can be worked, or in late summer or early fall, for a winter harvest. You can also sow spinach seeds every two to three weeks, for a continuous harvest. Besides this, you should sow the seeds about half an inch deep, and one to two inches apart, in rows that are 12 to 18 inches apart. You should water the seeds well, and keep the soil moist until they germinate, which usually takes seven to 14 days. Thin the seedlings When the spinach seedlings have two to four true leaves, you should thin them to avoid overcrowding and competition. You should leave about four to six inches of space between each plant, and eat or transplant the thinned seedlings. You should also weed the area around the spinach plants regularly, to prevent pests and diseases. Harvest the leaves Depending on the variety, you can start harvesting spinach leaves when they are big enough to eat, usually about 25 to 50 days after sowing. You can either harvest the whole plant or pick individual leaves from the outer part of the plant, leaving the inner leaves to grow. Additionally, you should harvest spinach in the morning, when the leaves are crisp and fresh, and before the sun gets too hot. You should also harvest spinach before it starts to bolt, which is when it produces flowers and seeds, and becomes bitter and tough. How to Use Spinach in Different Cuisines and Recipes? Spinach is a versatile vegetable that can be used in many different cuisines and recipes. Whether you want to make a salad, a soup, a pasta, a pie, or a smoothie, spinach can add flavor, color, and nutrition to your dish. Here are some examples of how to use spinach in different cuisines and recipes: Mediterranean cuisine Spinach is a staple ingredient in many Mediterranean dishes, such as spanakopita, a Greek pie made with spinach and feta cheese wrapped in phyllo dough, or spinach and chickpea stew, a Moroccan dish flavored with cumin, paprika, and lemon juice. You can also make a simple spinach salad with tomatoes, olives, and feta cheese, dressed with olive oil and vinegar. Asian cuisine Spinach is widely used in Asian cuisine, especially in Chinese, Japanese, and Indian dishes. You can make a Chinese spinach and tofu stir-fry with garlic, ginger, soy sauce, and sesame oil, or a Japanese spinach and sesame salad with rice vinegar, sugar, and soy sauce. You can also make an Indian spinach and potato curry with onion, garlic, ginger, turmeric, and garam masala, or a spinach and paneer cheese dish with cream, tomato, and fenugreek. Italian cuisine Spinach is a common ingredient in Italian cuisine, especially in pasta, pizza, and lasagna. You can make a spinach and ricotta ravioli with butter and sage sauce, or a spinach and mushroom pizza with mozzarella and parmesan cheese. You can also make a spinach and cheese lasagna with béchamel sauce, or a spinach and artichoke dip with cream cheese and sour cream. American cuisine  Spinach is also popular in American cuisine, especially salads, sandwiches, and casseroles. You can make a spinach and strawberry salad with almonds and poppy seed dressing or a spinach and bacon sandwich with mayonnaise and mustard. You can also make a spinach and cheese casserole with eggs, milk, and breadcrumbs, or a spinach and artichoke quiche with pie crust and cheddar cheese. Wrapping It Up! Spinach is a wonderful vegetable that you can harvest, store, and use in various ways. It's easy to grow, harvest, and store spinach, as long as you follow some simple steps and tips. It's also healthy, delicious, and versatile, as you can use it in many different cuisines and recipes. Spinach is a green treasure that you don't want to miss. If you want to know about how to harvest spinach, I hope that this blog has been of help to you. If there are any other queries related to the same, please feel free to let me know. All that you need to do is scroll down till you reach the bottom of the page. Then, leave your comments and suggestions in the box below. And I will be ether to answer them all for you. Read Also: How to Harvest Lettuce: A Step-by-Step Guide for Fresh and Crispy Salads Everything You Need To Know About Harvesting Basil! Asparagus 101: When, How, And How Often To Harvest?

READ MOREDetails
how to harvest lemongrass

How TO Harvest Lemongrass: Tips AND Tricks FOR Growing AND Using This Versatile Herb 

Lemongrass is a tropical herb that has a fresh and citrusy flavor and aroma. It is one of the most essential herb that is people widely use in Asian cuisines. They especially use it in Vietnamese, Thai, and Indonesian dishes. It is also a popular ingredient in teas, soups, curries, salads, and marinades. Lemongrass has many health benefits, such as improving digestion, boosting immunity, reducing inflammation, and relieving stress. But did you know that you can grow and harvest your own lemongrass at home? Yes, you can! Lemongrass is easy to grow and maintain, and can thrive in pots, containers, or gardens. You can enjoy fresh and organic lemongrass all year round, and save money and time from buying it at the store. In this article, I will show you how to harvest lemongrass, and share some tips and tricks for growing and using this versatile herb. By the end of this article, you will have a better understanding of how to harvest lemongrass, and how to make the most of this wonderful herb. So, if that is something that you want to know, I have you covered! Keep on reading this blog till the end to learn more… How to Grow Lemongrass? Lemongrass is a wonderful herb that can add a refreshing and citrusy flavor to your dishes, drinks, and teas. It is also a beautiful ornamental plant that can brighten up your garden with its tall, graceful stalks and fragrant leaves. Lemongrass is native to tropical regions, but you can grow it in cooler climates as well with some care and preparation. Here are the steps and conditions for growing lemongrass successfully at home: 1. Choose a healthy lemongrass plant or stalk You can buy a potted lemongrass plant from a nursery or garden center, or you can start your own from a fresh lemongrass stalk that you can find in most grocery stores or Asian markets. Look for a stalk that is firm, green, and has some roots at the base. Avoid any that are dry, brown, or moldy. 2. Prepare a sunny and warm spot for your lemongrass Lemongrass loves full sun and heat, so choose a location that gets at least six hours of direct sunlight per day. If you live in a colder region, you can grow lemongrass in a container that you can move indoors during the winter. Use a large pot with drainage holes and fill it with rich, loamy soil that is high in organic matter. You can also add some compost, manure, or leaf mold to improve the soil quality and fertility. 3. Plant your lemongrass in the soil If you bought a potted plant, simply transplant it to the ground or a larger container, making sure to bury the roots well and leave some space between the stalks. If you are starting from a stalk, peel off any dead or yellow leaves and trim the top part to about six inches. Place the stalk in a glass of water and keep it in a sunny windowsill until roots start to grow, which can take a few weeks. Then, plant the rooted stalk in the soil, leaving about two inches of the stem above the ground. Space the plants about two feet apart to allow them to spread 4. Water and fertilize your lemongrass regularly Lemongrass needs moist soil to thrive, so water it frequently and deeply, especially during hot and dry periods. A good rule of thumb is to water it once a week or whenever the top inch of the soil feels dry. You can also apply a layer of mulch around the plants to conserve moisture and prevent weeds. Lemongrass also benefits from a monthly dose of liquid organic fertilizer during the growing season, such as fish emulsion or seaweed extract. This will help it grow faster and produce more leaves and stalks. 5. Harvest and enjoy your lemongrass You can start harvesting your lemongrass when the stalks are about a foot tall and half an inch thick. Cut the stalks at the base with a sharp knife or scissors, leaving about two inches of the stem in the ground. Additionally, you can use the whole stalk, or peel off the outer layers and use only the tender inner part. You can also harvest the leaves and use them fresh or dried for teas and infusions. Lemongrass can be stored in the refrigerator for up to two weeks, or in the freezer for up to six months. You can also dry it and store it in an airtight container for later use. How to Harvest Lemongrass? Harvesting lemongrass is a simple and satisfying process that can be done in a few steps. Here are the basics of how to harvest lemongrass: Choose the right time  The best time to harvest lemongrass is when the stalks are about 12 inches tall and 0.5 inches thick. This usually happens after 3 to 4 months of planting. You can harvest lemongrass throughout the year, as long as the temperature is above 40°F. You can also harvest lemongrass in batches, leaving some stalks to grow and regenerate. Cut the stalks To harvest lemongrass, you need a sharp knife or scissors, and a clean cutting board. Cut the stalks at the base, as close to the soil as possible. You can cut as many stalks as you need, or as many as you can use within a week. You can also trim off the leaves, as they are not edible and can be used for other purposes. Wash and store the stalks After cutting the stalks, wash them under running water, and pat them dry with a paper towel. You can store the stalks in the refrigerator, wrapped in a damp paper towel, and placed in a plastic bag. They can last for up to a week. You can also freeze the stalks, chopped or whole, in a freezer bag. They can last for up to 6 months. Dividing Lemongrass: What is It and How to Do It? Dividing lemongrass is a great way to propagate and maintain this aromatic and flavorful herb. Lemongrass is a perennial plant that grows in clumps of stalks and leaves. Over time, these clumps can become crowded, woody, and less productive. By dividing lemongrass, you can rejuvenate the plant, increase its yield, and share it with others. Here are the steps and reasons for dividing lemongrass: 1. When to divide lemongrass? The best time to divide lemongrass is in the spring, after the last frost date when the plant is actively growing and has new shoots. You can also divide lemongrass in the fall if you live in a warm winter climate or if you plan to overwinter the divisions indoors. Avoid dividing lemongrass in the summer, when the heat and drought can stress the plant and reduce its survival rate. 2. How to divide lemongrass? To divide lemongrass, you must dig up the entire plant and separate it into smaller sections. You can use a shovel, a sharp knife, or your hands to do this. Each section should have at least one inch of root and several healthy stalks and leaves attached. You can trim the leaves to about six inches to reduce water loss and make the divisions easier to handle. Discard any old, brown, or damaged parts of the plant. 3. Where to plant lemongrass divisions? You can plant lemongrass divisions in the same spot where you dug up the parent plant or in a new location with full sun, moist and well-drained soil, and plenty of organic matter. You can also plant lemongrass divisions in containers at least 10 inches deep with drainage holes. Space the divisions about two feet apart to allow room for growth. Plant the divisions at the same depth as they were before, with the crown just below the soil surface.  4. How to care for lemongrass divisions? Lemongrass divisions need regular water and fertilizer to establish and thrive. Water them deeply and frequently, especially during the first few weeks and during hot and dry periods. You can also apply a layer of mulch around the plants to conserve moisture and prevent weeds. Fertilize the plants once a month with a liquid organic fertilizer, such as fish emulsion or seaweed extract, during the growing season. Protect the plants from frost in the winter by moving them indoors or covering them with a frost cloth. 5. How to harvest and use lemongrass divisions? You can start harvesting lemongrass divisions when they are about a foot tall and half an inch thick. Cut the stalks at the base with a sharp knife or scissors, leaving about two inches of the stem in the ground. You can use the whole stalk, peel off the outer layers, and use only the tender inner part. Additionally, you can also harvest the leaves and use them fresh or dried for teas and infusions. Lemongrass can be stored in the refrigerator for up to two weeks or in the freezer for up to six months. You can also dry it and store it in an airtight container for later use. How to Use Lemongrass in Food? Lemongrass has a long, green stalk with a bulbous base and grassy leaves. It has a lemony taste with a hint of mint and ginger. Lemongrass can be used fresh, dried, or powdered, depending on the recipe and preference. Here are some ways related to how to use lemongrass in different ways: Fresh lemongrass Firstly, fresh lemongrass is the most aromatic and versatile form of lemongrass. You can find it in the produce section of most supermarkets, Asian markets, or online. To prepare fresh lemongrass, you need to peel off the tough outer layers and trim off the root end and the top third of the stalk. You can use a sharp knife or scissors to do this. The part that you want to use is the pale and tender lower part of the stalk. After that, you can slice it thinly, chop it finely, or bruise it with a pestle or the back of a knife. Slicing or chopping is good for salads, stir-fries, curries, and marinades, while bruising is good for soups, stews, and broths. You can also make a paste by pounding or blending lemongrass with other ingredients, such as garlic, ginger, chilies, and cilantro. A paste is great for adding flavor to meats, seafood, tofu, and rice. You can store fresh lemongrass in the refrigerator for up to two weeks or in the freezer for up to six months. Dried lemongrass Secondly, dried lemongrass is less potent than fresh lemongrass but still has a nice, lemony flavor. You can buy it in whole or sliced form or dry your lemongrass by hanging the stalks in a warm and airy place until they are brittle. Dried lemongrass is good for making teas, infusions, and herbal blends. You can also use it to flavor soups, stews, and broths, but you must soak it in hot water for about 20 minutes before adding it to the pot. Additionally, you can store dried lemongrass in an airtight container in a cool, dark place for up to a year. Powdered lemongrass Lastly, powdered lemongrass is the most convenient form of lemongrass, as it does not require any preparation. You can buy it in spice shops, Asian markets, or online. Powdered lemongrass has a mild and sweet flavor and can be used in baking, desserts, sauces, and dressings. You can also sprinkle it over salads, soups, and stir-fries for a touch of freshness. The shelf life of powdered lemongrass is also great. For up to six months, you can store powdered lemongrass in an airtight container in a cool and dark place. How to Use Lemongrass in Other Things? Apart from cooking, you can use lemongrass in many other ways. Some of the best and most popular uses of this herb are as follows: Beautifying You can use lemongrass to make your own beauty products, such as soap, lotion, or shampoo. You can infuse the stalks or the leaves with oil, such as coconut, olive, or almond oil. Moreover, you can also add other ingredients, such as honey, aloe vera, or essential oils. You can use the products to cleanse, moisturize, or scent your skin and hair. Healing You can use lemongrass to treat various ailments, such as headaches, colds, or infections. You can inhale the steam from boiling the stalks or the leaves, or apply the oil to your temples, chest, or throat. Additionally, you can also drink the tea, or gargle with the syrup. You can use the products to relieve pain, inflammation, or congestion. Wrapping It Up! If you want to know how to harvest lemongrass, I hope that this blog has been of help to you. If there are any other queries about the same, please feel free to let me know. All that you need to do is scroll down till you reach the bottom of the bottom of the page. Then leave your suggestions and comments in the box below. And I will be there to answer them all for you! Learn More About: Everything You Need To Know About Harvesting Basil Asparagus 101: When, How, And How Often To Harvest? How to Harvest Spinach the Right Way: A Step-by-Step Guide

READ MOREDetails