Can You Dye Wet Hair? Here Is The Reason For It

Published on: 22 May 2021 Last Updated on: 03 January 2025
can you dye wet hair

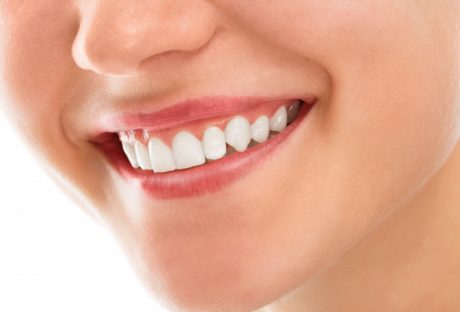
Many questions are arising associated with washing the hair and drying, but now the most frequent question that comes to your mind is, can you dye wet hair? Yes, it sounds a little bit different than the usual hair fashion-related question. But the answer indeed is yes, you can. 

Some hairstylists think dry hair dyeing can improve your hair texture naturally, and the end result is more natural than coloring dry hair. The wet hair dying technique is called wet balayage. This is a similar hair-dying technique to dry balayage techniques. Only here is a simple difference. It only applied to wet hair.

Why Do You Want To Dye Wet Hair?

can you dye wet hair

The dying of wet hair may not be a common practice, but when we are talking about the comparison with dry hair coloring, here are some positive effects of wet hair dying.

  • The dye of the wet hair is the best to work for achieving a subtle result.
  • The hair damage is less than usual dry hair coloring.
  • If you want to apply any semi-permanent hair color, then this technique is the best.
  • The hair color promotes better absorption on the wet strands.
  • The semi-permanent hair colors are more Ammonia-free. This type of coloring is becoming less harmful to your hair.
  • Wet hair coloring promotes the natural hair look.
  • This dying wet hair is a more user-friendly approach when you are dying your own hair at your home.

These all are the basic positivity of applying the color on the wet hair. When you want to dye your hair at home, wet hair dying is the most user-friendly and time-consuming procedure. All you have to do is just apply the color in the middle of the bath; after that, wash it off.

Benefits Of Dying The Wet Hair

When you are applying the hair color at home, wet hair colorings are the best possible way to get the desired result. If you have any queries about you can dye wet hair? Then here is the list of multiple benefits of dying wet hair.

1. The Wet Hair Strands Are More Absorbent 

The wet hair strands are more absorbent than the usual dry hair. The hair color easily melts into the hair, and more easily, you will get the desired color look. The equal distribution of the color is also an attractive part of the wet balayage coloring. The color of the hair is distributed equally after the applications.

The color change is quite simple. The hair color does not give you a drastically changing look. But if you want a good coverage color or anything which is a permanent hair color, then this color is not for you. The temporary and the demi temporary colors are working best as the wet color. Both of these colors have very less harmful substance init.

2. Best Hair Colour When You Are A Beginner

When you are a just startup color applicant, then the wet color is the best-suited hair color. The beginners are more prone to make a mess when they are applying the color. The wet color is just covering all messes. 

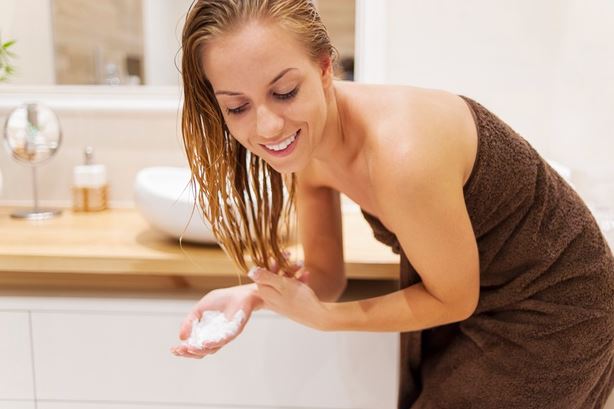
First, shampoo your hair and then apply the dye to the wet hair.

This will give you a more subtle result. These semi-permanent and semi-permanent hair colors are not working well on greasy hairs.

This technique is quite easy and time-saving rather than the other coloring techniques.

The working professionals and the people who do not have much time to go to the salon are more comfortable using this technique.

3. Gives You A Natural Flowy Look

When you are asking the question, can you dye wet hair? Then the first answer which comes to our mind is yes. Not only yes, but the more natural and flowy look is also given through this type of coloring.

The implementation is simple, and the drastic change of the hair color can not be found with the use of these temporary hair colors. You can expect mild color and a soft texture change of the hair.

The distinctive funky colors are better to work as the wet hair color.

How Can You Dye Wet Hair?

We all call this dying technique the wet balayage. This technique is simple and effective, and long-lasting more than your expectations.

Here are the four simple steps of applying the dye to wet hair.

Step1

Wash your hair by applying the shampoo.

Step2

Do not use the conditioner, serum, or any oil after washing the hair.

Step3

Then just pat dry the wet hair.

Step4

We need a damp surface to apply the hair color.

Step5

Check the ingredients list before applying the hair color on your wet hair. As wet hair is more fragile than dry hair.

Better to use semi or semi-permanent hair color for your hair.

When our hair is in the wet state, the hair’s inner cortex layer is also open, promoting better absorption.

Step 6

Read the instructions which are written on the package before starting the hair dying application.

Step 7

Then wear a pair of gloves.

Step 8

And take an amount on the small bowel as per your requirements.

Step 9

Then apply the hair color with the applicator brush.

Step 10

You can apply the color to the small sections of your hair. 

Step 11

You can also apply the hair color just like any hair care product.

Step 12

Apply a good amount of color because, with every wash, it will become lighter. 

Conclusion

The wet hair dye applications are easier to apply on the hair. These hair colors are less harmful with respect to the other type of hair dyes. The wet hair colors are more for the hair’s benefit and for improving the texture of the hair textures. Can you dye wet hair will no longer be a worry for you if you follow the mentioned points.

But it also has some disadvantages. You have to choose the correct hair color for you, which has a less harmful substance within it. If you need simple temporary hair color, then these hair colors are the best time-saver for you. Therefore, I have tried my best to give you answers on how can you dye wet hair and the reasons for the same. You can also mention some more in the comment sections below. 

Read Also:

Content Rally wrapped around an online publication where you can publish your own intellectuals. It is a publishing platform designed to make great stories by content creators. This is your era, your place to be online. So come forward share your views, thoughts and ideas via Content Rally.

View all posts

Leave a Reply

Your email address will not be published. Required fields are marked *

Related

Best Epilator

A full guide for you on Best Epilator for Full Body

Seek the use of the Best epilator. Though the numbers of hair removing techniques are available only through the experience you will definitely learn and get on the right conclusion that some methods are better as compared to others. Shaving, Tweezing, plucking and waxing, all can easily eliminate the unwanted hair but the outcomes can be less than our desires. If you are in search of something better then the epilator for the full body will be fair for hair removal that you have been long searching for. This is an electrical gadget that is designed for removing the hair from the roots directly. The choices include dry epilator that one can use without water or also wet epilator if you want hair removal ease while in the shower and in the bath. Removing hair by the root is too much pain and it is true that people experience a measure of discomforts particularly when they undergo hair removal for the first time. Some areas of the body are too much sensitive than the others. Here using the epilator will 100% assure you that the more you epilate, lesser pain you will be experiencing. How can you use the Best epilator? Best Epilator for full-body working same as that of waxing and in it, the hair is removed deeply from the roots. But epilator is not using wax. It just plucks away the hair as the device is moved all over the part of the body. For the best outcome, it is better that you exfoliate the skin before using the epilator. Through exfoliation, all the dead skin cells will be removed and it can easily prevent ingrown hair. Just start by positioning the best epilator for your body at the angle of 90 degrees to the skin. There is no need to press the device against the skin. Hold this device softly against the skin and pull skin taut and then gently move the device into the hair growth direction. If you move this device in the hair growth opposite direction, you will cut hair at the skin rather than fully removing the hair from the root. More easy to follow tips on using the epilator: Use the device at night time. It is true that some people face redness as well as skin irritation after the hair is removed. Skin redness will go away after a few minutes and will result in smooth and clear skin. Be calm and patient, for getting the expected outcome you must move the device softly all across the body so just take your time and don’t be hurry. If you move it faster, you can leave some hair behind. Some of the best epilators are having different speed setting so begin on low setting and then you can increase the speed gradually to see what can be easily tolerable for you. Moisturize the skin after you use this device so that the skin irritation can be reduced. Do not forget to clean the epilator that you use for hair removal after every use do that risk of skin infection can be easily eliminated. Also, remove the lingering hair and also make use of alcohol for device cleaning. Make use of the best epilator that can improve your skin quality. Is there any risk to use it? Using the best epilators is the safest way to remove all unwanted hair and it can be painful as well as uncomfortable. If in case you go too much faster or move the epilator against the hair growth direction, rather than pulling it out deeply from the root and these broken, shorten hair might become infected. Making use of this device is not at all harmful in fact if you use it carefully definitely you will get the desired outcome. It would be safe to say that epilators are one of the safest devices to remove hair. You can rely on them if you want to experience the best hair removal in Montreal. Although there are many options, choose one that causes no harm to your skin. Epilator for types of hair: The best Epilator for the full body can be used on the body hair from several parts of the body that includes legs, arms, pubic area, and face too. While not all types of epilators for the facial hair is recommended, there is the one that is particularly made for the soft facial hair. In order to remove the hair from the face, you must look at devices that clearly states using those will be safer for your face. The epilators can be also used for removing the coarser hair like heavy facial hair and pubic hair. This device is having tweezers head and strong motors that help in managing the thicker hair. Benefits of using epilator: Price- This device is inexpensive to buy and buying it will be a onetime expense unlike the buying of sugaring products or shaving equipment. The best epilator can make things easier for you. Conveniences- This hair removal device for home use and doesn’t need a salon trip. These are small enough to place in the suitcase and takes when you travel. It can be used on the arms, face, legs and at bikini area. The special epilators might produce better results on the bikini or underarms areas. Not complicated to use- Using this hair removal technique is not at all a complicated process. It can be used into the shower and it doesn’t need shaving cream and also no residue is left on skin once done with hair removal. Long-lasting results- As epilator remove the hair deeply from the root, the result will be long-lasting than the shaving. It will take two or even more weeks for the re-growth of the hair. Moreover, this tool can easily remove shorter hair than other epilator methods. If in case you wax it might not result in you that you expect and when you undergo it, you might face lots of pains and troubles. Therefore it is better that you undergo hair removal through epilator only. Conclusion: Epilator for the full body can leave behind the smoother skin that lasts for up to a month. The ends results are totally impressive and this hair removal technique doesn’t give you pain. The more one uses it and improves the technique of hair removal, less uneasiness one will feel.  And no doubt at the end this technique might become your favorite hair removal technique. Read Also: Epilators: The Best Solution To Smooth Skin Ways To Rejuvenate Your Skin In Montrose From Flint To Lasers – The Evolving Techniques Of Hair Removal 5 Most Exciting Facial Treatments Of 2018 – For Smooth, Gorgeous Skin

READ MOREDetails
Cannabis Topicals

How To Make Your Own Cannabis Topicals?

The past couple of years has seen a lot of research put into the uses and benefits of cannabis. As legalization continues to advance to new jurisdictions around the world, scientific evidence is being used to remove the stigma around cannabis use and discover the truth about the substance after decades of myths have guided policy. There remains a lot of apprehension about trying cannabis products. While many people are familiar enough with cannabis itself and smoking as a means of ingestion, other products remain a mystery, including edibles and topicals. Cannabis topicals are non-psychoactive and are a versatile way to take advantage of the benefits of cannabinoids. Coming in lotions, patches, creams, sprays, lubricants, and balms, topicals are absorbed through the skin for localized relief. Topicals can be used to: enhance sexual pleasure, treat skin irritations, alleviate psoriasis, heal burns and bacterial infections, keep skin youthful, and reduce inflammation and arthritis. Topicals can also be made from the comfort of your home. Here is an easy how-to guide to making simple homemade cannabis topical. This recipe is a safe topical salve but can also be further mixed to make full-body lotions, face masks or lip scrubs. Ingredients: 10 grams of ground, dried cannabis 1 ½ cups of coconut oil ⅓ cup olive oil (optional) ⅓ cup beeswax 1 baking sheet 1 saucepan 1 heat resistant glass jar 1 cheesecloth A few drops of essential oils of your choice Step 1: Decarboxylate the Cannabis The first step to making your own topical is to decarboxylate the cannabis. This process is essentially heating the cannabis in order to ignite the THC. Put a single layer of cannabis on a baking sheet and bake for 30 minutes at 240 degrees Fahrenheit, turning often to ensure equal heat exposure. Step 2: Cannabis and Coconut Oil Mixture While the cannabis is in the oven, begin heating the coconut and olive oil in a pot on low heat. Stir often enough that the coconut oil does not begin to stick to the pan. Once the decarboxylated cannabis is out of the oven and cooled, begin to stir it into the oil on the stove for 20–25 minutes. Stir occasionally. This way, you can infuse coconut oil with cannabis to create an effective topical. PRO TIP: It is important to keep the mixer on the stove on very low. Unfortunately, if the heat gets too high, there is a chance of burning cannabis and affecting the potency of the THC. Step 3: Beeswax and Jarring After the cannabis and coconut oil mixture has simmered for 25 minutes, strain over the cheesecloth into a heat resistant glass jar and set aside to cool. In the same pot, melt the beeswax and essential oil of your choice. Select a mild essential oil that you enjoy, such as lavender, peppermint, or tea tree oil. As the beeswax slowly melts, add the cannabis-coconut mixture, stirring often. Once the beeswax, cannabis, and coconut oil are thoroughly mixed, you have your cannabis-infused salve. Once cooled, this salve can now be used on its own as a topical rub or can be further mixed into Aloe Vera or cocoa butter to make more of a lotion type product. Cannabis topicals are not yet regulated in many jurisdictions where cannabis itself is legal, but regulation is on the way and it’s believed topicals will become popular products for cannabis users who want pain relief. Read also: The New Tech Running Canada’s Cannabis Industry

READ MOREDetails
Salmon

Top 5 foods for healthier and thicker hair

Healthy hair is closely related to your diet. We all know that dying and curling your hair can make you more attractive, but those are not the best things for your hair in the long term. What it really needs is essential nutrition. We listed the top 5 foods that will keep making sure it’s as healthy as possible. Spinach Spinach is rich in iron and also contains high amounts of vitamin A, vitamin K, and folate. One of the main causes for hair loss or breakage is a lack of iron. Iron helps in producing red blood cells called hemoglobin, which carry oxygen to different parts of the body and distribute essential minerals and nutrition for our cells to function properly. When iron levels are low, the number of red blood cells is decreased. As a result, our body experiences fatigue and weakness. A decrease in red blood cells means that oxygen is unable to reach derma papilla cells, which are the main source for nourishing hair follicles. Spinach also contains the highest amount of Vitamin K of any other vegetable. Vitamin K helps blood circulation by preventing blood from getting clogged in the body. One cup of spinach provides about 200% of the daily recommendation of vitamin K. Salmon Salmon is a great source of Omega 3 fatty acids. According to Foxnews.com, our bodies are not capable of producing Omega 3 fatty acids alone, so it is important to eat foods or hair growth vitamins that include this source.            Read Also: 6 stunning long hairstyles for oval faces Omega 3 fatty acids have a direct link to the health of hair follicles and keep our hair growing stronger by regulating sebum production. More hair care manufacturers are introducing new products that contain alpha-linolenic acid (ALA), which is a vital part of Omega 3 fatty acids. Eggs Our hair is largely made of protein but also contains a small number of lipids (a key source of moisture for hair). In order to keep hair in an optimal condition, providing enough protein is essential. Eggs, especially the egg yolks, are loaded with protein and vitamin B-12. Vitamin B-12 is another important component to nourish follicles and maintain normal hair growth cycles. Egg yolks are also often used for hair mask treatments as one of the many hair growth natural home remedies. Mixed with a couple of teaspoons of honey or olive oil, the mixture should be applied to your hair (including your scalp) for 20-30 minutes. Cleanse by rinsing it with warm water. This egg hair mask is another great way to strengthen hair and add moisture. Bell Peppers Vitamin C (ascorbic acid) plays a protective role in the health of our skin and hair. Its antioxidant properties help by preventing harmful free radicals from damaging our body parts. One of the early signs of a lack of Vitamin C is dry skin and breakage of hair according to the University of Maryland Medical Center. Bell peppers contain high amounts of Vitamin C and Vitamin B-6. One medium-size red bell pepper provides 292% of the suggested daily value of Vitamin C. Oysters Oysters are packed with Zinc (about 30 mg per serving), which plays a vital role in overall human health. Considering the daily intake recommendation for Zinc is 8 to 11 mg, it’s obvious that oysters can be very beneficial. Zinc helps by contributing to a healthy immune system, cell growth, and renewal of cells for skin, hair, and nails. By regulating appropriate hormone levels, Zinc-rich foods such as oysters can prevent premature hair fallout.

READ MOREDetails