Published on: 22 May 2021
Last Updated on: 03 January 2025
Many questions are arising associated with washing the hair and drying, but now the most frequent question that comes to your mind is, can you dye wet hair? Yes, it sounds a little bit different than the usual hair fashion-related question. But the answer indeed is yes, you can. Some hairstylists think dry hair dyeing can improve your hair texture naturally, and the end result is more natural than coloring dry hair. The wet hair dying technique is called wet balayage. This is a similar hair-dying technique to dry balayage techniques. Only here is a simple difference. It only applied to wet hair.
Why Do You Want To Dye Wet Hair?
The dying of wet hair may not be a common practice, but when we are talking about the comparison with dry hair coloring, here are some positive effects of wet hair dying.
The dye of the wet hair is the best to work for achieving a subtle result.
The hair damage is less than usual dry hair coloring.
If you want to apply any semi-permanent hair color, then this technique is the best.
The hair color promotes better absorption on the wet strands.
The semi-permanent hair colors are more Ammonia-free. This type of coloring is becoming less harmful to your hair.
Wet hair coloring promotes the natural hair look.
This dying wet hair is a more user-friendly approach when you are dying your own hair at your home.
These all are the basic positivity of applying the color on the wet hair. When you want to dye your hair at home, wet hair dying is the most user-friendly and time-consuming procedure. All you have to do is just apply the color in the middle of the bath; after that, wash it off.
Benefits Of Dying The Wet Hair
When you are applying the hair color at home, wet hair colorings are the best possible way to get the desired result. If you have any queries about you can dye wet hair? Then here is the list of multiple benefits of dying wet hair.
1. The Wet Hair Strands Are More Absorbent
The wet hair strands are more absorbent than the usual dry hair. The hair color easily melts into the hair, and more easily, you will get the desired color look. The equal distribution of the color is also an attractive part of the wet balayage coloring. The color of the hair is distributed equally after the applications.The color change is quite simple. The hair color does not give you a drastically changing look. But if you want a good coverage color or anything which is a permanent hair color, then this color is not for you. The temporary and the demi temporary colors are working best as the wet color. Both of these colors have very less harmful substance init.
2. Best Hair Colour When You Are A Beginner
When you are a just startup color applicant, then the wet color is the best-suited hair color. The beginners are more prone to make a mess when they are applying the color. The wet color is just covering all messes. First, shampoo your hair and then apply the dye to the wet hair.This will give you a more subtle result. These semi-permanent and semi-permanent hair colors are not working well on greasy hairs.This technique is quite easy and time-saving rather than the other coloring techniques.The working professionals and the people who do not have much time to go to the salon are more comfortable using this technique.
3. Gives You A Natural Flowy Look
When you are asking the question, can you dye wet hair? Then the first answer which comes to our mind is yes. Not only yes, but the more natural and flowy look is also given through this type of coloring.The implementation is simple, and the drastic change of the hair color can not be found with the use of these temporary hair colors. You can expect mild color and a soft texture change of the hair.The distinctive funky colors are better to work as the wet hair color.
How Can You Dye Wet Hair?
We all call this dying technique the wet balayage. This technique is simple and effective, and long-lasting more than your expectations.Here are the four simple steps of applying the dye to wet hair.
Step1
Wash your hair by applying the shampoo.
Step2
Do not use the conditioner, serum, or any oil after washing the hair.
Step3
Then just pat dry the wet hair.
Step4
We need a damp surface to apply the hair color.
Step5
Check the ingredients list before applying the hair color on your wet hair. As wet hair is more fragile than dry hair.Better to use semi or semi-permanent hair color for your hair.When our hair is in the wet state, the hair’s inner cortex layer is also open, promoting better absorption.
Step 6
Read the instructions which are written on the package before starting the hair dying application.
Step 7
Then wear a pair of gloves.
Step 8
And take an amount on the small bowel as per your requirements.
Step 9
Then apply the hair color with the applicator brush.
Step 10
You can apply the color to the small sections of your hair.
Step 11
You can also apply the hair color just like any hair care product.
Step 12
Apply a good amount of color because, with every wash, it will become lighter.
Conclusion
The wet hair dye applications are easier to apply on the hair. These hair colors are less harmful with respect to the other type of hair dyes. The wet hair colors are more for the hair’s benefit and for improving the texture of the hair textures. Can you dye wet hair will no longer be a worry for you if you follow the mentioned points.But it also has some disadvantages. You have to choose the correct hair color for you, which has a less harmful substance within it. If you need simple temporary hair color, then these hair colors are the best time-saver for you. Therefore, I have tried my best to give you answers on how can you dye wet hair and the reasons for the same. You can also mention some more in the comment sections below.
Content Rally wrapped around an online publication where you can publish your own intellectuals. It is a publishing platform designed to make great stories by content creators. This is your era, your place to be online. So come forward share your views, thoughts and ideas via Content Rally.
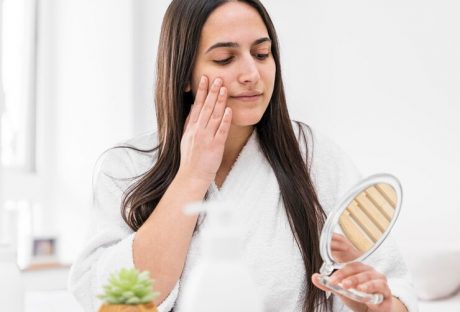
In the quest for youthful and vibrant skin, many individuals seek effective ways to combat sagging or loose skin. Whether it's due to the natural aging process, weight loss, or other factors, skin tightening has become a popular choice to rejuvenate one's appearance.
In this article, we will explore the world of skin tightening, discussing various methods and considerations to help you make an informed decision. The desire for firm and radiant skin is universal.
The good news is that there are numerous methods available to help you achieve just that. Skin tightening is a procedure designed to restore and enhance the tightness of the skin, resulting in a more youthful and rejuvenated appearance.
What Is Skin Tightening?
Skin tightening toronto is a cosmetic procedure that aims to enhance the elasticity and firmness of the skin. It can be performed on different areas of the body, including the face, neck, abdomen, arms, and thighs. This process helps reduce sagging, fine lines, and wrinkles, providing a more youthful and refreshed look.
Causes Of Skin Laxity
Before we delve into the methods of skin tightening, it's essential to understand what causes skin laxity in the first place. Several factors contribute to this condition, including:
Aging: As we age, the production of collagen and elastin, two vital proteins responsible for skin tightness, decreases.
Weight Loss: Rapid weight loss can lead to loose skin, as it doesn't have enough time to adapt to the new body shape.
Sun Exposure: Prolonged exposure to UV rays can break down collagen and elastin fibers in the skin.
Natural Methods For Skin Tightening
If you're looking for non-invasive ways to tighten your skin, you're in luck. There are several natural methods you can try:
Proper Nutrition
A well-balanced diet rich in vitamins, minerals, and antioxidants can help improve skin elasticity. Foods like fruits, vegetables, and lean proteins can make a significant difference.
Hydration
Drinking an adequate amount of water keeps your skin hydrated, promoting better elasticity and a healthier complexion.
Facial Exercises
Certain facial exercises can help tone and tighten the muscles beneath the skin, reducing sagging and fine lines.
Non-Surgical Skin Tightening Procedures
For those looking for quicker and more dramatic results, non-surgical skin tightening procedures are available. These include:
Radiofrequency Therapy
This procedure uses radiofrequency waves to stimulate collagen production, leading to tighter skin.
Ultrasound Therapy
Ultrasound waves penetrate deep into the skin, promoting collagen growth and skin tightening.
A popular example of this is the Sofwave treatment, which targets the mid-dermis to lift the brows, neck, and under-chin area.
Laser Skin Tightening
Laser treatments target specific areas, improving skin texture and tightness.
Surgical Skin Tightening Options
When non-surgical options don't provide the desired results, surgical procedures can be considered. These include:
Facelift
A facelift is a surgical procedure that lifts and tightens the skin on the face and neck, reducing wrinkles and sagging.
Tummy Tuck
A tummy tuck, or abdominoplasty, is a surgical procedure that tightens the abdominal skin and muscles.
Arm Lift
An arm lift, or brachioplasty, is a surgical procedure that removes excess skin and fat from the upper arms, resulting in firmer arms.
Considerations Before Opting For Skin Tightening
Before undergoing any skin tightening procedure, it's crucial to consider the following:
Consult with a qualified dermatologist or plastic surgeon to discuss your goals and expectations.
Understand the potential risks and side effects associated with each procedure.
Evaluate the cost and recovery time involved in the chosen method.
Pros And Cons Of Skin Tightening
While skin tightening procedures offer many benefits, there are also drawbacks to consider. It's essential to weigh the pros and cons before making a decision.
Pros:
Improved skin tightness and youthful appearance.
Boosted self-confidence.
Minimized wrinkles and fine lines.
Cons:
Potential side effects, such as redness and swelling.
Cost can be prohibitive for some individuals.
Results may not be permanent.
Recovery And Aftercare
After undergoing a skin tightening procedure, proper aftercare is crucial. This may include keeping the treated area clean, avoiding excessive sun exposure, and following the doctor's instructions for the best recovery possible.
Long-Term Results
The longevity of skin tightening results varies depending on the chosen method and individual factors. It's essential to maintain a healthy lifestyle to prolong the effects.
Conclusion
Skin tightening procedures offer a remarkable solution for individuals looking to rejuvenate their appearance and regain the confidence of their youth. Whether you opt for non-surgical or surgical methods, the key is to make an informed decision in consultation with a qualified professional. With proper care and consideration, you can achieve firmer, more youthful skin and embrace a more confident you.
Read Also:
11 Foods You Must Incorporate Into Your Diet For Great Skin
8 Home Remedies To Banish Acne Scars And Discoloration For Good (Info-Graphic )
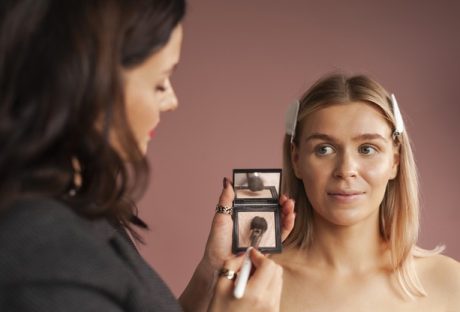
If you are a person who loves to wear makeup, then you must know every bit about makeup. In fact, there are many women who are conscious and very particular about makeup. However, they might know about Smashbox Primer.
On the contrary, there are other women who apply makeup, but they skip a few makeup products because they do not feel the need to use every makeup product. Just as a foundation, there is another makeup product that keeps the makeup intact.
It is the primer that holds the makeup for a longer period of time. At the same time, you can get a smooth finish to your makeup. If you want to use a good quality primer, then you should buy Smashbox primer from the acclaimed online fashion site. On the online fashion site, you will get a top-quality primer that will pep up your appearance.
Demand For Primers:
There was a time when women did not use primers. Hardly any woman used to apply primer on their face. With the popularity of primers in the current days, women have understood the right use of primers which has made primers one of the favored cosmetic products by many women.
For many good reasons, primers are used by many women in the present day. There are countless women who do not know the purpose of using primer. Some women skip the use of primer because they think it is not important for them. In order to smoothen the skin, primer is used. When you use a primer, your skin appears to be even and polished.
Before applying makeup to your face, you should use a primer. It is the primer that blurs the blemishes, fills in the pores, and provides smooth skin. A primer helps adhere to makeup properly. If you want your makeup to last longer, then you must use a primer before applying makeup.
Pick The Right Primer: Smashbox Primer
Primers can be of various types. You need to select a primer as per your skin type. You can get primers in gel form as well as silky form. Primers can be colorless or tinted. You can get primers for your eyes as well as for your face.
You need to make sure that the primers should go well with your skin tone. The main purpose of the primers is to give you a flawless look and a smooth finish and to make the makeup last for long hours. Cover the visible pores on your skin with face primers. Also, to get an even-toned and polished look, face primers are the best.
Nowadays, you can get a primer for your dry skin and oily skin. Make sure to apply primer before the foundation to get flawless-looking skin.
Smashbox Primer: Why Is It The Better Option?
The following are the major features of Smashbox Primer that you must know about:
Smashbox Primer comes in a tube that is reflective and squeezable. However, previously, it was a transparent tube. But, now, this upgrade makes the primer look better and more attractive.
The nozzle in the Smashbox Primer’s tube is slim. Hence, it dispenses the primer in the right amount.
The packaging also consists of the ingredients of Smashbox Primer. Moreover, it also gives you direction on how to use the product. Additionally, the tube also shows a consumer study of how many women tried the product.
However, the best thing about Smashbox Primer is its formula. Despite having a slightly thicker consistency, it mixes well.
In addition to that, the clear hue of the primer dries down fast. Hence, it shows that the primer is suitable for all types of skin tones.
One of the best things about this formula is that all you need is a small amount. Hence, when you are starting out with Smashbox Primer, start with a pea-sized amount. Then, add more if you think it is necessary.
How To Choose A Good Primer? – Factors To Consider
Here are the factors you must consider before you choose a good primer for your skin:
Skin Type:If you have dry skin, you need to hydrate it. In this case, you must use a cream primer. However, if you have oily skin, use a gel primer to give it a shine. On the other hand, if your skin is prone to acne, choose a primer that has salicylic acid. This will help you with blemishes.
Texture and Consistency: Make sure that the texture and consistency of the primer are not too thick. This will result in a lack of mixing ability.
Sun Protection:A good primer must be able to protect your skin against the harmful rays of the sun.
Reviews: Before you buy a primer, check online reviews to find out what other users are saying. Additionally, you must also take recommendations from a skin-care expert.
Buy The Mattifying Face Primer:
You do not have to look for any other stores to get a face primer when you have the best oil-free and mattifying Smashbox primer from the online fashion site. You can use the face primer on your face without worrying about side effects. Using this effective face, primer will control oil on your face for up to the right hours and will also reduce the visible pores.
Your face will not look oily, and you will not get breakouts or clogged pores after using the face primer. Purchase the recommended face primer to get a fresh and glam look.
Do you have more suggestions on how to use Smashbox Primer as a beginner? Please share your opinions and experiences in the comments section below.
Read Also:
Get Part Ready In No Time with These Hair And Makeup Hacks
6 Proven Ways to Deal with Hair Loss for Women
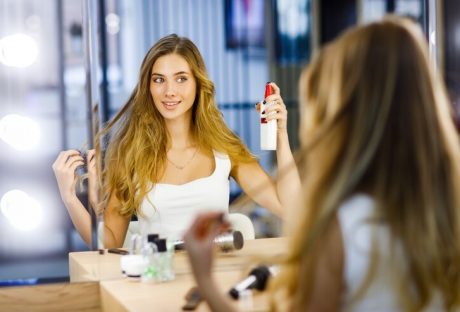
Hey there, beautiful people! Let's chat about something we all love: great hair. We all want fabulous locks, but how do we get there without all the confusing beauty jargon and expensive treatments?
One of the secrets to achieving that hair nirvana is tapping into the Arkive of salon-quality haircare products. These unassuming bottles and tubes might just be your ticket to hair heaven, and today, we're going to tell you why they matter and why you should consider making them a part of your daily hair routine.
The Good Stuff: Your Hair Deserves It
Ever wonder what makes your hair feel so amazing after a salon visit? It's those salon-quality products! They're like a gourmet meal for your hair, packed with nourishing ingredients that your locks crave.
We're talking about vitamins, proteins, and oils that work together to make your hair happy, healthy, and oh-so-gorgeous. No more dull and lifeless locks – salon products bring the party back to your hair!
No More Mystery Ingredients
Have you ever tried deciphering the ingredients list on a cheap shampoo bottle? It's like reading a foreign language. Salon-quality products don't play that game.
They're all about quality, not quantity. You won't find harsh chemicals or weird fillers in these gems. Your hair deserves better than that, and salon products deliver the good stuff without the confusing extras.
Tailored To Your Unique Hair
One size fits all doesn't work for hair, and salon-quality products know it. They come in a variety of formulas specifically designed for different hair types.
Whether you've got fine and straight locks or thick and curly ones, there's a product that's tailor-made for you. No more guessing games at the drugstore aisle – it's time to give your hair exactly what it needs.
Professional-Level Results At Home
Remember how your hair looks and feels fantastic after a professional salon treatment? Well, salon-quality products bring a little piece of that magic into your daily routine.
They're formulated to give you those jaw-dropping professional results without the hefty salon price tag. Who doesn't want to feel like they just stepped out of a luxurious spa in their bathroom?
Protection And Strength, All In One
Let's face it: we put our hair through a lot. Heat styling, coloring, and environmental stressors can take a toll on your tresses. Salon-quality products often include ingredients that protect your hair from damage and strengthen it from the inside out. It's like a suit of armor for your precious locks!
Smell Like A Dream
We must remember the scent. Salon-quality haircare products often come in the most delicious fragrances. Using them is like a mini aromatherapy session in the shower. Plus, who doesn't want their hair to smell like a field of flowers or a tropical paradise? It's a little slice of luxury every time you wash your hair.
An Investment In Your Hair And Wallet
Sure, salon-quality products might seem a tad pricier upfront, but here's the kicker: they last longer!
You typically need less product to get the job done, meaning a bottle of shampoo or conditioner will stick around for a while. It's an investment in your hair's health and your wallet's happiness. Over time, you'll find they're cost-effective, keeping your hair looking its best.
Conclusion
So there you have it, folks. Salon-quality hair care products aren't just a luxury but a necessity for fabulous hair. Say goodbye to bad hair days and hello to luscious, healthy locks. Your hair will thank you, and you'll feel like a superstar daily. Go ahead, treat yourself and your hair to the best!
Read Also:
Understanding Certifications In Organic Haircare Products: Ensuring Transparency And Quality
The Art Of Hair Regrowth: 3 Techniques For Restoring Your Crowning Glory
5 Essential Hair Care Products To Combat Frizz And Humidity


 The dying of wet hair may not be a common practice, but when we are talking about the comparison with dry hair coloring, here are some positive effects of wet hair dying.