Essential Things to Consider before Hiring a Window Tinting Expert

Published on: 05 July 2017 Last Updated on: 11 September 2024
image001

Window tinting is perhaps the best way to block the UV rays of the sun and eventually maintaining an adequate inner temperature of your building. Tinting also enhances the overall gaze of your home or commercial building and cuts your home and office cooling bills up to 60 percent. There are numerous service providers in the market that offer tremendous services, but you need to consider several things before choosing the one. Here we’ll discuss some aspects related to commercial and residential window tinting.

Overall Experience of the Tinting Service Provider

One of the important aspects is to check for a service provider having a good experience in the same domain so that you get the services from the professionals. You can seek help from your friends and acquaintances regarding a renowned residential window tint expert in your area.  Apart from this, you can also explore the internet and search for an experienced professional in your area. One thing you must always keep in mind is that you should always visit their site and check out their way of handling things and professionalism, which is necessarily important.

Online Comparison of Services

One must always compare different service providers by their services and pricing. Many people ignore this fact that they can easily get better window tinting residential services by online comparison. You just need to browse the internet and get the detailed information regarding every tinting expert in your location. Though there is a certain thing that can be only be discussed once you visit the office of the service provider. It has been seen that some agencies provide pictures and videos of their previous work; you can easily check out their previous work on their official websites and get a better idea of things.

Consider your exact Requirements

You must first consider your exact requirements of window tinting as numerous people often have different requirements. Some people prefer window tinting for enhancing the overall gaze of their home’s exterior while others choose it as a perfect way to reduce the inner temperature of their commercial buildings and offices. You can visit the office of the agency and seek help in regards to the type of service that you are looking for. Furthermore, you can also request a quote and ask for the guarantee of the work as numerous companies offer satisfactory services with a proper guarantee of their work so as to ensure trustworthy services. Also, be sure the window tinting expert provides information on how to maintain your windows after they have been tinted. It is important to keep the film in good condition so the ongoing benefits are maximized.

Check out the Local Reviews

image003

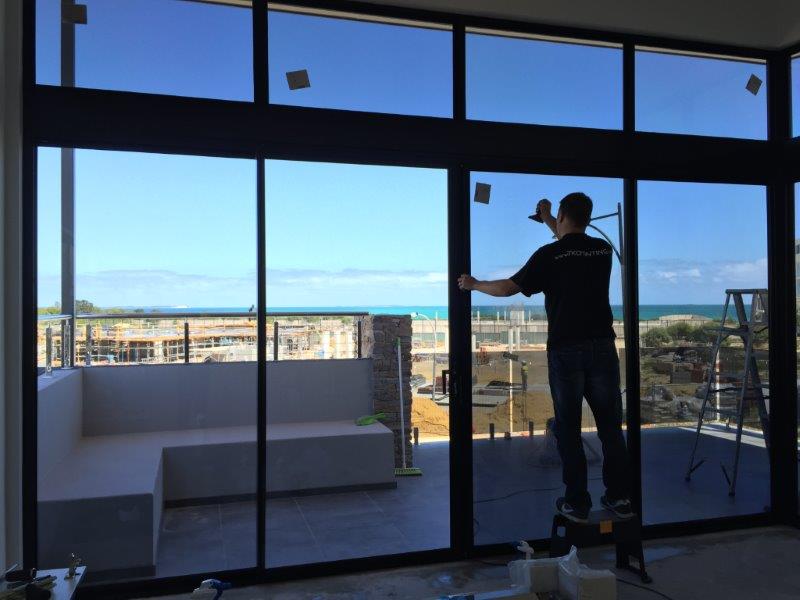
Image source: tkotinting.com.au

One must always check the reviews of previous customers that can give you the exact idea about the services of the agency. Moreover, there are several online comparisons and reviews websites that can help you in selecting the appropriate service provider at the best prices. You just need to visit one of these websites and go through the reviews, and you can also ask your queries and get a proper response from the customers. You must strictly consider these reviews as they are helpful in making the right decision.

Ask for a Contract in case of Commercial Window Tinting

If you are seeking the finest window tinting services that can augment the looks of your office and significantly reducing the glare, you must always ask for a contract with the service provider. Signing a contract will eventually decrease the stress of handling the entire project for your building’s different needs. Apart from this, you can save a good amount of money by giving a contract of the entire building to an individual agency.

Conclusion

You must always prefer a renowned service provider having adequate experience in the same domain so as to ensure quality work.

Read also:

Image source:

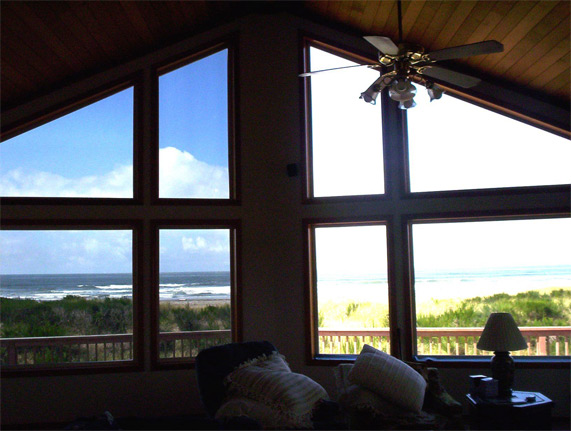
Featured image: https://www.tinting-laws.com/wp-content/uploads/2013/11/home-window-tint.jpg

Content Rally wrapped around an online publication where you can publish your own intellectuals. It is a publishing platform designed to make great stories by content creators. This is your era, your place to be online. So come forward share your views, thoughts and ideas via Content Rally.

View all posts

Leave a Reply

Your email address will not be published. Required fields are marked *

Related

Moving house

Moving house? Here’s the ultimate checklist

In your excitement to complete a house move and rush to undertake all of the clearly necessary responsibilities, like packing boxes and hiring moving vans, you could overlook too many crucial "little things". You might not notice that you have overlooked them until an inopportune moment... For this reason, we have compiled a thorough checklist of small but vital tasks to which you ought to pay diligent attention before you become accustomed to your new life in your new residence. Ask the previous owner the following questions... As ensuring a good supply of gas and electricity is crucial to running a home, you shouldn't neglect to ask someone where exactly you can find the gas and electricity meters. The person selling the house is an obvious person to ask - and they could also help you locate the thermostat and main stopcock. It's also wise to ask them what day the bins are collected and which company is responsible for your home's energy and broadband. Otherwise, you won't know who to turn to if an issue arises with any. Get the Royal Mail to redirect your post Of course, moving into a property also means leaving one - and, with someone else taking up residence there, there's an urgency to redirecting post to prevent it falling into their hands. Naturally, you should manually approach the organizations that regularly mail you and ask them to change your address details on their file. However, in the potentially long wait for those changes to be made, you could have Royal Mail temporarily redirect the post to your new address. Thoroughly clean the home before moving into it Sadly, as MoneySavingExpert.com attests, your new home could be disconcertingly dirty when you first enter it. Even a new build will look scattered with plaster chips and dust, while a pre-owned home will have grubby cupboards and fingerprints left by moving men taking items down the stairs. If some blotches in the home appear to have resulted from a roof leak, Google "roofing repair companies near me" to get that opening patched before it worsens. Register to vote and seek a new GP You will need to make a few registrations after moving. If you are switching between parliamentary constituencies, you must register to vote in the new one - it doesn't happen automatically. You should also prioritize registering with a new local GP; if you hold off registering until you need treatment, you could face a delay in receiving it, Which? cautions. Don't forget to do these things after moving Once the move is complete, you could still be left with a few loose ends. For example, if the new home's cost outweighed £125,000 or - if this is your first property purchase - £300,000, there will be a stamp duty bill to pay within 30 days of the move. You ought to also get the locks changed - or perhaps even the doors and windows fully replaced with strong uPVC alternatives - for bolstered security. Read Also : Moving Home Checklist: What You Need To Know How To Sell Your House Fast?! Five Must-Know Tips To Move Your Property! 5 Awesome Advantages Of Buying A Smaller House

READ MOREDetails
how to install faucets

How To Install Faucets And Sinks

Installing a new sink is an uncomplicated and quick task. The process is relatively easy, and you can do the installation part by yourself with a bit of experience. Then how to install faucets? Though some complicated kitchen faucets require professional installation, many of the kitchen fixtures can be installed easily.  Here is a guide on how to install faucets and sinks.  Materials Needed   In order to install the kitchen faucet and sink set, you will need the following list of things: a sink, a faucet or tap, a basin wrench, a strainer set, pump pliers, a screwdriver, a crescent wrench, a spatula, plumber's putty, silicone sealant, a bucket, a flashlight, and a set of towels.  How to install faucets, and this reason is nearby if you wish to enlarge the opening within the countertop. It is also necessary to know how to clean bathroom sinks to maintain hygiene.  Step By Step Guide To Install Faucets And Sinks If you are looking for durable, sturdy, and premium quality faucets, it is best to choose Oltsw taps.  Here, we have mentioned the steps to know how to install faucets and sinks.  Step 1: Measure and mark the layout of the kitchen’s sink Place the counter's back edge in the center of the sink within its cabinet. If the sink contains a template, align it along the mark on the counter. This is the first step of how to install faucets. Place the back edge one and a half inches parallel to the counter. Trace around it; proceed to the subsequent degree. If there is no template, use 2-inch tape to stipulate the sink location. Mark the middle of the sink on its back edge. Lay the sink inverted on the counter. Align the mark on the sink and the one on the counter together.  Step 2: Mark the cut lines on the counter The cut line marking is the second phase of how to install faucets. The employing a straightedge to attach the marks, you will find yourself with an oblong outline on the counter of the sink's hole. To approximate the radius of the corner of the sink, round off the corners by hand. Take a slightly wider bit than the jigsaw blade (½-inch bit is typically enough). Then, at each junction of the cut-out lines, make sure to drill a hole inside the radius.  Step 3: Use a jigsaw to cut the sink opening Place a jigsaw blade into a front hole and cut along the marked line to the back hole. Repeat on the opposite side. Lay a scrap of wood some inches longer than the cut-out across the sink area. Screw through the piece and into the cut-out waste to stop it from binding the saw blade or falling. Cut along the cut lines marked at the front and back and remove the cut-out piece. Make sure that the fit of the sink in the countertop is set. If it is necessary, trim the opening with the jigsaw.  Step 4: Install the kitchen faucet Set the sink the wrong way up on a padded sawhorse or counter. Then, feed the tap's supply tubing and tailpiece through the gasket, which helps seal the faucet to the sink. Screw the washers and mount them on the lower side sink deck. This is the pre-final step of how to install faucets. Just make sure that the tap can swing for a whole area across the sink deck before tightening mounting nuts.  Step 5: Attach The Strainer Over Applied Putty Put the sink up, apply a thick roll of the plumber putty under the strainer edge, and push it up through the sink's drain hole. Slip the housing (if your strainer has one), gasket, and washer onto the filter and against the lower side of the sink. Dab the pipe-joint compound and expose the opening threads.  Thread the locknut onto the strainer by hand, then tighten it with pliers while holding the filter in situ. Fit the gasket onto the tailpiece of the sink drain and attach it to the strainer through its slip nut. Tighten the nut using a hand while holding the filter.  Step 6: Set the sink and connect the water supply Remove the tape, and pull it toward the center of the hole. With the sink still, the wrong way up, press a bead of silicone tapping around the lower side of the sink's brim. Turn the sink upright and set it on the hole of the countertop.  Make sure that the front of the sink is parallel with the front fringe of the countertop. Adjust it, if necessary. Next, use the corn-head supply tubes or the braided stainless-steel hoses to connect the tap and shut off the valves. Now, attach the required sprayer hose to the faucet's threaded tailpiece.  Step 7: Connect The Drain Pipes Assemble the trap adapter on top of the sink-drain tailpiece. Cut and dry-fit the length of the PVC pipe and attach the trap adapter to the trap and the drain elbow to the waste line. Then slide the web on the tailpiece to finely tune the length and alignment of the pipe.  Take the drain pieces apart. Clean the cut ends with a utility knife. Use a PVC primer to coat it and its mating pieces. Let it dry and hold for 30 seconds. Now you are finishing the process of how to install faucets. Conclusion The essential features of kitchens and bathrooms are the sink and faucets. The sink and faucets need to be installed properly to avoid any damage and issues later on. Taking this into account, we have mentioned how to install faucets with significant steps to be followed while installing sinks and kitchen faucets. Additional reading: Small Kitchen Storage Ideas Know About The Type Of Kitchens According To Different Size Different Types of Conversions to Make the Most of Spare space  

READ MOREDetails
Your Home

Top Useful Tips On How To Make Your Home Allergy-Free

Many people suffer from dust, pet dander, pollen, mold, and other allergy-causing substances. These allergens can be found throughout your entire home, including the air you breathe, the floors you walk on, and the drapes you open. Sadly, allergy-causing substances are unavoidable, but you can do something about the severity of your allergies. We’re here to help you find the top tips that will make your home more allergy-free. Hide-and-seek: hidden allergens in your home Allergens are everywhere! They live in our bed, clothes, carpet, and walls. The air we breathe can contain allergens, and staying indoors can make the problem worse. Even if you avoid allergens, you may be exposed to them in other people's homes or places you visit. It's true that the highest concentrations of allergens are in your home, but they can also be found in restaurants, grocery stores, and many other places you visit. Now that you know where allergens are hiding, it's time to figure out how to get rid of them. While getting rid of all allergens in your life can be next to impossible, there are some things you can do to keep your home clean, reduce allergens in your life, and keep yourself healthy. Why are allergens dangerous? Allergens are small particles in the air that cause people to produce an immune system response. People with allergies will react to these particles and release histamines, which cause the body to work harder and release more of the allergy molecules. This can cause asthma attacks and other autoimmune problems. On top of that, they can cause rashes and just be difficult to live with. Allergens are especially bad for people with asthma, and other respiratory problems, but they can also trigger sneezing, coughing, or itchy eyes. The best way to rid your home of allergens is to remove them, by regular home cleaning and using allergy-friendly products. How to reduce allergens in your home? Did you know that keeping your home clean can help eliminate allergens? There are plenty of easy ways to keep everything clean without any hassles or extra work! If you're looking for ways to reduce allergens from your home, check out the following tips. Wash your bedding, curtains, and comforters frequently in hot water. Limit the number of carpets, rugs, and other floor coverings. If you can’t remove them, wash them often. Vacuum often. Wash your floors with a mop and hot water. Leave your shoes at the door. Dust frequently. Remove clutter. Use a HEPA air cleaner. Choose allergy-friendly houseplants. Use safe cleaning products, especially hypoallergenic laundry detergents. As you see, there are many steps you can take to reduce allergens in your home. By implementing a few of these tips, your home will be a safe, healthy environment for you and your family. Read Also: Vancouver House Cleaning Services with Local Home Cleaners Near You Cleaning Your Home with Pets – The Most Common Problems  

READ MOREDetails