Published on: 07 September 2017
Last Updated on: 30 July 2024
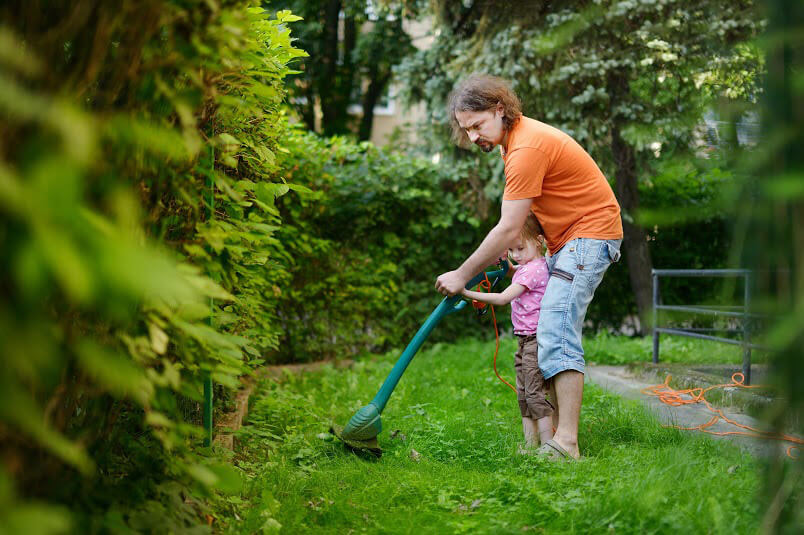
It is often said that if the grass is greener on the other side, you need to work on your lawn. One of the tools that can help you to maintain your lawn and keep it in good shape is the weed wacker. Also known as a string trimmer or a weed eater, this versatile tool is designed to keep your lawn free from weeds and tall grasses. But selecting the right weed wacker for your lawn can be quite a task if you don’t know where to begin. Outlined below are a few things that you need to keep in mind while selecting a weed wacker.
Examine the area of action
One of the first things that you need to examine is the area where you plan to use the weed wacker. Not just the size of your yard or lawn, you must consider its distance from available electrical outlets as well. While a small yard will provide you more flexibility in terms of the weed wacker you select, it may not be always true for a large yard.
For instance, if you need to remove strong weeds from the far end of a large lawn, an electric trimmer may not be the perfect machine to opt for because of the distance of the spot from the electrical outlet. Additionally, you must keep in mind any structures or features present in or near your lawn, such as bushes and fences. The weed wacker you select must be able to work smoothly around such things.
Consider the intensity of the task
The type of weed you need to remove with the weed wacker also plays a significant role in its selection. If you are looking to eliminate normal weeds from your lawn, a standard weed wacker will usually be sufficient for your requirements. But if you need to use it for more intense weed-cutting purposes, such as the removal of tough weeds or cutting of thick grass covering a large segment of the lawn, a commercial-grade machine will be a better option for you.
Pay attention to the mode of operation
Weed wackers are available in various types, including electric, gas, and battery-operated models. Battery and gas operated models do not need the use of extension cords. So, they offer more freedom as far as the mobility of the tool is concerned. But battery-operated models need to be frequently recharged. Gas operated models can be used for bigger jobs, where more time is required. Electric models are light, quiet, and easy to use. But they are restricted by the extension cord. Select the mode of operation based on your requirements.
Keep your budget in mind
The make or break of any buying decision ultimately depends on the budget. So, set a basic budget first and then look for a model that satisfies your budget as well as your weed eating requirements. But before you finalize your decision, do not forget to compare the features of the different models. You can check out the best weed wackers here to get an idea of their budgets and features.
Content Rally wrapped around an online publication where you can publish your own intellectuals. It is a publishing platform designed to make great stories by content creators. This is your era, your place to be online. So come forward share your views, thoughts and ideas via Content Rally.
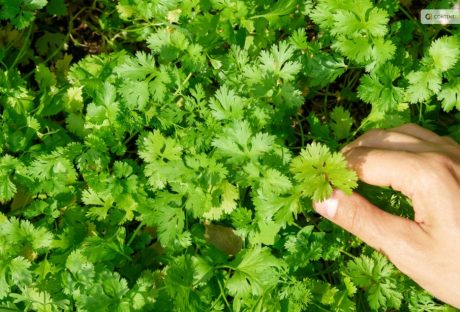
One of the most used herbs in the world, cilantro, is also referred to as Chinese parsley or Coriandrum sativum. Fresh and zesty, cilantro gives your recipes a flavor boost. Mexican, Middle Eastern, Indian, Mediterranean, Chinese, African, and even Scandinavian cuisines use it extensively. Even cilantro microgreens are grown from it!
Since cilantro itself doesn't keep well and loses aroma and flavor once dried, most people prefer to use it fresh. To have cilantro on hand, you should also have a few plants in the garden.
You can harvest the plant for its flavorful cilantro seeds, also known as coriander, even if you don't use the leaves in your recipes. The leaves of the cilantro plants come throughout the spring and summer. Allow them to go to seed at that time since they grow easily in the garden!
You must know how to harvest cilantro properly if you want to have a steady supply. Keep reading to find out all you need to know about harvesting cilantro.
Harvesting Cilantro: Overview
Most people either love or hate the flavor of cilantro leaves. However, you should still think about cultivating a few coriander plants in your garden and saving the seeds for a range of culinary uses.
Most people in the US grow this delicious herb for its leaves. But the tasty coriander seeds are also worth harvesting. They have a distinct flavor from cilantro leaves. This fragrant herb of the cool season, cilantro, quickly goes to seed in the long, sweltering summer months.
As the plant reaches higher in the sky, its rounded, lobed leaves become feathery. Pretty clusters of tiny white blossoms quickly emerge. Many pollinators are drawn to these nectar- and pollen-rich blossoms, particularly syrphid flies and honeybees. Little round coriander seeds with a kelly green color emerge as the blossoms start to fade.
What To Expect from Cilantro?
The distinctive flavor of coriander is citrusy and slightly nutty. It goes incredibly well with rice, beans, lentils, and roasted or grilled veggies. You can pick the seeds while they are still young and vibrant green. Or you can wait until they start to turn brown.
Since green coriander seed is only found in gardens, it is better to harvest them when they are still green because of their stronger, more distinct flavor. You will not find them in the farmers’ market or the grocery store.
If the seeds are kept in a glass container with a lid, then they can be refrigerated for several weeks and frozen effectively as well. Wait until most of the seed turns brown if you want to harvest the mature brown seed for winter grinding or planting next year.
Next, trim off a few inches of stalk and the seed heads, then hang them upside down in a brown paper bag. The seeds will drop out of the heads and land in the bag's bottom once they are completely dry. The dry seed should be kept in a dry, cool place in a glass jar with a lid.
For optimal flavor, grind it just before using. The flavor difference between freshly ground coriander seed and the pre-ground variety typically found in stores will astound you. Try adding green coriander seeds to dressings and marinades. Frequently adding an equal amount of ground coriander to recipes that call for cumin makes the flavors of the two go particularly well together.
How to Harvest Cilantro?
The most exciting aspect of growing plants is undoubtedly harvesting. Pick individual cilantro leaves if you plan to use a small amount. It is best to leave at least 1-2 inches of stem above the soil's surface when harvesting larger quantities of cilantro.
It is preferable to leave a few lower leaves on the plant to support the herbs until they grow back. To cut the stems cleanly, use harvesting snips, long reach harvesting snips, or sharp, sterilized garden shears. To guarantee that your herbs regrow, it is best to remove only a small portion of the plant at a time.
Furthermore, when the cilantro plant blooms and sets seed, the herb may start to taste bitter. So, when wondering how to harvest cilantro, it is preferable to harvest before the plant bolts because the leaves will be less appetizing at that point.
When is The Best Time to Harvest Cilantro?
When the morning dew has cleared and the sun hasn't set, it's the ideal time of day to harvest a variety of fruits, vegetables, and herbs, including cilantro. This way you can lessen the stress on your cilantro plant and give the fresh stock cuts enough time to dry before dusk, which lowers the risk of illness.
Before it bolts, harvest cilantro when it is 6 to 8 inches tall. The flavor of cilantro leaves significantly decreases after they have bolted. The lifespan of the cilantro plants can be increased by careful and routine harvesting. It is crucial, though, to wait for your plant to become established before beginning to harvest.
The plant develops numerous long, thin stems as it grows. They are ready to be harvested when the stems are long, and the leaves have a lacy appearance. The cilantro herbs are about ten to twelve inches tall at this point. Gather your cilantro in the spring and into the first part of the summer.
Your plants may bolt to seed if summertime full sun conditions prove to be too hot for them. The best time to harvest cilantro is early morning. You can either choose to harvest it once a week or source just individual leaves whenever you need them.
Most of the time, it takes about 2-3 weeks for regrowth, so you must harvest accordingly. You must remember that regular cut-and-come-again harvesting is the most ideal while the plant keeps producing foliage.
How To Store Fresh Cilantro?
Part of knowing how to harvest cilantro is also knowing how to store them. It's best to know how much you should take from the garden before you harvest. You will need to learn how to store cilantro if you do not intend to use the leaves right away to extend its shelf life. There are several approaches to try.
Storing Cilantro in Water
To keep the cilantro leaves dry, wait to wash them after harvesting. For storage purposes, store the stem ends in a glass or jar with 1 to 1.5 inches of water and refrigerate for a few days. At a minimum, change the water once a day. Use a plastic bag to cover the top loosely to preserve the humidity surrounding the herbs.
Storing Cilantro in The Freezer
Freezing cilantro is another low-maintenance way to store it. Shake off any extra moisture and rinse the leaves to get rid of any garden soil. Tear the leaves into small pieces and stuff them into ice cube trays, covering the herb with just enough water to barely cover.
You can pre-measure if you'd like to ensure that you know precisely how much is in each cube for recipes in the future. After the cubes are completely frozen, place them in a freezer bag. Add as needed to marinade, smoothies, soups, and sauces. You can freeze cilantro for up to six or eight months.
Read More: Everything You Need To Know About Harvesting Basil
How To Dry Cilantro?
There are two methods for drying cilantro. You can use the oven to dry cilantro. Since hot air can greatly affect the flavor of the finished and dried herb, you might want to avoid using heat if you want to enjoy flavorful dried cilantro.
Air drying or hanging drying is a better way to dry cilantro. Gather the stems of the herbs into a small bunch and secure them with a string. Place the bunch in a dark, well-ventilated area and hang it upside down. Alternatively, you can wrap the bunch in a brown paper bag to keep the cilantro from getting dusty.
After the bunch has been hanging for about a week, begin to check its level of dryness every day or two. It's ready to be crushed or powdered and stored for later use when it crumbles when touched.
Cure the cilantro ahead of time to reduce the possibility of mold growth. Put the dried cilantro in a glass mason jar to cure. Open the jar and give it a good shake every day to let fresh air into it and mix the contents. This will assist in achieving moisture content parity. If you'd like, you can also include a moisture-absorbing packet.
How To Harvest Cilantro Seeds?
You can harvest the coriander seeds even if you don't like cilantro leaves. The plant can grow to 20 inches when it flowers. This requires temperatures above 75 degrees. Pods will form once they have flowered, and the flowers will fade.
Before being harvested, these should be green to brown in color. These pods release the mature seed when it's ready. Tie the stems with the seed pods still attached into a bunch. Next, hang them upside down in a paper bag in a cool, dry place to harvest the seeds.
With time, the seeds will sprout and drop into the bag. Store your seeds in a dry, cool place in an airtight jar. Unground dried seeds can be kept for three to four years in storage. Before using dried seeds in your recipes, grind them for the best flavor.
How To Harvest Cilantro So It Keeps Growing?
If you sow cilantro seeds every two weeks from spring until late summer, you can be sure to always have fresh leaves available. We advise chopping them up and firmly packing them into an ice cube tray filled with water. Then, just place the tray in the freezer. These can then be added directly to hot pans when preparing soups or sauces. Or they can be dropped into hot or cold water for cooking or drinking.
What To Do If Cilantro Bolts?
It's time to collect and preserve your own coriander seeds once your plant produces seeds. Picture each of those tiny white blossoms turning into a flavorful spice for your cooking or seeds for the following year! In addition to being aesthetically pleasing and tasty, cilantro flowers are also excellent pollinators.
There is a short window of time when the growing seasons of cilantro and tomatoes coincide. This proves they go well together. It usually happens that my tomato and pepper plants are just starting to take off when my cilantro plants bolt, sending forth gorgeous white flowers.
To maximize the amount of fruit your plants produce for you, beneficial insects that are feeding on your cilantro flowers will collide with your fruiting plants, vibrate their leaves, and assist in pollination. Ladybugs, butterflies, and bees all love cilantro flowers. It truly is a win-win!
Choose Slow Bolt Seeds
Seek out seed packets labeled "long-standing" or "slow bolt cilantro," as these varieties have been cultivated to endure longer in the garden. You can find your go-to slow bolt seeds that are 100% certified organic from Seeds of Change.
Finding a local seed producer is another smart move. Buying local seeds means you'll be growing a climate-adapted variety of cilantro, which increases the likelihood that you'll keep it longer.
Harvest Cilantro Regularly
Regularly chop your cilantro leaves. This preserves the health of the plant and guarantees that the leaves of this herb are fresh when you use them. Your cilantro will continue to produce new leaves from the center of the plant if you regularly harvest it by chopping off the older outer leaves.
Additionally, your chances of cutting off those immature flower stalks increase with the amount of cilantro you harvest. This will aid in postponing any bolting.
Since cilantro is incredibly obstinate, you can delay as long as you can. Cut that thick center stalk as soon as possible. After that, the plant will start to send outside shoots, giving you a little extra cilantro before it eventually bolts completely. For sun protection, surround your cilantro with tall plants.
Plant Taller Plants Around Cilantro for Sun Protection
Encircle your cilantro with large warm-season plants (like tomato or pepper plants) so that the taller plants can shade your herbs slightly and help keep the soil cooler as the temperatures rise. After all, four to six hours of sun is sufficient for cilantro to grow. To increase the lifespan of your cilantro in the garden, interplant it with larger plants.
Wrapping Up
You will need to have patience if you want to collect the seeds for your cilantro. Before seeds can be harvested, cilantro needs to blossom. Before harvesting, the resulting seed heads need to be allowed to dry on the plant for a while.
Harvesting the seeds is then as simple as shaking them into a paper bag or chopping off the entire seedhead and placing it inside the bag. If you have thoughts to share or questions to ask about how to harvest cilantro, please leave a comment below. We would love to hear from you!
Read Also:
Asparagus 101: When, How, And How Often To Harvest?
Some Facts You Need to Know About Rainwater Harvesting
How to Harvest Lettuce: A Step-by-Step Guide for Fresh and Crispy Salads
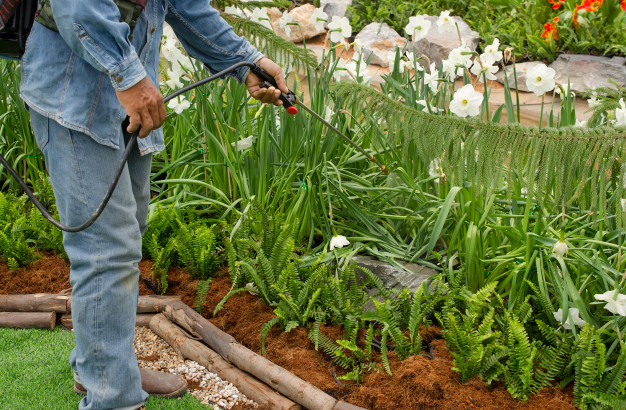
Pests can be a menace and a mood killer. They dampen your spirits of developing a beautiful garden with their destructiveness. Many gardeners make frequent visits to the stores to buy insecticides to try and save their gardens. But did you know your home is full of natural insecticides that you could use to control the pest? Several items that you use in your home can also be used to control pests in the garden.
So, if you are tired of the frequent visit to the stores or don’t have the time, here are several home items and products you can use to control pests in your garden.
DIY Ways to Control Pests in Your Garden:
One Hot Pepper Spray:
Mix one gallon of water and about three spoons of hot pepper; if you are using fresh peppers, chop about ten peppers. Simmer the mixture or about 15 minutes and then let the mixture settle for 2 hours.
Add a few drops of dish soap to the mixture. The soap helps the mixture acquire a sticky solution that can easily adhere to the plants.
Garlic-Mint Insect Spray:
To make this homemade pesticide, blend some mint leaves with garlic gloves. Add cayenne pepper and dishwashing soap. Boil the mixture and let it settle for 12hours. It should be ready to chase the bugs away.
Apple Cider Vinegar Fruit Fly Trap:
Flies are irritant and spread diseases very fast. Instead of waiting until it’s morning to buy some bug spray, you can easily make a homemade fly trap using basic kitchen products.
Fill a bottle with apple cider vinegar and add a few pieces of chopped apple. The bottle top should be funneled shaped or have a shaker that allows the flies to get in but restrict them from easily getting out.
Coffee Grounds:
Do not throw away used coffee grounds if you have a pest problem in your house. Despite making you a cup of coffee, coffee grounds can be used as homemade pesticides.
If there is an infestation of ants in your garden, place the coffee grounds in the spot they are originating from. Coffee grounds are fatal to many species of ants. Coffee grounds can also be used to control bugs, snails, and slugs.
Eggshells:
If a population of slugs and snails are wreaking havoc on your recently planted seedlings, you can easily win the war with eggshells. Eggshells make the ground rough, and the snails find it challenging to slither. Crash eggshells into tiny pieces and then spread the pieces on the ground. The shells also add value to your garden by adding calcium and other minerals to the soil when they degrade.
Dust Mite Oil Repellent:
You can easily make a pesticide to control mites and aphids that invade your home and garden with some few basic home items. To do this, mix either lavender, eucalyptus, peppermint, clove or rosemary oil with water. Pour the mixture into a spray bottle.
Mites and aphids hate the smell of this mixture and will stay away from the sprayed area. You can add lemongrass and basil to repel lice and fleas as well.
Egg Deer Repellent:
Yes, a deer is also a pest. They can be a big problem for your garden, especially if you live near game reserves. However, you can keep the deer away from your plants by using a mixture of eggs and water. Mix several eggs with water and blend the mixture until it forms a solution. Pour the mixture into a spray bottle and then spray the solution on the leaves of your plants. The deer will be repelled by the smell and will stay away from your garden.
Bananas and Tin Foil:
Aphids are some of the most destructive pests in the garden. They can easily destroy a whole garden if they are not controlled. It is one of the best ways to Control Pests.
To control aphids collects banana peels and chop them up into small pieces. Place the peels under the soil around the base of the plants. Aphids are repelled by the peels, and the peels add nutrients to the soil when they decompose.
Foil can also be used to chase way aphids. The foil reflects sun rays to the underside of the leaves when placed at the base of the plants. The heat and light will chase away the destructive pests.
Some people might wonder, “what if I meet banana spiders while spraying the garden?” Well, the best thing to do is to leave them alone. Banana spiders are pest controllers and will help you reduce pests in your garden. Majority of banana spiders are harmless to humans.
Pests should no longer be a big problem if you use the home remedies above. Frequent visits to the store to buy pesticides will also be a thing of the past.
Read Also:
What You Should Expect From A Pest Control Visit
5 Tips To Keeping Animals Away From Your Garden
5 Essential Tips To Designing A Beautiful Front Yard Garden
The most important thing in anybody’s life is to get to know the best things around and to let it be in the right place. If you are going to win over a place and that too for a better reason for scope and action then think of making a positive change. It is right in front of different sorts of approaches that you can find a fair deal. You can provide a trendy look to your gym or the training center with Activity/Gym Mirror. At the same time, you can find a better reason for scope and action. You need to see the best sorts of things and that too for better exposure and reasons.
The display is Very Important for Proper Ambiance
You see things are going all well with the best sorts of things and reasons to explore for best products. It is just too important to look for the best sorts of deals and that too in a proper way of course. If anyone wants an exotic presentation at the gym with mirrors then you need to find the best sources, and how to look for the great opportunities around. Creating a proper display buzz for your best attitudes is a way out of different sorts of marketing tactics that you need to look for the best kinds of clientele. You need to see what kinds of things really matter and required as per marketing gimmicks are advertised.
People are Getting Health Conscious Every Single Day
The way of life is all too busy and it becomes more of a necessity to keep you all active and healthy. You are doing a typical 9 to 5 job, and then it’s all sitting and working. So, it is best if you join a proper job and do little exercise that is good for you. It is healthy and keeps blood circulation all moving. Eventually, it is all going to be the best way to look for the best kinds of options. If anyone enters any exercise arena with the purpose of regular joining then he will definitely look at the typical machines as well as the overall environment. Here keeping gym wall mirrors display all around is too good.
How to Purchase Great Quality Wall Mirrors
Well, the range of wall mirrors is not limited and it varies from client to client. It is a need-based requirement and for bathrooms, there are different sizes. If someone wants to display it for beautification at an entrance then different sorts of designs and sizes are required. Here clients are going to look for their own preferences, and then gym mirrors will be best available through online stores. It is easy to select, pay and gets home delivery, without moving a single foot out of your exercise center. The sizes of gym mirrors are subject to walls, and how much a client requires and it will work great for sure. It is an easy and effective method as technology develops and online shopping is paying off for sure.