5 Benefits That Come With Sheer Mineral Sunscreen For Face

by

24 May 2022

Beauty

Sheer Mineral Sunscreen

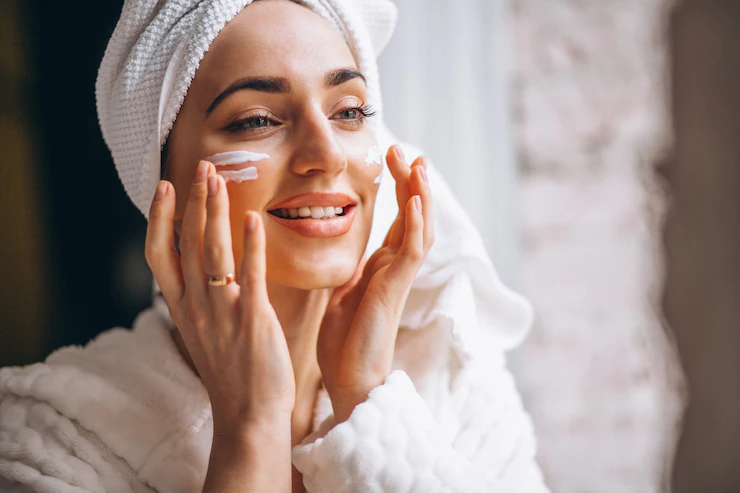
Sun protection as a topic never really goes away, as it’s an ever-present paradigm that needs to be paid attention to all year round. People have used sunscreen since its invention back in the mid-1930s (yes, it’s only been around for that long) as the damage that UV rays can cause has become more and more known. Fast forward to the present day and one of the most popular choices now is sheer mineral sunscreen for the face.

So, what’s the reason for its popularity? Why have millions of people turned away from traditional chemical-based sunscreen brands? That’s what we analyze here for you now. Sit back as we take you through 5 of the major benefits the product offers.

List Of 5 Benefits That Come With Sheer Mineral Sunscreen For Face:

1 – Sheer Mineral Sunscreen For Face Works Instantly

Chemical sunscreen has to be absorbed into the skin to work. Why does that matter? Well, this process takes time and until it’s happened, you’re not protected. So, even if you’ve just slapped a load of it on, it can be up to ½ an hour until you’re properly protected against the sun.

Mineral sunscreen, on the other hand, works the instant it goes on, as it provides protection from the surface of the skin – not from within it. So, no annoying delays for you getting out into the sun.

2 – The Skin Benefits from Mineral Sunscreen Ingredients

Skin Benefits from Mineral Sunscreen

The main active ingredient in mineral sunscreen is zinc oxide, which is actually really good for the skin. So, rather than working despite the ingredients, the effect is enhanced.

Want some evidence that it’s good for your skin? You can find it in acne treatments, nappy rash ointments, and other skin care formulations. It wouldn’t be in there otherwise!

3 – Broad Spectrum UV Protection is Provided

Do a little research into UV protection and you’ll discover that effective sunscreen needs to be able to deal with both UVA and UVB rays equally. When you use chemical brands, you don’t always get this, but when the hero that is zinc oxide is around, that’s not a problem, as its naturally-occurring formula is really efficient at blocking out both types of sun radiation.

4 – It’s Better For Your Body

mineral sunscreen

Believe it or not, if you choose to avoid sheer mineral sunscreen for your face in favor of absorbed chemical sunscreens, the chemicals are able to find their way into your bloodstream. Studies have shown that these synthetic compounds also find their way into urine and breast milk – obviously not something you want as a new mother!

No such problems for mineral sunscreen, however, as it never enters the body.

5 – It’s More Planet Friendly

If you Google the words sunscreen and coral reefs together, you’ll find hundreds of articles telling you about how chemical sun protection is having a devastating effect on our marine wildlife.

Thousands of tons of the stuff make its way into the oceans and it’s literally suffocating our coral reefs. However, being a naturally occurring compound, zinc oxide is harmless and those who use it help in their own small way to prevent this from happening.

All Evidence Points Towards Sheer Mineral Sunscreen For Face

The truth is that there are many, many reasons to consider using mineral sunscreen over chemical brands and here we’ve only been through 5 of them. We’ve only scratched the surface here and it’s already patently obvious what the right choice is.

What you do is up to you, but with compelling factors like these to consider, it’s hard to argue against it.

Read Also:

Arnab is a professional blogger, having an enormous interest in writing blogs and other jones of calligraphies. In terms of his professional commitments, He carries out sharing sentient blogs.

View all posts

Leave a Reply

Your email address will not be published. Required fields are marked *

Related

The Selfie Culture: Should we be worried?

Selfie trend is spreading everywhere in teenagers and teenagers. If you visit Facebook or Instagrams you can see many selfies posted by teens. It is very rare that you scroll on Facebook or any social media site, and you do not find any selfie posted by teenagers. Research shows that 91% of teenagers daily post their selfies on Facebook. Selfie has become a harmless habit of teens. Selfie is not dangerous in actual, but it could be harmful in many ways. Parents should ask their children to avoid this habit of always taking selfies. Inform them about the risks they can face. Selfies and Self-Esteem Many teenagers think that before the trend of selfies they were extremely camera-shy. But now they feel confident while taking selfies as well as in normal life they are confident, but this is just the thought of teens. In actual, the craze of taking selfies is a reason for the development of poor self-esteem. A survey has been made which shows that 65% of teenagers think that selfies are a way of increasing self-confidence, 40% of them believe that social media is a good way to share pictures with others in this way, they can show their beauty to others while 53% believe that if their photos are posted by someone else, it makes them feel bad. On the other hand, American plastic surgeons declared that more patients are visiting them for surgery because they think their face does not look good while taking selfies. They are not happy with their pictures on social media sites. There is a story of a UK teen which shows you how bad is selfie habit? He left the school and stayed at home for six months and spends 10 or more hours in selfie-taking. In the end, he attempted suicide due to over craze of a selfie. Now you can understand how selfies hurt teen’s self-esteem. Read More: App Development Benefits: Here’s Why You Should Go Mobile Selfies and Your Online Reputation As some activities on the internet or social media sites can be dangerous for your children and selfie is one of them. Teens post and share their selfies on Facebook or any social site with their friends. This can have a harmful impact on their reputation if their friends give bad comments on their selfies it may also hurt their relationships. Teens focus on online reputation more than the real world, if someone hurt their reputation they may get emotional and can take wrong steps. So, sharing selfie can be very harmful. Selfie Safety Tips: Parents should discuss with their children that too much enthusiasm for selfie-taking is not okay. Also, the comments of people on their pictures should not be related to their reputation. Make sure that your child is using all the security settings in their social accounts. Explain to them that they should take care of their personal things and do not share selfies with strangers or person to whom they cannot believe. Only post those selfies on social media on which they feel comfortable. Read More: Google Getting Into Phones – And It’s Changing The Mobile Internet Best IPhone Spy Apps Without Jail Breaking Top 5 Digital Wallet Apps For Android

READ MOREDetails
lip fillers

Looking to get lip fillers in Las Vegas? Here are 4 questions to ask your doctor before the procedure

If you're concerned about getting lip fillers to enhance your look, you should ask your doctor a few questions before beginning. Make sure that you put your mind at ease before getting anything injected in your face, going under the knife, or taking any kind of dug - not only is this a good practice to make you feel more confident about the procedure, but you can ensure that you are avoiding taking any unnecessary risk that can put you in harms' way later on in life. Before you get lip fillers in Las Vegas, make sure you speak with your doctor before the procedure so you can be 100% confident in the procedure and understand all steps of the process. Even though it might seem like an easy procedure, sometimes things can go wrong, your doctor may be unable to answer questions, and you might have a unique situation that can put you in a higher risk category. Speak with your doctor and ask these common questions before getting lip fillers in Las Vegas to enhance your look and boost your facial symmetry! If you need more information about “lip filler Las Vegas”, you can find it here. Am I the right candidate to get lip fillers? Is this the right choice? If you are asking yourself if this is the right choice, you should take some more time before booking your first appointment in Las Vegas. If you are still questioning whether this is the right move for you, you should take some more time and consult some other doctors and healthcare professionals before getting this procedure done. Although you might think that it is time, you need to be 100% sure before you book this appointment. However, if you are just wondering if you are the right candidate, speaking with your doctor about your past medical history and any potential complications can help you put your mind at ease. What types of lip fillers should I get? If you are scheduling your lip filler in Las Vegas, then you need to ask about the type of dermal fillers that would be best for your lips. There are various types that you can use, such as hyaluronic acid, collagen, and other less common options. How much does getting lip fillers in Las Vegas cost? The average price of getting lip fillers in Las Vegas typically costs between $400 and $800 depending on the location that you chose, the doctor of your choosing, and any special conditions that can increase the price. What is the recovery after getting lip fillers in Las Vegas? If you are worried about bouncing back after getting lip fillers in Las Vegas, then you can rest assured the recovery process is quicker than you think! Take care of your lips for the first day after the procedure, avoiding intensely cold drinks, hot drinks, exercise, and putting on makeup. After that, you are good to go! Conclusion Debating getting lip fillers in Las Vegas to enhance your look and make you less self-conscious? Ask your doctor these four questions before getting lip fillers so you can see if you are the perfect fit for this aesthetic procedure. Read Also: How to Achieve Kissable and Healthy Lips

READ MOREDetails
Classy Makeup

Simple But Classy Look Make-up

If you're looking for a simple but classy makeup look, there are a few steps to follow that will help you achieve just that. Whether you want to adopt a basic and elegant look for a special occasion, such as an engagement, wedding, reunion, or another occasion, there are certain guidelines that will help you achieve a sophisticated look for almost any event. Here are some basics to get you started. In the following section, we speak to leading experts at the Paris Lash Academy and ask them about the best simple and classy make-up looks that you can opt for. Paris Lash Academy offers various eyelash extensions that can complement your looks. Simple But Classy Makeup Look: Makeup Brushes: Before you get started on your simple but classy makeup routine, be sure and gather a set of quality makeup brushes to speed up the process. You'll likely need foundation, blush, eyelid, powder, and contouring brushes. You might also want to think about including a few beauty blenders, particularly for foundation, blush, and contour application. You want a smooth application and the right brushes and blenders can provide that. Prepping Skin: In order for makeup to blend as it should, cleanse your skin to create a slight exfoliating effect before any makeup is applied. Once cleansed, moisturize the face and apply a face and eyelid primer. Primer applications should smooth and preserve any makeup that is applied to those areas. Evening out Skin Tone: If the skin is blotchy or uneven, the application of a sheer tinted moisturizer will help to smooth and even out skin tone. Tinted moisturizers can also add warmth to the complexion. You don't have to go for an exact skin match with a sheer tint as you can still bring an added intensity or glow to the skin. If your skin is extremely oily, you'll probably want to skip the tinted moisturizer step to avoid oil buildup. Concealing Under-Eye Circles and Blemishes: Evening out skin tone also means including and using a good concealer that is rich in pigment and staying power. You want to cover dark under-eye circles and other blemishes. Using too much will accentuate problems, so simply use a short swiping motion under the eye. When dispensing the concealer, place it in a triangular shape under the eye. Blend the area with your finger or a beauty blender. For blemishes, dab the actual spot and blend. Continue to do the same action if added coverage is necessary. You want the concealer to be at least one to two shades lighter than your skin tone. Other spots to highlight include going up the bridge of the nose and on up to the forehead. Foundation: The right foundation is the piece de resistance of any makeup routine. You want to find a shade that is closest to your actual skin tone and decide whether a liquid or cream is suitable for your skin type. For a more flawless look, use a beauty blender to apply the foundation. It will definitely deliver a smoother and more complete coverage. Blend the foundation on the face and continue down onto the neck area. If necessary, use your concealer again to cover any blemishes or dark areas, or to add further accents. Contouring/Highlighting: Once the foundation phase is complete, use a contour brush to apply contour powder or cream under the apple areas of the cheeks. Also, apply that same contour to the forehead area and both sides of the jaw. In order to add more warmth, apply a bronzer to those same areas. Blush Color and Highlighter: For added color, choose a blush color for a simple but classy makeup look. You want to think about using cream blushes in warm peaches and pinks so that skin is given a natural and subtle look. Forego cool pinks as they add too much drama. Natural cheek colors can convey a blushing bride kind of appearance that can enhance just about any luvbridal wedding ensemble as well as any other special occasion or event. Use a blender or brush to apply blush to the apples of the cheeks. For more cheek and face enhancement, add a non-sparkly highlighter to the tip of the nose and cheek areas and anywhere else where the sun would normally hit. Again, use a beauty blender to smooth out both the blush and highlighter to create a more subtle and simple effect. Eye Shadow, Liner, Mascara, and Eye Pencils: Soft browns are the best eyeshadow colors to use to enhance the eye area and its shape. Select a shade that is a bit darker than your skin. Brush and blend the shadow into the creases of the eye as well as on the lower lashes. Keep it soft with no hard lines. Add a neutral creamy color shadow at the inner corners of the eyes as well as at the center of the lids, and on the brow bones. At the outer corners of the eyes, use a darker shade to bring a further dimension to the eyes. Liner - Apply a dark brown or black liner to the eyelids. Liquid and gel liners give a longer, starker and lasting effect while pencils usually bring a softer and smoother look. Mascara - provides a finishing touch to the eye area. Apply several coats to the top lashes. For lighter lashes uses brown mascara and if you have darker lashes, use brown or black. Avoid mascara products that produce spidery lengths to lashes, as they can detract from a more natural look. Mascara can also be used on your bottom lashes by applying a bit of mascara from the wand and placing it right at the roots of the bottom lashes using a small eye brush to dot in the mascara. Eyebrow pencil/gel - color choices should be one or two shades on the darker side for blonde or light brown hair, while one or two shades lighter for dark or black hair. You want your brows to be natural but you also want them to be defined. Use an eyebrow template if you are not sure of how to color in your brows or simply need a guideline for correct color placement. Think soft and subtle, yet defined. Lips: You want to enhance your lips with a pretty lasting tint rather than an outlandish and garish color. Choose a shade that actually matches your true lip color and pat or press the color into the lips. Go to the center of the lips first and blend the color in an outward motion. Darker berry colors and reds are flattering in a matte tint as they do bring emphasis to the lips without exaggerating them. Powder: Maybe you don't require powder to finish your look but if your skin has a tendency to get oily and produces shiny spots, you might want to think about an oil-absorbing powder. Powders that are pressed, silk, airbrushed, translucent, and hydrating are great for completing any look, whether your skin is oily or otherwise. These powders are easy to use as you can just sweep a powder brush across them and buff the skin to create a perfect look, which includes powdering the under-eye area as well. Pores and blemishes are also reduced with the use of this kind of powder, and touch-ups are easy as the buildup is almost nonexistent. Setting or Fixing Spray: Once your makeup is completely done, use a setting or fixing spray to hold your work of art in place. Whether you choose it in spray, powder, or mist form, it is designed to maintain your makeup for a number of hours to all day. It helps you avoid those frequent powder room touch-ups that are annoying and a hassle. There are specific types to use for both oily and dry skin. Creating a simple but classy makeup look can be fun and enhancing and if you have a few steps to follow, the process isn't then difficult. Take a look at the steps here and give yourself a simple but classy makeup makeover. Just remember not to overdo it. Read Also: 7 Tips For People With Hypersensitive Skin Expert Doctor’s Treatments For Cystic Acne 7 Anti-Aging Tricks And Tips To Get Youthful Skin Like A Teen Get Part Ready In No Time With These Hair And Makeup Hacks!

READ MOREDetails