Starting Your Rare Coin Collections: A Beginners Guide to the 1794 Flowing Hair Half Dime

by

30 March 2022

Art

Rare Coin Collections

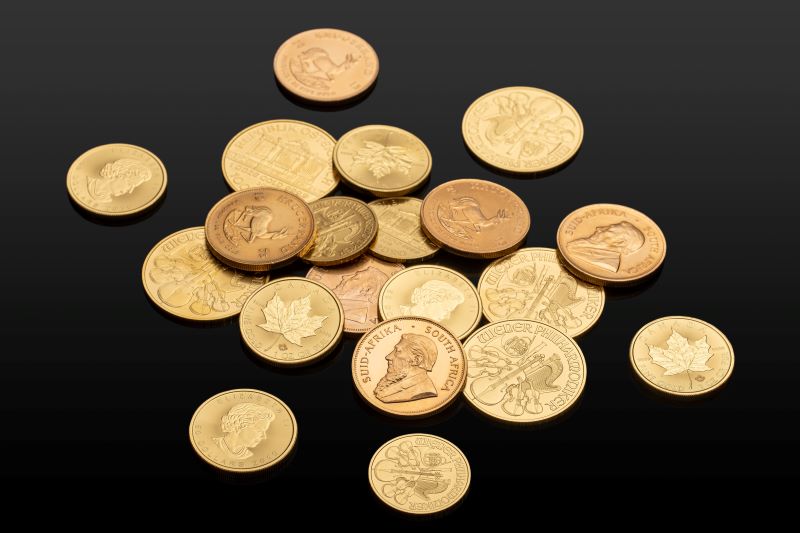
Rare coin collections are a window into the past. It can be hard to believe these coins, now incredibly difficult to come by, were once commonly circulated. Coin collecting is a neat way to have a tangible piece of what was.

One particularly interesting coin is the flowing hair half dime, first produced in 1794. Its rarity makes the coin a prized possession for anyone lucky enough to come across it. Keep reading to uncover the history behind the coin and learn about its historical significance.

It All Started With The Coinage Act of 1792

The United States dollar was established as the standard currency in 1792 in the Coinage Act, or Mint Act. This created the United States Mint in Philadelphia, Pennsylvania, then the US capitol. It also created a decimal system for US currency and pegged the US dollar to the Spanish silver dollar, which at the time was widely used and accepted.

It’s hard to overstate how monumental this was. While some aspects have changed over time, they established coin design and production foundations.

         Related Resouce: All Aboard! 5 Reasons to Consider Collecting Things as a Hobby

The Half Dime Design Emulates the USA’s Founding Principles

green plant on brown round coins

As mentioned, the Coinage Act outlined what was essentially a design template for US coins. The flowing hair half dime follows this; Miss Liberty is shown with flowing hair, facing right, with the word LIBERTY above her and the production date below.

Fifteen stars encircle the coin’s front outer edge; they represent the fifteen states that had ratified the constitution at the time. On the other side, you’ll find an eagle perched on top of a wreath, surrounded by the words “The United States of America.”

If you think about today’s coins, they also portray these values. The word “liberty” is spelled across the front with various designs on the back, and “The United States of America” is prominently displayed.

Cold Hard Facts About This Cold Hard Cash

As you might imagine, the half dime was valued at five cents or half of the ten-cent dime. It was also smaller and thinner than the dime.

Now, of course, this coin has a considerably higher value due to its rarity. It was only produced for two years—1794 and 1795.

Other coins in this family are even more challenging to find and can fetch a price up to $10 million dollars. This coin is not quite that rare, but it’s still highly valued due to its limited production, and because of the history it represents. Many design elements from this coin era endure today, though they do change with the times to an extent.

Rare Coin Collections Capture Bygone Eras

Rare Coin Collections Capture Bygone Eras

Time marches on, and things change, including how coins are produced and how they look. A rare coin collection is a great way to keep the past alive and show appreciation for what was. In particular, the 1794 flowing hair half a dollar is an excellent homage to the United States’ founding principles and early design that still shapes coinage today.

Read Also:

Sumona is a persona, having a colossal interest in writing blogs and other jones of calligraphies. In terms of her professional commitments, she carries out sharing sentient blogs by maintaining top-to-toe SEO aspects. Follow more of her contributions in SmartBusinessDaily

View all posts

Leave a Reply

Your email address will not be published. Required fields are marked *

Related

Rubber Stamps

10 Innovative Ways To Use Creative Rubber Stamps In Your DIY Project

The world of DIY crafting is ever-evolving, with creative individuals constantly seeking new ways to add a personal touch to their projects. One versatile tool that often gets overlooked is the rubber stamp. Rubber stamps have been a staple in the crafting world for generations, providing a simple yet effective way to add intricate designs and personalized touches to various projects. While these stamps are commonly used for scrapbooking and card making, their versatility extends far beyond these traditional applications. With this and many more other information, let’s get started with this.  What Are Creative Rubber Stamps?  To put simply, rubber stamps refer to a small device having a name, symbol and date on it. One needs to press it tightly on an ink pad and then paste it on the document. Usually, big organizations use stamps for branding purposes, but it has other uses as well. They are not just communication facilitators but also carry relevant messages themselves.  The design of a stamp varies, and there might be different uses for it, too. In the next section of the article, I have listed down 10 ways in which one can make use of creative rubber stamps. Make your DIY projects look good with these astounding stamps.  Here Are Ten Prime Ways To Use Creative Rubber Stamps In Your DIY Project Using rubber stamps for your own purposes varies significantly. While some do it for stationery purposes, others use them for decor uses. This article explores a few innovative ways to use Creative Rubber Stamps in your DIY projects, allowing you to unleash your creativity and add unique flair to your creations. 1. Custom Fabric Patterns: It can be a game-changer for textile enthusiasts. Create custom fabric patterns by stamping them onto plain fabric with fabric ink. Whether making custom clothing, throw pillows, or home decor items, these stamps allow you to add intricate designs that reflect your style. Most custom fabric patterns need something to seal them properly. Thus, rubber stamps are the best solution here.  2. Personalized Stationery: Elevate your correspondence with personalized stationery. Use these stamps to add your monogram, a special design, or favorite quotes to notecards, envelopes, and letterhead. Your letters will stand out and leave a lasting impression on recipients. Who can forget to use stamps for personalized stationery items? They are literally the best when you want to make an impression before your peers.  3. Decorative Wrapping Paper: Tired of generic store-bought wrapping paper? Make your gifts extra special by creating custom wrapping paper with rubber stamps. Use festive designs for holidays or birthdays, or go for a minimalist look with subtle patterns. Your gifts will look like works of art. Additionally, they serve their true purpose- keeping everything together! So, what else do you need from a single stamp?  4. DIY Home Decor: Transform your living space with DIY home decor projects. Stamp intricate designs onto plain canvas to create unique wall art or add decorative accents to lampshades, curtains, or furniture. The potential is boundless, and it’s effortless to align your decor with your style. Moreover, the quest of constantly decorating our abode is completed with these stamps. Nothing else is required!  5. Personalized Textiles: Take your customization to the next level by stamping your name or initials on linens, towels, or napkins. It provides a quick and cost-effective way to personalize your home textiles, making your space your own. As already mentioned, custom textiles and fabrics can make the most out of these rubber stamps. You just need to use them in the best way possible.  6. Garden Markers: Gardening enthusiasts can use these stamps to create stylish garden markers. Label your plants and herbs with stamped designs on wooden stakes or stones. Not only will it help you keep track of your garden, but it also adds a decorative touch. And don’t worry because they come at affordable prices, too. Search for stamps that will assort your gardens perfectly.  7. Unique Wedding Invitations: For couples looking to add a personal touch to their wedding invitations, these stamps offer an elegant solution. Customize your wedding invitations with your initials, wedding date, or a romantic motif. It’s a budget-friendly way to create beautiful, one-of-a-kind invitations. Let your guests remember you for sending out the most assorted invitations! 8. Art Journals and Scrapbooks: Artists and scrapbookers can take their creativity up a notch with these stamps. Use them to create intricate backgrounds, borders, and embellishments in your art journals or scrapbooks. The stamps add depth and character to your creations, making them unique. Just like it fulfills your stationery needs, stamps literally enhance your scrapbooks and art journals as well.  9. Handmade Gift Tags: When giving a thoughtful gift, remember to add a handmade touch with custom gift tags. Stamp designs, names, or special messages on plain tags to make your gifts extra special and memorable. 10. Personalized Clothing: Whether you aim to breathe new life into a pair of worn-out jeans or infuse personality into a simple t-shirt, these stamps offer a helping hand in achieving a distinctive appearance. Craft your clothing designs by applying fabric ink to your garments through stamping. Feel free to explore various colors and patterns as you express your style. Conclusion: Creative Rubber Stamps are a versatile tool that can elevate your DIY projects to new heights. These innovative uses demonstrate the limitless possibilities that these stamps offer. Whether you're a crafting enthusiast or just looking to add a personal touch to everyday items, consider incorporating these stamps into your creative repertoire. With a bit of imagination, you can turn the ordinary into something extraordinary, all with the help of these handy tools. So, get stamping and watch your DIY projects come to life in unique and exciting ways. And it’s a wrap on this comprehensive guide! I hope it imparted you valuable insights and you could find the best stamp for you. Also, don’t forget to comment below and share your thoughts into this.  Read Also: DIY vs Professional Heaters Installation in Fairfax VA How To Plan A DIY Bathroom Remodel 9 Home DIY Decorating Tips

READ MOREDetails
diamond painting

Terrible mistakes you are likely to encounter in diamond painting and the way out

Diamond painting is as artistic as it is exciting. Realizing that breathtaking design after rigorously placing your diamond facets all days can be really fulfilling. Just like any other artwork, mistakes are as natural and integral to the process. While mistakes form a vital part of the learning curve, there is no doubt they could be painful at times. Let us explore some of the most prevalent mistakes diamond painters slide into and the way out. When your diamonds not staying in place: This is one infamous pain many battles when painting with their diamond painting kits. Upon successfully applying your drills to the canvas, it is ideal that you should be able to bend and manipulate them your way. However, in practice, some of the gems may fall off intermittently such that you have to restore them by pressing them back into position. This can be frustrating for sure. There is an easy way to reduce the propensity of this nightmare. You can keep the finished piece up to prevent a scenario where the adhesive is thoroughly dried out before you get to finish work on each segment. It would serve you better if you share your sheet (protective) into various segments which you would peel as you progress in your work. When your diamonds get crooked: If you work with square drills, the probability is very high that you would encounter this mistake as you tend to arrange them in rows diligently. The reality is that if a row gets twisted, the picture on the overall may appear warped. There are ways to get around this. What you need to do is get a set of tweezers to prod the drills back into a straight line. You can also use the edge of a knife. Note that you wouldn’t be able to this prodding if the adhesive has dried out.  So it is best to go for it when the adhesive is yet sticky checking every row as you steadily progress. When you commit the abomination of putting down the wrong color: Often when working with your diamond painting kits, we stumble into putting down the inappropriate color damaging our work. What is the way out? You can simply get your tweezers to unpick the color. If you choose to put the colors down, you will end up spending far more time. However, when unpicking the colors, ensure you don’t scratch the adhesive layers (while scraping them) on your canvas. It is all about gentility for sure. Don’t be scared to pull but try your best not to be too forceful in the act. The organization would be of immense help here. You can also resort to labeling every one of these colors to be able to distinguish between them easily. A sample gem works well for labeling them on the side. More importantly, place these colors in different labeled bags. Would you love some diamond paintings that stun and gush artistic genius? Then you should be getting your orders from Diamond Express. You can only expect exceptional quality. Can you expect less when Diamond Express uses a $50,000 state-of-the-art Epson laserjet printer for print your orders? Read Also: 5 Factors To Consider In Choosing The Right Floor Colors Floor Cutting Using Diamond Saw: What You Need To Know

READ MOREDetails
Character Masks

Types of Commedia Character Masks

Masks have been used in theater throughout history. From ancient Greece to Japanese theater to ancient Chinese theater, masks were a huge part of enhancing actor performance during stage plays. Masks were not only used in the theater but also rituals and performances throughout communities in the past. Commedia dell’arte is a form of theater that originated from Italy in the 16th century. A commedia dell’arte performance is characterized by comedy and the different characters represented by masks. All commedia masks represent a specific character. The audience can tell from the start from which social class the character comes from, their attitudes, and their likes and dislikes. Commedia dell’arte type of theater was popular in Italy up to the 18th century. This shows just how much masks amplified theater performance and excited the audience. Instead of the actor doing all the work, they would only focus on movement, and the mask would finish the job. From lovers to authority figures, Commedia masks are known to create characters that the audience can relate to from the minute they get on stage. Below are the different types of commedia dell’arte masks. 1.Zanny This character was used to represent the low-class people in the society or the peasants. The mask was made to resemble a clown or foolish character. It only covered the upper part of the face and had a long nose. The longer the nose, the bigger the fool. The actors would wear sacks and arch their backs because peasants were known to carry heavy loads. 2.Pantalone This mask has distinct facial features such as a hooked nose and bushy eyebrows. Pantalone is a character that represents an old, wealthy merchant and a highly respected businessman. 3.IlDottore Il Dottore, in English, means the doctor. Doctors in the past used to dress in black suits with big caps and so did Il Dottore in commedia dell’arte. His mask covered only half his face. The main feature was a bulging nose. The mask would sometimes be used to represent the character of a lawyer. 4.Arlecchino Arlecchino translates to Harlequin in English. This was the most famous character in the Commedia dell Arte Theater. Arlecchino’s mask had cat-like features with a small and round nose. These features showed their primitive nature. Arlecchino is part of the Zanni genre, so he was also a clown and made to be foolish but loyal to his master. 5.Pulcinella The most distinctive feature of this mask is the nose. It is either black or dark brown with a beaked nose. It also has a wart either on the nose or forehead. The mask to has furrowed or knitted eyebrows with a beard or mustache and wrinkles. Other common characters in Commedia Dell’arte Theater include Il Capitano, Brighella, and Colombina. In the past, all masks were made of leather, but today most of them are made out of neoprene. Some leather masks still exist today. However, most of them are being made new with modifications to the characters. Read Also: Clay Masks For Smooth And Shiny Face

READ MOREDetails