What Size Heat Pump Should I Buy for a Swimming Pool?

by

13 February 2023

Energy

Heat Pump

A swimming pool is a great addition to any home, providing a place to relax and exercise in the comfort of your own backyard. However, keeping a pool at the desired temperature can be expensive, especially in areas with extreme temperatures.

This is where a heat pump for a swimming pool can be a great solution. A heat pump for a swimming pool works by transferring heat from the air to the water, thereby heating the pool without the need for traditional heating methods such as gas or electric heaters.

Size Heat Pump

The Size of the Heat Pump

When it comes to choosing a heat pump for a swimming pool, the most important factor to consider is the size of the unit. The size of the heat pump will determine its effectiveness in heating your pool, as well as its energy efficiency and overall cost.

Desired Temperature

To determine the size of the heat pump you need, you will need to consider several factors, including the size of your pool, the desired temperature, and the climate in your area. The general rule of thumb is to choose a heat pump that is capable of heating the pool to the desired temperature in one hour. This means that if you have a 20,000-gallon pool and want to heat it from 60°F to 80°F in one hour, you will need a heat pump with a heating capacity of 20,000 BTUs per hour.

Climate

The climate in your area also plays a significant role in choosing the right heat pump. In areas with mild climates, a smaller heat pump may be sufficient, as it will not have to work as hard to maintain the desired temperature.

However, in areas with extreme temperatures, a larger heat pump may be necessary to effectively heat the pool. Additionally, the type of pool cover you use can also affect the size of the heat pump you need, as a cover helps to retain heat and reduce heat loss.

Energy Efficiency

Another factor to consider is the energy efficiency of the heat pump. A more energy-efficient heat pump will use less electricity and cost less to operate. Look for heat pumps with high Seasonal Energy Efficiency Ratings (SEER) and Energy Efficiency Ratings (EER) to determine their efficiency.

Cost

In addition to choosing the right size and energy efficiency, it is important to consider the cost of the heat pump and installation. While larger heat pumps may have a higher initial cost, they may be more cost-effective in the long run due to their energy efficiency and ability to heat the pool more effectively. On the other hand, smaller heat pumps may be more affordable upfront, but may not be as effective in heating the pool and may result in higher energy bills.

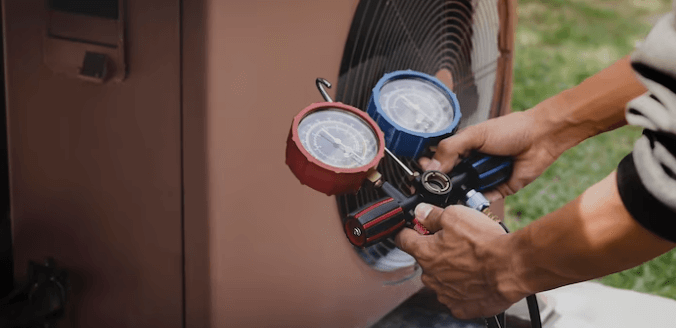
When it comes to installing a heat pump for a swimming pool, it is important to work with a professional. A professional can ensure that the heat pump is properly installed and maintained, and can also advise on the best type and size of heat pump for your pool and climate.

In conclusion, choosing the right size heat pump for a swimming pool is essential for effective heating and energy efficiency. Consider the size of your pool, desired temperature, climate, energy efficiency, and cost when selecting a heat pump.

Additionally, work with a professional to ensure proper installation and maintenance. With the right heat pump, you can enjoy a warm and comfortable swimming pool without the high costs associated with traditional heating methods.

Additional:

Sumona is a persona, having a colossal interest in writing blogs and other jones of calligraphies. In terms of her professional commitments, she carries out sharing sentient blogs by maintaining top-to-toe SEO aspects. Follow more of her contributions in SmartBusinessDaily

View all posts

Leave a Reply

Your email address will not be published. Required fields are marked *

Related

Safeguard Your Loved Ones Against the Dangers of Radon Gas

Radon Gas is one extremely harmful elements present in our environment that cannot be seen, is odorless and also tasteless. It is basically the end result of decaying uranium in the ground that ultimately takes the shape of gas and gets emitted into the air above the ground. Essentially, radon is harmless when it remains outdoors, but after seeping inside any construction it leaves a long-term negative impact. If the required preventive measures aren't taken, the gas gets accumulated at a dangerously high concentration. This radiation is actually the number one cause of lung cancer in the United States for nonsmokers. And overall, it ranks being the number 2 cause of lung cancer in Canada and the US. Therefore, you must protect your family and your loved ones against the terror of this deadly and unseen menace. Radon Testing Testing for radon, including both the DIY and professional support ways, is a pretty easy and straightforward process. 1. DIY Radon Gas Test Kits : The DIY radon gas kits used for short-term testing are charcoal-based where a canister collects the particles of radon present in the air of a particular environment. The exposure period usually ranges from 48 hours to 72 hours. While the kit does its job, you are supposed to follow a few important steps. While testing, make sure to keep all the doors and windows closed for as long as possible. This will allow the apparatus to get the most precise readings. In the end, the entire kit is sealed, a few forms are to be filled and then the user has to courier the complete package back to the (authentic) testing laboratory where the results will be compiled. All the accumulated radon particles will be tested by the experts and a detailed report will be prepared to be sent to the user. DIY Test Kits - Why Should You Buy? These kits are easily available online as well as offline stores. They are very much affordable and a user can test the concentrations himself. Such kits are ideal when you are doubtful about the situation but don't really want to invest a fortune into professional services. Exposure time is also manageable and at the end, you get expert suggestions about the circumstances. There's optimal accuracy maintained and that's what you may even long for! You must also know that if you get precise results only then it will benefit the whole situation.  Results that are achieved at the end form the basis for preventive measures that you might have to apply in case of higher concentrations. However, in case the levels appear safe and under the accepted levels, there's nothing else you will have to worry about. Electronic Radon Gas Detectors : These are electronic radon monitors that keep a check on the radon levels in your house. Such detectors are power or battery operated. The results are readily available, without wasting any time you can take the preventive measures and results too can be achieved on the spot. The hassle to courier a package and wait for the results gets avoided as the electric radon gas detector brings out precise readings right after the exposure time ends. Click here to know more about electronic radon monitors Electric Radon Gas Detection Monitors - Why Should You Buy? These devices administer only professional and advanced technology to help you keep the dangerous radon gas away. A radon detector can be useful in both home constructions as well as commercial properties. So, once you have the accurate results, you can take corrective steps to disperse the gas out of your property. On the basis of the readings you get, a radon mitigation plan is to be laid out for your home. And it is only in this manner that you become both an informed citizen of the nation along with being a responsible member of your family as well as the society. You will be able to take the next steps i.e. how to make your home radon-free! Radon Mitigation System When the test results report of any unsafe levels of radon gas inside your home, you will have to address the problem. In fact, address the problem as soon as possible. Contact a specialist or do it yourself if you are confident enough to be able to fix all the loopholes. However, an expert can actually help you in installing the right type of radon mitigation systems. A radon reduction system that cannot perform aptly is of no use. So, depending upon the kind of construction your home has, a multiple numbers of options will easily be made available by the professionals. The most prevalent option is the sub-slab depressurization along with sub-membrane depressurization. It is ideal for homes, basements as well as crawlspaces. 1.Sub Slab Depressurization Method : This method involves the drilling of a hole into the floor of your home's foundation and scooping underneath a slight cavity. A pump is then connected to this drilled out hole to vacuum radon gas before it can even break out and start causing harm to the members in the house. Even the other organic contaminants are pulled out from below to vent out the dangers present in your house. 2. Sub Membrane Depressurization Method : This method is actually similar to the method mentioned above. However, the only difference lies is in the membrane that is installed above the ground as opposed to a cavity being created in the other method.  In fact, the membrane is fitted right above the floor of the crawlspace, so the radon gas can easily be trapped and be vented out of the house. The gas is extracted out in a similar manner as above; there just isn't a slab but a membrane. One can consider any of the mentioned ways to get rid of radon gas from your home. But you'll have to ensure that radon must be released at a place where it will not cause any further damage to the people or animals. Radon mitigation isn't a one for all kind of treatment. And every house needs its own tailor-made preventive measures.  It may or may not be the job for a DIYer. From targeting the entry points of the radon gas to sealing all those spots, it is a pretty important process. One must have the needed skills, the absolute presence of mind and knowledge to ensure the safety of all the members in the family. If you aren't sure how to go about, contact any professional radon inspector. But, if you are knowledgeable enough to restrict the flow of gas in your property, then go ahead and save your loved ones. Read More : First Home Renovation Ideas And Tips What Are Renewable Sources And How To Introduce Them Into Your Household? Additional Ways To Keep Your Home Warm   Image Source: http://www.cancercarenews.ca/social-awareness/can-you-afford-to-ignore-radon-gas

READ MOREDetails
AC Vs DC

Solar Battery System Types – AC Vs DC-coupled

Before you choose the right solar battery, you first need to learn what AC and DC coupling means. Your solar battery storage system determines how effective your solar air conditioning will be. There are two main ways to connect your power sources when you add battery storage to your solar energy system. AC and DC are the two main types of voltages used to conduct electricity. Let’s find out what differentiates these two battery systems. What is the Difference Between AC and DC Power? AC stands for Alternating Current, and it means electric power first flows in one direction and then the other. This is the type of electric current on the main grid, and it’s suitable for your solar air-con. DC power, on the other hand, stands for Direct current, and it means electricity flows in one direction only. This is the electric power that your solar panels generate from sunlight. The energy stored in your home’s solar battery is usually DC power. Since your solar panels generate DC power and your solar air conditioning and other home appliances need AC power, you need a solar inverter to convert this energy to AC electricity. There are three main types of solar inverters in the market; Traditional Inverters This first type of inverter is also known as the central inverter because it draws power from your solar panels. If you have a solar air conditioner at home, you’ll need this kind of converter to keep it running. It is usually a box that’s installed next to your home’s breaker box. It functions by combining all DC energy from your solar panels and converting it to DC power so that you can use your solar air conditioner Malaysia. Micro-Inverters The second type of inverter is an in-built component on individual solar panels. They are small inverters found on the backside of your panels. They allow your panels to individually and independently convert the harnessed DC power to AC energy. DC-Optimizers Lastly, we have the DC-optimizers that are devices that also go at the back of individual solar panels. Unlike Micro-inverters, they don’t convert DC to AC. Instead, they optimize conditions to ensure your home’s central inverter has an easy time converting DC to AC power. These converters work in a hybrid solar energy system that includes a traditional central inverter and in-built solar panel inverters. Is a Battery DC or AC? Batteries, like solar panels, store and produce DC power. Since your home’s electricity is AC, it means batteries in devices have converters that turn the AC power to DC energy. DC batteries use the same solar inverters that your home uses to convert the stored DC energy to AC power. AC batteries, on the other hand, have an in-built inverter that directly does the conversion. AC Vs DC -Storage Architecture Comparing the strengths and weaknesses of these two battery storage systems helps you choose what is best for your home. DC-Coupled Systems The DC-coupled system is designed to connect directly to the main grid the same way as your solar panels. In which case, a hybrid inverter is required to create a synergy between the solar battery and the solar panels. Strengths There is less energy loss because it’s a one-way conversion. Your system makes you eligible for Net Energy Metering if your solar panels can generate excess energy. It is a simple system which translates to lower costs. It is a smart option for people who’re just beginning their solar energy journey. Weaknesses If you already have a PV system, incorporating it is complex and costly. AC-Coupled Systems The AC-coupled system operates with two solar inverters; a conventional inverter and an additional storage inverter that charges your solar battery. It might seem like a complicated system, but it is very easy to setup. However, as compared to the DC-coupled system, it’s less efficient because it has to be charged. Strengths It is way more flexible than the DC-coupled system. The inclusion of two inverters allows you to adjust the location of the battery at will. It is compatible with all kinds of solar inverters. It is a cost-effective solution for people that already have a PV system. Weaknesses The system is slightly less efficient as compared to the DC-coupled system because of the AC-DC-AC conversion. The system will have more points of failure because you’ll have one inverter in a different location. Which Is Better for your Solar and Storage Needs? If you already have a solar energy system at home, you should go with the AC-coupled system because it’s flexible and easy to set up. However, if you’re just starting your solar journey, you should go with the DC-coupled system; if you generate excess energy, you get to sell it to the main grid. Final Thoughts Understanding the difference between these two solar battery systems helps you make the right purchase. Ensure that you work with a professional who understands what is best for your home. Solar energy systems are here to stay, and you might as well jump on the bandwagon because it’s a system that pays for itself. Read Also: What You Should Know about Solar Energy for Schools Benefits The Benefits of Solar Lighting in a Nutshell Everything You Need to Know About Portable Solar Power What To Do When Your AC Unit Stops Working Ready Rooftops – How to Install Solar Panels

READ MOREDetails
solar-panels-943999_1920

The Essential Factors You Need to Consider when Installing Solar Panels

Solar panel systems have taken the world by storm, and it’s not just in ‘sunny’ countries like Australia where solar panel installations have become immensely popular. In the UK, more homeowners and householders are opting for solar panels as well, and the fact that the cost of installing your own solar panel system has gone down tremendously in the last few years has contributed to its popularity. But if you are thinking of having a solar panel system installed, there are some major considerations you need to think about as well. For one, solar panel installations need to be done in the proper way and with the proper accreditation in order for you to take advantage of the government's Feed-in Tariff programme. What else do you need to consider, then? Here’s a list of the essential factors you need to consider when installing solar panels in your home. The investment: Truth be told, having a solar panel installation isn't a cheap affair. It is an investment, and it's best you know this from the start. But the good news is that the cost of a typical solar panel installation has already gone down by as much as 50% compared to the cost of a system eight years ago. But here's the thing: while it's not cheap, you are guaranteed to recover your investment over time, especially since your energy bills are going to be lower and you can even earn extra money through the Feed-in Tariff scheme. With the scheme, whatever extra energy you have that you don't use can be sold back to the grid, and you will receive payments from the government every quarter for this. The supply of energy: Your solar panel installation will still work quite well even if you are in the UK, with its inclement and unpredictable weather. Of course, the system will work best during the sunnier seasons, but it doesn’t mean that it won’t produce energy whilst it’s winter time or when it’s cloudy. But while it is still within reason for you to expect your system to generate energy, even on cloudy days, you can never really tell how much the system will produce. What you can expect, though, is that your energy bills will definitely be reduced – sometimes by as much as 40 to 50%. Where to place them: The placement of your solar panels is of utmost importance as well, so you also have to consider this, as confirmed by the specialists in solar in Manchester from Atlantic Renewables. Whilst your solar panels don't require direct sunlight to work, they will have to be installed by a professional, preferably one who is accredited by the MCS (this is so you can get your Feed-in Tariff). The location of the solar panels matter, and so does the angle of placement. Make sure other buildings or structures or trees don't overshadow your roof; but if this is the case, you have the option to install your solar panels on the ground as well. Read Also: Prepare Your Solar Panels For The Fall Everything You Need To Know About Portable Solar Power

READ MOREDetails