Published on: 28 April 2021
Last Updated on: 02 January 2025
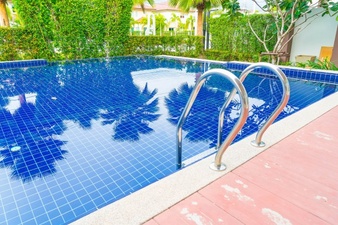
When the summer heat starts kicking in, doesn’t it feel good to jump into the pool?
Spending hours in the soothing water, swimming, and having a relaxing time takes all the summer heat away.
And if you have a pool in your backyard, you can go swimming anytime you want, right?
The only problem is, keeping the pool clean and hygienic to swim. If you are getting inside the water, it’s essential to make sure the water won’t harm your skin or hair.
Pool cleaning and maintenance are almost as important as taking a bath every day.
The easiest way is to follow a certain procedure and regular practices to keep the water clean. You might also want to buy some cleaning chemicals.
While pool cleaning can get a bit costlier, there are some easy-to-use and cheap online pool supplies available to save your day.
Here is how you can maintain the pool and enjoy a swim round anytime in a day.
Pool Maintenance Basics -
Maintaining a pool is a three-step process and is pretty easy once you get used to it.
Step 1: Water Circulation
As much as the water keeps circulating, the pool is going to stay healthy. The water will carry any invisible dirt and debris towards the filters to keep itself clean and harmless.
Ideally, the pool filters and pumps should keep the water running all the time. But considering the electricity situation, that might not be possible.
It will be cheaper if you follow a certain timetable to keep the water running. The best solution would be to turn on filters and pumps during the night hours till the morning.
A good 8-hour routine would be enough for water circulation.
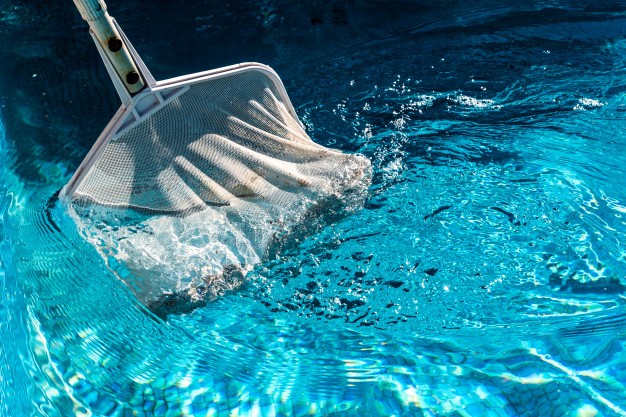
Step 2: Cleaning The Pool and Equipment
The circulating water will carry and trap any debris into the pump baskets and filters.
To maintain those tools functioning, clean all the pump baskets and filters.
You might have sand filters or cartridge filters. Cleaning both the filters is easy and doesn’t need a lot of work.
There are some automatic, robotic vacuum cleaners and filters that can do the cleaning themselves so that you can invest in that as well.
Now, to clean the pool, first, pick up the skimmer and get all the visible debris out.
Then brush and clean the walls, steps, ladders to get rid of any collected dirt that might harm the water. Brushing on alternate days would be a good idea.
Cleaning can never be enough, be more generous in this step. Shine the pool and the water.
Step 3: Pool Chemistry
Pool Chemistry might sound tricky and complex to understand for beginners. But it isn’t.
A couple of sanitizers and chemicals are going to help you maintain the pH of the water.
Ideally, the pH of the pool water should be between 7.2 to 7.6, and the alkalinity range should be 100-150 ppm.
Get some pool test strips to test these ranges and use the chemicals accordingly.
Have pool chlorine and dispensers in handy all the time. If you have a saltwater pool, then you can get salt supplies at a cheaper rate online at Watson’s.
Test the water every other day to make sure it’s safe to enter.
Final Words:
Pool cleaning and maintenance activity is actually as fun as swimming. Once you understand and sync into the whole process, it’s quite easy to do it at least once a week.
Get into the cleaning mode, and your pool will stay functional for a longer time. Next time you host a party, your pool will be shining with crystal clear water.
Content Rally wrapped around an online publication where you can publish your own intellectuals. It is a publishing platform designed to make great stories by content creators. This is your era, your place to be online. So come forward share your views, thoughts and ideas via Content Rally.
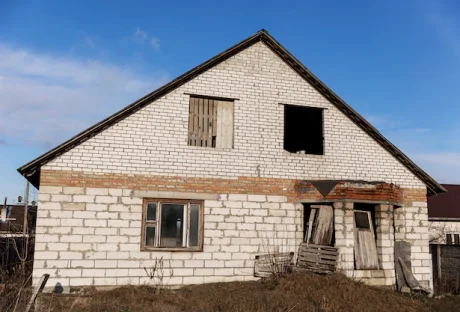
The holiday season is coming, so is the time to build a sturdy house that can withstand the harsh winters. Furthermore, with holidays around, you would look to have a house where kids can play and have some fun.
Also, with family and friends coming over, it is the best time to invest some time and money to enter the new year in a new house. The house will keep your whole family safe and cozy in winter and cool in summer.
Therefore, in this section, we will discuss how to build a strong home with a strong foundation. Mainly, the focus will be laid on houses absorbing minor earthquakes and storms. So, you need to shift your attention to the next part.
Tips To Build A Sturdy Home
With the holiday season coming faster than ever, you need to make some plans to build a beautiful house. Therefore, it is the best time to invest your money to build the best house for you and your family. Consequently, you need to make proper planning and prepare a future understanding of the house.
That's why we will give you some tips to build a sturdy home for yourself -
1. Getting Proper Permits
One of the things that you need to do is go to the local housing departments, where you can get a housing permit to build a proper house. You need to know how to build a house in a legal way so that government people won’t knock on your door unnecessarily. Therefore, you need to get all the permits that will get you going in the process of building a good house -
Pouring Foundation
Construction Permit
Installing home systems like heating and cooling
Installation of wires and plumbing materials
Adding other utilities to the house
Once you get all the permits done, you can then start building your house properly. For this, you might need a contractor builder who will get all the permits for you. Consequently, they all bring all the necessary things to build the house.
2. Getting The Right Builder
Another thing that you need to do is get the right builder.
This will ensure that you get to build a sturdy house. Consequently, they will ensure that they can give you the right foundation for you to build a great structure. Moreover, you should discuss it with them, where you can sit and discuss the project.
Hence, you can discuss the type of house you want yourself, especially everything from the roof to the ground, and you can showcase proper planning.
Then, they can put the blueprint into action and build a big house for you. For this, you need to do some internet research. It will help you to hire the best house to enter the new house.
And if you are looking for a roofing contractor, you can visit Gj Keller’s website. You can gain access to the service from the site.
3. Building A Budget
One of the important things that you need to do is decide on a budget. It is the thing that will showcase what type of house you want for yourself. It will ensure that you are able to earn a valuable house for you and your family.
Therefore, you need to sit with your partner and discuss some of the aspects of budgets. There, you can decide where you need to invest the money carefully. Mainly, it refers to the building materials, wires, plumbing equipment, and paint.
Consequently, you must fixate your mind on the process of what type of house you want to live in. That will clear your head and then create a proper budget for your dream sturdy house.
4. Always Look Into The Future
Another thing that you need to decide on is always looking into the future while building a house. It's important that you see how you'll accommodate every member of your house. Thus, it would help if you stepped into the future to create the best sturdy home.
Here are a few things you need to look into -
Always have three or more rooms in the house: It will ensure that your house can accommodate every member of the house. Also, keep a spare room for guests.
Have two or more bathrooms: To stay safer, you should always have two bathrooms to make your house more functional
Add some greeneries to your house: You should look to include some house plants and trees in the garden to make your house look beautiful.
Look to install security: From security cameras to space to charge your electric cars.
Keep some extra space in the house in case you choose to expand your house in the future.
After you set all the things regarding the points mentioned, then you can build a better house for yourself and your family.
5. Choosing The Right Construction Site
Lastly, one of the things you need to do is choose the right construction site. This is because if you want to build over soft soil, the chances of crashing down will increase. Therefore, you need to buy the right plot, especially ensure that the house is not beside any pond or lake.
The soil is soft in that area. So, you need to look into a few things that will help you build the best house, especially for the foundation part -
Basement
Concrete slab
Pier and beam
Crawl space
These things will ensure that you give the proper foundations for your house to grow and welcome all your family members.
The Bottom Line
In the end, we can say that there are many aspects of the house that you need to look into to build a proper house. Therefore, if you follow the tips, you will surely have a sturdy house where you can welcome everyone in the house.
Also, with the holiday season around the corner, the sturdy house will allow your kids and their friends to have fun on Christmas.
Read Also:
How to Make Your Student Apartment Feel Like Your Own House?
How Do I Know If I Can Afford Buy A House In Valdosta Ga
Here’s How We Buy Houses Companies Work
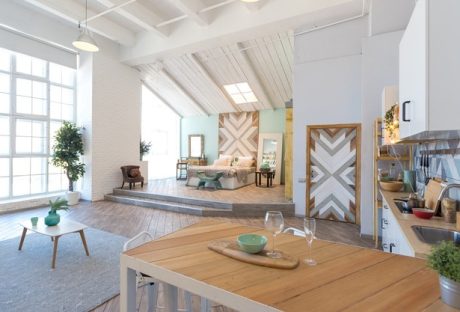
Decorations don’t necessarily make your house a home. However, certain interior design tips can help make your space cozier. When your home feels lived-in, it feels more like you belong there! Here are just a few tips for making your house feel more like home.
1. Lighting is Everything
Comfortable lighting is one of the most important elements of interior design, and it’s one of the quickest ways to make your new home feel like home. Try indirect lighting for a gentle glow. If you’re going to be doing more than watching movies in your living room, consider task lighting. Make sure you can see to read or craft if you plan to spend a lot of time doing those things in your living space.
Where there isn’t natural light, provide warm light with different types of lamps, different lampshades, and more. Mix it up with recessed lighting, chandeliers, and other different fixtures to bring out the coziness of your home.
2. Dress it Up with Art
Bare walls can make your home feel empty and soulless. Even beautifully painted walls need to be decorated, and art is a great way to make your home feel closer and more lived-in. Choose art that you already know and love, but choose a frame that works best with your current design ideas. Make sure to hang the art correctly and display it where it fits best.
Using art can be a great way to tie a room together! If you can’t find art that you like enough for a certain room, trying substituting a classy mirror instead!
3. Family Photos are Key
All of those family photos need a place, so why not put them where you can see them? Nothing makes you feel more at home than your family and friends. You can display your photos in frames on the wall or your surfaces. You can also get canvas prints made of your favorite family photos and hang them up for all to see!
Your house starts to feel like home once it’s full. Even if you don’t live with your family, being able to see their faces and recall great memories with them can help you feel more at ease.
4. Personal Space
If you don’t live alone, chances are you share all of your spaces with at least one other person. However, choosing to set aside a room or corner of a room just for you is important. Make sure that you have your personal space with your favorite things, including books, personal decorations, gifts from friends, and your favorite blanket. Make a cozy space just for you! It can help your home feel more welcoming.
5. Your Style Rules
One of the greatest things about your home is that you can decorate it however you want. The urge to make your room look like a showroom or a picture from a magazine is tempting, but adding your style can be incredibly worthwhile. Use the colorful pillows that you like, you can easily buy this product online and hang those custom pieces you’ve found throughout your life where you can see them, and choose wall colors that compliment your uniqueness.
The only way to make your home feel completely yours is to put yourself into it wherever you can. Use your style to create a space you’ll enjoy living in.
6. Plants Add Life
Finally, plants can make all the difference. Use small succulents or other plants on your shelves and surfaces to add color and life. Large plants go great in corners while hanging plants can be placed near windows to liven up your living room. Wherever you choose to place them, make sure you care for your plants properly to keep them alive as long as possible.
If you don’t want to care for living plants, there are also synthetic options that add a great look without needing any care at all!
Conclusion
Even a well-decorated house can feel comfortable. Make sure that you dress up your existing style with things that make you feel as if space is uniquely yours. If you don’t love spending time there, it just isn’t worth it! If you need to make your house a home in the Atlanta area, call on the expertise of interior designers in Atlanta, GA.
Read Also:
Modern Home design ideas for crowded families
How to Make Your Home Look Like You Hired An Interior Designer
Outstanding Design Advice If Your Home Is Really Small
How to Make your Home Look Beautiful in the Upcoming Holidays
Top 5 Interior Designers from Singapore
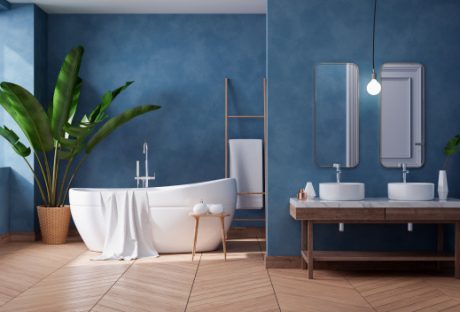
It's frustrating to have a messy bathroom. You want to maintain the place, but it always looks terrible. You can't keep things the same. Changes need to happen. Given that we're at the height of a pandemic, you have more reasons to maintain the bathroom clean. These are some tips to help you.
Involve your family members:
You shouldn’t be the only one taking care of your bathroom. Your entire family uses it, and everyone should have a role in keeping it clean. You can even involve your children by assigning them easy tasks. Eventually, they will learn how to clean the place and be responsible.
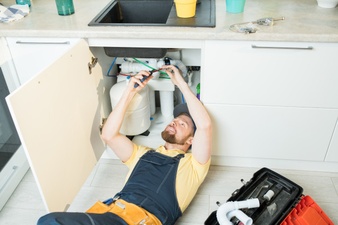
Invest in bathroom improvement:
If you invest in bathroom improvement, space will look amazing. Imagine if you considered the many options for complete suites for a new bathroom. Anyone who enters the bathroom will feel fascinated. Your family members will also feel bad if they don’t spend time cleaning it. Once the appearance changes, the attitude of the people using it will also change.
A number of homeowners lose sight of the fact that simply improving the drainage can go a long way in helping keep it clean. For example, standing water in the shower area can be splashed around as it slowly gets drained. However, if the process was better, there would be less accumulation. This would prevent splashes on the walls and make the bathroom dirty. Interior designers suggest using easy drain products to ensure that the bathrooms stay clean, even when there are kids in the house.
Don’t wait until the weekends:
Another reason why your bathroom looks messy is that you wait until the weekend before you decide to clean. You can start with small and easy tasks that won’t take long to finish.
For instance, you can keep the floor dry. You can also empty the bin regularly. In doing so, your bathroom will look great. The problem with waiting until the weekends is that mess starts to pile up. As a result, you spent hours cleaning the bathroom, and you can't keep it in excellent condition.
Create rules:
If you already feel exhausted maintaining your bathroom, you have to inform your entire family members. Let them know that they can’t continue with their terrible behavior when using the bathroom.
There should be rules for everyone to follow and consequences for not following the rules. It’s the best way to instill a sense of responsibility. You might hear complaints at first, but it’s natural.
Eventually, your family members will realize that everyone needs to be responsible for maintaining the place. The rules shouldn’t only apply to the bathroom but the entire house.
Install a heated floor:
Another reason why your bathroom looks messy is that it's damp. You shower in it, and it's natural for it to be wet all the time.
However, if you install a heated floor, you can keep the floor dry without mopping it. You also prevent the growth of mold and mildew. It might be costly to install, but you won't regret the decision.
If you decide to pursue these changes, it might take time before seeing results. Be patient in trying to involve your family members. Once they feel the impact of having a clean bathroom, they will cooperate. You also have to take note of the strategies that work. Consider doing them regularly.
Having a clean bathroom is necessary to keep everyone safe and healthy, and you should do everything to maintain it.
Read Also:
Considerations When Choosing the Ceramic Tile Bathroom
Mirror Decorating Ideas To Style Your Bathroom
Considerations When Choosing the Ceramic Tile Bathroom


 The circulating water will carry and trap any debris into the pump baskets and filters.
To maintain those tools functioning, clean all the pump baskets and filters.
You might have sand filters or cartridge filters. Cleaning both the filters is easy and doesn’t need a lot of work.
There are some automatic, robotic vacuum cleaners and filters that can do the cleaning themselves so that you can invest in that as well.
Now, to clean the pool, first, pick up the skimmer and get all the visible debris out.
Then brush and clean the walls, steps, ladders to get rid of any collected dirt that might harm the water. Brushing on alternate days would be a good idea.
Cleaning can never be enough, be more generous in this step. Shine the pool and the water.
The circulating water will carry and trap any debris into the pump baskets and filters.
To maintain those tools functioning, clean all the pump baskets and filters.
You might have sand filters or cartridge filters. Cleaning both the filters is easy and doesn’t need a lot of work.
There are some automatic, robotic vacuum cleaners and filters that can do the cleaning themselves so that you can invest in that as well.
Now, to clean the pool, first, pick up the skimmer and get all the visible debris out.
Then brush and clean the walls, steps, ladders to get rid of any collected dirt that might harm the water. Brushing on alternate days would be a good idea.
Cleaning can never be enough, be more generous in this step. Shine the pool and the water.