











How To Clean Evaporator Coil Without Removing?

Published on: 27 February 2023 Last Updated on: 30 January 2026
how to clean evaporator coil without removing

If you want your air conditioner to perform well at all times, you will need to ensure that you maintain and clean the parts of the air conditioner on a regular basis. If you schedule your maintenance as per the requirement of the AC, then it is great. However, in some cases, people like to clean their AC themselves. If you are one of them, you might be interested to know how to clean evaporator coil without removing it when you have a dirty evaporator coil.

In this article, we will basically talk about why you need to clean your AC's evaporator coil and how to clean evaporator coil without removing the coil from the AC. Before that, you will also know about what happens to the air conditioner when the evaporator gets dirty.

What Happens When Your AC Coil Gets Dirty?
What Happens When Your AC Coil Gets Dirty?
Image Source: lirp.cdn-website.com

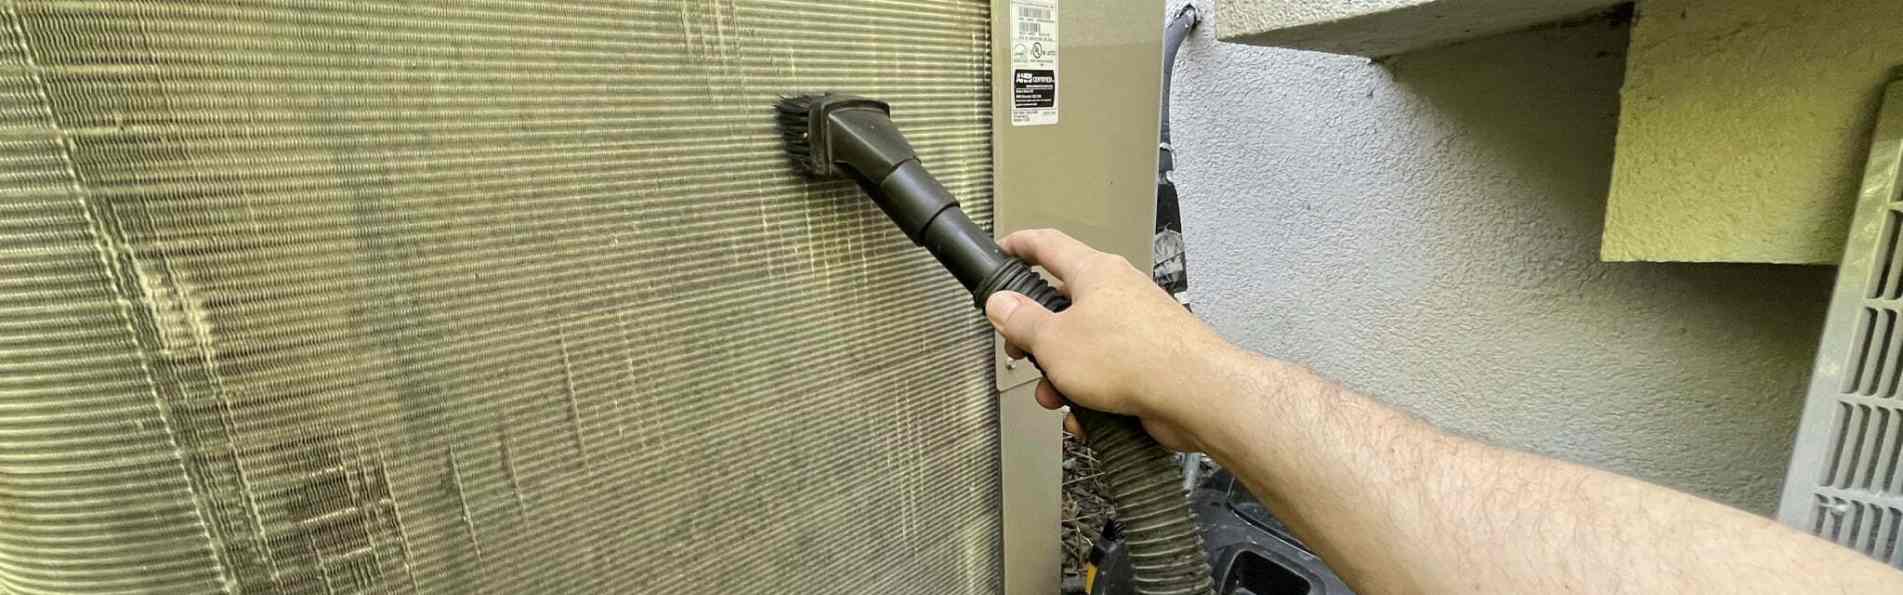
If the evaporator coil of your AC is unclean, it puts your AC at risk. It compromises the safety and working efficiency of the AC in general. In the first, an unclean evaporator coil slows down the speed at which the air blows through the AC, as it blocks the flow of the air. If the evaporator coil contains other materials and particles like pollen and dust, it limits the efficiency of the flow of air.

The following things happen when there is an unclean evaporator coil inside the air conditioner:

1. If the evaporator coil is dirty or clogged with particles, then it reduces the flow of air into your home. If there is a reduced flow of air inside your home, it will lead to a lowering of the efficiency of the cooling system of the AC. Your room takes a lot of time to cool than it normally takes, probably your evaporator coil needs cleaning.

2. There might be some cases where your room is not achieving a good level of cooling, despite running the AC for hours at a stretch. In such cases, the problem is probably more than a delay in the cooling performance of the AC. Basically, it is a negative effect on the AC's cooling capacity.

3. Another great issue that happens when the evaporator coil of your AC gets dirty is that the operating pressure increases. This increases the temperature level of the AC, as the unit is working at hotter levels. This is not good for the AC as it damages the components of the AC.

4. An unclean evaporator coil creates wear on the AC system. If one important part of the AC fails to work properly, the other parts follow suit. This is because there is more pressure on the other components of the AC. Hence, the other parts are more likely to get damaged due to the failure of one part. Therefore, you will end up with a damaged AC altogether, and repairing it will be quite expensive for you.

5. If your AC’s evaporator coil gets compromised and does not work properly, then it affects the performance of the other parts of the AC. Hence, your AC unit will have a shorter life. If you want your AC unit to perform well and serve your home for a long time, you will need to ensure that every part of your AC is clean, especially the evaporator coil.

Why Do You Need Your Air Conditioner Coil Clean?
Why Do You Need Your Air Conditioner Coil Clean_
Image Source: www.cleanairprotx.com

You will not need to spend a lot on the repairs of the AC. Regular maintenance will keep out the issues from the AC that need repair. Before any problem turns into a bigger one, you can fix it with regular maintenance. Apart from that, if you keep your evaporator coil clean always, it will not accumulate dust and hence will perform better as a result.

How To Clean AC Coils? – Things You Need?

How To Clean AC Coils? – Things You Need
Image Source: phyxter.ai

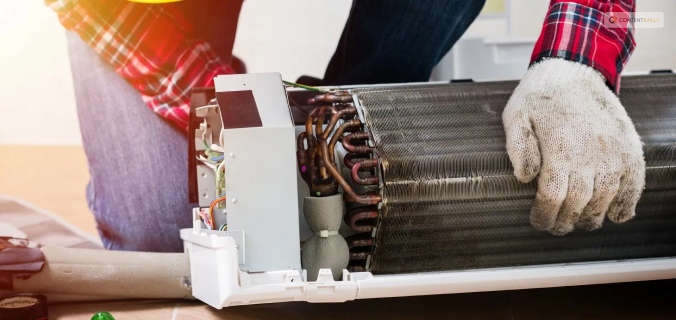
The first thing you will obviously need for your AC cleaning is an air conditioner coil cleaner. Apart from that, you will need a cotton cloth for cleaning the coil. For your own protection, wear protective goggles, and wear gloves on your hand for better protection. Furthermore, ensure that you are following the instructions properly while you are cleaning your AC’s evaporator coil.

How To Clean Evaporator Coil Without Removing?
How To Clean Evaporator Coil Without Removing?
Image Source: snyderac.com

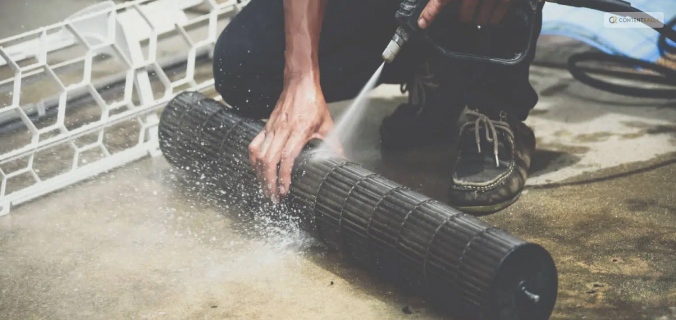
The evaporator coil basically captures all the heat present in your home to condition the air inside. Apart from the evaporator coil, there is a condenser coil in the AC, which removes the air from the AC to the outside of the house.

This is the way in which the AC works in colling the house. Since an evaporator is an important part of your air conditioner, hence keeping it clean will enable you to keep your air conditioner always efficient. However, if your question is, “How to clean AC evaporator coils inside house?” then you need to read the next subsection of this article.

Read More: Here’s What Makes Package Units Better than the Other ACs

AC Coil Cleaners - How To Clean Evaporator Coil Without Removing?

AC Coil Cleaners - How To Clean Evaporator Coil Without Removing
Image Source: img.fruugo.com

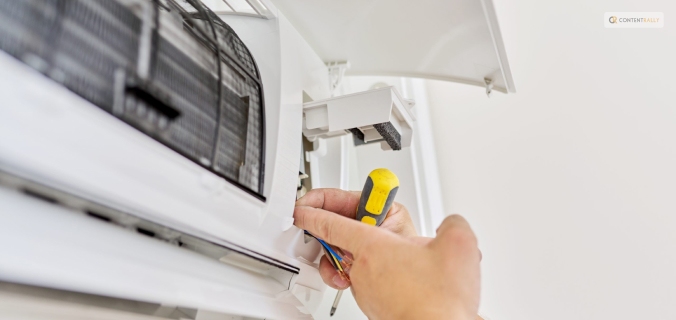
The following are the ways in which you can clean the evaporator coil of your AC without removing it from the AC:

Step 1: Turn down the power of the AC, and unplug the machine from the electric port. You will not need an electricity risk for yourself while cleaning.

Step 2: Remove the access panel from the AC to see the evaporator coil clearly. Go over the manual of the AC, if required. The manual has instructions on where you can find the access panel.

Step 3: Take the access panel off, and remove the screws from the AC. Keep the screws in a safe place.

Step 4: To blow the unclean particles off, try using a compressed air canister. This will help you to easily loosen the dirt on the evaporator coil.

Step 5: Put back the screws, as well as the access panel. Your evaporator coil is clean.

Summing Up

Hope the article helped you in knowing how to clean evaporator coil without removing it from the AC. Cleaning your AC is a part of the maintenance operation of the AC. If you maintain your AC on a regular basis, it will offer you a lot of benefits. There will be less hassle and issues on your AC as a result of regular maintenance and cleaning. If you clean the parts of your AC, your AC will look and perform as if it is fully new.

Read Also:

A passionate writer and an avid reader, Soumava is academically inclined and loves writing on topics requiring deep research. Having 3+ years of experience, Soumava also loves writing blogs in other domains, including digital marketing, business, technology, travel, and sports.

View all posts

Leave a Reply

Your email address will not be published. Required fields are marked *

Related

Zebra Blinds

Elegance of Zebra Blinds: Functionality and Style

Zebra blinds, also known as transitional shades, have emerged as a popular window treatment option for those seeking a harmonious blend of style and functionality. These versatile window coverings are gaining recognition for their unique design and ability to transform any space.  In this article, we will delve into the world of zebra blinds canada, exploring their features, benefits, installation, and maintenance. Let's embark on this journey to uncover the elegance that zebra blinds can bring to your home. What  Do You Know About Zebra Blinds? Zebra blinds are a modern and innovative window treatment solution that gives homeowners optimal control over light and privacy. They consist of two layers of fabric with solid stripes and alternating sheer, giving them their distinctive appearance. The ingenious design allows you to adjust and control the position of the fabric layers, creating varying degrees of light filtration and privacy. The Zebra blinds are available in different shades, transitional shades, alternating shades and others. These solid bands offer privacy and then block out the lights. It can help you get the soft, diffused glow in your space. These zebra blinds are available in different options. You can fix them in different places, the living rooms, the bedrooms, the home office and others. They offer you a contemporary, modern look that complements the different design styles.  Benefits of Zebra Blinds The Zebra blinds are available in different shades and styles, as we mentioned above. But they are more used for the advantages they carry. Here, we provide you with the advantages that you have with the help of the zebra blinds. So, let's get started with the discussion to have a better understanding of the facts.  1. Light Control Zebra blinds offer exceptional control over natural light. You can perfectly balance a well-lit room and a shaded private space by aligning the sheer and solid stripes. This adaptability is especially valuable for rooms with changing light conditions throughout the day. It requires mention that you need different shades of light for different occasions. If you have control over the amount of lights entering your house, you can undoubtedly be able to regulate the temperature of your home.  2. Privacy Maintain your privacy without sacrificing natural light. Zebra blinds allow you to obscure the view from the outside while still enjoying the scenery outdoors. It's an ideal solution for homes in densely populated areas or those facing busy streets. Among the top requirements that you have, privacy is undoubtedly one of them. From this aspect, the zebra blinds are of great benefit without a hint of doubt.  3. Stylish Aesthetics Zebra blinds are not just functional; they also serve as a stylish design element in any room. Their contemporary look complements various interior styles, from modern to traditional, making them versatile. There are different categories of zebra blinds that define your core requirements. You have to be highly specific about your own requirements. They help you get the best look and feel.  But you can not shift your focus or attention from the aesthetics.  This is the reason they are effective in terms of the overall look and feel of both your zebra blinds and at the same time, the aesthetics.  4. Easy Maintenance Keeping zebra blinds clean is hassle-free. Regular dusting or gentle vacuuming is usually sufficient to maintain their pristine appearance. Their durability ensures they remain an attractive window treatment for years to come. What you simply need is to allocate some minutes, once or twice a week. It will be more than sufficient to provide you with the necessary maintenance.  Installation Installing the zebra blinds has their own fun and, at the same time, their own challenge. You can say that there are both positives and the negatives. But you can not overlook the fact that you, too, have your own requirements.  Installing zebra blinds is a straightforward process that can be done by a professional or as a DIY project. Here's a basic guide: 1. Gather Your Tools To begin, you'll need a measuring tape, a level, a screwdriver, and a pencil.  2. Measure Your Windows Accurate measurements are crucial for a perfect fit. Measure the width and height of your window frame, noting down the dimensions. 3. Mounting Brackets: Attach the mounting brackets to the top of your window frame, ensuring they are level. 4. Install the Blinds Insert the zebra blinds into the mounting brackets and secure them in place. 5. Test Operation Test the blinds to ensure they raise, lower, and adjust smoothly. Another angle of this action is the availability of time. You may not have sufficient time for installation. Or it might be possible that you are not good at it and it's not your among your priorities. Then, in that case, you make the best of professionals. They have a thorough knowledge of the nitty-gritty of the art. They can help you out with the inputs. Maintenance Tips Buying aesthetically appealing zebra blinds will not be enough; you must also focus on maintenance. It involves your daily time investments. You must mop it daily or do it twice or thrice a week. It may be that you don't have sufficient time. But if you can not mange your maintenance, then in that case you must take the help of helping hands, be it the  To keep your zebra blinds in pristine condition, follow these maintenance tips: Regularly dust or vacuum the blinds to prevent dust buildup. Spot clean any stains with a mild detergent and a soft cloth. Avoid using harsh chemicals or abrasive cleaners, as they can damage the fabric. Conclusion In conclusion, zebra blinds offer a unique combination of functionality and style for your windows. Their innovative design can help you control light and privacy effectively while adding a touch of elegance to your living spaces. Whether you're redecorating your home or simply looking for a practical window treatment solution, zebra blinds are an excellent choice. So consider these points while you look to select zebra blinds for your home.  Read Also: Inspiring Window Treatment Ideas Replacement Windows – Benefits of Vinyl Windows 10 Tactics To Maintain Clear Windows

READ MOREDetails
Maintain Garden

4 Essential Tools Needed to Maintain Your Garden in the Winter

You may not expect that it is necessary to do yard work in the winter, but it is more important than you think. Properly preparing your lawn in the beginning months of cold weather and even though snowy conditions will ensure you have the best-looking lawn come springtime. These four tools are essential in maintaining a healthy yard during the winter. 4 Essential Tools For Maintaining Your Winter Garden When you love to spend your leisure time in front of your lawn. The maintains of your garden is quite an important task to preserve the beauty of your favorite garden. Every time seeking professional help is costly so better look at how you can maintain a garden in winter using some simple tools. However, you need to understand that maintaining your garden during winter can be a tough affair. Not only will freezing temperatures deter you from engaging in outdoor work, but the tools and machines can become non-operational. This is why a good idea would be to engage an expert to do the needful. Tree Service Round Rock can maintain your garden during the winters and ensure that you stay safely and cozily within the warm confines of your home. Here are the names of four tools to maintain a garden in the winter season. 1. Aerator: Cool-season grass, which is the most common type, should be aerated in the early spring and late fall. For those of you that may not be familiar with this machine, it digs small plug-like holes out of the ground. This helps the grassroots have access to more water, nutrients, and air. The point of this is to make the roots deeper and healthier so the grass has a stronger foundation to grow. Use this equipment on a day that the ground is slightly moist, maybe the day after rain, for the best results. It will relieve the soil from compaction that causes the roots to be starved and suffocated. Making sure your grass gets all the nutrients it needs before it is covered in snow will help it grow back better when the weather warms up. 2. Chainsaw: Pruning your trees and bushes during the wintertime is an essential part of a healthy yard. Plants will waste too much energy trying to send nourishment to dead limbs which affect the living ones. Investing in a chainsaw would be beneficial so that you can cut down the dead branches. If you are a seasoned expert, you will know to not only trim dead branches but also cut any that are rubbing together. Damage to the tree from the rubbing can create an entry for bugs to get inside. When it comes to finding a good quality chainsaw, get this it works! The better the quality of equipment, the less risk when it comes to the safety and wellbeing of your yard. 3. Drop Spreader: Fertilizer is the basis for giving your lawn what it needs to look its best for next year. There are winterizing products that slowly release nitrogen during the offseason. Using a spreader makes this task time-efficient and well done. It allows you to evenly distribute the fertilizer throughout the lawn, maximizing the benefits of this product. Putting grass seed down at the beginning of the winter can help maintain your yard as well. You will use the same drop spreader to put this down, but you’ll want to make sure you set the amount it is releasing slightly less than recommended. In doing this, you can overlap your passes, so nothing is missed, and you still have enough to do the whole yard. As a pro tip, it is encouraged to spread a thin layer of compost before laying the seed. Combining the seed and the compost keeps your grass moist and germinated during dry and cold weather. 4. Rake: Before a snowfall, it is crucial to clear your yard of any leaves, branches, or debris. When this waste sits on your grass all winter it will cause these patches to brown or die. Simply raking every once in a while will prevent dead spots and inconsistency in height and color. Raking will also help mix in any seed or fertilizer you have laid down in the soil previously. Something to keep in mind is to make sure you are not raking when the ground is frozen. The protective layer in the frozen blades of grass gets destroyed from the pressure of footsteps. While this will not kill the grass, it may cause it to be brown when it grows back in. Get a leg up on those who do not know to still maintain during the winter months. Investing in these tools will ensure you have the lushest green grass on the block come spring and summertime. Wrapping It Up: Maintain Garden is simple when you are already having the essential tools to do the job. But the professional touch every time required. When you already have these tools your hard work related to garden maintains in the winter is becoming a much easier process. So what is your opinion? Are you going to maintain your garden on your own? Or do you seek professional help? Do not forget to share your opinion with us. Read Also: 5 Summer Garden Maintenance Tips And Tactics You Have To Know 5 Essential Tips To Designing A Beautiful Front Yard Garden

READ MOREDetails
Repairing Your Roof

Repairing Your Roof – How Should You Get Started?

Your house's roof is its ultimate defense against harsh weather, pesky creatures, and infestations.  If your roof is not in top condition, your entire house is at risk. It's crucial to schedule roof repair as soon as you notice a leak, even if it's small, as it can cause significant damage.  Repairing your roof is more cost-effective than replacing it entirely and is vital to maintain its integrity.  Left unaddressed, roof leaks can cost you tens of thousands of dollars.  This article will discuss the basics of roof repair, what you need, and how to do it. Ensuring your roof is in top condition is essential to protect your home from the elements and ensure its longevity. Steps For Repairing Your Roof Given below are the steps that will guide you in the process of roof repairing at your home— 1. Examine The Damage Following a systematic approach is vital when searching for a leak in your roof. Begin by surveying the visible damage to your roof, including shingles, gutters, and roof edges.  It's essential to start with the most obvious issues and progress to less apparent ones. Once you've assessed the exterior, examine the interior for signs of water damage.  Look for indications of water stains, dripping water, sagging, pooled water, and dampness. Inspect during rainy weather, as some leaks are intermittent and only occur when there is enough rain.  Access the attic using a flashlight to locate the water source through the roof deck. Check around all rafters for indications of water.  Water can travel through the roof decking and rafters due to the force of gravity, which may result in dripping in different areas. If you observe water dripping, trace it back to its origin. 2. Find A Reliable Contractor After a thorough inspection of your roofing system by a professional roofing consultant, you will receive an accurate and detailed bid or estimate. The estimate will be based on the materials you choose for your roofing projects. Moreover, you must consider the unique measurements of your roof. The roofing consultant will also consider any special conditions that may affect the cost. This can include the complexity of the roof design or any existing damage that needs repairing. When evaluating your options, it can be important to take the time to vet contractors beyond just the numbers. Look for a company with a strong local track record. Checking online reviews, verifying licenses, and confirming they carry proper insurance can save headaches later. Whether you're working with a san antonio tx roofing company or a contractor elsewhere, these vetting steps apply universally and help ensure you're trusting your roof to someone reputable. Once you receive the bid or estimate, your roofing contractor should provide a written contract outlining the details. This contract should include a comprehensive breakdown of the costs, the expected timeline for completion, and any warranties or guarantees included. Therefore, you must carefully review and understand the contract before agreeing to any work to ensure everything is clear and fair for both parties. 3. Select The Suitable Material  It's crucial to have a complete set of roofing tools when undertaking any repair project. These hand tools have various uses throughout the house. They include the following: Roofing hammer. Pry bar. Nail puller. Utility knife. Shears. Tin snips. Handbrake. Tape measure. Chalk box. Roofing nails (also known as roofers). Speed squares. A pencil for notes or markings. A 10 oz clay gun. Choosing the right roofing sealant depends on the roofer's needs, but any kind will suffice.  While shingles are optional, matching them is optional. For flashing work, it's recommended to use aluminum coil stock, which is available in various colors at most box stores. A tape measure is recommended for all measurements and layout work, and a chalk box is ideal for snapping reference lines and general layout work.  Roofing nails, or "roofers," are recommended for their durability. The materials used for the roofing sealant, shingles, and aluminum coil stock are also essential. 4. Ensure That All Cracks Are Sealed Using an uncomplicated roofing sealant is important to seal any cracks on your roof.  To apply a sealant, you must pierce a thin aluminum membrane with the tube, allowing the sealant to flow.  Next, load the sealant into a caulk gun and aim it at the crack or hole to seal it.  The sealant will dry in a few hours and be set entirely in 24 hours without intervention.  Finally, you can cover the hole with shingles or flashing and move on to other projects. Ensuring that the roof sealant is compatible with your caulk gun is crucial. This is because some construction materials come in 28-ounce tubes that won't fit a standard 10-ounce gun. 5. Ensure The roof Is Insulated When planning to replace your roof, it's also a good opportunity to consider upgrading your insulation.  However, if you opt for new blown-in insulation, your roofing contractor will install it while they remove the decking.  This insulation process requires running a hose through the exposed roof and into your attic. It allows the insulation to be installed quickly and easily without causing any damage to your walls or ceilings.  Therefore, with the new insulation, you can enjoy improved energy efficiency and a more comfortable indoor environment. 6. Leave It Clean After the roofing crew installs your new roof, they should clean up any debris around your home. This includes loose shingles and nails and leaves them in their original condition.  They should also haul away old roofing materials for proper disposal. Additionally, you must ensure not to dispose of in landfills, which can contribute to pollution. The roofing expert must inspect the final product to ensure it meets all industry standards and building codes.  They should also check for potential leaks or damage and address any concerns. It is important to address any concerns and take steps to correct any issues. Therefore, ensure you’re completely satisfied with the new roof and its reliable protection for years. Can You Repair Your Roof Yourself? Understandably, as a homeowner, you may want to save money. Therefore, taking care of some home maintenance tasks can help you save a lot.  However, it is important to know your limits when it comes to your roof.  You may be capable of handling minor tasks such as replacing caulking or cleaning gutters. On the other hand, leaving any roofing projects to the professionals is highly recommended.  Moreover, roofing maintenance requires specific skills, knowledge, and equipment that only experienced and trained professionals possess.  Even a seeming DIY project can quickly spiral into a much bigger roof repair if something goes wrong.  Therefore, it's always wise to prioritize the safety of your home and family. Look for an efficient roofing service provider and explain the damage. You can get your roof cost-effectively repaired under expert supervision! Read Also: How Often Do You Need A Roof Inspection? Elevate Your Roof’s Health With Aerial Roof Inspections Choosing A Siding And Roofing Companies In Delaware

READ MOREDetails