Published on: 12 April 2021
Last Updated on: 27 December 2024
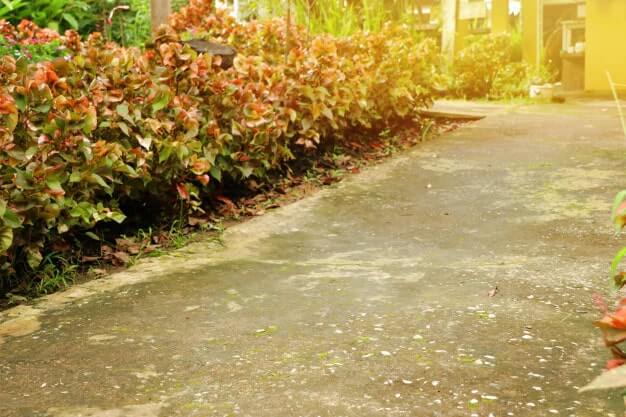
Edging offers a beautiful touch to your garden, but many people think of edging as expensive and time-consuming. It also protects the flowerbeds, lawns, and other plants by creating a boundary for them. Edging makes the perennials and annual flower beds look clearer and more polished. Also, you can paint the brick and concrete edging to create a color theme for your garden.
However, you need to consider the plan and design of the garden before creating an edging, and it can be challenging for beginners. Let us know more about edging for beginners that they can use for their home garden.
Consider the available space:
The amount of available space plays a special role in designing garden edging. For instance, it would not be good to choose large slabs of boulders to create an edging in a small garden. Small brick edging, metal sheets, and plastic sheets are more suitable to use as edging in small gardens.
However, if you have sufficient space or a large garden, you can go with any type or style.
Make your garden look new by using the most creative edging solutions. Once you are able to decide on what will work best, you will be able to completely transform the garden space and wow everyone who sees it.
Plan your budget:
You need to plan the budget for your garden because it's a way to narrow down your options. Planning your budget also helps you to save time as you will exactly know what things you can buy within your budget. Now let us know various types of edgings that you can use in your garden.
Edging trees might look simple enough, but a lot of things can go wrong if you are not familiar with the processes. If you are looking to make the most out of your budget, you can consider Tree Service Arlington for garden edging. They are professionals that will get the best work done so that you do not have to keep thinking and worrying about overgrown trees on your property. Using funds and spending them on experts will also help you save on expenditures over the long run.
Steel, Aluminum, and Plastic:
The simplest and most subtle edge of the landscape that effectively separates a lawn from a garden is made of steel, aluminum, or plastic strips 4 inches deep. The metal lawn edge easily bends into beautiful, smooth curves and prevents grassroots from spreading.
However, painted aluminum and steel provide the most elegant and sophisticated look of garden edging as it almost disappears into the grass and garden bed. Plastic garden edge types have a prominent black bump on the top edge. They all work best on a reasonable basis; If you have a lot of drops and climbs, it's easy to install a paving edge.
Plastic edging:
The plastic aging may not look so glamorous, but it is relatively simple and highly convenient to install. As it's available in small sections, you can easily stall one part at a time that requires you to dig the ground with a trench to sink in the edge. The primary benefit of plastic edging is that it is inexpensive and long-lasting.
Paver stones:
Concrete pavers are another form of material that have a long life and are nearly indestructible. One disadvantage of paver stones is that they are heavy to handle and take time to install. So, you need to take off from work for a few days to perform heavy digging and installation of paving stones. Paving stones are durable and last longer than any other material available for edging.
Natural rock:
Mother durable material after paving stones that you can use to create an edging. They are available in a variety of shapes, sizes, and colors. They are very easy to install as all you need to do is the edges of each garden bed.
However, as they have irregular shapes, you need to choose rocks of similar shape and size to create the most pleasing visual impact. You can visit a garden center for a nursery to buy natural rocks for your garden.
Flagstone:
Black stones are available in a variety of shades and thicknesses. You can directly place the flat species of flagstone along your garden edge or stack them to create a retro-style look for your landscape. Most local nurseries and garden centers offer some varieties of flagstones. They look pretty in your garden and last for years to come.
Brick:
Bricks are easily available in every area and are very convenient to install any landscape. All you need is to lay the bricks keeping their wide side down. The challenging part of the installation of bricks is to level them right. A simple way to level them is to use a string or line level or a rubber mallet. Bricks last longer and are relatively cheaper than other materials.
Mazzega's landscaping offers premium-quality landscaping materials for residential and commercial use in Kelmscott. If you are located in or near Kelmscott, they can help you in choosing a suitable garden edging solution and offer landscaping materials. In addition to a physical store, they also have an online shop where you can order products on their website.
Final Words:
These were some garden edging tips for beginners. Creating garden edging is not difficult if you take help from a professional landscaping service. The difficulty level of installation depends on the type of material you choose for landscaping. Following these tips can help you to create a garden edging for landscape owners.
Content Rally wrapped around an online publication where you can publish your own intellectuals. It is a publishing platform designed to make great stories by content creators. This is your era, your place to be online. So come forward share your views, thoughts and ideas via Content Rally.
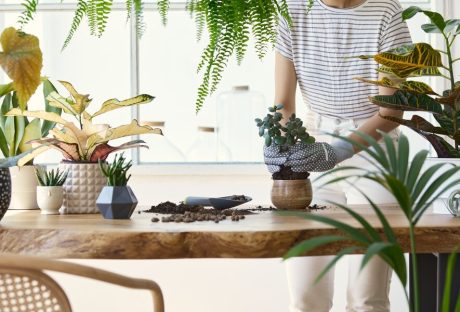
In the dynamic realm of design, a captivating trend has taken root that resonates globally and within the context of interior design. The art of plant styling, a practice that breathes life into spaces by introducing lush greenery, has found its place within the landscape of interior design. From the serene homes of Singapore to bustling commercial establishments, the fusion of nature and interior design in Singapore has paved the way for a new aesthetic that redefines spaces. This article looks into the profound impact of this transformative approach, exploring its role in shaping ambience, fostering well-being, and enhancing visual appeal within Singapore's interior design framework. Singapore combines innovative interior design with abundant urban greenery, creating harmonious living spaces that blend functionality and nature seamlessly. The city's commitment to sustainable architecture and lush landscapes enhances the overall quality of life.
Integrating Nature's Serenity:
Plant styling represents an endeavour to transcend the conventional boundaries between indoors and outdoors. The gentle sway of leaves, the soothing rustle of branches, and the play of light on foliage create a captivating tableau of serenity. These natural elements have the remarkable ability to not only enrich the visual aesthetics of a space but also to imbue it with an intangible sense of calm, offering a haven of tranquillity amid the modern whirlwind.
Foliage As Functional Art:
Beyond its artistic significance, the incorporation of greenery within interior design holds functional virtues that are equally captivating. Indoor plants act as dynamic purifiers, diligently working to improve air quality by absorbing pollutants and releasing oxygen. This symbiotic exchange is a testament to the remarkable synergy between the natural world and human habitation, resulting in spaces that are not only visually inviting but also remarkably conducive to holistic well-being.
Evolving Design Aesthetics:
The interior design canvas is ever-evolving, with aesthetics that shape-shift in response to cultural shifts and design movements. The beauty of plant styling lies in its ability to seamlessly adapt to these evolving aesthetics, transcending the boundaries of design trends. Whether it's the sleek lines of minimalism, the free-spirited eclecticism of bohemian design, or the raw industrial appeal, greenery finds a way to weave its verdant magic, breathing life into these aesthetics and fostering a harmonious coexistence between the designed and the natural.
The Art Of Selection:
Choosing the right plants to adorn interior spaces is akin to curating a living gallery. Each plant chosen is a testament to an intricate interplay of factors – from light availability and humidity levels to aesthetic preferences and maintenance commitments. The heart of this endeavour is striking the perfect equilibrium between aesthetic allure and the practicality of plant care, resulting in a tapestry of green that enchants the senses and enhances the atmosphere.
Nurturing Connection:
Plant styling is more than an aesthetic venture; it's an intimate connection with nature that thrives within one's living space. Nurturing indoor plants instils a sense of responsibility and mindfulness as one tends to the growth, well-being, and seasonal changes of these living companions. This connection fosters a deeper appreciation for the resilience of nature, weaving the threads of the natural world into the fabric of daily life.
Creating Focal Points:
In the tapestry of interior design, plants serve as masterful focal points, guiding the eye and punctuating spaces with living accents. Majestic ferns, cascading ivy, or sculptural cacti effortlessly take centre stage, captivating the observer with their unique forms and textures. These focal points transform mundane corners into captivating nooks, where the play of light and shadow on foliage tells a visual story that evolves throughout the day.
The Versatility Of Planters And Containers:
The vessels that cradle these botanical wonders are as integral to the design narrative as the plants themselves. The design spectrum of planters and containers spans rustic terracotta pots to sleek, modern ceramics and even repurposed vessels that breathe new life into forgotten objects. This versatility extends the creative possibilities of plant styling as containers become an extension of the design language, introducing new textures, colours, and forms.
Integrating Plant Styling In Commercial Spaces:
The allure of plant styling isn't confined to residential spaces alone; it has also made its indelible mark on the commercial landscape. Forward-thinking offices, elegant hotels, and dynamic retail environments have embraced the verdant touch of greenery. The infusion of plants within these spaces goes beyond aesthetics, fostering employee well-being, enhancing customer experiences, and creating an environment that promotes creativity and productivity.
Symbiosis Of Light And Greenery
The interplay between light and plants is a symphony that defines the heart of plant styling. Plants thrive in well-lit spaces, where sunlight cascades over leaves, casting intricate patterns and dynamic shadows. This symbiotic relationship between light and greenery transforms interiors into living canvases, where the ever-changing dance of illumination narrates an evolving story.
Conclusion:
As the chapters of interior design in Singapore continue to unfold, the integration of plant styling emerges as a timeless motif that marries the lush beauty of nature with the precision of design. This artistic symbiosis transcends aesthetics, creating spaces that exude tranquillity, health, and elegance. From the serene corners of private homes to the innovative interiors of commercial spaces, plant styling infuses its magic, redefining the essence of interior design in Singapore. In this ever-evolving narrative, the fusion of greenery and design remains a constant reminder that the beauty of nature is an eternal source of inspiration. As interior design in Singapore continues to shape urban environments, the allure of plant styling serves as a testament to the enduring power of nature's splendour within the tapestry of design.
Read Also:
Your own space: decor ideas for your private place to relax
Home Improvement Hacks to Add to Your Space
TV Wall Mount Ideas for Living Room
Your dream house needs some ornaments and decorations to stand out as the queen of all houses in your neighborhood. With trailing indoor plants, you can add the green your beautiful home was missing all this time.
For the urban dwellers, it is almost impossible to live inside the greenery. But, using indoor trailing plants, you can bring the green into your house.
Indoor plants are the lively jewelry of your home decoration, and it is no secret. It is only with the green plants that the brick walls and your house's concrete get the touch of life.
Hanging a few vines here and there from the pots can add the touch of the goddess of green vines to your home.
You can keep a trail of the indoor plants on the railing of the staircase. You can hang some of them from the porch ceiling of your house. Maybe you can keep one or two containing some low-light plants for the interior?
As you start to live with the green, you add extra life and vivacity to your life. So now, if I have got you even a little bit interested in the indoor trailing plants, allow me to introduce you to the best trailing indoor plants that you can decorate your house with.
10 Best Trailing Indoor Plants
You can invite the wild indoors with these incredibly pretty green trailing indoor plants mentioned in this article.
1. Trailing Indoor Plants: Golden Pothos
Golden pothos is just as beautiful as healthy for your surrounding environment. Not only can they thrive in the low light, but they also keep the air around you pure and refreshed.
They help eliminate odors and cleanse the air within your home with formaldehyde, benzene, and carbon monoxide.
If you have to stare at the computer screen all day long, you can look at them to reduce the irritation.
As for decorating the interior, it is one of the most beautiful trailing indoor plants that you can hang from the ceiling of your room or the balcony.
Read More: Grow these flowering plants in your home garden
2. Trailing Indoor Plants: Satin Pothos
Scindapsus pictus' Exotica' or satin pothos is another vine you can keep within your home. It grows slowly, and the beautiful green leaves are splashed with silver color.
This plant takes only a little water to grow within low light. When 2 cm of the compost goes dry, you can water them. Even NASA recommends these plants for the refinement of indoor air.
The satin pothos are easy to propagate, and they are low maintenance. Many people keep them as good luck charms. If you have a flower vase with a stand in the drawing-room, you can place one of these plants there.
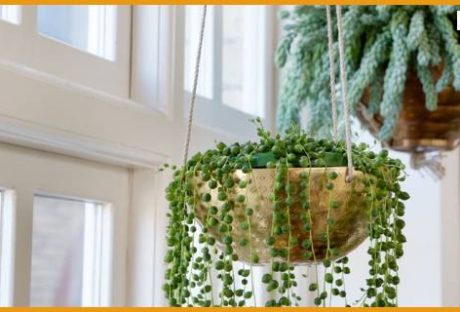
3. Trailing Indoor Plants: String Of Pearls
One of my favorites, Senecio Rowleyanus, or String of pearls, is another pretty member that you can add to your drawing room. The skinny stems of this plant grow green bubbles as if they are green pearls.
During winter, tiny white flowers grow out of the String of pearls plants. These are cascading plants, and they can be the attraction of your home decor.
It is a pretty trailing indoor plant that grows in low light and dry air. I will suggest you make a trail of these indoor green pearls. You can hang them from baskets or use a shelf to arrange a trail of baskets containing the String of pearls.
4. Trailing Indoor Plants: Burro's Trail
You can easily grow, propagate, and maintain the Burro's trails. However, if you are worried about your children and pets, then allow me to assure you that these trailing indoor plants pose no harm to them.
They are nonpoisonous plants and are easy to grow and maintain. You can lay them on top of a pot full of compost and grow them quickly within a few days' notice. The plant also requires minimal watering. You can water them when the 2 cm of the compost is dry.
You can decorate the interior with a few small baskets of the Burro's tail hanging from the ceiling. Or, you can also keep them on top of the tables in the dining room.
You May Like To Read: 4 Essential Tools Needed to Maintain Your Garden in the Winter
5. Trailing Indoor Plants: Red Herringbone Plant
Maranta leuconeura, Red herringbone plant, also known as the prayer plant, is another beauty to decorate your interior.
The attractive patterns of this plant will amaze you both during the day and at night. Growing this plant may take a little experience. They require only a little water, but you need to water these plants when the pot is dry.
The prayer plant is one of the most common trailing indoor plants, which you can place on the table.
6. Trailing Indoor Plants: String Of Hearts
Also known as the Chain of hearts, sweet vines, rosary vines, String of hearts is another pretty indoor trailing plant. These are easy to grow and propagate.
They have tiny leaves with pink and purple shades, making your interior look prettier as they grow and thrive across your balcony. In addition, they create the best contrastive combination with a white wall or ceiling.
If you are a beginner and not much of a career giver, the String of hearts will bear with you. This plant grows within low light and requires minimum water.
7. Trailing Indoor Plants: Boston Fern
Do you want to keep a vase full of green and lively ferns on the tea table? If your need is something similar, you can consider giving the Boston ferns someplace within your house.
You can hang them from the ceiling or shelves. But unlike the other plants here, they are attention seekers. They need your daily care; from ample lights, humidity and regular watering are a must.
Do you have space beside your window? If you do, you can put them there. They shed dead leaves, so you also need to groom them occasionally. They are also excellent givers. And they keep the interior air fresh and maintain the moisture within the house.
8. Trailing Indoor Plants: Chain Of Cactus
Rhipsalis paradoxa minor, or the Chain of cactus, grows pretty-looking white flowers during the spring. However, the winter stimulates the growth of these pretty flowers. These trailing interior plants are rich in antioxidants and vitamin C.
These are best for big hanging pots. You can keep a wide vase full of the Chain of cactus and let them grow wildly. They require minimum water and light, although you need to be a little experienced to grow them properly.
You May Also Like This: Best Material for Garden Sheds: A Guide for Everyone
9. Trailing Indoor Plants: Grape Ivy
These trailing indoor plants are pretty underrated. The grape ivy is a good air purifier; they require moderate or low light to thrive within your interior. They also have antioxidant and anti-inflammatory benefits.
You can hang one or two baskets of the grape ivy inside and be amazed as they keep shining while getting older.
10. Trailing Indoor Plants: Maidenhair Fern
The cousin of the Boston ferns, not too distant from its relative, the maidenhair ferns take after the qualities of the Boston ferns. They also require lots of care, ample light, and regular watering.
They indeed maintain the various hues of greenkeeping a dazzling look within the interior of your house.
These trailing indoor plants possess anti-thyroidal, anti-diabetic, antifungal, wound healing, and anti-hair loss properties. So not only are they pretty, but they are quite beneficial for your health as well.
Let The Trailing Indoor Plants Decorate Your Home
Most of these plants only take a little care and light to grow healthy within the interior of your house. You can go from little pots of green plants to large vases full of them to decorate your interior wildly. These plants have some health benefits like refreshing the interior air or cleansing it. They are also good at keeping the air humid.
If you are looking for such plants, I suggest you choose from any of these vines, pothos, cactuses, and ferns. Also, if you think that we have missed out on any valuable plant, you can let us know through the comment.
Read Also:
Garden Edging for Beginners
How To Arrive At The Perfect Choice Of A Potting Bench For Your Gardening
How To Install Artificial Grass In Your Garden – Installation Guide Step By Step
Transforming your outdoor space into a relaxing oasis begins with the right furniture. Outdoor furniture has evolved beyond functionality, with design trends now focusing on creating a visually appealing and comfortable outdoor environment.
Embracing Natural Materials
One of the prominent trends in outdoor furniture design is the use of natural materials. Wholesale furniture suppliers are increasingly incorporating materials like rattan, teak, and bamboo into their product lines. These materials not only provide durability but also offer a natural and organic aesthetic. Incorporating natural materials into your outdoor space can create a sense of harmony with the surrounding environment.
To embrace this trend, opt for furniture pieces made from these materials, such as teak dining sets or rattan loungers. Pair them with earthy-toned cushions and throws to enhance the overall organic feel of your outdoor oasis. Using natural materials not only adds visual appeal but also promotes sustainability, making it a win-win choice.
Blurring Indoor-Outdoor Boundaries
Designs that seamlessly merge indoor and outdoor spaces continue to gain popularity. Wholesale furniture manufacturers are now producing versatile pieces that can be used both inside and outside the home. This trend allows for a smooth transition between the two spaces and expands the usability of your outdoor oasis.
Consider incorporating outdoor sofas or sectionals that mimic the style of indoor furniture. By using similar colors and patterns, you create a cohesive flow between your indoor and outdoor spaces. To make the most of this trend, install bi-fold or sliding doors that can be fully opened, providing a seamless connection between your indoor and outdoor areas.
Comfort Is Key
When it comes to outdoor furniture, comfort is paramount. Design trends now prioritize furniture that offers the same level of comfort as indoor seating. Wholesale furniture suppliers are crafting outdoor lounge chairs and sofas with plush cushions and ergonomic designs, ensuring a cozy and relaxing experience.
To create a relaxing outdoor oasis, invest in seating that prioritizes comfort. Look for deep-seated chairs and loungers with thick cushions that will cradle and support you. With added features like adjustable backs and ottomans, you can customize your seating to suit your relaxation preferences. By prioritizing comfort in your outdoor space, you create a sanctuary where you can unwind and rejuvenate.
Versatile And Modular Furniture
Flexibility and adaptability are key considerations in outdoor furniture design. Wholesale furniture suppliers are catering to this demand by offering modular furniture sets that allow for easy reconfiguration. These versatile pieces can be rearranged to suit different entertaining needs and space constraints.
To maximize the flexibility of your outdoor space, opt for modular furniture sets that consist of individual pieces that can be rearranged as needed. This allows you to create different seating arrangements for various occasions. Consider adding a modular dining set that can transform into a cozy lounge area by rearranging or removing certain pieces. With versatile and modular furniture, you can easily transform your outdoor oasis based on your specific needs.
Adding Style With Accessories And Lighting
To complete the transformation of your outdoor oasis, pay attention to the finishing touches. Wholesale furniture suppliers often offer a range of outdoor accessories and lighting options to enhance the style and functionality of your space.
Consider adding outdoor rugs, throw pillows, and planters to elevate the visual appeal of your outdoor area. Opt for weather-resistant materials that can withstand the elements. Additionally, incorporate ambient lighting fixtures, such as string lights or lanterns, to create a warm and inviting atmosphere for evening gatherings.
Conclusion
Creating a relaxing outdoor oasis begins with the right furniture choices. By embracing natural materials, blurring indoor-outdoor boundaries, prioritizing comfort, selecting versatile furniture, and adding style with accessories and lighting, you can transform your outdoor space into a haven of relaxation and beauty. Whether you are a homeowner or a furniture wholesale business, these design trends and tips will help you create an outdoor oasis that your customers or family will love.
Read Also:
Your own space: decor ideas for your private place to relax
Home Improvement Hacks to Add to Your Space
TV Wall Mount Ideas for Living Room


 Concrete pavers are another form of material that have a long life and are nearly indestructible. One disadvantage of paver stones is that they are heavy to handle and take time to install. So, you need to take off from work for a few days to perform heavy digging and installation of paving stones. Paving stones are durable and last longer than any other material available for edging.
 Black stones are available in a variety of shades and thicknesses. You can directly place the flat species of flagstone along your garden edge or stack them to create a retro-style look for your landscape. Most local nurseries and garden centers offer some varieties of flagstones. They look pretty in your garden and last for years to come.