Garden Edging for Beginners

Published on: 12 April 2021 Last Updated on: 27 December 2024
Garden Edging

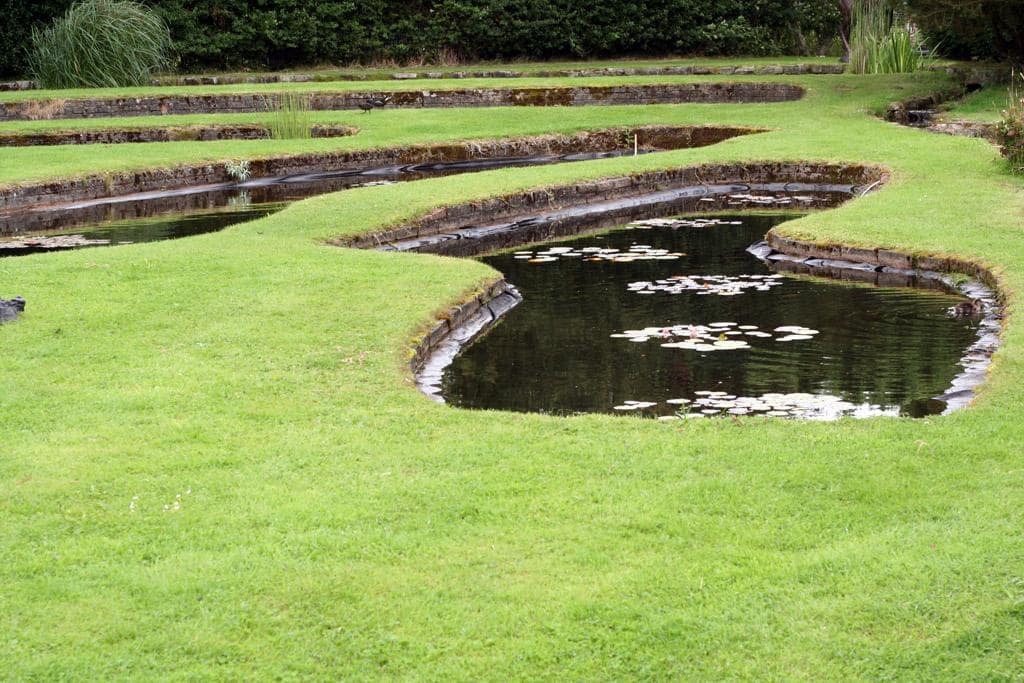
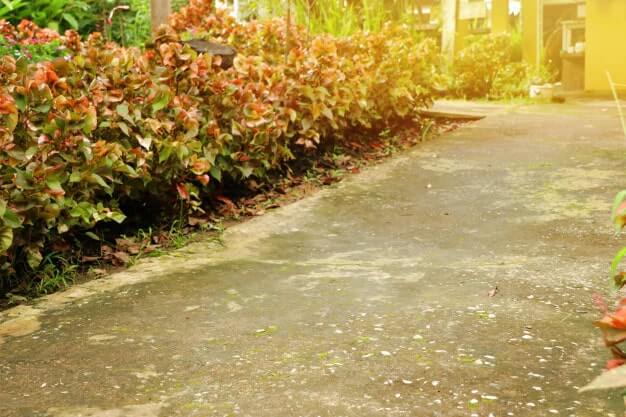
Edging offers a beautiful touch to your garden, but many people think of edging as expensive and time-consuming. It also protects the flowerbeds, lawns, and other plants by creating a boundary for them. Edging makes the perennials and annual flower beds look clearer and more polished. Also, you can paint the brick and concrete edging to create a color theme for your garden.

However, you need to consider the plan and design of the garden before creating an edging, and it can be challenging for beginners. Let us know more about edging for beginners that they can use for their home garden.

Consider the available space:

The amount of available space plays a special role in designing garden edging. For instance, it would not be good to choose large slabs of boulders to create an edging in a small garden. Small brick edging, metal sheets, and plastic sheets are more suitable to use as edging in small gardens.

However, if you have sufficient space or a large garden, you can go with any type or style.

Make your garden look new by using the most creative edging solutions. Once you are able to decide on what will work best, you will be able to completely transform the garden space and wow everyone who sees it.

Plan your budget:

You need to plan the budget for your garden because it’s a way to narrow down your options. Planning your budget also helps you to save time as you will exactly know what things you can buy within your budget. Now let us know various types of edgings that you can use in your garden.

Edging trees might look simple enough, but a lot of things can go wrong if you are not familiar with the processes. If you are looking to make the most out of your budget, you can consider Tree Service Arlington for garden edging. They are professionals that will get the best work done so that you do not have to keep thinking and worrying about overgrown trees on your property. Using funds and spending them on experts will also help you save on expenditures over the long run.

Steel, Aluminum, and Plastic:

The simplest and most subtle edge of the landscape that effectively separates a lawn from a garden is made of steel, aluminum, or plastic strips 4 inches deep. The metal lawn edge easily bends into beautiful, smooth curves and prevents grassroots from spreading.

However, painted aluminum and steel provide the most elegant and sophisticated look of garden edging as it almost disappears into the grass and garden bed. Plastic garden edge types have a prominent black bump on the top edge. They all work best on a reasonable basis; If you have a lot of drops and climbs, it’s easy to install a paving edge.

Plastic edging:

The plastic aging may not look so glamorous, but it is relatively simple and highly convenient to install. As it’s available in small sections, you can easily stall one part at a time that requires you to dig the ground with a trench to sink in the edge. The primary benefit of plastic edging is that it is inexpensive and long-lasting.

Paver stones:

Paver stones

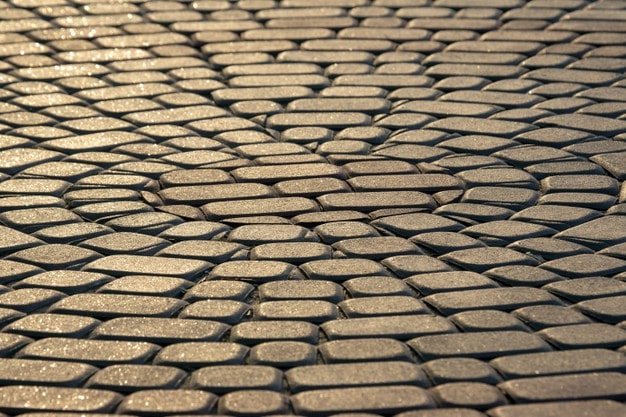
Concrete pavers are another form of material that have a long life and are nearly indestructible. One disadvantage of paver stones is that they are heavy to handle and take time to install. So, you need to take off from work for a few days to perform heavy digging and installation of paving stones. Paving stones are durable and last longer than any other material available for edging.

Natural rock:

Mother durable material after paving stones that you can use to create an edging. They are available in a variety of shapes, sizes, and colors. They are very easy to install as all you need to do is the edges of each garden bed.

However, as they have irregular shapes, you need to choose rocks of similar shape and size to create the most pleasing visual impact. You can visit a garden center for a nursery to buy natural rocks for your garden.

Flagstone:

Flagstone

Black stones are available in a variety of shades and thicknesses. You can directly place the flat species of flagstone along your garden edge or stack them to create a retro-style look for your landscape. Most local nurseries and garden centers offer some varieties of flagstones. They look pretty in your garden and last for years to come.

Brick:

Bricks are easily available in every area and are very convenient to install any landscape. All you need is to lay the bricks keeping their wide side down. The challenging part of the installation of bricks is to level them right. A simple way to level them is to use a string or line level or a rubber mallet. Bricks last longer and are relatively cheaper than other materials.

Mazzega’s landscaping offers premium-quality landscaping materials for residential and commercial use in Kelmscott. If you are located in or near Kelmscott, they can help you in choosing a suitable garden edging solution and offer landscaping materials. In addition to a physical store, they also have an online shop where you can order products on their website.

Final Words:

These were some garden edging tips for beginners. Creating garden edging is not difficult if you take help from a professional landscaping service. The difficulty level of installation depends on the type of material you choose for landscaping. Following these tips can help you to create a garden edging for landscape owners.

Read Also:

Content Rally wrapped around an online publication where you can publish your own intellectuals. It is a publishing platform designed to make great stories by content creators. This is your era, your place to be online. So come forward share your views, thoughts and ideas via Content Rally.

View all posts

Leave a Reply

Your email address will not be published. Required fields are marked *

Related

how to harvest sunflower seeds

How To Harvest Sunflower Seeds: A Fun And Easy Activity For The Whole Family

Sunflowers are not only beautiful and cheerful, but they also produce delicious and nutritious seeds that you can enjoy as a snack or use in various recipes. Harvesting sunflower seeds is a fun and easy activity that you can do with your whole family. It is also a great way to teach your kids about nature, gardening, and healthy eating. In this article, I will show you how to harvest sunflower seeds in a few simple steps, as well as some tips and tricks to make the most of your sunflower harvest. If you enjoyed reading my blog on harvesting lettuce, you will enjoy reading this one! So, if that is what you are interested in knowing, I have you covered! Keep reading this blog till the end to learn more… How to Grow Sunflower Seeds: A Simple and Rewarding Gardening Project? Sunflowers are one of the most iconic and cheerful flowers in the world. They are also one of the easiest and most rewarding plants to grow from seeds. Sunflowers can brighten up your garden, attract pollinators, provide shade, and produce edible seeds that you can harvest and enjoy.  In this part of the article, I will show you how to grow sunflower seeds in a few simple steps, as well as some tips and tricks to make the most of your sunflower growing experience. How to Choose Sunflower Seeds? The first step to growing sunflower seeds is to choose the right seeds for your garden. Sunflowers come in a wide range of sizes, colors, shapes, and types. Some of the most common types of sunflowers are:  Giant sunflowers These are the tallest and largest sunflowers, reaching up to 15 feet in height and 12 inches in diameter. They produce huge and heavy flower heads that are filled with large and plump seeds. They are ideal for creating a dramatic and impressive display in your garden, as well as for harvesting large quantities of seeds. Some examples of giant sunflowers are Mammoth, Titan, and Kong. Dwarf sunflowers These are the smallest and shortest sunflowers, growing up to 3 feet in height and 6 inches in diameter. They produce smaller and lighter flower heads that are easier to manage and maintain. They are ideal for growing in containers, pots, or small spaces, as well as for adding a splash of color and charm to your garden. Some examples of dwarf sunflowers are Teddy Bear, Sunny Smile, and Little Becka. Colored sunflowers These are the most diverse and colorful sunflowers, ranging from yellow, orange, red, pink, purple, brown, and even green. They produce medium-sized flower heads that are attractive and eye-catching. They are ideal for creating a vibrant and varied display in your garden, as well as for cutting and arranging in bouquets or vases. Some examples of colored sunflowers are Autumn Beauty, Moulin Rouge, and Lemon Queen.  Things to Consider While Choosing Sunflower Seed When choosing sunflower seeds, there are several things that you need to keep in mind. For instance, you should also consider the following factors: Climate and season of your area Sunflowers are warm-season plants that need full sun and warm temperatures to grow and bloom. They are best planted in late spring or early summer, after the last frost, when the soil is warm and moist. If you live in a cold or frost-prone area, you can start your seeds indoors and transplant them outdoors when the weather is favorable. Soil and water conditions of your garden Sunflowers are adaptable and tolerant plants that can grow in most types of soil, as long as they are well-drained and fertile. They prefer slightly acidic to neutral soil with a pH of 6.0 to 7.5. They also need regular watering, especially during the germination and flowering stages. However, they can withstand some drought and dryness once they are established. Space and support available in your garden Sunflowers are large and sturdy plants that need ample space and support to grow and thrive. They should be planted at least 2 to 3 feet apart from each other and from other plants, to avoid overcrowding and competition. They should also be staked or tied to a fence, a trellis, or a pole, to prevent them from bending or breaking under their own weight.  How to Plant Sunflower Seeds? Once you have chosen your sunflower seeds, you can proceed to the next step. Planting sunflower seeds is a simple process that involves preparing, sowing, and caring for the seeds. Here is how to do it: Prepare the Soil Prepare the soil by loosening it with a fork or a spade. Ensure that you remove debris, weeds, or rocks. You can also enrich your soil by adding some compost, manure, or fertilizer, to boost its fertility and drainage. Make sure the soil is moist but not soggy, and has a temperature of at least 50°F. Sow the Seeds Sow the seeds by making holes or furrows in the soil, about 1 to 2 inches deep and 2 to 3 feet apart. You can use a ruler, a stick, or your finger to make the holes or furrows. Drop one or two seeds in each hole or furrow, and cover them lightly with soil. You can also sprinkle some water over the seeds to help them settle in the soil. Nurture Care for the seeds by watering them regularly, but not excessively, to keep the soil moist but not wet. You can also mulch the soil with straw, grass clippings, or leaves, to retain moisture and prevent weeds. You should also protect the seeds from birds, squirrels, or other animals, by covering them with a net, a cage, or a cloche. You should also thin the seedlings when they are about 4 to 6 inches tall, by removing the weaker or smaller ones, and leaving only the strongest and healthiest ones.  How to Grow Sunflower Seeds?  After planting your sunflower seeds, you can watch them grow and enjoy their beauty and bounty. Growing sunflower seeds is a rewarding and satisfying experience that requires minimal maintenance and care. Here are some tips and tricks to grow sunflower seeds successfully: Water Water your sunflowers regularly, but not excessively, to keep the soil moist but not wet. Sunflowers need about 1 to 2 inches of water per week, depending on the weather and the soil conditions. You can use a hose, a sprinkler, or a drip irrigation system to water your sunflowers. You should water them in the morning or evening, and avoid wetting the leaves or the flower heads, to prevent fungal diseases. Fertilizer Fertilize your sunflowers occasionally, but not excessively, to boost their growth and flowering. Sunflowers need a balanced fertilizer that contains nitrogen, phosphorus, and potassium, such as a 10-10-10 or a 20-20-20 formula. You can apply the fertilizer once or twice during the growing season, following the instructions on the label. You should avoid over-fertilizing your sunflowers, as this can cause them to grow too tall and weak, and make them prone to pests and diseases. Pruning Prune your sunflowers occasionally, but not excessively, to improve their shape and health. Sunflowers do not need much pruning, as they are naturally self-pruning and self-cleaning. However, you can prune them to remove any dead, damaged, or diseased leaves, stems, or flowers, to prevent infection and improve air circulation. You can also prune them to control their height and spread, by pinching or cutting off the tips of the main stem or the side branches. You should use clean and sharp scissors or pruners to prune your sunflowers and do it in the morning or evening when the plants are less stressed. When to Harvest Sunflower Seeds? The first step to harvesting sunflower seeds is to know when they are ready. Sunflowers typically bloom in the summer and their seeds mature in late summer or early fall. You can tell when your sunflowers are ready to harvest by looking at their appearance and feel. Here are some signs that your sunflowers are ready to harvest: Petals have fallen off or turned brown. The back of the flower head has turned yellow or brown. Seeds have developed black and white stripes. The seeds are plump and firm to the touch. If you are not sure if your sunflowers are ready to harvest, you can do a simple test by rubbing your thumb over the seeds. If they come off easily, they are ready to harvest. If they are still attached to the flower head, they need more time to ripen. How to Harvest Sunflower Seeds? Once you have determined that your sunflowers are ready to harvest, you can proceed to the next step. Harvesting sunflower seeds is a simple process that involves cutting, drying, and storing the seeds. Here is how to do it: Cut the flower heads from the stems using a sharp knife or scissors. Leave about 12 inches of stem attached to the flower head for easier handling. Place the flower heads in a dry and well-ventilated area, such as a garage, shed, or porch. You can hang them upside down or lay them flat on a screen or rack. Make sure they are not touching each other to prevent mold and rot. Let the flower heads dry for about two weeks or until the seeds are completely dry and hard. You can check the dryness by biting or cracking a seed. If it is crunchy and not moist, it is dry enough. Remove the seeds from the flower heads by rubbing them gently with your hands or a soft brush. You can also use a fork or a spoon to scrape them off. Discard any debris, such as petals, leaves, or insects. Store the seeds in an airtight container, such as a glass jar, a plastic bag, or a metal tin. Label the container with the date and the variety of sunflower. Keep the container in a cool and dark place, such as a pantry, a cupboard, or a basement. How to Enjoy Sunflower Seeds? Now that you have harvested your sunflower seeds, you can enjoy them in various ways. You can eat them raw or roasted, salted or unsalted, shelled or unshelled. You can also use them in salads, soups, breads, muffins, granola, trail mix, pesto, butter, and more. Sunflower seeds are rich in protein, fiber, healthy fats, vitamins, minerals, and antioxidants. They can help manage high cholesterol, blood pressure, and inflammation and boost your immune system, brain function, and mood. Here are some tips and tricks to enjoy your sunflower seeds: Roast To roast your sunflower seeds, spread them in a single layer on a baking sheet and bake them in a preheated oven at 300°F for about 15 to 20 minutes, stirring occasionally, until golden and crisp. You can season them with salt, pepper, garlic, onion, paprika, cumin, or any other spices you like.  Shell To shell your sunflower seeds, you can use your teeth, your fingers, or a nutcracker. You can also soak them in water for a few hours to make them easier to shell. To remove the shells, you can blow them away with a fan, a hair dryer, or your mouth, or you can shake them in a colander or a sieve. Sunflower Seed Butter To make sunflower seed butter, you need to blend the shelled and roasted sunflower seeds in a blender until it turns smooth and creamy. You can add a little oil, honey, salt, or vanilla to enhance the flavor and texture. You can use sunflower seed butter as a spread for toast, crackers, or fruit, or as a dip for pretzels, celery, or carrots. Pesto To make sunflower seed pesto, blend roasted and shelled sunflower seeds with fresh basil, garlic, olive oil, lemon juice, salt, and pepper in a food processor or a blender until smooth and thick. You can use sunflower seed pesto as a sauce for pasta, pizza, or sandwiches, or as a dressing for salads or roasted vegetables. Wrapping It Up! Harvesting sunflower seeds is a fun and easy activity that you can do with your whole family. It is also a great way to enjoy the beauty and bounty of nature, as well as the health benefits of sunflower seeds. By following the steps and tips in this article, you know how to harvest sunflower seeds in a few simple steps, as well as enjoy them in various ways. I hope you found this article helpful and informative. If there are any other queries related to the same, please feel free to let me know. All that yo need to do is scroll down till you reach the bottom of the page. Then leave your comments and suggestions in the box below. And I will be ether to answer them all for you!  Learn More About: Best Material for Garden Sheds: A Guide for Everyone Asparagus 101: When, How, And How Often To Harvest? Best Gardening Tips For Beginners: Adopting A Relaxing Hobby

READ MOREDetails
Mint

Planting & Harvesting Mint

Mint is a wonderful plant that practically cultivates itself. So fast is its growth that it can threaten to spread across and take over your entire yard or garden. One way to battle this is to confine its growth by planting it in a pot or a separate bed. However, once you have this plant, you will be glad, because it has properties that make it fruity and a great addition to tea and foods. As can be seen here, it is also quite useful in health remedies that can aid digestion and relieve headaches. We know you already feel enthralled by this herb and would like to know more. So, why don’t you read on and discover more amazing things about mint… What Mint is All About Mint is an herb that is perennial and has a very wonderful fragrance. Its leaves are toothed and may have tiny pink, white, or purple flowers. Mint has so many variants from crinkled or smooth, to fuzzy or shiny. However, one thing is constant despite what kind of variant it is; all mints have that wonderful fragrance. Hence, whenever you pick up any variant of this great herb and roll it in your fingers, you would get the same smell that will make you either think of sweet teas, candy, or mint juleps. Aside from being a wonderful kitchen companion, this herb is also used as ground covers, garden accents, herbal medicines, and air fresheners. Mints are functional as well as beautiful and can grow either in shades or under the sun.  However, as we already said, this plant is a vigorous spreader; therefore, unless you want to have too much than you need, you have to be very deliberate about planting it. Uses We have already stated several things that mints can be used for, but there are still so many more benefits of this wonderful herb. Below are some of these benefits: Can be used to make mint tea. To do this, simply put the leaves in a cup of hot water and then leave it to sit for some minutes. Make tasty ice cubes with it by freezing the leaves with raspberries and cranberries. Add it to a salad dressing, marinades, or fruit salad.  Use it to relieve headaches by applying It's oil to the temples.  It can also be used to relieve anxiety and stress. Yes, mints have many other health benefits, but though not a practical use, it is also used as a virtue symbol. Planting Mints If you decide to plant mints in your garden or yard, then below are some important things that you have to know: They flourish in light earth which has good drainage. Their original habitats are stream banks, so, the site you plant them should imitate stream bank soils. That is to say, ensure the soil you plant your mints is moist but also well-drained. Variegated mints should not be planted in direct sun as they require a bit of shade. Mints typically grow to become one to two feet tall. If you plant them in a container or pot, then you would need to topdress them with organic or compost fertilizer once in a few months. If you plant mints in your garden, ensure to plant them next to tomatoes or cabbages, this will help contain their spread and prevent them from stealing your crops’ nutrients. Care Mints do not require that much care; however, you should consider the following points when caring for them: If planted outdoor, use light mulch. You can visit https://www.thespruce.com/what-is-mulch-1402413 to read up more on mulch. The light mulch will ensure the soil remains moist and also help the leaves to stay clean. If planted indoors, then ensure you water them often to help the soil stay evenly moist. Mints should be picked and pruned regularly. Like we have stated many times already, these guys are fast spreaders, therefore, you would need a lot of pruning to stop them from taking over everything. This should not worry you since their roots are shallow making it quite easy to drag them out of the soil. The Propagating You do not need to do a lot to propagate mint. The perfect way to go about this is to find the plant which you like and then cut out of it. Ensure the cutting is at least 6 inches and has ample roots attached. Then plant them in the soil horizontally. You can always get a cutting from a gardening friend, so this is nothing to worry about. Harvesting and Storing To learn how to harvest mint is quite easy, it typically does not involve any special skill. You may either pick the leaves individually, or you may use shears to prune the plant and then take off the leaves from the stem you had cut off. Despite the harvesting process being relatively easy, you need to remember a few things when you harvest your mints: Frequent harvesting will keep the plant at its best. The younger leaves have a better flavor than the old ones. You can pluck the leaves whenever you need mints. If you need dry mints, then pluck the leaves before flowering and then save them in an airtight container. You can also store fresh mints that you do not immediately have use for. To do this, put water in a glass and then put the stems inside the water. The mint will stay fresh for 3 to 7 days this way. You may equally put the mints inside a rubber bag and then store them in your refrigerator. This should keep it fresh for at least a week. Conclusion Mint is an herb that would make a very great addition to your garden or yard. But, without proper knowledge about the plant, everything may spiral out of control. Therefore, you must have basic knowledge about planting, caring for, and harvesting this plant before you farm it.  Read Also: How to Maintain a Bright and Beautiful Garden During Winter
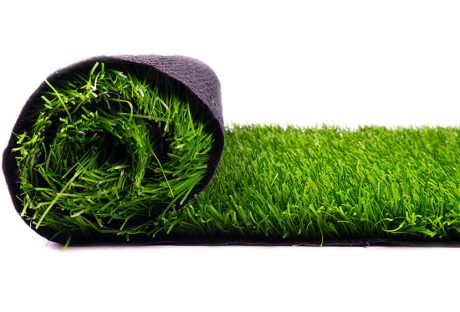
 How to Choose the Right Containers for Your Container Garden Grow these flowering plants in your home garden How To Grow Tomatoes From Seed  

READ MOREDetails
Gardening

Best Gardening Tips For Beginners: Adopting A Relaxing Hobby

Gardening is a delightful hobby that requires patience and perseverance. Everyone can make mistakes while planting, whether you're a seasoned grower or a novice.  However, with careful planning, you can avoid these common errors. As the spring season approaches, now is the perfect time to start planning your garden and prepare for planting.  Gardening is not only a fun pastime. It also rewards you with fresh, homegrown produce and a fragrant outdoor space to enjoy your meals. Therefore, find a neighborhood nursery, get your favorite plants, and start an amazing journey amidst nature! While knowing when and how to begin your gardening journey might be challenging, the outcome is worth the effort. In this article, we shall help you with some major tips to help you on this green journey. Keep reading! Gardening Tips For Beginners A relaxing hobby can help you cope better with the stress and disappointments in life; gardening is the best solution. Therefore, gardening can be one of the best ways to channel your time in a positive direction. When you plant a sapling and watch it grow over time, it helps you connect with the innocent joys of life. It stimulates the nurturing nature within you. Therefore, gardening helps you heal mentally and enhance your well-being. Given below are some of the most important tips that you will need to follow at the beginning of your gardening endeavors— 1. Select The Right Spot To get your vegetable garden off to a good start, selecting the perfect area is crucial.  This spot must receive a minimum of six hours of sunlight each day. Insufficient sunlight can lead to stunted growth and reduced crop yields.  When choosing your garden location, take note of areas that receive the most sunlight. Next, you must try to situate your garden bed near a water source.  Therefore, your plants can easily access the necessary nutrients for healthy development.  By considering these factors, you'll be on your way to a successful and thriving garden. 2. Choose The Right Plants It is often difficult for beginners to understand what plants are right for their garden. There are several factors that affect the type of plant you must consider— Weather conditions: To choose the right plants for your garden, consider factors like temperature, humidity, and sunlight at your place. Moreover, the weather conditions also affect the soil type and maintenance requirements. Water availability: When selecting plants for your garden, it's important to consider their water requirements. Moreover, your garden’s drainage ability can also affect the growth of plants.  Attention and care requirements: Consider attention and care requirements when choosing plants for your garden. Some plants need more maintenance than others.  Therefore, assess the time and effort you are willing to invest and choose accordingly. Knowing the specific care needs of different plants will help them thrive in your garden. Start with low-maintenance succulents and cacti if you're new to gardening. These plants need little attention and help you get hooked on the hobby.  These plants store water in their leaves or stems. Therefore, they are perfect for those who regularly forget to water their plants.  Succulents come in different shapes and sizes, while cacti range from small, round shapes to tall, columnar forms. 3. Choose Between Seeds And Saplings When starting your gardening journey, you must choose seeds or saplings.  Seeds are the most cost-effective option and offer a wider variety of plant choices. However, they require more time and effort to grow. Moreover, seeds will need proper conditions for germination and nurturing.  On the other hand, saplings are pre-grown plants that can be directly planted into your garden.  Saplings are more expensive than seeds. However, they save you time and effort as they are already established and have a higher chance of success.  Therefore, the choice between seeds and saplings depends on your personal preferences, budget, and level of gardening experience. Related: How To Arrive At The Perfect Choice Of A Potting Bench For Your Gardening 4. Know How To Make Your Soil More Fertile It is important to enhance the structure of your soil and improve its drainage and moisture-holding capacity.  Therefore, you can improve the health of your soil by using compost, leaf mold, or well-aged manure, which is a great option.  These organic materials act as a sponge and help retain water and nutrients, ultimately benefiting plants' growth.  However, it is important to avoid using fresh manure. It can harm your plants. Moreover, fresh manure might contain harmful bacteria and pathogens. These pathogens can cause serious diseases, and their high nitrogen content may burn the plants' tender roots.  Therefore, it is recommended to compost the manure for at least 6 to 12 months before using it on your plants.  This breaks down the harmful bacteria and pathogens and also makes the nutrients in it more available to the plants. 5. Select The Right Pots If you don't have enough space for gardening, you might want to try container gardening. It's a fantastic way to grow a wide variety of plants, including fruits, vegetables, herbs, flowers, berries, and shrubs.  However, when you opt for container gardening, you must select a pot that's big enough for your plant to grow in. Moreover, the pot should also have enough room for the roots to spread out and grow comfortably.  Also, it's highly recommended to use potting soil specifically formulated for plants grown in containers. This soil type has all the nutrients and drainage that potted plants require to thrive.  Additionally, it helps prevent problems such as over and under-watering, which can be common when gardening in containers.  By following these tips, you'll be able to enjoy the benefits of a thriving container garden, even if you have limited space for traditional gardening. Happy Gardening! As you look ahead to the future, don't forget to plan for moments of relaxation and enjoyment in your garden.  Picture yourself sitting in a cozy seating area, surrounded by lush borders and colorful blooms. Imagine the laughter and conversations you'll share with friends and family over a meal or a cup of tea.  Anticipate the joy of watching birds flock to your feeder and delight in their playful antics. Therefore, with a little planning and effort, your garden will become a haven of beauty and tranquility for the future. Read Also: Does Organic Gardening Improve Soil Quality? How To Choose The Right Containers For Your Container Garden The Top Four Reasons Why You Could Certainly Benefit From A Garden Shed

READ MOREDetails