Published on: 27 February 2021
Last Updated on: 26 December 2024
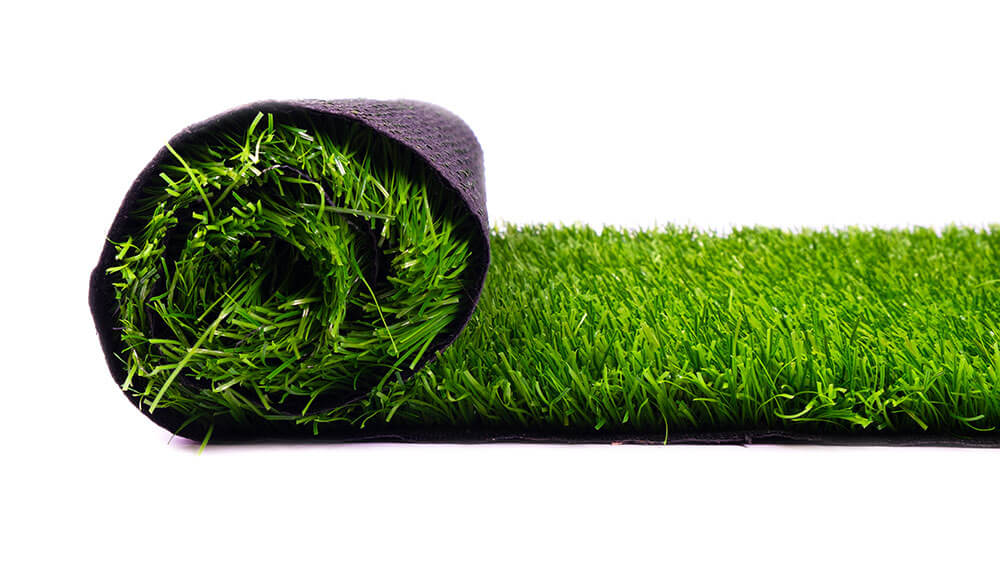
Artificial grass or fake grass is more popular than ever. The best part is you don’t have to hire a professional to install artificial grass in your garden. With the help of this article, you can do it by yourself with the help of your friends or family members. With proper installation, you don’t have to maintain your artificial grass in the long run. You just have to keep it neat and clean with a spray. On the other hand, maintaining real grass seeds is very difficult and may not be possible for busy individuals who don’t get enough time to maintain the same. If you still love natural grasses and want to play games on grass, you can consider growing them that may give you a real feeling of natural grasses.
What Is Artificial Grass?
Artificial grass is basically a material made up of artificial, human-made fibers that seem like real grass, but in reality, it is not! This saves you both money and time in the long run. This fake grass was first installed in the multipurpose sports stadium. This grass has made leaps and looks real. On the other hand, this type of grass is designed for those individuals who don’t have enough time to plant grass seeds.
Why Should You Consider Artificial Grass?
Artificial grass may have various benefits for consumers. It saves you both time and money and is regarded as an excellent landscaping option. The best part about artificial grass is that it does not require any water and includes less maintenance. You can also consider centipede grass seed for this because it also requires low maintenance and can grow in any condition. Real grass can die, but artificial turf can last for more years. Moreover, you don’t have to buy any fertilizers or pesticides to maintain your fake grass. However, there are various pros and cons of artificial grass that you need to consider before buying. You can buy good quality artificial turf with the help of turf near me feature on EasyTurf to make it last for a longer time.
How To Install Artificial Grass In Your Garden – Step By Step Guide
Installing artificial turf is not as easy as it seems. To do this work, you need a good amount of time and hard work. Also, be prepared to get your hands dirty to install the fake grass on your lawn. Now, there are four elements to almost every installation that can reduce the cost of installing fake grass are:
Tools used
Seaming system
Material waste
Subbase material
Here are the major steps to follow in order to install artificial grass in your garden in 2021.
1. Measure Your Area
It is obvious that the area of the garden will differ for everyone. First, you need to measure the length and width of the area that you want to install with the artificial grass. Thus, measuring the area is an important factor that you need to consider at the earliest.
2. Gather Tools And Equipment
The second step to install artificial grass in your garden is to gather vital tools and equipment for the same. You cannot complete the task without the use of a Stanley knife, geotextile weed killer, a turf cutter, and accessories such as tape and glue.
3. Remove The Existing Surface
Now, it’s time to remove the existing surface with your hand if the area is small. However, you need to use a turf cutter if the lawn is very big. You can also plan this before removing the existing surface.
4. Compact The Ground
Another step to install artificial turf in your garden is to compact the ground. You can take the help of a roller or a vibrating plate to meet your objectives. You need to follow this step again later.
5. Place Grass Edging Down
Placing this is not mandatory but optional. If you have a desire to use timber or other edgings, you can follow this step. However, you need to ensure that your final grass line should not be smaller than edging. This is generally done to enable water to run off the turf.
6. Lay Your Sand Or Stone Base
Another step to install fake grass in your backyard is to lay your sand or stone base, and this is one of the most vital factors that you need to consider. Place at least 40mm of compact sand and add more wet sand if the sand is dry. Then, you need to compact the ground again.
7. Roll Out Your Underlay And Grass
Now, roll out your underlay grass first. By keeping in mind not to disturb the weed-killing underlay, roll out the artificial grass on top of that. In this step, you need to do it very carefully.
8. Let The Grass Settle
One of the most vital things to do while installing your artificial turf is to let your grass settle after you have completed the above steps. This is generally done to stop the grass from creasing or wrinkling.
9. Trim The Edges
After completing the above steps, you have successfully installed artificial grass. Trimming is the only thing left now. Trim and cut the artificial grass from the edges neatly. You can use a sharp Stanley knife for trimming.
10. Brush The Grass Up And Relax!
Before brushing up the artificial grass, you need to pin it down using landscape pins. You need to brush up again to bring the fibers of the artificial turf upright. Now, it’s time to sit back and relax and enjoy the artificial grass in the garden.
The Final Thoughts
The best part about artificial grass is that it saves you lots of time and effort that you can spend on other important projects. Once you lay your artificial grass in your garden, it will always be green without any maintenance. Isn’t this amazing? Let me know your views about this in the comment section below.
Reference: https://www.buzzgrass.com/how-to-install-artificial-grass/
Content Rally wrapped around an online publication where you can publish your own intellectuals. It is a publishing platform designed to make great stories by content creators. This is your era, your place to be online. So come forward share your views, thoughts and ideas via Content Rally.
In the heart of every home, the kitchen stands as a hub of activity. It's where culinary masterpieces are born, where families gather, and where memories are created. But what if your kitchen is no longer inspiring or functional? That's where the magic of "ny kitchen remodeling" comes into play.
In this article, we'll explore the exciting world of kitchen remodeling in New York, guiding you through the process, trends, and tips to transform your kitchen into a stylish and functional space.
Understanding the Need for Kitchen Remodeling
Kitchen remodeling is the need of the hour, and you must understand it for convenience. Here, we discuss some points that will provide you with an idea of kitchen remodeling.
Assessing the Current State of Your Kitchen
Before diving into the renovation process, it's essential to assess your existing kitchen's layout, design, and functionality. Identify what works and what doesn't. Take note of any outdated appliances, worn-out cabinets, or inefficient use of space.
Setting Clear Goals for Your Remodel
Once you've identified the shortcomings, set clear objectives for your kitchen remodeling project. Do you want to enhance storage space, improve the flow, or create a more modern aesthetic? Having a clear vision will guide your decisions throughout the process.
Exploring Design Trends
When you look for kitchen design, the first thing you look into is aesthetics. This section discusses some of the trends in the new kitchen's design. The design of the modern kitchen must sync with the present requirements. So let us understand them all here.
Modern Minimalism
Minimalistic designs with clean lines, neutral colors, and streamlined appliances are gaining popularity in New York kitchens. This trend emphasizes functionality and simplicity, making the kitchen a serene space for cooking and socializing.
Open Concept Layouts
Breaking down walls to create an open-concept kitchen and living area is another prevalent trend. This approach fosters a sense of togetherness, making it easier to interact with family and friends while preparing meals. The open layout can easily fit today's requirements, and at the same time, they elevate the aesthetics and the utility of modern kitchens.
Sustainable Kitchen Remodeling
Eco-friendly designs and materials are on the rise. Incorporating energy-efficient appliances, recycled materials, and sustainable practices not only reduces your carbon footprint but also adds value to your home. Sustainability is the need of the hour. Here, we discuss some of the approaches to earn it. Let us get started with the discussion here.
The Kitchen Remodeling Process
Here we bring forth some areas of kitchen remodelling.
Budgeting
Setting a realistic budget is a crucial step. Determine how much you're willing to invest in your project, and allocate funds for each aspect, from cabinetry and countertops to lighting and flooring.
Hiring Professionals
Engaging experienced contractors, designers, and craftsmen is vital. They can help you bring your vision to life and ensure that the remodeling process goes smoothly.
Choosing Materials
Selecting the right materials is key to achieving the desired look and durability. Explore options for countertops, cabinets, backsplashes, and flooring that match your style and budget.
Adding Personal Touches
Personalize your kitchen by incorporating elements that reflect your personality and preferences. Whether it's unique lighting fixtures, custom cabinetry, or a bold color scheme, these touches will make your kitchen truly yours.
Benefits of Kitchen Remodeling
There are some of the benefits of kitchen remodeling. Some people might relate it to aesthetics. But if you discuss it in the long run, it indeed has its benefits for not one but multiple reasons. Let us look at them here.
Enhanced Functionality
A well-planned kitchen remodel can significantly improve the functionality of your space, making cooking and daily tasks more efficient.
Storage
In the UK, space is depleting; therefore, everyone within their capacity is trying their level best to enhance the storage facility. A kitchen removal focuses on using the space and creating new space.
It indeed has its own advantages. Therefore you can say that storage indeed becomes one of the factors. With a good storage facility, you can remodel your kitchen and make it smart.
Increased Home Value
Investing in a kitchen remodel can increase your home's resale value, making it a wise financial decision.
Improved Aesthetics
Aesthetic upgrades can transform your kitchen into a visually stunning space, providing joy and inspiration daily.
Safety
The majority of kitchen accidents occur due to safety reasons. If your oven is outdated, If the screws of your cupboard fittings are not ready, it can indeed put you at risk. A kitchen remodel provides you with an opportunity to replace whatever is old. Thus, it reduces the risks. This is the reason people try to move whatever is old for safety reasons.
Adding personal Touches
There is nothing better than personalization. Personalizing your kitchen is all about the efforts that you made in decking and improving the features it has. There are myriads of areas in your kitchen where you have room for personalization. You can try different ways to personalize your kitchen.
First, you can create a noticeboard corner in your kitchen. You can leave comments or directions there for the other family members. You can also use the potted plants on the window sill. Thereafter, you can create a pegboard so tha you can access the utensils you use most frequently.
Conclusion
To conclude, one can say that kitchen remodeling must be one of the projects that a household must prioritize.
In the bustling city of New York, kitchen remodeling is more than just a renovation project; it's a way to enhance your daily life. By embracing the latest design trends, carefully planning the process, and personalizing your space, you can create a kitchen that reflects your style and meets your needs.
Read Also:
Simple Ways To Prevent Insects From Taking Over Your Kitchen
How To Choose the Right Brass Range Hood for Your Kitchen
Five Essential Components For Your Outdoor Kitchen
Lemongrass is a tropical herb that has a fresh and citrusy flavor and aroma. It is one of the most essential herb that is people widely use in Asian cuisines. They especially use it in Vietnamese, Thai, and Indonesian dishes. It is also a popular ingredient in teas, soups, curries, salads, and marinades. Lemongrass has many health benefits, such as improving digestion, boosting immunity, reducing inflammation, and relieving stress.
But did you know that you can grow and harvest your own lemongrass at home? Yes, you can! Lemongrass is easy to grow and maintain, and can thrive in pots, containers, or gardens. You can enjoy fresh and organic lemongrass all year round, and save money and time from buying it at the store.
In this article, I will show you how to harvest lemongrass, and share some tips and tricks for growing and using this versatile herb. By the end of this article, you will have a better understanding of how to harvest lemongrass, and how to make the most of this wonderful herb.
So, if that is something that you want to know, I have you covered! Keep on reading this blog till the end to learn more…
How to Grow Lemongrass?
Lemongrass is a wonderful herb that can add a refreshing and citrusy flavor to your dishes, drinks, and teas.
It is also a beautiful ornamental plant that can brighten up your garden with its tall, graceful stalks and fragrant leaves. Lemongrass is native to tropical regions, but you can grow it in cooler climates as well with some care and preparation.
Here are the steps and conditions for growing lemongrass successfully at home:
1. Choose a healthy lemongrass plant or stalk
You can buy a potted lemongrass plant from a nursery or garden center, or you can start your own from a fresh lemongrass stalk that you can find in most grocery stores or Asian markets. Look for a stalk that is firm, green, and has some roots at the base. Avoid any that are dry, brown, or moldy.
2. Prepare a sunny and warm spot for your lemongrass
Lemongrass loves full sun and heat, so choose a location that gets at least six hours of direct sunlight per day. If you live in a colder region, you can grow lemongrass in a container that you can move indoors during the winter.
Use a large pot with drainage holes and fill it with rich, loamy soil that is high in organic matter. You can also add some compost, manure, or leaf mold to improve the soil quality and fertility.
3. Plant your lemongrass in the soil
If you bought a potted plant, simply transplant it to the ground or a larger container, making sure to bury the roots well and leave some space between the stalks.
If you are starting from a stalk, peel off any dead or yellow leaves and trim the top part to about six inches.
Place the stalk in a glass of water and keep it in a sunny windowsill until roots start to grow, which can take a few weeks.
Then, plant the rooted stalk in the soil, leaving about two inches of the stem above the ground. Space the plants about two feet apart to allow them to spread
4. Water and fertilize your lemongrass regularly
Lemongrass needs moist soil to thrive, so water it frequently and deeply, especially during hot and dry periods.
A good rule of thumb is to water it once a week or whenever the top inch of the soil feels dry. You can also apply a layer of mulch around the plants to conserve moisture and prevent weeds.
Lemongrass also benefits from a monthly dose of liquid organic fertilizer during the growing season, such as fish emulsion or seaweed extract. This will help it grow faster and produce more leaves and stalks.
5. Harvest and enjoy your lemongrass
You can start harvesting your lemongrass when the stalks are about a foot tall and half an inch thick. Cut the stalks at the base with a sharp knife or scissors, leaving about two inches of the stem in the ground.
Additionally, you can use the whole stalk, or peel off the outer layers and use only the tender inner part. You can also harvest the leaves and use them fresh or dried for teas and infusions.
Lemongrass can be stored in the refrigerator for up to two weeks, or in the freezer for up to six months. You can also dry it and store it in an airtight container for later use.
How to Harvest Lemongrass?
Harvesting lemongrass is a simple and satisfying process that can be done in a few steps. Here are the basics of how to harvest lemongrass:
Choose the right time
The best time to harvest lemongrass is when the stalks are about 12 inches tall and 0.5 inches thick. This usually happens after 3 to 4 months of planting. You can harvest lemongrass throughout the year, as long as the temperature is above 40°F. You can also harvest lemongrass in batches, leaving some stalks to grow and regenerate.
Cut the stalks
To harvest lemongrass, you need a sharp knife or scissors, and a clean cutting board. Cut the stalks at the base, as close to the soil as possible. You can cut as many stalks as you need, or as many as you can use within a week. You can also trim off the leaves, as they are not edible and can be used for other purposes.
Wash and store the stalks
After cutting the stalks, wash them under running water, and pat them dry with a paper towel. You can store the stalks in the refrigerator, wrapped in a damp paper towel, and placed in a plastic bag. They can last for up to a week. You can also freeze the stalks, chopped or whole, in a freezer bag. They can last for up to 6 months.
Dividing Lemongrass: What is It and How to Do It?
Dividing lemongrass is a great way to propagate and maintain this aromatic and flavorful herb. Lemongrass is a perennial plant that grows in clumps of stalks and leaves.
Over time, these clumps can become crowded, woody, and less productive. By dividing lemongrass, you can rejuvenate the plant, increase its yield, and share it with others.
Here are the steps and reasons for dividing lemongrass:
1. When to divide lemongrass?
The best time to divide lemongrass is in the spring, after the last frost date when the plant is actively growing and has new shoots.
You can also divide lemongrass in the fall if you live in a warm winter climate or if you plan to overwinter the divisions indoors.
Avoid dividing lemongrass in the summer, when the heat and drought can stress the plant and reduce its survival rate.
2. How to divide lemongrass?
To divide lemongrass, you must dig up the entire plant and separate it into smaller sections. You can use a shovel, a sharp knife, or your hands to do this.
Each section should have at least one inch of root and several healthy stalks and leaves attached.
You can trim the leaves to about six inches to reduce water loss and make the divisions easier to handle. Discard any old, brown, or damaged parts of the plant.
3. Where to plant lemongrass divisions?
You can plant lemongrass divisions in the same spot where you dug up the parent plant or in a new location with full sun, moist and well-drained soil, and plenty of organic matter.
You can also plant lemongrass divisions in containers at least 10 inches deep with drainage holes. Space the divisions about two feet apart to allow room for growth.
Plant the divisions at the same depth as they were before, with the crown just below the soil surface.
4. How to care for lemongrass divisions?
Lemongrass divisions need regular water and fertilizer to establish and thrive. Water them deeply and frequently, especially during the first few weeks and during hot and dry periods.
You can also apply a layer of mulch around the plants to conserve moisture and prevent weeds. Fertilize the plants once a month with a liquid organic fertilizer, such as fish emulsion or seaweed extract, during the growing season.
Protect the plants from frost in the winter by moving them indoors or covering them with a frost cloth.
5. How to harvest and use lemongrass divisions?
You can start harvesting lemongrass divisions when they are about a foot tall and half an inch thick. Cut the stalks at the base with a sharp knife or scissors, leaving about two inches of the stem in the ground. You can use the whole stalk, peel off the outer layers, and use only the tender inner part.
Additionally, you can also harvest the leaves and use them fresh or dried for teas and infusions. Lemongrass can be stored in the refrigerator for up to two weeks or in the freezer for up to six months. You can also dry it and store it in an airtight container for later use.
How to Use Lemongrass in Food?
Lemongrass has a long, green stalk with a bulbous base and grassy leaves. It has a lemony taste with a hint of mint and ginger. Lemongrass can be used fresh, dried, or powdered, depending on the recipe and preference. Here are some ways related to how to use lemongrass in different ways:
Fresh lemongrass
Firstly, fresh lemongrass is the most aromatic and versatile form of lemongrass. You can find it in the produce section of most supermarkets, Asian markets, or online.
To prepare fresh lemongrass, you need to peel off the tough outer layers and trim off the root end and the top third of the stalk. You can use a sharp knife or scissors to do this. The part that you want to use is the pale and tender lower part of the stalk.
After that, you can slice it thinly, chop it finely, or bruise it with a pestle or the back of a knife. Slicing or chopping is good for salads, stir-fries, curries, and marinades, while bruising is good for soups, stews, and broths.
You can also make a paste by pounding or blending lemongrass with other ingredients, such as garlic, ginger, chilies, and cilantro.
A paste is great for adding flavor to meats, seafood, tofu, and rice. You can store fresh lemongrass in the refrigerator for up to two weeks or in the freezer for up to six months.
Dried lemongrass
Secondly, dried lemongrass is less potent than fresh lemongrass but still has a nice, lemony flavor. You can buy it in whole or sliced form or dry your lemongrass by hanging the stalks in a warm and airy place until they are brittle.
Dried lemongrass is good for making teas, infusions, and herbal blends. You can also use it to flavor soups, stews, and broths, but you must soak it in hot water for about 20 minutes before adding it to the pot.
Additionally, you can store dried lemongrass in an airtight container in a cool, dark place for up to a year.
Powdered lemongrass
Lastly, powdered lemongrass is the most convenient form of lemongrass, as it does not require any preparation. You can buy it in spice shops, Asian markets, or online.
Powdered lemongrass has a mild and sweet flavor and can be used in baking, desserts, sauces, and dressings. You can also sprinkle it over salads, soups, and stir-fries for a touch of freshness.
The shelf life of powdered lemongrass is also great. For up to six months, you can store powdered lemongrass in an airtight container in a cool and dark place.
How to Use Lemongrass in Other Things?
Apart from cooking, you can use lemongrass in many other ways. Some of the best and most popular uses of this herb are as follows:
Beautifying
You can use lemongrass to make your own beauty products, such as soap, lotion, or shampoo. You can infuse the stalks or the leaves with oil, such as coconut, olive, or almond oil.
Moreover, you can also add other ingredients, such as honey, aloe vera, or essential oils. You can use the products to cleanse, moisturize, or scent your skin and hair.
Healing
You can use lemongrass to treat various ailments, such as headaches, colds, or infections. You can inhale the steam from boiling the stalks or the leaves, or apply the oil to your temples, chest, or throat.
Additionally, you can also drink the tea, or gargle with the syrup. You can use the products to relieve pain, inflammation, or congestion.
Wrapping It Up!
If you want to know how to harvest lemongrass, I hope that this blog has been of help to you. If there are any other queries about the same, please feel free to let me know. All that you need to do is scroll down till you reach the bottom of the bottom of the page. Then leave your suggestions and comments in the box below. And I will be there to answer them all for you!
Learn More About:
Everything You Need To Know About Harvesting Basil
Asparagus 101: When, How, And How Often To Harvest?
How to Harvest Spinach the Right Way: A Step-by-Step Guide
A home is more than just four-wall confinement to provide shelter. Sense of security, range of emotions, the commemoration of establishments, symbol of status, and more, all are some of the many aspects related to becoming a homeowner.
There are certain risks to achieve the absolute benefits of homeownership. It covers several social, personal, and financial advantages over monthly renting. Owning a house should represent your financial stability, emotional success, and community contribution.
The National Association of Realtors (NAR) reveals about 60% of Americans have homeownership. This lofty percentage is due to continued economic expansion with surging educational access. Settling for a home directly is thus more appealing for conscious people like yourself.
Concerning the monetary facts, you’re sure to enjoy an extended number of benefits. You can learn more at https://paradisedevelopments.com/blog/communities/renting-vs-buying-in-toronto/, the expert suggestions, practical ideas, and in-depth details are sure to relieve your headache associated with homeownership.
Financial Requirements Of Homeownership
Almost every person understands the financial prerequisites of owning a home. In fact, it appears to be the most invigorating point of homeownership. Initial investment requires you to spend an incredibly high amount of money. But the outcome is sure to make a satisfying payoff with time. The pointed facts should explain the obvious advantages in brief.
Building Equity: The possessed value of any given asset is represented as equity. In fact, monthly mortgage payment lets you establish equity for your house. Direct contribution to the physical asset explicitly differs from monthly rental payments to landlords.
Long-Term Saving: Equity happens to initiate certain savings for your financially stable future. There are a number of strategies available to tap into equity. Even a minimal saving per month will aggregate massive savings after several years. Several studies indicate peak outcomes on your retirement ages to suggest retiree savings.
Building Wealth: The value of properties is burgeoning right now. Therefore, it will help you sell the home for a notable profit after years of use. Although short-term use can’t exactly have a significant payoff; however, long-term consideration, like 30 years plus, will provide you with a great profit.
Expense Control: There are different uncertainties involved in rental living. But ownership lets you skip the issues with less fixed payments. The amount lets you reimburse the overall expense for every month. And you can initiate absolute control over your costs.
Financial Education: Ownership immediately starts to develop a personalized understanding of your financial knowledge. Likewise, you’ll have to deal with many financial aspects. It becomes easy to predict the probable costs, letting you plan ahead of time. The educational skills regarding its management will surely help future generations.
Taxation Aspects Of Homeownership
Attractive tax breaks on ownership are sure to give you definite relief from complex regulations. Many deductions should occupy your applicable Federal Tax rules following the purchase. Check out the benefits closely to understand their viability.
Property Tax Deduction: Distinctive jurisdiction allows you to check the deduction of property taxes. There are several regulations regarding the aspect. It requires your attention to the usable points.
Home Sales Profit: Exemption in capital gain tax can cover thousands of dollars on selling. Though taxation eligibility requires you to occupy the benefits. It should follow the sale of homeownership.
Reduced Mortgage Interest: Almost every payable home mortgage interest remains tax-deductible. Therefore, the curtailed mortgage interest triggers a particular deduction of your taxable income.
Imputed Home Rent: Every landlord that provides rental living space has to pay taxes on the income. But it has nothing to do with homeownership. You can skip the hassles of additional tax regulations.
Credit Builder: There are many direct or indirect factors that contribute to your credit score. Owning a home improves the average credit account length. And it simply manages to push the score forward.
Additional Aspects That Remains Underrated
Alongside the benefits, there are several other factors to consider. The extra aspects often remain neglected, ignored, or unnoticed.
Inflation Hedge: Rental costs or housing payments keep pace with the ongoing inflation rate. Continued inflation obviously affects your overall expense.
Borrowing Power: Superior home equity results in further eligibility of borrowing money. A credit line or particular load on home equity suffices for a second mortgage. And the loan can provide financial support. It can include, medical bills, tuition fees, home improvements, or additional purchases.
These are all the monetary benefits of homeownership. There are several social benefits to ownership as well. You don’t have to deal with landlord permissions or restrictions on any change. The emotional and financial security you get from owning a home provides great relief. There remains no uncertain rental stay. Possessing a home becomes a symbol of personal accomplishments to raise the status. Freedom of full customization lets you check the possibilities towards further development.
Encountering The Risks
Talking about homeownership, the discussion remains incomplete without discussing its risks. You must consider the current financial aspects to back your expensive investment. In fact, high maintenance costs are likely to give you trouble. It’s particularly true for houses that feature minimal facilities. A poorly maintained home can also reduce the property value.
More Resources:
Benefits of Investing in City Centre Property
Buy to Let Mortgage Explained
What are the key pillars of a profitable Airbnb business?