Published on: 06 February 2021
Last Updated on: 26 December 2024
Selaginella lepidophylla, or resurrect plant, is a desert plant that belongs to the Spikemoss family, Selaginellaceae. Across the desert of Mexico and the United States, you will find this plant. However, it is considered that the desert of North Africa is the native place of this plant.
It is also called the False Rose of Jericho. The creeping stems of this plant grow horizontally, and the leaves are like scale.
What Is A Resurrection Plant?
Any poikilohydric plant that is able to survive extreme dehydration is called a resurrection plant. These plants can survive without water for several months and even for years.
For example, the Rose of Jericho, which is native to the North African deserts, is an example of the resurrection plant. The scientific name of this plant is Anastatica hierochuntica.
Overview Of The Resurrection Plant
Common Name
Resurrection plant, Rose of Jericho, false Rose of Jericho, stone flower, dinosaur plant
Botanical Name
Selaginella lepidophylla
Family
Selaginellaceae
Plant Type
Perennial
Mature Size
2-6 in. tall, 3-6 in. wide
Sun Exposure
Full
Soil Type
None needed
Hardiness Zones
10
Native Area
North America
Some Interesting Facts About The Resurrection Plant
Here are some interesting facts about the resurrection plant that will surely amaze you.
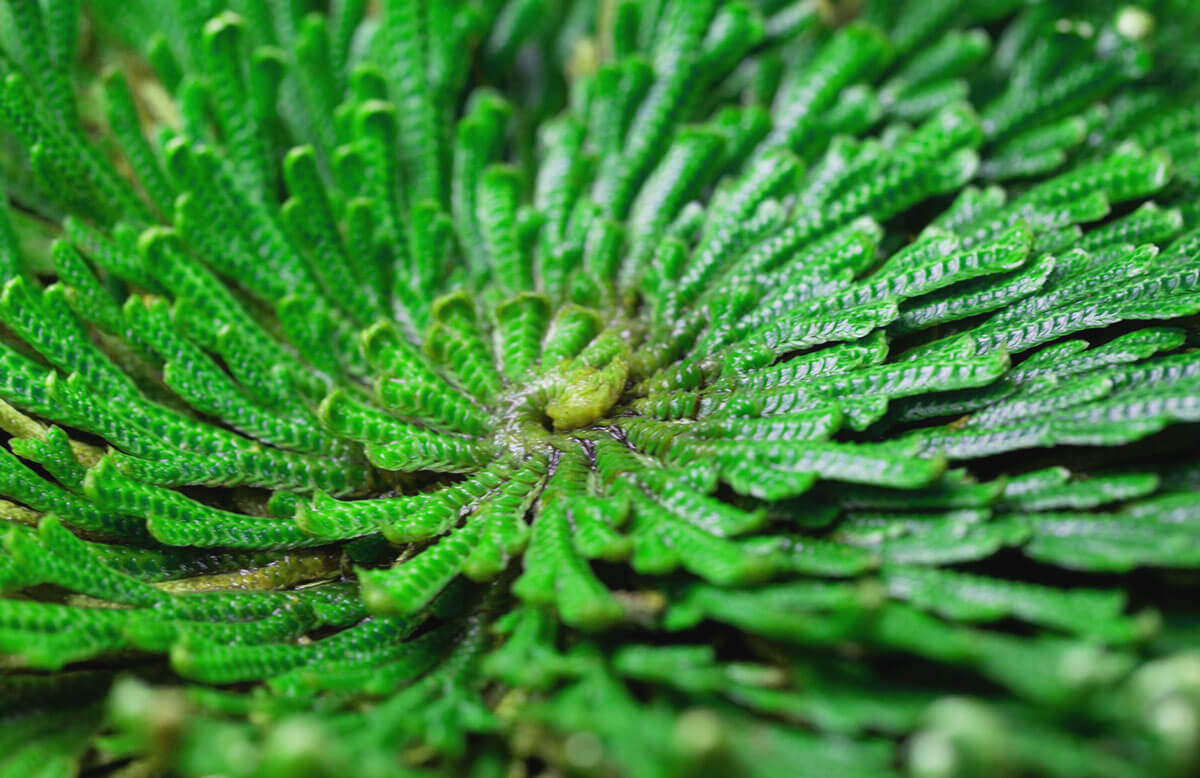
Scaly Stems
These plants have scaly stems that are arranged in the form of a rosette. A few stems that the resurrection plant produces always grow close to the ground. The entire plant covers a diameter of less than only 1 foot. Just like other plants, this plant also uses its roots in order to extract nutrients and water from the ground.
Resurrection plant is a primitive plant that falls between the category of ferns and mosses. You can not see any leaves on the resurrection plant. All you will find are small, scaly extensions of stems that look like junipers.
Absorb Water
After rainfall, the resurrection plant quickly absorbs the water and enters the phase of rapid growth. As this plant is unable to accumulate water in the roots and stems, once the soil dries out, it also dries shortly. The dry plant curls up into a tight ball with a very small amount of water that is stored in the center. Though the curled ball looks like it is dead it is only dormant. During the whole period of dormancy, the plant minimizes metabolic activities and can last a few years or till the time of the next rain.
Reviving Ability
Due to its reviving ability, this plant is called a resurrection plant. This plant is able to rehydrate. Once it is exposed to moisture, after a few hours, it unfolds its stem and reactivates its metabolism. After it absorbs the water, the stem starts swelling and unfolds itself. Even if the stems do not have any live protoplast within them, this will indeed happen. “Siempre Viva,” which is another name for the resurrection plant. The phrase mentioned earlier means “everlasting.”
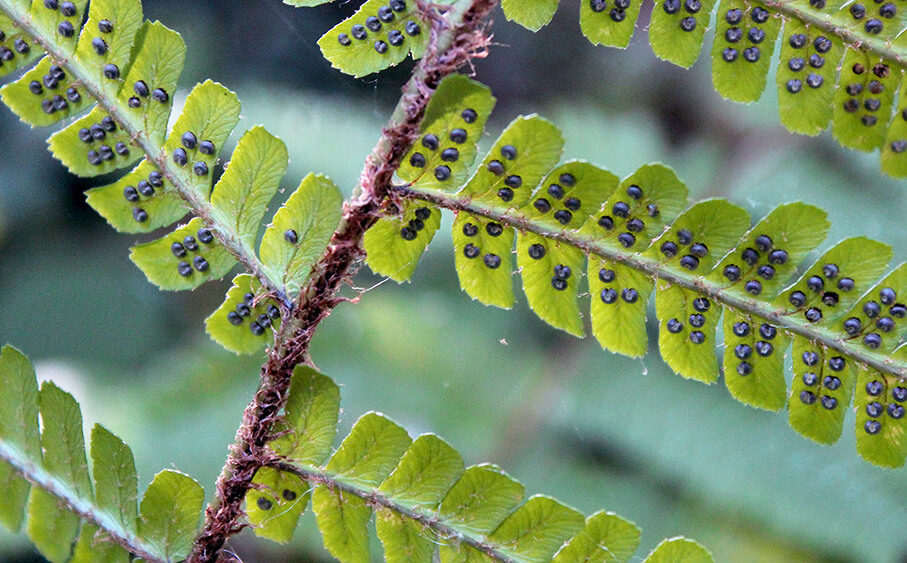
Reproduce Sexually
Resurrection plants do not produce flowers, fruits, and seeds. This plant reproduces sexually. Strobili, which is a club-like structure and produced via spores. 400 million years ago, this plant appeared on the planet. Most of the ancient lycopods were giant plants.
But as a result of climate change, all of them became extinct. Small lycopods like resurrection plants have managed to survive without any morphological changes till the modern days.
Dinosaur Plant
Another name for the resurrection plant is the “Dinosaur plant” because it has lived side by side with dinosaurs. Tea made from the resurrection plant can treat sore throat and the common cold due to its antimicrobial properties. The resurrection plant is the longest-living plant on earth.
Does the Resurrection Plant Need Soil?
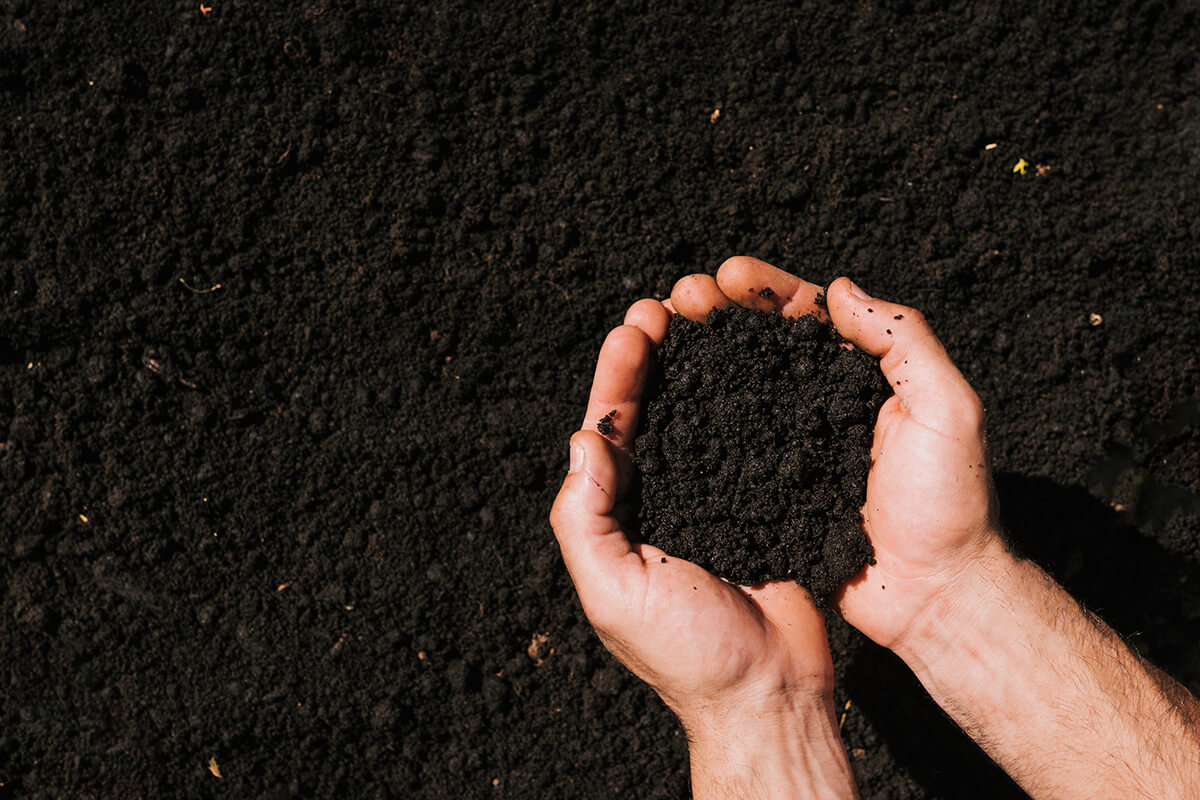
When you will buy a resurrection plant online or from your nearest nursery on the resurrection plant for sale, you will receive a brown ball of dried moss. This brown ball of moss does have roots, but the roots are not attached to anything. So, in order to grow, this miracle plant does not need soil.
Similar to a hydroponic system, when there is no water or moisture for a really long time, the plant will curl into a ball and turn brown with a diameter of around 6 to 10 inches. which generally has a height range of 15 to 35 centimeters. This plant is very convenient in terms of taking care of and growing.
Can a Resurrection Plant Die?
From the earlier discussion, it may be clear that this plant is really hard to kill. You can simply put the plant in the dark corner of a room without water. But once you bring it out and leave it in water, it will get relieved once again. There is one way to kill this plant. That is overwatering. You can leave this plant in water for a few days, and it will start rotting, and eventually, it will die.
How to Grow the Resurrection Plant?
In order to grow and to care for a resurrection plant, all you need are:
A broad and shallow container that should not have any drainage hole.
Another wide container that should have drainage holes.
For spreading at the button, gravel or pebbles.
Distilled water at room temperature.
A bright but shady place.
And lastly, a dried resurrection plant.
Process
First, fill the wide and shallow container that has no drainage system with water. Do not fill it wholly. Put in two-thirds water.
Place pebbles or gravel up to the waterline. Now, put the dried resurrection plant on the pebbles. For a completely dry and brown plant, it will take around 3 to 4 hours to turn green.
Now, take the wide container that has drainage holes and spread the gravel or pebbles upto the level of water. Mix peat moss. Add humus and sand and spread it on the pebbles. Now, place the resurrected plant on the top.
Do not place it in direct sunlight. Instead, place it in a shady place that has a temperature of higher than 40 degrees Fahrenheit.
Once you notice the plant is getting brown, continue to water it.
Conclusion
This plant is super convenient for plant lovers who can not afford much time to take care of plants. Due to its relative properties, this plant can come back to life just after receiving water. That is why this brown dry ball of moss is so popular among plant lovers.
Mashum Mollah is the feature writer of Search Engine Magazine and an SEO Analyst at Real Wealth Business. Over the last 3 years, He has successfully developed and implemented online marketing, SEO, and conversion campaigns for 50+ businesses of all sizes. He is the co-founder of Social Media Magazine.
Fostering a connection between children and the great outdoors has become more important.
Playful landscapes offer a unique solution to this modern challenge by seamlessly integrating play areas into your lawn, creating a harmonious environment that encourages physical activity, creativity, and family bonding.
Choosing the right type of grass
When considering grass types for your playful landscape, opt for those that are hardy and resilient, able to withstand the wear and tear of active play. Bermuda grass and Kentucky bluegrass are excellent choices due to their durability and lush appearance.
These grasses recover well from foot traffic and require moderate maintenance, balancing playability and aesthetics. These grasses are available for purchase via the convenience of the Internet (http://www.naturesseed.com).
Designing play zones with natural elements
How often do we see playgrounds today? The answer is very rarely. Kids are nowadays trapped in technology and gadgets- they have almost forgotten the importance of playground. But as adults, we are responsible for keeping this feeling mortal in them. And what helps in doing so? Making the playgrounds more attractive with organic elements.
Integrate play areas with their natural environment using gentle slopes, mounds, and pathways. These additions improve the aesthetic value, pique kids' interest, and inspire creativity. Adding native trees and plants to playgrounds has multiple benefits, including aesthetics, environmental education, and biodiversity.
Incorporating safe play equipment
Playful landscapes must prioritize the installation of secure play equipment. You may put in swings, slides, and climbing structures suitable for different ages that still fit in with the architecture. Ensure everything is in working order and up to code before using it. A well-designed playground incorporating natural elements will encourage youngsters to play and learn.
Blending play areas with aesthetic appeal
Aesthetics shouldn't take a back seat to functionality while designing an entertaining and engaging environment. Use landscaping components like rocks, grasses, and flowers to help blend the playsets in with the rest of the yard. This method results in a space that is appealing to the eyes of both young and old.
Maintenance tips for a lively lawn
Your landscaping should be maintained regularly to keep it looking fresh and appealing. Maintain a proper mowing height, water the grass well, and immediately fix bald spots. You should consider aerating and overseeding the grass to keep it lush and healthy, so your kids will have a great place to play.
Environmental considerations
Make your landscaping more environmentally responsible without sacrificing fun. A greener and more sustainable playground is possible through rainwater collection systems, native plant varieties, and organic fertilizers. Instilling lifelong lessons of environmental responsibility in children through their play space is worthwhile.
Enhancing family bonding through play
An environment with play opportunities improves bonding among family members. Have a picnic, do some gardening, and compete against each other in fun contests. Children will remember these times fondly far into adulthood, and the relationships between family members will grow stronger as a result.
Boosting children's creativity and imagination
Playful landscapes inspire creativity and imagination by providing a constantly shifting canvas for play. Encourage children to make forts, nature-inspired artwork, and imaginative activities. The flexibility to experiment and explore promotes cognitive growth and problem-solving abilities.
Final words
Adding playsets to your yard may completely alter the vibe of your outdoor space, making it a more inviting place for kids to spend time and develop their interests. You may make a landscape that entertains, teaches, and enhances through careful planning and a balance between natural and artificial features.
Read Also:
The Secret To A Lush And Beautiful Lawn: Unveiling Littleton’s Best Lawn Care Services
Natural ways to get rid of flea in your lawn
5 Power Tools For New Homeowners
Choosing the right concreting solutions is a cornerstone in the journey of constructing or renovating your home. It not only guarantees durability and structural integrity but also elevates the aesthetic appeal of your living space. Concrete, with its unmatched versatility, stands as a pillar in residential construction, marrying the qualities of strength, longevity, and design flexibility.
As we delve into the realm of concreting solutions suitable for various facets of home construction, from the foundational elements to decorative finishes, it becomes evident how these solutions significantly enhance both the functionality and appearance of our homes.
Understanding Different Types of Concrete
Concrete comes in various forms, each suited to specific applications in home construction. Here's a look at the primary types:
Standard Concrete: The foundation of most construction projects, known for its strength and durability, suitable for driveways, sidewalks, and structural foundations.
High-Strength Concrete: Offers enhanced durability and load-bearing capabilities, ideal for areas requiring superior strength.
Lightweight Concrete: Used where less structural mass or better insulation is needed, it provides thermal efficiency and is easier to work with.
Decorative Concrete: Enables aesthetic customization for home exteriors and interiors through options like colored, stamped, or polished concrete.
Benefits of Concrete in Home Construction
The benefits of using concrete in home construction are manifold. Its durability stands up to extreme weather, heavy traffic, and the wear and tear of daily life, ensuring structures that last generations. Concrete's thermal mass contributes to energy efficiency, helping maintain consistent indoor temperatures and potentially lowering energy costs. Moreover, its versatility allows architects and builders to explore creative designs, molding concrete into various shapes and finishes to complement any architectural style.
Innovative Concreting Techniques for Homes
Innovative concreting techniques, such as stamped concrete, polished concrete, and concrete overlays, push the boundaries of traditional concrete applications, offering homeowners unique ways to enhance the aesthetic appeal of their exteriors and interiors.
Stamped concrete introduces textures that mimic natural materials, while polished concrete floors bring a sleek, high-gloss finish to any room. Concrete overlays provide a fresh look for existing concrete surfaces without the need for complete replacement, making them a cost-effective option for renovations.
Choosing the Right Concrete for Your Project
Selecting the appropriate concrete for your endeavor requires a thorough assessment of your project's unique demands, whether it's for construction or renovation. This entails evaluating the visual goals you aim to achieve, the structural requirements essential for stability and safety, and the adaptability of the materials to the specific climate conditions in your area. Additionally, financial considerations are pivotal in this selection process.
The cost implications of various concrete types and their associated finishing methods can significantly influence your final decision. Engaging a Perth concreter, such as Project Concrete, ensures expert guidance in navigating these considerations, guaranteeing that your choice aligns with both your aesthetic preferences and budgetary constraints.
Maintenance and Care for Concrete Surfaces
Maintaining concrete surfaces is straightforward, involving routine sealing to protect against moisture and stains, regular cleaning to preserve appearance, and prompt repair of any cracks or wear to prevent further damage. Such care ensures the longevity and beauty of concrete installations, contributing to the overall value of your home.
Disadvantages Of Concrete For Home
When building concrete slab foundations, constructors are aware of the reason why it needs to be freezed. Apart from the worry that the foundation might crack, there is also concern about cost savings. One thing that you might not have to worry about at all is when you use concrete for your home, it is quite safe.
There is no problem when it comes to the base of the house and how it might decrease the risk of damage with regards to the instances of buying or building a home with concrete. There are several benefits which we have already mentioned, however, there are some drawbacks as well.
You need to go through the disadvantages of using concrete so that you can consider all pros and cons. This will help you in understanding the need for concrete or should you choose another option when building a home.
Read about the drawbacks that are described below in detail. You can decide on your own regarding making the choice of whether or not you would like to choose concrete as your choice for the house site!
Labor
Not everyone knows how to use concrete and accordingly, they know how to implement the concrete and tools that will help in building concrete structures.
It is quite common to understand that you will need to learn about how concrete works and efficiently work on looking for laborers.
These laborers must know how to use concrete and the tools or else it might be difficult especially when the process is expensive!
Cost
Using concrete is one of the most expensive ways of building a house! There is labor, material costs, transportation costs and market competition. When evaluating the conditions based on which you are building a house, there can be serious concerns regarding the expenses of a traditional home.
Several factors influence the way your house is built! I agree that there are long term benefits to the use of concrete however, it can significantly impact your costing and budgeting when building a house.
Pests
With concrete becoming the foundation of your house, there can be a chance that there can be pests such as roaches and termites. Considering the house is closer to the ground, the insects and pests can easily enter through the walls accessing the infrastructure of the house.
It will severely impact the woods across the house along with concerns if you sit on the ground!
Heating And Cooling
If there is a unit for air-conditioning or there is a furnace installed, there is a high chance that it will affect the concrete. These devices when installed in the ground floor will take up room directly impacting your purpose.
Slab Cracks
One of the most potential concerns when using concrete is that there can be cracks in the concrete! Now that we have already discussed about it being costly, it can be expensive to repair the house especially when there are cracks.
It will look bad! Do you wonder how these cracks have developed? Earthquakes, frozen ground or tree roots are common concerns due to which the cracks in the concrete appear.
Conclusion
In conclusion, concrete offers a versatile, durable, and aesthetically pleasing solution for home construction and renovation projects. By understanding the different types of concrete, their benefits, and the innovative techniques available, homeowners can make informed decisions that meet their structural and design needs.
Whether laying a new foundation, upgrading a patio, or seeking durable and stylish flooring options, the right concreting solutions can significantly enhance the livability and appeal of your home, ensuring it stands the test of time.
Learn More About:
10 Points To Remember If You Are Building A Residential House
Home Decoration At Its Best: 7 Key Ideas To Recreate Your Home
Making Your Home Strong From Within: Tips To Build A Sturdy House
Being a gardener, I know Spinach is one of the most popular and versatile leafy greens you can grow in your garden. It's rich in vitamins, minerals, antioxidants, and fiber and can be used in salads, soups, smoothies, and more. But how do you harvest spinach the right way so that you can enjoy it fresh and crisp and make it last longer?
In this article, I will show you how to harvest spinach, so it keeps growing. I will also explain how to harvest spinach seeds, how to store and freeze spinach, and the health benefits of spinach. Additionally, I will also share some tips and tricks on how to grow spinach successfully and how to use it in delicious recipes.
Whether you're a beginner or an expert gardener, this guide will help you make the most of your spinach harvest. So, keep on reading till the end to learn more, and thank me later!
Driven by Benefits: Why are People Growing Spinach?
Spinach is not only tasty but also healthy. It's low in calories and high in fiber, vitamins, minerals, antioxidants, and phytochemicals. It can help improve various aspects of health, such as:
Eye Health
Spinach is rich in lutein and zeaxanthin. These are carotenoids that protect the eyes from age-related macular degeneration, cataracts, and glaucoma. Spinach also contains vitamin A, which is essential for vision and eye health.
Blood Pressure
Spinach is high in potassium, magnesium, and nitrates, which are compounds that help lower blood pressure and relax the blood vessels. Spinach also contains folate. This helps prevent homocysteine, an amino acid that can damage the blood vessels and increase the risk of cardiovascular diseases.
Bone Health
Spinach is a good source of calcium, magnesium, and vitamin K, which are important for bone health and density. Spinach also contains vitamin C, which helps the body absorb calcium and produce collagen, a protein that strengthens the bones and connective tissues.
Immune System
Spinach is loaded with vitamin C, which is a powerful antioxidant that boosts the immune system and fights off infections and inflammation. Spinach also contains vitamin E, which enhances the immune response and protects the cells from oxidative stress.
Digestion
Spinach is high in fiber, which helps regulate digestion and prevent constipation, diarrhea, and bloating. Fiber also feeds the beneficial bacteria in the gut. This improves the digestion and absorption of nutrients. It also supports the immune system.
Skin And Hair
Spinach is rich in vitamins A, C, E, and iron, which are essential for healthy skin and hair. Vitamin A helps maintain the moisture and elasticity of the skin and prevents acne and wrinkles. Vitamin C helps produce collagen, which keeps the skin firm and smooth.
On the other hand, vitamin E helps protect the skin from sun damage and aging. Iron helps deliver oxygen to the skin and hair cells and prevents anemia, which can cause hair loss and pale skin.
How To Harvest Spinach So It Keeps Growing
One of the best things about spinach is that it's a cut-and-come-again crop. This means you can harvest it multiple times throughout the season if you do it correctly. Here are the steps to follow to harvest spinach so it keeps growing:
Choose the right time to harvest
The best time to harvest spinach is when the leaves are young and tender. This is usually about 40 to 50 days after planting. You can also harvest baby spinach leaves earlier, about 25 to 30 days after planting.
You should harvest spinach before it starts to bolt. This is when it produces flowers and seeds and becomes bitter and tough. Spinach usually bolts when the days get longer and warmer. So, you should harvest it more frequently in the spring and summer.
Use a sharp knife or scissors to cut the leaves
You can either cut the whole plant at the base, leaving about an inch of stem, or cut individual leaves from the outer part of the plant, leaving the inner leaves to grow.
You should cut the leaves about an inch above the soil, to avoid damaging the crown and the roots. Moreover, you should also avoid cutting too many leaves from one plant, as this will weaken the plant and reduce the yield. A good rule of thumb is to leave at least half of the leaves on each plant.
Wash and dry the leaves
You should wash the spinach leaves as soon as possible after harvesting, to remove any dirt, bugs, or pesticides. You can use a colander or a salad spinner to rinse the leaves under cold water. After this, pat them dry with a paper towel or a cloth. Additionally, you should remove any damaged or yellow leaves, and trim any tough stems.
Enjoy or store the leaves
You can eat the spinach leaves fresh, or store them in the refrigerator or freezer for later use. We'll explain how to store and freeze spinach in the next sections.
How to Harvest Spinach Seeds?
If you want to save some spinach seeds for the next season or share them with your friends and family, you must let some spinach plants bolt and produce flowers and seeds. Here are the steps to follow to harvest spinach seeds:
Select the best plants to save seeds from
It would be best if you chose healthy, vigorous, and productive plants with the desired characteristics. Some of these are the flavor, size, color, and disease resistance.
Apart from these, you should also avoid saving seeds from hybrid varieties, as they will not produce true-to-type plants. You should look for open-pollinated or heirloom varieties, which will produce plants that are similar to the parent plants.
Isolate the plants to prevent cross-pollination
Spinach is a wind-pollinated crop, which means that it can cross-pollinate with other spinach plants or related plants, such as beets, chard, or quinoa, within a distance of up to a mile. This can result in seeds that have different traits than the parent plants. To prevent cross-pollination, you should isolate the plants you want to save seeds from, by either planting them far away from other spinach plants or related plants, or covering them with a mesh bag or a cage.
Let the plants flower and set seeds
You should let the plants bolt and produce flowers, which are small and yellow, and then wait for the seeds to form and mature. The seeds are round and black, and they are enclosed in a spiny husk. The seeds are ready to harvest when they are dry and hard, and the husks are brown and brittle, usually about four to six weeks after flowering.
Harvest and clean the seeds
You should cut the seed stalks and place them in a paper bag or a bucket, and then shake or rub them to release the seeds from the husks.
Furthermore, you should then winnow the seeds, which separates the seeds from the chaff or the husks and other debris. You can do this by blowing or fanning the seeds or using a screen or a sieve. You should end up with clean and shiny seeds.
Store the seeds
It would be best if you stored the spinach seeds in a cool, dry, and dark place, such as a jar, a tin, or a plastic bag. You should also label the seeds with the variety name and the date of harvest. Besides, you can store the spinach seeds for up to five years, but they will germinate better if you use them within two to three years.
How to Store and Freeze Spinach?
Spinach is best eaten fresh, as it loses its flavor and texture quickly. However, if you have a large harvest, or you want to preserve spinach for later use, you can store or freeze it. Here are the best ways to store and freeze spinach:
Store spinach in the refrigerator
You can store fresh spinach in the refrigerator for up to a week if you keep it in a perforated plastic bag or a container with a lid. However, you should avoid washing the spinach before storing it, as this will make it wilt faster. You should wash the spinach just before using it.
Freeze spinach raw
You can freeze raw spinach without blanching it, which is a process of briefly cooking and cooling the vegetables to stop the enzyme activity that causes them to spoil. However, freezing raw spinach will result in a mushy and watery texture and a loss of flavor and nutrients. To freeze raw spinach, you should wash and dry the leaves, and then pack them in freezer bags or containers, leaving some space for expansion. You can freeze raw spinach for up to six months, and use it in smoothies, soups, or casseroles.
Freeze spinach blanched
You can freeze blanched spinach, which will retain its color, texture, flavor, and nutrients better than raw spinach. To freeze blanched spinach, you should wash and trim the leaves, and then blanch them in boiling water for one to two minutes, depending on the size of the leaves.
You should then drain and cool the leaves, and squeeze out the excess water. You can then pack the leaves in freezer bags or containers, leaving some space for expansion. Furthermore, you can freeze blanched spinach for up to a year, and use it in salads, sandwiches, or quiches.
Things to Keep in Mind: How to Grow Spinach Successfully?
Spinach is a cool-season crop that grows best in the spring and fall, when the temperatures are between 40°F and 75°F. It can tolerate light frost but not heat or drought. Spinach also prefers moist, fertile, and well-drained soil with a pH of 6.0 to 7.0. Here are some tips and tricks on how to grow spinach successfully:
Choose the right variety
There are many types of spinach, but the most common varieties are savoy, semi-savoy, and flat-leafed. Savoy spinach has dark green, crinkly leaves that are great for salads and wraps. Semi-savoy spinach has slightly curled leaves that are more resistant to diseases and bolting. Flat-leafed spinach has smooth, broad leaves that are easy to clean and process. You can also choose spinach varieties based on their maturity time, bolt resistance, flavor, and color. Bloomsdale, Tyee, Space, Melody, and Red Kitten are popular spinach varieties.
Sow the seeds
You can sow spinach seeds directly in the garden, or start them indoors and transplant them later. The best time to sow spinach seeds is in early spring, as soon as the soil can be worked, or in late summer or early fall, for a winter harvest. You can also sow spinach seeds every two to three weeks, for a continuous harvest.
Besides this, you should sow the seeds about half an inch deep, and one to two inches apart, in rows that are 12 to 18 inches apart. You should water the seeds well, and keep the soil moist until they germinate, which usually takes seven to 14 days.
Thin the seedlings
When the spinach seedlings have two to four true leaves, you should thin them to avoid overcrowding and competition. You should leave about four to six inches of space between each plant, and eat or transplant the thinned seedlings. You should also weed the area around the spinach plants regularly, to prevent pests and diseases.
Harvest the leaves
Depending on the variety, you can start harvesting spinach leaves when they are big enough to eat, usually about 25 to 50 days after sowing. You can either harvest the whole plant or pick individual leaves from the outer part of the plant, leaving the inner leaves to grow.
Additionally, you should harvest spinach in the morning, when the leaves are crisp and fresh, and before the sun gets too hot. You should also harvest spinach before it starts to bolt, which is when it produces flowers and seeds, and becomes bitter and tough.
How to Use Spinach in Different Cuisines and Recipes?
Spinach is a versatile vegetable that can be used in many different cuisines and recipes. Whether you want to make a salad, a soup, a pasta, a pie, or a smoothie, spinach can add flavor, color, and nutrition to your dish. Here are some examples of how to use spinach in different cuisines and recipes:
Mediterranean cuisine
Spinach is a staple ingredient in many Mediterranean dishes, such as spanakopita, a Greek pie made with spinach and feta cheese wrapped in phyllo dough, or spinach and chickpea stew, a Moroccan dish flavored with cumin, paprika, and lemon juice. You can also make a simple spinach salad with tomatoes, olives, and feta cheese, dressed with olive oil and vinegar.
Asian cuisine
Spinach is widely used in Asian cuisine, especially in Chinese, Japanese, and Indian dishes. You can make a Chinese spinach and tofu stir-fry with garlic, ginger, soy sauce, and sesame oil, or a Japanese spinach and sesame salad with rice vinegar, sugar, and soy sauce. You can also make an Indian spinach and potato curry with onion, garlic, ginger, turmeric, and garam masala, or a spinach and paneer cheese dish with cream, tomato, and fenugreek.
Italian cuisine
Spinach is a common ingredient in Italian cuisine, especially in pasta, pizza, and lasagna. You can make a spinach and ricotta ravioli with butter and sage sauce, or a spinach and mushroom pizza with mozzarella and parmesan cheese. You can also make a spinach and cheese lasagna with béchamel sauce, or a spinach and artichoke dip with cream cheese and sour cream.
American cuisine
Spinach is also popular in American cuisine, especially salads, sandwiches, and casseroles. You can make a spinach and strawberry salad with almonds and poppy seed dressing or a spinach and bacon sandwich with mayonnaise and mustard. You can also make a spinach and cheese casserole with eggs, milk, and breadcrumbs, or a spinach and artichoke quiche with pie crust and cheddar cheese.
Wrapping It Up!
Spinach is a wonderful vegetable that you can harvest, store, and use in various ways. It's easy to grow, harvest, and store spinach, as long as you follow some simple steps and tips. It's also healthy, delicious, and versatile, as you can use it in many different cuisines and recipes. Spinach is a green treasure that you don't want to miss.
If you want to know about how to harvest spinach, I hope that this blog has been of help to you. If there are any other queries related to the same, please feel free to let me know. All that you need to do is scroll down till you reach the bottom of the page. Then, leave your comments and suggestions in the box below. And I will be ether to answer them all for you.
Read Also:
How to Harvest Lettuce: A Step-by-Step Guide for Fresh and Crispy Salads
Everything You Need To Know About Harvesting Basil!
Asparagus 101: When, How, And How Often To Harvest?