Night vs. Day Moisturisers: What’s The Difference And Why It Matters

Published on: 22 July 2024 Last Updated on: 12 September 2024
Night And Day Moisturisers

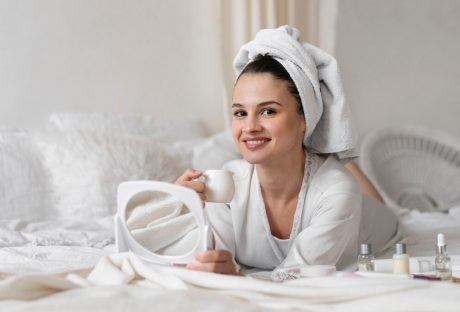
We know that moisturizing our skin is very necessary. It helps to keep the skin healthy and radiant. However, there are many different moisturizers available on the market. So, choosing the one often makes you feel overwhelmed.

The night and day moisturisers are formulated differently. Each type has its purpose to serve. 

So, I know you often feel confused about which one to choose or why using different moisturizers at different times of the day is necessary.  

Thus, it is essential to understand their different purposes and their optimal results to maintain healthy and radiant skin. 

The Role Of Day Moisturisers

Role Of Day Moisturisers

The formulation of a day moisturizer aims to provide better hydration to your skin. It also provides a shield from the daily environmental aggressors.  

The day moisturizers generally contain SPF, which protects your skin from UV rays. Your bare skin is exposed to UV rays, which can cause massive damage to your skin. These UV rays can cause premature aging, and they can also increase the risk of skin cancer.  

Additionally, the day moisturizers are very lightweight. Its quick absorption nature ensures that your skin feels comfortable all day long. It blends into your skin so seamlessly that you can quickly wear your choice of makeup without any issues. 

Other than SPF components, your day moisturizer also contains powerful antioxidants such as Vitamin C and Vitamin E. These antioxidants help neutralize all kinds of free radicals generated from sunlight and pollution. 

Moreover, these antioxidants also prevent oxidative stress and damage to your skin. 

For example, a day moisturizer doesn’t only limit itself to hydrating your skin. It also helps to create a barrier on your skin, making it strong and resilient against all kinds of daily stressors. 

This dual action is necessary to provide youth with a better complexion and prevent all the early signs of aging. 

The Role Of Night Moisturisers

Role Of Night Moisturisers

Nighttime is when your skin goes into repair mode. During sleep, the blood flow in your skin increases, and it starts to rebuild its collagen while repairing the damage from UV exposure. It also helps in reducing wrinkles and age spots. 

Night moisturizers are specifically designed to support this natural repair process.

These moisturizers are more expensive and thicker than the daytime moisturizers. Moreover, these also provide deep hydration that helps to rejuvenate your skin overnight.  

They often contain three active ingredients, such as 

  • Retinol, 
  • Peptides, and 
  • Hyaluronic acid. 

Retinol helps in cell turnover and collagen production; peptides strengthen the skin. On the other hand, hyaluronic acid draws moisture into the skin, ensuring you wake up with a plump and rejuvenated complexion.

Unlike day moisturizers, night creams do not contain SPF – this absence allows them to focus on repair and hydration without sun protection. 

The lack of SPF also means these products can deliver higher concentrations of active ingredients that might make the skin more sensitive to sunlight.

Day And Night Moisturizer-Why It Matters

Using the proper moisturizer at the right time is critical to maintaining healthy, balanced skin. 

A day moisturizer protects and prepares your skin for environmental challenges, while a night moisturizer aids in its natural repair processes. 

Neglecting to use these specialized products can lead to imbalances such as dryness, premature aging, and increased sensitivity to environmental damage.

Moreover, properly using these moisturizers can enhance the effectiveness of other skincare products. 

For example, using a night cream with retinol will prepare your skin to better absorb the benefits of your morning Vitamin C serum, creating a synergistic effect that boosts your overall skincare routine.

Incorporating day and night moisturizers into your skincare regimen is essential for achieving and maintaining optimal skin health.

By understanding and utilizing the distinct benefits of each, you can protect your skin during the day and support its natural repair processes at night. 

For those looking to elevate their skincare routine with high-quality products, consider exploring options from Solskin Beauty Labs – this range of expertly formulated day and night moisturizers can help you achieve radiant, healthy skin around the clock. 

Invest in your skin today and let the combined power of day and night moisturizer work their magic… your skin will thank you for it!

The Facts That You Should Know 

daytime and nighttime moisturizer

The concept of daytime moisturizer and nighttime moisturizer isn’t just some kind of gimmick. They contain different skincare products that can cause you different benefits. The day creams mainly focus on the following: 

  • Brightening your skin complexion, 
  • Maintaining the proper hydration of your skin, 
  • Protecting your skin from sunlight and other environmental damage.

On the other hand, nighttime creams are thicker in kind. They specifically help to:

  • Deliver more hydration to your skin, 
  • Reduce all kinds of damage, 
  • Soothes irritation if you are experiencing any. 

But how to understand which facial cream will suit you well? In that case, you have to understand your skin type. You can also consult with a dermatologist to understand your skin type. 

The general rule is that you must choose creams that are noncomedogenic in nature. But, if you have sensitive skin then you must select your cream carefully.

It is good to add these products to your skincare habits when you are in your mid to late 20s. That way, you get the full benefit of the antiaging properties, and your face will look much younger.  

Wrapping It Up! 

So, the question is, do you need two different types of creams in your skincare routine? It is unnecessary, but again, it comes down to your preferences and necessities. 

Firstly, you will have to learn what exactly your skin wants. What are your skin concerns? And how tight are you on your budget? 

Perhaps your skin is delicate when you apply the same cream twice daily. Once you understand that, deciding whether you need two different creams at different times becomes straightforward! 

As you get older, you tend to deal with more skin issues. Your skin can thrive with different ingredients, from the other ingredients of day and night moisturizer. 

Ultimately, it is all about meeting your skin needs without compromising your skin’s radiance and better health.

Read Also:

Content Rally wrapped around an online publication where you can publish your own intellectuals. It is a publishing platform designed to make great stories by content creators. This is your era, your place to be online. So come forward share your views, thoughts and ideas via Content Rally.

View all posts

Leave a Reply

Your email address will not be published. Required fields are marked *

Related

Classy Makeup

Simple But Classy Look Make-up

If you're looking for a simple but classy makeup look, there are a few steps to follow that will help you achieve just that. Whether you want to adopt a basic and elegant look for a special occasion, such as an engagement, wedding, reunion, or another occasion, there are certain guidelines that will help you achieve a sophisticated look for almost any event. Here are some basics to get you started. In the following section, we speak to leading experts at the Paris Lash Academy and ask them about the best simple and classy make-up looks that you can opt for. Paris Lash Academy offers various eyelash extensions that can complement your looks. Simple But Classy Makeup Look: Makeup Brushes: Before you get started on your simple but classy makeup routine, be sure and gather a set of quality makeup brushes to speed up the process. You'll likely need foundation, blush, eyelid, powder, and contouring brushes. You might also want to think about including a few beauty blenders, particularly for foundation, blush, and contour application. You want a smooth application and the right brushes and blenders can provide that. Prepping Skin: In order for makeup to blend as it should, cleanse your skin to create a slight exfoliating effect before any makeup is applied. Once cleansed, moisturize the face and apply a face and eyelid primer. Primer applications should smooth and preserve any makeup that is applied to those areas. Evening out Skin Tone: If the skin is blotchy or uneven, the application of a sheer tinted moisturizer will help to smooth and even out skin tone. Tinted moisturizers can also add warmth to the complexion. You don't have to go for an exact skin match with a sheer tint as you can still bring an added intensity or glow to the skin. If your skin is extremely oily, you'll probably want to skip the tinted moisturizer step to avoid oil buildup. Concealing Under-Eye Circles and Blemishes: Evening out skin tone also means including and using a good concealer that is rich in pigment and staying power. You want to cover dark under-eye circles and other blemishes. Using too much will accentuate problems, so simply use a short swiping motion under the eye. When dispensing the concealer, place it in a triangular shape under the eye. Blend the area with your finger or a beauty blender. For blemishes, dab the actual spot and blend. Continue to do the same action if added coverage is necessary. You want the concealer to be at least one to two shades lighter than your skin tone. Other spots to highlight include going up the bridge of the nose and on up to the forehead. Foundation: The right foundation is the piece de resistance of any makeup routine. You want to find a shade that is closest to your actual skin tone and decide whether a liquid or cream is suitable for your skin type. For a more flawless look, use a beauty blender to apply the foundation. It will definitely deliver a smoother and more complete coverage. Blend the foundation on the face and continue down onto the neck area. If necessary, use your concealer again to cover any blemishes or dark areas, or to add further accents. Contouring/Highlighting: Once the foundation phase is complete, use a contour brush to apply contour powder or cream under the apple areas of the cheeks. Also, apply that same contour to the forehead area and both sides of the jaw. In order to add more warmth, apply a bronzer to those same areas. Blush Color and Highlighter: For added color, choose a blush color for a simple but classy makeup look. You want to think about using cream blushes in warm peaches and pinks so that skin is given a natural and subtle look. Forego cool pinks as they add too much drama. Natural cheek colors can convey a blushing bride kind of appearance that can enhance just about any luvbridal wedding ensemble as well as any other special occasion or event. Use a blender or brush to apply blush to the apples of the cheeks. For more cheek and face enhancement, add a non-sparkly highlighter to the tip of the nose and cheek areas and anywhere else where the sun would normally hit. Again, use a beauty blender to smooth out both the blush and highlighter to create a more subtle and simple effect. Eye Shadow, Liner, Mascara, and Eye Pencils: Soft browns are the best eyeshadow colors to use to enhance the eye area and its shape. Select a shade that is a bit darker than your skin. Brush and blend the shadow into the creases of the eye as well as on the lower lashes. Keep it soft with no hard lines. Add a neutral creamy color shadow at the inner corners of the eyes as well as at the center of the lids, and on the brow bones. At the outer corners of the eyes, use a darker shade to bring a further dimension to the eyes. Liner - Apply a dark brown or black liner to the eyelids. Liquid and gel liners give a longer, starker and lasting effect while pencils usually bring a softer and smoother look. Mascara - provides a finishing touch to the eye area. Apply several coats to the top lashes. For lighter lashes uses brown mascara and if you have darker lashes, use brown or black. Avoid mascara products that produce spidery lengths to lashes, as they can detract from a more natural look. Mascara can also be used on your bottom lashes by applying a bit of mascara from the wand and placing it right at the roots of the bottom lashes using a small eye brush to dot in the mascara. Eyebrow pencil/gel - color choices should be one or two shades on the darker side for blonde or light brown hair, while one or two shades lighter for dark or black hair. You want your brows to be natural but you also want them to be defined. Use an eyebrow template if you are not sure of how to color in your brows or simply need a guideline for correct color placement. Think soft and subtle, yet defined. Lips: You want to enhance your lips with a pretty lasting tint rather than an outlandish and garish color. Choose a shade that actually matches your true lip color and pat or press the color into the lips. Go to the center of the lips first and blend the color in an outward motion. Darker berry colors and reds are flattering in a matte tint as they do bring emphasis to the lips without exaggerating them. Powder: Maybe you don't require powder to finish your look but if your skin has a tendency to get oily and produces shiny spots, you might want to think about an oil-absorbing powder. Powders that are pressed, silk, airbrushed, translucent, and hydrating are great for completing any look, whether your skin is oily or otherwise. These powders are easy to use as you can just sweep a powder brush across them and buff the skin to create a perfect look, which includes powdering the under-eye area as well. Pores and blemishes are also reduced with the use of this kind of powder, and touch-ups are easy as the buildup is almost nonexistent. Setting or Fixing Spray: Once your makeup is completely done, use a setting or fixing spray to hold your work of art in place. Whether you choose it in spray, powder, or mist form, it is designed to maintain your makeup for a number of hours to all day. It helps you avoid those frequent powder room touch-ups that are annoying and a hassle. There are specific types to use for both oily and dry skin. Creating a simple but classy makeup look can be fun and enhancing and if you have a few steps to follow, the process isn't then difficult. Take a look at the steps here and give yourself a simple but classy makeup makeover. Just remember not to overdo it. A Simple Professional Makeup Routine for Everyday   Sometimes all we need is simple classy makeup to put yourself together before your office.  Creating a polished look for the office doesn’t have to be time-consuming. With a few straightforward steps, you can achieve a clean and classy makeup look that’s ideal for work.  Start with a Clean Slate  Your face is the canvas, and a clean slate is the beginning step of a well-set makeup.  Therefore, begin by thoroughly cleansing your face to remove any impurities.   Apply a lightweight moisturizer to hydrate your skin, followed by a primer to ensure your makeup lasts throughout the day.  Achieve an Even Complexion  The second step is getting an even complexion. This will be the base of your minimal makeup. Half of the time, getting an even tone can already make you feel put together.  Select a light foundation or BB cream (if you do not want something heavy like foundation) that closely matches your skin tone.   Blend it evenly across your face using a beauty blender or brush, focusing on areas that need extra coverage. For blemishes or dark circles, gently apply concealer and blend it in seamlessly.  Enhance Your Natural Glow  Too much bold makeup can make you stand out in all the wrong ways when you are in the office.  So, if you are in love with the heavy sun-kissed look, it is time to keep that overwhelming rouge down.  Rather, choose a soft pink or peach blush to add a subtle pop of color to your cheeks.   Lightly contour under your cheekbones and along your hairline with a matte bronzer. Finish by applying a touch of highlighter to the high points of your face, such as the tops of your cheeks and the bridge of your nose.  Subtly Define Your Eyes  Again, do not go for a bold eye look. Reserve them for the evenings. But here is how you can define them with the help of counting.  Go for neutral eyeshadow shades like soft browns or taupe. Apply a lighter shade across your lids and blend a slightly darker shade into the crease for depth. Use brown or black eyeliner to line your upper lash line and finish with a coat of mascara.  Perfect Your Brows  Sometimes, all you need is a well-set brow, and your makeup and your face have an automatic symmetry.  Fill in any sparse areas of your brows with a brow pencil or powder, maintaining a natural look. Follow the natural shape of your brows without making them too bold.  Finish with a Soft Lip Shade  Finally, it is time to seal the makeup with lips.  For a natural and professional look, you can opt for a simple lip gloss or balm. Try not to go overboard with the clear gloss, as it can cheapen your look at times.  Select a lip color that enhances your natural lip tone, such as a nude, pink, or soft berry shade.   Apply it evenly, and if you like, add a layer of gloss for a polished finish.  Read Also: 7 Tips For People With Hypersensitive Skin Expert Doctor’s Treatments For Cystic Acne 7 Anti-Aging Tricks And Tips To Get Youthful Skin Like A Teen Get Part Ready In No Time With These Hair And Makeup Hacks!

READ MOREDetails
Laser Hair Removal

What To Know About Laser Hair Removal Utica NY

What To Know About Laser Hair Removal Utica NY If you’re tired of managing your body hair and you’ve been thinking of ways to permanently remove them, then laser hair removal may be the best option for you. This method can get rid of the fast and thick growing hair you’ve been struggling with. Continue reading this to know all about laser hair removal. 1. How does it work? In the cycle of hair growth, each follicle will have its own cycle, which means that each one of them will not grow at the same time and speed. Laser hair removal targets the follicles when they’re just about to start the anagen phase, which is the active growth phase where the root of the hair is rapidly growing. Laser hair removal completely eradicates the follicle and effectively stops hair growth. The treatment can take several sessions, which are spaced out between four and six weeks to achieve the desired results. Laser hair removal treatments are considered cosmetic procedures that are strictly regulated by the state. Thus, you should make sure that you book a treatment at a licensed cosmetic facility with qualified technicians and the Food and Drug Administration (FDA) approved equipment. If you’re wondering where to find such a facility, then visit the website https://aesyracuse.com for more information. 2. What are the three main types of lasers? Here are some of the most popular types of lasers used in hair removal treatments: Alexandrite: One of the fastest types of lasers, which are commonly used to treat larger areas of the body and patients with light complexions. Diode: This type of laser is effective for both light and dark complexions. Nd: YAG (Neodymium-doped Yttrium Aluminum Garnet): This type utilizes long pulse lasers that are safe for all skin types. However, it’s less effective in patients with fine or light hair. 3. Which areas does laser hair removal work best? Although the treatment can be done on any part of the body where you want to remove hair from, it’s particularly effective on parts such as: Underarms Chin Lip Bikini area 4. Is it safe for someone under medication? As with most skin care treatments, the intake of certain medications should be stopped. In the case of laser hair removal, photosensitive medications must be discontinued one week before treatment. For example, if you’re under antibiotic medication for an infection, it might be best for you to reschedule your treatment as most antibiotics are photosensitive. Additionally, you should avoid using skin care products that have strong, active ingredients such as alpha hydroxy acids and retinoids. These ingredients will increase your skin cell turnover and will make your skin vulnerable to irritation. It’s best to consult your doctor first and ask if your current medication can have adverse effects on your treatment. 5. How many treatments will you need? The number of treatments required will vary for each individual, as factors such as skin complexion and hair color can affect the effectiveness of the treatment. Laser hair removal treatments work best when your hair is still in its anagen phase, and different parts of your body will have different hair growth rates. This means that treatment can be shorter or longer depending on which body part, and it can average from six to eight treatments. 6. Should you attend all the sessions? It is essential that you complete all the treatment sessions as per your doctor’s advice. Don’t be under the impression that once your hair growth slows down, further treatments will not be necessary, as this can negatively impact the effectiveness of the laser hair removal. 7. Will it be painful? Laser hair removal is practically painless, as most treatments will include numbing of the skin for added comfort. However, patients will still feel a warm and light pinching. 8. Will your monthly period affect the treatment? Unlike waxing, your monthly period will not have any adverse effects on laser hair removal. Keep in mind that treatment schedules should be strictly followed for it to be effective. However, if you’re treating your bikini area while on your period, it’s advisable that you use a tampon. 9. Should you shave before the appointment? Shaving the area that you want to treat before the treatment is necessary for the laser to penetrate the roots of your hair. However, you should avoid waxing, tweezing, and bleaching your hair at least a month before treatment. Closing thoughts: Now that you’ve read most of the things you should know about laser hair removal, you should be all set and ready for your first treatment session. Also, keep in mind that you should find a doctor that you’re comfortable working with to make your experience even better and to get the best results out of your treatment. Read Also: Top 7 Superfoods For Healthy Skin And Hair Dore Aesthetics: Proven And Safe Acne Treatment  

READ MOREDetails
Hypersensitive Skin

7 Tips for People with Hypersensitive Skin

Maintaining healthy and beautiful skin is not that easy especially for women who go through redness, rashes, and irritation on their skin frequently. However, there is no magic pill that can help you get rid of your sensitive skin. ll of us nowadays, however, want to focus on what we can do to look beautiful. The tips listed on SLSB can aid and advise you to help you achieve the results you desire. Whether that's making your skin more glowing or softer, there's a solution for everything. But we have compiled a list of skincare ideas that can surely aid in minimizing your problem. So follow our tips and have irritation-free skin. 1. A Good Wash: Women often go to bed without washing their face after a hectic day. If you experience pimple or acne frequently maybe this is one of the reasons . Daily your skin contacts with pollution, gasses, and chemicals that can damage your skin. Secondly, women daily use makeup items that are packed with chemicals and some of them are hazardous to your skin if applied for a longer time. Other than this covering skin with makeup fills pores and skin is not able to breathe properly thus results in skin disease. Therefore, wash your face at night with a mild cleanser to washout these elements and avoid any skin breakout issues. 2. Exfoliation: People usually take cleansing and moisturizing skin as a basic skincare routine. However, exfoliation is yet another important step that you must add into your basic skincare regime. Our skin cells live for 28 days and once they are dead the dirt, debris and bacteria easily settles down on them and cause skin irritation. Therefore, exfoliation is required to remove dead skin cells and to bring healthy and new skin to the surface. In addition to this, exfoliation increases blood circulation making sure that skin gets nourished from within. Exfoliation also minimizes pores which help in avoiding breakouts. If you have hypersensitive skin exfoliate your once or twice a month. 3. Using Natural Products:   Finding a suitable product for your skin becomes a big task sometimes especially if you have sensitive skin. Skin products that are readily available in the market are packed with chemicals that can risk your skin's health. Therefore, instead of buying these products find home remedies for your skincare. You can use different ingredients available in your pantry and refrigerator to make different DIY masks. You can make skin scrub by mixing sugar with coconut oil or bee-wax or grounded oats with a base of honey, coffee can also apply with cream to revitalize your skin, tomatoes can be rub on skin to kill bacteria, green tea bags and olive oil have antiseptic properties that can lead to healthier skin. 4. Moisturize:   Whether your skin is dry, oily or combination keeping it moisturized is important. Facial cleansers strip off important moisture from your skin that leads to excessive secretion of sebum and oil from your skin that can lead to skin breakouts. In addition to this moisturizing, your skin creates a wall between skin and bacteria or dirt to get into your pores, smooths your skin and avoids the skin from drying out. 5. Cleanse and Clean: Always keep your makeup implements clean because they not only have makeup build-in them but also bacteria and debris. Using makeup implements without cleaning means transferring them to your skin which will aid in a breakout. Other than this change your pillowcases, bedsheets, and wash or vacuum tour carpeting once a week or twice a month to avoid skin allergies. 6. Choose Your Makeup Wisely: As I have mentioned prior that makeup is full of chemical and can aid in blemishes, acne, irritation or redness especially if you have hypersensitive skin. Therefore, if you are buying any product for the first time always read the label to get familiar with the ingredients. Other than this always goes for a patch test before applying it to your face if there is no reaction you are good to go with it. In addition to this makeup, industry has evolved and has introduced makeup products specially designed for hyper sensitive skin. These products are the mild formula and known as hypoallergenic, non-cosmogenic or dermatologist recommended makeup products that cause no harm to your skin. 7. Stay Hydrated: Staying hydrated is a tip for healthy skin that requires no extra efforts. One must drink 8 glass of water daily. Water cleanses our body from within and washes out toxins that lead to a healthy body and healthy skin ultimately. Read More: Anti Aging Creams – What To Consider Before You Purchase? Top 4 Natural Combination For You To Eliminate Blackheads (Infographics) Top Simple But Effective Ways To Get Your Eyebrows Thicker When You’re Buying Furs, Get The Best   Jane is a girl who is in love with the beauty and makeup products. She has been blogging for many years and makes great recommendations for those who are looking for the latest beauty and makeup tips. You can read her latest post here.

READ MOREDetails