What Is This Magic Product Salons Are Using? What is Builder Gel?

by

31 December 2024

Fashion

what is builder gel

What is builder gel? It could be your whole personality right now. I mean, that’s the prime function of beauty, though. Most importantly, it can change your nails big time. I just felt everyone should get to know more about it. So, here I am with the details! 

Firstly, it is a magic product, no doubt. Most licensed nail teachers and professional salon experts say this viscose polish strengthens your nails. The nails can grow without breaking. In technical terms, we call this- building your apex. Some refer to builder gel extensions as adding structure or creating structured overlays. 

What is an apex?

What is an apex_

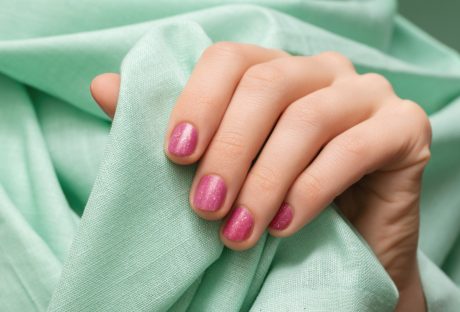
You now know what builder gel is. But what is an apex? In the terminology of nail care, the apex is the highest point of nail extensions. It is added to your nail to give it strength and balance it simultaneously. 

To understand an apex better, you can think of it as the arch or dream curve of the nail. It is the thickest segment of your nail and the most challenging part of your nail palette. Once you get the apex right, you can pull off any of the nail designs 2024.

How Do You Apply Builder Gel?
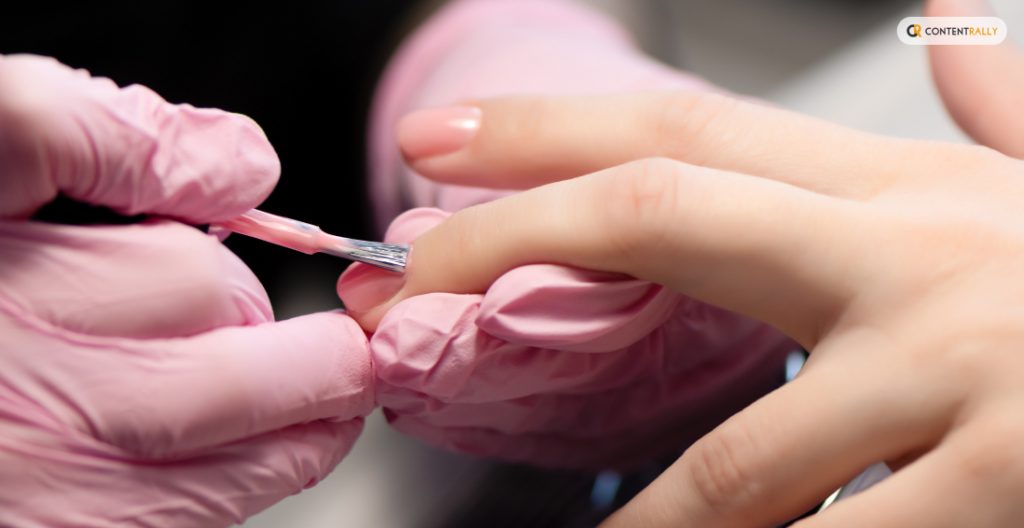
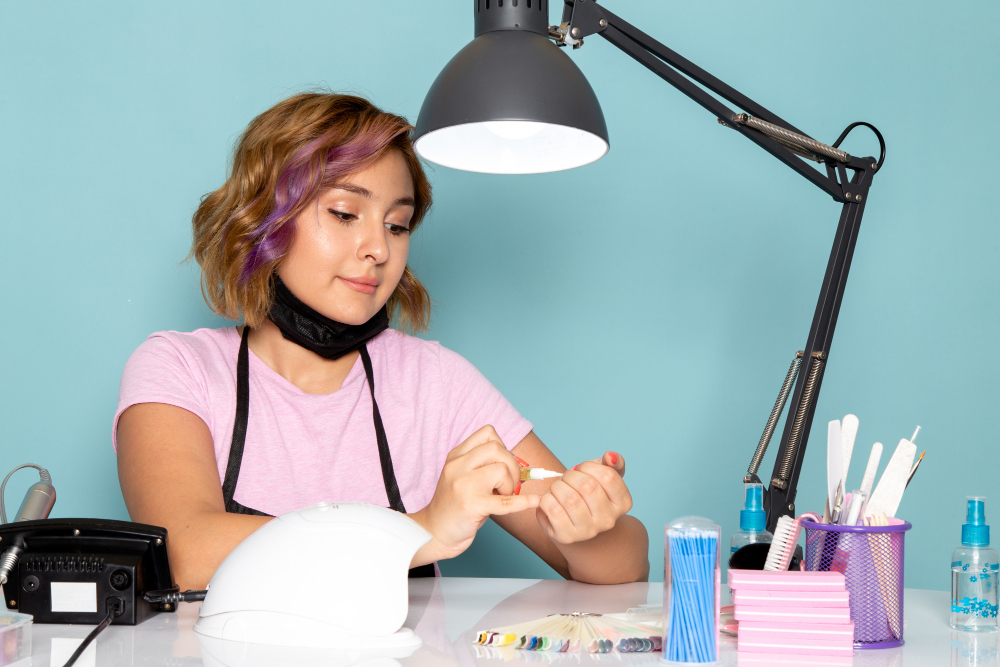
How Do You Apply Builder Gel_

Don’t confuse it with the application of nail polish. Firstly, we apply nail polish in vertical strokes. However, builder gel is much more viscose. Hence, we use horizontal strokes while applying it. 

As a result, the policy expands across the whole nail. There are three types of builder gel. These are hard, medium, and soft gels. If you’re using the hard gel, then use a separate brush for the same. 
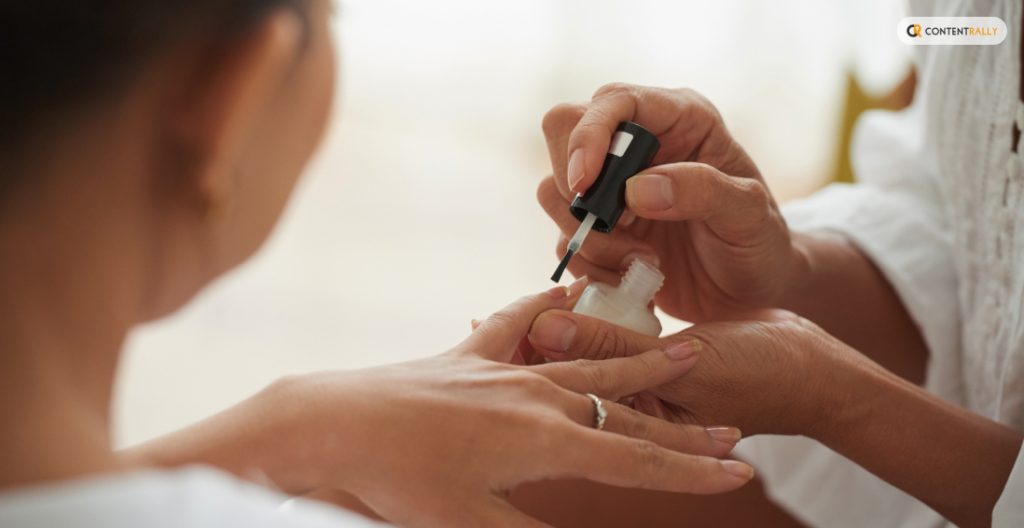
Let’s clarify another confusion here. Some builder gels need you to apply a base coat first and then apply the gel on the top. However, builder gels manufactured by brands like Halo need nothing. 

Once applied correctly, the hard gel helps you keep your manicure safe for a long span. However, some experts say using a rubber-based base coat is always better. It helps you to achieve the correct adhesion and take good care of your nails. 

Why does builder gel lift?

Why does builder gel lift_

There are many reasons why the builder gel coating can lift from the nail top. Firstly, you must know that it is not as flexible as the natural nail. Therefore, the gel coat may lift at any time. The same may happen when you don’t apply a base coat to make the natural nail more adhesive. 

Generally, we call the lifting of gel- “pocket lifting.” The center of the enhanced nail lifts away from your natural nail. Well, we understand that the builder gel coat may ward off any time. 

But we apply it to give our nails strength, shape, and safety. So, we must know why the nail coating comes off. Otherwise, our builder gel treatments would be in vain. Here are some of the main reasons I’ve noticed over the years: 

Inaccurate nail preparation

You can’t achieve proper adhesion if you don’t remove your ail cuticle debris; moreover, not buffing the surface properly leads to the same outcome. Therefore, I suggest using a hydrator properly and avoiding such outcomes especially if you’re into French manicure acrylic nail ideas.

Imperfect application

I’ve always suggested visiting experienced nail experts. They know the proper application techniques. Frail treatments like builder gel applications may go wrong if you don’t know the accurate application technique. 

However, the exact flaws that amateurs make are not properly curing the portions between the layers. The process takes time and patience. 

Poor products 

Are you using cheap or non-compatible gel primer? Even poor topcoats can also cause poor adhesion. Hence, the builder gel coat can be lifted easily. 

Quality of natural nails 

Often, your nails are naturally damaged. Some of the people have fragile natural nail layers. In that case, the nail additions can easily ward off. So, you must apply a good hard gel and a base coat of the right consistency. The same is also important for ombre nail designs 2024.

Poor Curing Quality

Did you use weak UV to cure the gel? It may be one reason your builder gel came off before time. When you don’t apply the UV for long, it makes the polymerization process weaker. As a result, it leads to easy lifting. 

Benefits of Using Builder Gel

Benefits of Using Builder Gel

There are many benefits to using builder gels. By now, you know what builder gel is and its uses. Now, it is time to find out what are the most expected benefits of the builder gel application:

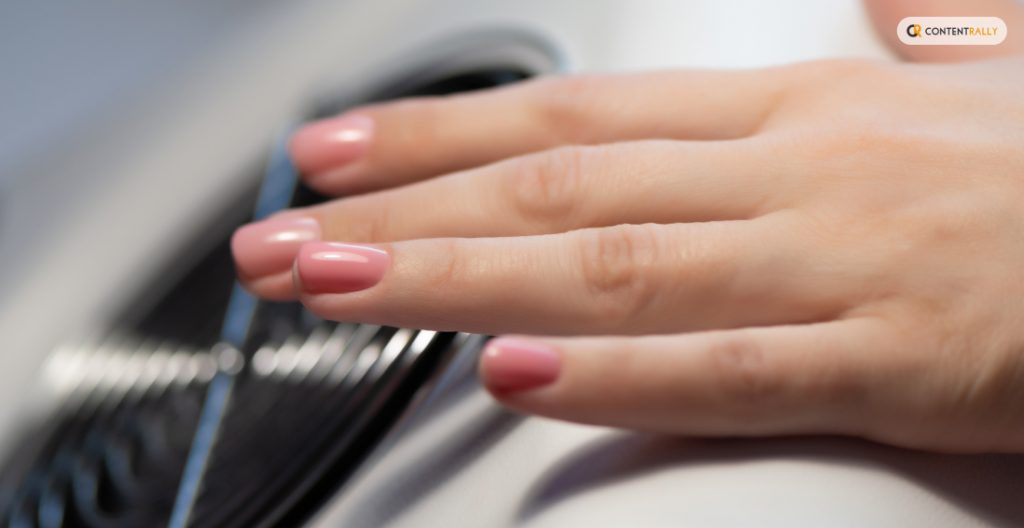
a. strengthening natural nails if your nails are skinny and weak 

b. The nails can grow long, giving your fingers a premium finish 

c. The thickness of your nails also improves when you apply a builder gel finish 

d. Lastly, the builder gel nails become more durable. It can resist weathering, especially during severe winters. 

Builder gels make your nails chip-resistant and much longer lasting. However, you have to make the application right. Remember the tricks I mentioned, and you can enjoy builder gel nails for a long time. 

Application Process

Application Process

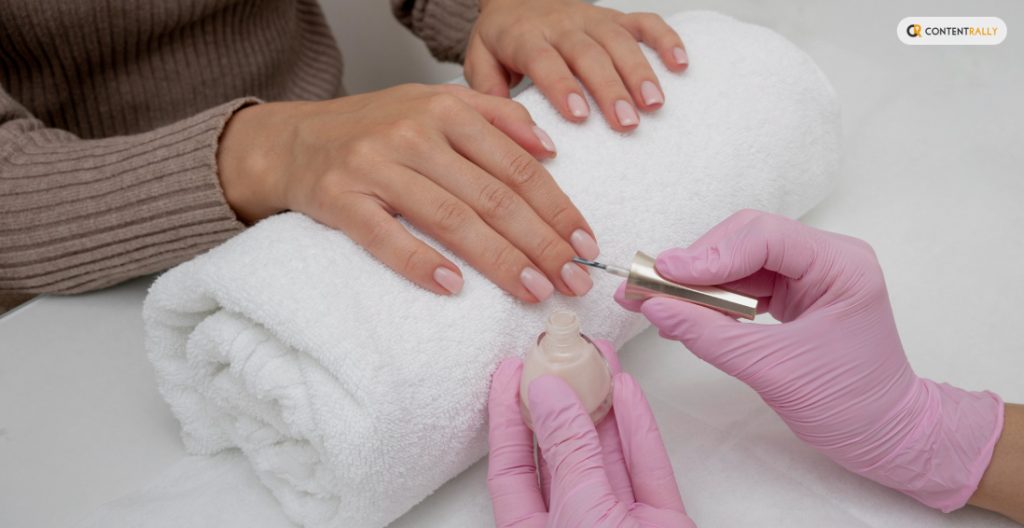
The application process is easy. It suits even beginners well. I suggest just following the steps below and having a safe and durable coat of builder gel. Start with preparing your nails for application. Do that by cleaning your nails and removing any existing polish or debris. After that, you have to do your nail buffing clinically. 

Start with buffing the surface gently. After that, ensure you’ve achieved the right rough texture to help the gel sediment on your nails. 

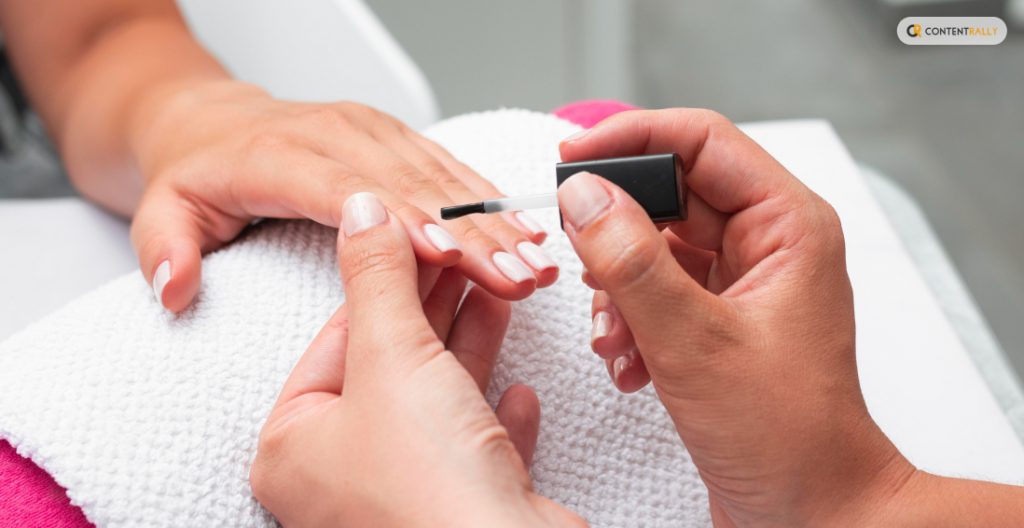
Thirdly, you have to apply builder gel. This is the most critical stop that we were all looking for. First, use only a thin layer of gel on each nail. 

Remember, the gel is much thicker than regular nail paint or nail polish. So, don’t use the builder gel in very high concentrations. At the same time, know about the proper application strokes. 

When you apply builder gel, the strokes go horizontally. However, the nail polish strokes are vertical. Lastly, use a sculpting form to extend it evenly across the edges, too. 

Done the primary step? Now, think about increasing the life of your builder gel nails. You must cure your nails with a UV/LED lamp. It will harden the builder gel layer. To finish off, cover the tips of your nails with a short nail polish layer. 

Always remember you must use a clean brush to remove the remains of the polishes applied beforehand. There might be small traces of polish inside the cuticles. Or on the sidewalls. So, use the brush well. Clean up and then layer the builder gel. 

Maintenance and Removal

Maintaining a builder gel is not challenging. Shrug off the terrors experts may be giving you. You can now easily keep your builder gel nails with some simple tricks: 

1. don’t use any harsh chemicals on the nails. 

2. Most importantly, don’t soak your nails in water for a prolonged time. It is enough to ward off adhesion. At least avoid doing that for the first 3 days after application. 

3. Don’t forget cuticle oil. You must regularly apply cuticle oil to keep the nails hydrated for a long time. In the meantime, the same also keeps your nails healthy. At the same time, cuticle oil can help avoid hangnails or dry and choppy nails. Most importantly, it helps you to avoid cracked cuticles, too. 

The removal of the builder gel coat is equally easy. Just soak the nails in an acetone remover. However, you can also remove the layer manually with a nail file and a cuticle pusher. This is, in fact, a gentler method. Hence it helps you to keep the health of your natural nails intact.

Read Also:

A passionate writer and an avid reader, Soumava is academically inclined and loves writing on topics requiring deep research. Having 3+ years of experience, Soumava also loves writing blogs in other domains, including digital marketing, business, technology, travel, and sports.

View all posts

Leave a Reply

Your email address will not be published. Required fields are marked *

Related

running with flat feet

A Quick but Helpful Guide to Running With Flat Feet

Maybe your doctor's told you running just isn't in your cards. But you really don't believe that. You see the open road or the winding trails and your heart wants to soar. But every time you try, your feet just hurt too much. About 20% of us have flat feet. And doctors are often too quick to dismiss us as invalids. The truth is, you can run with flat feet. Some of the top athletes in the world have flat feet. It just takes some strength work and adaptation. Here's our quick guide to running with flat feet. 1. What Makes a Flat Foot? Flat feet makes it sound like you have platypus feet. This isn't the case. People with flat feet have what we call "fallen arches" or pes planus. Your feet aren't just flapping around like two sheets of paper. We have three arches in each foot. Two on either side of the foot, the inside arch being the most prominent general, and in the very center of the foot. These arches act as natural shock absorbers. When you run, they absorb some of the energy and then spring back, helping you move. When the ligaments and muscles in these arches lose strength, they quit working properly. Sometimes this loss of strength is due to injury sometimes it's hereditary. Either way, collapsing arches aren't how feet are supposed to work. 2. Over-Pronation: If you've been in the running field for very long, you'll have heard two terms: over-pronation and under-pronation. Often, running shoe sites will ask you about your pronation when helping you choose a shoe. Most people with flat feet over-pronate. This means their feet and leg turns inward when they impact the ground. If your quads and posterior tibialis aren't strong enough, you could cause a number of injuries after a time. Ignoring over-pronation could eventually end a running career. 3. Do I Need Arch Support for Flat Feet? The answer to this question is case-based. It probably wouldn't hurt to support the arches in your flat feet. Especially if you're running long miles like a marathoner or ultramarathoner, your feet will get tired and you'll want that extra arch support. But whether you "need" to support your arches really depends on how strong your feet and legs are. You could have a strong tibialis that's just lengthened. This means you still have no arch, but can handle neutral shoes. But that's probably not the case for most people. Unless you're specifically strengthening the right muscles, and you should see a physical therapist to figure out which ones, you're not going to be strong enough for neutral shoes. This means you should wear stability or motion control shoes. These shoes include a bost in the medial arch of dense foam. When you contact the ground, it essentially forces your foot into a natural arch position preventing overpronation. Running With Flat Feet is Totally Possible: If your doctor says that running with flat feet is impossible, get another doctor or see a sports doc. You're going to just lose out on your runner's high if you don't. What have you found to work with flat feet? Let us know in the comments below. Read Also: Top 6 Formal Shoes Under $100 Opt For Comfortable Pair Of Cross Training Shoes For Men Furniture In Utica: Benefits Of Buying Locally-Made Products

READ MOREDetails
Flexible Belt For Men

Picking The Right Flexible Belt For Men

So, you’re out on the market to buy a flexible belt for men! Perhaps, you’ve lost weight and your existing trousers appear loose. Maybe, you’d like to tighten your waist to accentuate your overall body. No matter your intentions, a good-quality belt/strap lets you accomplish your desires. All you should do is pick the right belt meant for males. If you can do that, you’re on your way to enriching your individuality on the go. However, picking the right men’s strap isn’t as simple as it appears. Tips to buy a flexible belt for men Men are usually careless about belts and other small accessories. They rely on the recommendations of the storekeeper when making their choice. Sadly, most buyers end up with poorly-made straps. Some folks finish up with an extremely dull belt. Then others pick a shabby model. All such scenes can be highly undesirable. If you don’t wish to face such scenarios, follow the below advice. Measure Your Waist The selection of the right strap begins with some labor. So, take a paper sheet to finish your legwork. First of all, figure out your waist size. Many folks just head over to the belt outlet and pick the strap they feel is okay. Belts come with adjustments to let you the desired fit. So, the chances of picking an undesirable strap are less. Still, it never hurts to measure your waist size. Also, determine the shape of the belt. Today, men’s straps come in varying shapes. That leaves you with a slew of choices. However, getting prepared avoids blunders when shopping around. Decide Your Liking Besides measurements and shapes, decide what type of belt you like. Your preferences have the say in your selection. So, enlist the colors you wish. The colors of your clothes need consideration here. Check your regular outfits’ colors. Also, enlist your favored designs. Your little bit of creativity and homework will help to make the most out of your shopping. Consider Reliable Brands The accessory market is full of hundreds of vendors and products. Each supplier promises to offer the best item. However, the claims of many suppliers fall short of their tall promises. If you pick a flexible belt for men believing the vendor’s claims, you may wrap up with the wrong product. No smart person would like to end up this way. To avoid such a scenario, check reputable brands only. Popular brands care more about customers. Their products are well made and engineered using top-class materials. Although such items may be priced a bit higher, you enjoy a slew of perks that recoup the cost. Shop Wisely Now you know what to look for in a flexible men’s belt. So, making the right choice gets easy. Just assess the types of belts available at each outlet minutely. Compare the rates and quality care. Also, check the return policy and shipping terms in great detail. Finally, settle with the outlet that offers a not-notch flexible belt for men without reducing the size of your wallet. Read Also: 3 Killer Tips for Buying Men’s Underwear Online Misconceptions about Elevator Shoes for Men Dress for Success: 4 Tips to Look (and Feel) Like a Confident Man

READ MOREDetails
Bomber Jacket

Craft Your Signature Style With A Made-To-Order Bomber Jacket

The bomber jacket has secured its place as a timeless fashion staple. This iconic outerwear silhouette flatters most body types. While you can shop readymade bomber jackets, getting one tailored specifically for you takes the style to the next level. A customized bomber jacket offers unrivaled benefits you won't find off the rack. Read on to understand why you need a bespoke bomber in your wardrobe. Benefits of Custom Bomber Jackets Consider these advantages of ordering a jacket made just for you: Flawless Fit Finding a ready-to-wear jacket with the ideal fit is virtually impossible. Standard sizes simply don't accommodate all body shapes. With a tailored bomber jacket, you provide your precise measurements for an impeccable personalized fit. The jacket contours to your form for a slimming, polished look. Premium Materials Big brands mass produce their jackets using inferior quality materials to save money. The results don't withstand the test of time. Custom makers utilize fine leathers, lining fabrics, and hardware you select for a bomber that looks and feels luxe. Your investment will last for years. Unlimited Personalization You're limited to set styles and designs with readymade pieces. But customization offers endless options to create a one-of-a-kind bomber that represents your essence. Dictate every detail from the cut to fabrics and colors. Add graphics and other unique touches for an ultra-personalized piece. Cost Savings Surprisingly, bespoke jackets often cost less than big-name brands. You skip the brand markup and middlemen costs by ordering directly from the maker. For the same price or better, you get a high-end garment made specially for you instead of mass-produced. It's a win-win. Designing Your Custom Bomber Jacket Creating your own bomber versity jacket is an exciting endeavor. Follow these key steps: Choose a Silhouette Bomber jackets come in varied silhouettes, including: Classic bomber - the signature style with rib-knit collar, cuffs, and waist. Zipper front closure. Aviator - military-esque with loads of pockets and flaps. Snug at collar, cuffs, and waist. Varsity - baseball jacket style with contrast sleeves and knit collar. Snap closures. Cropped - a shorter version ending at the waist. Once you decide on the silhouette, it's time to customize every facet. Select the Fabric Your fabric choice defines the overall look and durability. For leather jackets, consider supple lambskin or rugged cowhide. Luxe suede offers elegance. Cotton canvas and wool fabrics like melton bring casual vibes. Weatherproof nylon is ideal for activities. Choose a high-end material suited to your personal style and needs. Pick the Color The color palette options are endless. For leathers, go classic with black, tan, or navy. Make a statement with a vibrant red, green or pink. Cotton bombers can feature camo prints, color blocking, plaids, and other eye-catching designs. Select colors that flatter you and coordinate with your existing wardrobe. Style the Lining A bomber's lining provides comfort and extra warmth. Consider plush linings like: Silk - lightweight with a subtle sheen Cotton - soft, breathable and moisture-wicking Wool - warm and insulating Fur - luxurious and extremely warm Quilted - puffy padding for maximum warmth Let the lining reflect the climate you live in and the purpose for wearing it. Add Custom Graphics Make your bomber uniquely you with personalized graphics like: Embroidery - add names, words, or logos for a focal point Patches - represent your hobbies, interests, or affiliations Screenprints - choose artistic prints or bold graphics Paint - hand painted details give a one-of-a-kind look Your custom graphics should showcase your personality and passions. Choose Hardware Opt for rugged, quality hardware like: Riri, YKK, or Talon zippers - known for smooth gliding Durable metal snaps - avoid cheap plastic that breaks Heavy duty rivets - reinforce stress points Decorative buckles and grommets - add stylish flair Hardware should be built to last so your jacket stays looking great. Finding a Custom Jacket Company Once your design is set, find a company that: Specializes in made-to-order leather jackets Uses high-end materials Has strong reviews for fit, quality, and service Provides design help and clear communication Offers fair pricing - no hidden fees Ships worldwide A reputable maker delivers on your vision for a showstopper jacket made just for you. FAQs About Bespoke Bomber Jackets Have more questions about ordering a custom bomber? Here are some commonly asked questions: How much does a tailored bomber jacket cost? Prices range from $200 - $500 for leather. Budget around $100+ for cotton or nylon. Complex designs cost more. What's the ordering process? You design the jacket, provide measurements, and approve the final mockup. Production takes 2-4 weeks typically. Can you return a custom jacket? Most don't accept returns on custom orders. Verify all details before approval. How durable are they? With care, expect at least 10 years from quality leather styles. Other fabrics may last around 5 years. How do I determine my size? Provide your exact measurements. Size up or down if between sizes for your preferred fit. Make Your Fashion Statement with a Custom Bomber A made-to-order bomber jacket allows you to craft a look that's uniquely you. With a tailored fit and personalized details, this timeless topper becomes an extension of your own signature style. Invest in a quality bespoke bomber jacket from Craft Leather and unleash your inspiration. This versatile wardrobe essential will become your favorite way to make a bold fashion statement all your own. Read Also: How To Wear A Denim Jacket To Any Occasion How Does Muscle Fit Suit Trousers Elevate Your Formal Look? Kurta Pajama Styles To Amp Up Your Party Look

READ MOREDetails