


THIS is How Much Police Officers Make!!!
When it comes to being a police officer, there is one thing that people think about apart from the danger. And that is: how much do police officers make? You see, the job of a police officer is full of risks. And it is obvious that people who are in this service are financially secure— not only for themselves but also for their families. So, if you are planning to become a police officer, you might be eager to know about the sum, right? Do not worry— I have you covered! So, keep on reading this blog till the end to learn everything about how much money police officers make… How Much do Police Officers Make in 2024? Among society's frontline workers are police officers. They must come forward and take charge even in times of emergency to guarantee that everyone is secure and that law and order are upheld. Additionally, their pay would justify their employment because they prioritize the safety of others above their own. If I tell you that a police officer's beginning pay in the United States of America will be more than $50,000 in 2024, you won't be shocked. You did really read correctly! As of right now, the average base pay for a police officer in the United States is $65,308 annually. But this might be anything from $55,000 to $80,000, depending on the city. Besides, when it comes to the police officer's pay, the year of experience also matters. For example, you may need to sell for an average yearly pay of $55,000 if you have less than a year of experience. However, more than ten years of expertise will almost certainly secure you a salary of above ninety thousand dollars each year. As per the 2023 report of the Bureau of Labor Statistics, USA, the hourly wage of the police officers is as follows: Percentile10%25%50%(Median)75%90%Hourly Wage$ 21.73$ 26.33$ 34.75$ 44.43$ 53.70Annual Wage$ 45,200$ 54,770$ 72,280$ 92,410$ 111,700 Highest Paying Cities Near the US for Police Officers As per Talent.com, Washington is the place where police officers earn the most. To be exact, they earn about $87,176 annually. Here are the top ten places on that list: StateSalariesWashington$87,176California$81,023Minnesota$79,957Connecticut$75,366Oregon$73,530Alaska$70,221Colorado$70,202Wisconsin$67,065Utah$63,829Idaho$63,648 What Does a Police Officer Do? Firstly, what really is the task of a police officer? Well, let me brief you on that! A police officer's responsibilities include both active and administrative work. At the station, a police officer writes reports, confers with witnesses and suspects, obtains warrants, and responds to public queries. Furthermore, a police officer's responsibilities go much beyond the police station. They investigate accidents and crime sites, respond to emergency aid requests, and detain criminals. While on the job, a police officer employs a range of abilities, such as listening, critical thinking, and collaborating with other law enforcement personnel, including peace officers. To diffuse situations, a police officer uses sound judgment and prompt response. In addition, they can be in charge of maintaining order in particular areas to protect locals and property. Is Being a Police Officer a Good Career? You have read about the salary of a police officer, right? There is one last thing you should remember. The national average wage for a police officer in 2020 was $67,600, which was marginally more than the average compensation of $51,960 for all jobs. In 2022, patrol officers made an average salary of $65,790. The highest 25% of earners received $84,520 in that year, while the bottom 25% received $50,210. This merely demonstrates how quickly salaries in this industry have been rising. Thus, this can be a fantastic moment if you want to be a police officer! In addition to the pay, there are a number of other factors that make becoming a police officer a desirable career option. Benefits of Being a Police Officer Here are some of the major benefits of a police officer in the USA: 27 paid time off following six years of employment Unrestricted sick leave with full compensation Choosing health care benefit plans Dental, prescription, and vision coverage Fund for annuities 401K, I.R.A., and Deferred Compensation Plan. 22-year service requirement with optional retirement at half salary $12,000 Variable Supplement Fund each year (after retirement) Outstanding chances for promotion Promotional Opportunities Firstly, promotion exams for the levels of Sergeant, Lieutenant, and Captain are frequently offered by the Department. All positions above Captain and promotion to detective (note: you do not have to be a police officer to be a detective!) are determined by merit. Members have the ability to make much more money at each of these rankings. Military Veterans Secondly, the police department, especially the NYPD, actively recruits veterans because they have a special place in their hearts for those who have served. Additionally, they respect their training and talents, and believe that veterans will bring with them their own managerial experience. Additional benefits available to military veterans include: During the first two years, veterans are eligible to receive benefits under the GI Bill in addition to their pay. Scores from the Police Officer Exam are retained on file indefinitely. Veterans have six months from the time they leave the U.S. Armed Forces to begin the hiring process. Veterans may increase their maximum hiring age by four years or by six years if they served in a time of war or other national disaster. This is only applicable to veterans under 40. Three years of their military service may be redeemed by veterans and utilized toward their retirement from the NYPD. Furthermore, in addition to their vacation time, active reservist officers are entitled to 30 paid military days annually. Work Hours Police officers rarely work regular 9–5 shifts. Their work schedule may be more erratic. For instance, a police officer might work late into the night or early in the morning so they can spend the day with their family. Besides, some firms provide their police officers with a weekly three-day weekend in exchange for four 10-hour workdays. Job Security This is probably one of the most important things that you need to know about. Indeed states that “this career has a 7% projected growth rate, which is about as fast as the average for other careers. If you become a police officer, you're likely to find employment in both rural and urban areas.” Community Additionally, a police officer's actions might affect the community they serve. They seek to lower crime rates while defending the area or the community as a whole. Furthermore, a police officer can prevent criminal activity in the community by apprehending individuals and overseeing investigations. How to Become a Police Officer in 2024? So, if you are happy with what you have learned about the salary of police officers, it is time to learn how to become one. It is 2024 and, obviously, the steps have changed a little. Here are the things that you will have to go through to become a police officer in 2024: 1. Complete Education Firstly, you must have completed at least your high school education or earned a GED in order to apply to the police academy and seek a career as a police officer. Besides, it is occasionally necessary for police officers to have an associate's or bachelor's degree in a relevant discipline, such as criminal justice. This criterion might be waived for those having a military background. 2. Other Requirements Secondly, to work as a police officer, you might need to fulfill additional prerequisites. Among them are: It's possible that you must be at least 18 or 21 years old. You must possess a current driver's license and a spotless driving record because your position may require you to operate a police car. Passing a criminal background check and a medical and physical examination are also required. To make sure you can act and react appropriately under pressure, you must pass a psychological test. 3. Pass Law Enforcement Exam Thirdly, becoming a police officer may also mean passing a law enforcement test. These tests frequently consist of the following: A written exam that includes multiple-choice, short essay, and true/false questions will assess your understanding of the position. These could assess your knowledge of math, grammar, reading comprehension, reasoning, and decision-making in real-world situations. Your general presentation and communication skills will be tested in an oral exam, which could include an interview. You can also be asked to compose an essay to assess your logical reasoning, clear thought expression, and ability to cite relevant information to back up your assertions. 4. Police Academy Training Fourthy, the police academy is a prerequisite for becoming a police officer. The following will be covered in your training: Instruction in the classroom: This will give a comprehensive overview of law enforcement, covering techniques for conducting criminal investigations, laws and regulations, methods for making arrests and holding people, and strategies for public safety and police in general. Developing your abilities: You will hone abilities including communication, negotiation, and stress management during your course. Field training: This will cover administrative responsibilities, firearm safety, defence strategies, vehicle operation, appropriate use of force, and handling hazardous materials. 5. Apply for Jobs. Lastly, you can start applying for positions as a police officer once you've finished your schooling, passed your law enforcement exam, and undergone police academy training. Other job options are available to you, such as investigator, K-9 representative, sheriff and her deputy, officer of the state police, and officer of the highway patrol. Wrapping It Up! In case you wanted to know how much police officers make, I hope that this blog has been helpful to you. If there are any other questions that you might have related to the same, please feel free to let me know. All that you need to do is scroll down until you reach the bottom of the page. Then, leave your comments in the box below. I will be there to answer them all for you! Additional Reading: Tips for Hiring a Private Investigator to Prove Infidelity Want To Become A Detective? Here’s What You Should Do! 51 Blue Collar Jobs/Career Options to Pursue If You Get Laid Off From Big Tech In 2024
READ MOREDetails
Peace Officer VS Police Officer: Understanding Their Roles and Differences!
If you plan to start a law enforcement career, you might likely get torn between a peace officer and a police officer! However, the decision might get easier once you start understanding what they do and their roles. While both patrol at times, they are not the same. And yes, even if both carry guns (licensed, obviously!), their duties are quite different. And yes, these are some of the most dangerous jobs in the world. If you are interested in learning the differences between these two officers' roles and responsibilities, you have reached the right place! Therefore, keep reading this blog until the end to learn more… Peace Officer vs Police Officer: Understanding Their Jobs in Society! Before discussing the differences in terms of their roles, it is important to learn about who they are and what they do. So, without further ado, let us get started! What is a Peace Officer? You might be confused by this term, right? There's no need to! A peace officer is someone with the legal power to uphold the law and maintain peace. This covers a wide range of occupations, including law enforcement positions like sheriffs and state troopers. Besides this, the peace officers are sworn in when they take an oath to perform their duties effectively and adhere to the law. Additionally, they frequently have guns on them and have the authority to make arrests. Their primary objective is to ensure everyone abides by the law and contributes to everyone's safety. They have a heavy-duty to keep people and property safe. What is a Police Officer? A member of the police force is referred to as an officer. Enforcing the law, ensuring everyone abides by the regulations, and keeping people safe are their duties. They operate in certain regions, such as cities or neighborhoods. Officers on patrol for crimes assist in times of need and monitor the streets. They can make an arrest when someone violates the law, drives police cars, and wears a uniform. And yes, they make lots of money! Police officers converse with members of the public to deter crime and find solutions to issues. They are vital because they work hard to guarantee everyone can live in a secure and tranquil environment. Peace Officer vs Police Officer: Key Differences You Need to Know The main difference between a peace officer and a police officer lies in the scope of their authority and the areas they serve. While all police officers are considered peace officers, not all are police officers. Scope of Authority The authority of peace officers is more expansive and can go beyond what is typically assigned to police personnel. Depending on their role, they may work for different law enforcement agencies and have varying tasks. First, there is a significant distinction between the authority and responsibility held by peace officers and police officers. Due to their broad reach, peace officers can perform a variety of law enforcement duties. They may have distinct responsibilities and work for different organizations. A county sheriff, for instance, has powers different from those of a state trooper assigned to highway patrol. Police officers, on the other hand, are authorized to do more particular tasks. They typically work for the police department of a municipality or city. Their primary responsibility is to maintain the safety of their community by patrolling, looking into crimes, and handling emergencies. At work, they concentrate on upholding the law. Therefore, the primary distinction is that police officers often have a specific duty in a certain area, but peace officers can have multiple roles in various locations. Both are crucial in upholding the law, although they do so in various contexts and methods. Jurisdiction As you know, "jurisdiction" refers to the domain in which an individual possesses the authority to decide and act. It all comes down to where peace officers and police personnel can carry out law enforcement. A police officer's jurisdiction is usually restricted to the town or city where they work. They focus on certain areas and ensure that the law is followed there. If you notice a police cruiser or officer wandering around, it's likely that they are patrolling their area. Peace officers' jurisdiction is more expansive. They may operate in several regions or throughout the entire state. For instance, one sort of peace officer who can enforce the law in state parks and wildlife areas, which can be rather large areas, is the game warden. To put it briefly, jurisdiction refers to the "where"— the areas where these authorities are free to exercise their power. Law officers have a specific "where," such as municipal limits. The "where" for peace officers is broader and can encompass various locations and law enforcement roles. It is significant since it designates the individuals responsible for maintaining order in various locations. Peace Officer vs Police Officer: Roles and Responsibility You Need to Know Now that you know their scope of authority or jurisdiction, it is time to learn about their roles and responsibilities. One thing you must know is that these are not the low stress jobs. Let us take a step, one at a time: Peace Officers Peace officers are vital members of the legal community who perform a variety of duties. They may be state troopers, sheriffs, game wardens, court officials, or other officers. Although the duties of each type of peace officer vary, they are all concerned with maintaining law and order. In a county, the sheriff is in charge of law enforcement. They are in charge of the county police department and the local jail. The county's residents choose the sheriff, and deputies assist the sheriff in carrying out his duties. State troopers, often known as highway patrol officers, enforce the law on state-owned roadways. They contribute to road safety by apprehending speeders and reckless drivers. They can work anywhere in the state and help out in big emergencies. Game wardens are peace officers who protect wildlife. They ensure that people don't harm nature and follow hunting and fishing rules. They also monitor parks and natural areas to protect plants and animals. Court officials work in courtrooms. They help with court papers, keep judges safe, ensure the court is secure, and ensure everyone follows court rules. Any of these peace officers can arrest someone if needed. Their uniform shows they are responsible for enforcing the law. They often have guns, handcuffs, and radios to help them do their job. Peace officers are ready to deal with many situations, like helping lost people or catching criminals. They need to know the law well and be good at talking to people fairly and kindly. Peace officers can include:Sheriffs: Oversee county law enforcement.State Troopers: Patrol state highways and provide statewide law enforcement.Game Wardens: Enforce hunting, fishing, and wildlife conservation laws.Court Officers: Maintain security within courtrooms. Police Officers Police officers are the ones you frequently see driving patrol cars, responding to various problems in your community, and wearing uniforms. They are a particular class of peace officers from the police force. Their primary responsibility is to ensure everyone's safety and the community's rules are obeyed. There is patrolling, for instance. Officers of the law spend a great deal of time walking or driving through the area under their jurisdiction. This enables them to monitor the situation and be ready to assist anyone who requests it. Investigating crimes is also a major task for which the police are responsible. They investigate crimes as they happen, attempting to ascertain what occurred and who was responsible by gathering evidence and speaking with witnesses. Additionally, when police officers establish a rapport with the community's citizens, this is known as community policing. They converse with the inhabitants, pay attention to their worries, and collaborate to find solutions. This improves the neighborhood's quality of life by reducing crime. And yes, how can we forget emergency response? Police officers are among the first to arrive and assist in an emergency, such as a vehicle accident or a natural disaster. In addition to these responsibilities, they frequently manage traffic, help missing children find their homes, and conduct safety awareness training. It is safe to say that every day is different, so they must be ready for everything. Law enforcement officials receive training on handling challenging circumstances and treating everyone fairly and with dignity. They need to be knowledgeable about the law and how to enforce it, but they also need to be highly skilled in interpersonal interactions and sensitive to others' concerns. Police officers are tasked with:Patrolling: Monitor areas to prevent and detect crime.Investigating: Solve crimes and gather evidence.Community Policing: Engage with the community to build trust and prevent crime.Emergency Response: Provide immediate assistance during emergencies. Peace Officer vs Police Officer: Training and Qualifications Both peace officers and police officers need to finish a rigorous training program. Through this teaching, they learn specialized procedures, applicable laws, and how to maintain physical health. However, the specific expertise that law enforcement agencies need to obtain may vary depending on the state. To be a peace or police officer, one must meet certain qualifications and finish specialized training. This will enable them to do their jobs well and guarantee everyone's safety. For Peace Officers An individual must ensure no history of significant offenses before being eligible to work as a peace officer. They accomplish this by proving their excellent conduct and passing a background investigation. They ought to be at least eighteen and have completed high school or something similar. Individuals must also pass a physical examination to prove they are qualified for the position. In states such as California, they must demonstrate their ability to make wise decisions and dependability. They learn how to manage crises, make arrests, and maintain thorough records of everything that occurs while they're on the job during their training. For Police Officers: The typical requirement to become a police officer is to graduate from high school or a comparable program. In addition, you must be of legal age and free of criminal history. Once you've demonstrated the necessary knowledge and abilities, you take tests. If you pass, you enroll in a police academy to gain comprehensive knowledge of being a police officer. This covers how to look into crimes, handle various circumstances, and defend the rights of individuals. Even once they begin their careers, police officers must continue their education and training. This keeps people informed about new legislation and safety measures for the neighborhood. Being a police officer comes with a lot of duty. The training ensures their readiness to assist the people they serve. Police officers must possess the abilities, know-how, and moral fiber necessary to carry out their duties effectively and win the public's trust. (Psst.. if you want to drop out of it, you can still become a detective!) Wrapping It Up! Although they have different functions and responsibilities, people often used the terms "peace officer" and "police officer" interchangeably in law enforcement. If you were looking for information on peace officers vs. police officers, I hope this blog was useful. Do not hesitate to contact me if you have any more questions. Scroll down until you reach the bottom of the page. Next, post your thoughts and recommendations in the space provided below. Additional Reading: 5 Little-Known Founder Habits To Advance Your Career & Personal Life How To Become A Blockchain Developer In 2024? Is It A Good Career Path 51 Blue Collar Jobs/Career Options to Pursue If You Get Laid Off From Big Tech In 2024
READ MOREDetails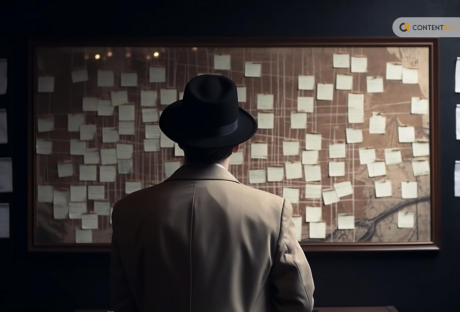
Can You Become a Detective Without Being a Police Officer?
I do not think that anyone has said that they did not want to be a detective growing up. Well, after reading stories on Sherlock, that was something that I always wanted to become! But I didn’t like the idea of being a police officer. Then, how to become a detective without being a police officer? If this is something that you also have been thinking about, then I am here to help yo out! So, keep on reading this blog till the end to learn more and thank me later… Understanding the Role of a Detective If there is one thing that I would like to compare a detective to, it's surely going to be a puzzle. They search for missing pieces in order to decipher puzzles and discover the truth. Imagine being unable to locate your beloved toy after losing it. Considered to be one of the most dangerous jobs, a detective would begin by searching for hints, such as the location of your last recent playtime or any witnesses. They act in the same way but in more serious situations, such as when someone violates the law or a business suspects someone of stealing from them. Since detectives must be keen observers, they pick up on details that others might overlook. In order to gather information, they converse with people and pose inquiries. They also examine records from computers, videos, and papers. Occasionally, they observe locations or individuals covertly to see what transpires when the subject is unaware that they are being observed. The piece up a narrative of what they believe happened using all the hints they discover. It's similar to trying to recall your gaming route in order to locate where you might have let go of your toy. The narrative that detectives compile into a report is sent to other decision-makers, such as judges or attorneys, so they can decide what to do next. Police departments do not employ all investigators. Some work as private investigators, which means that individuals or organizations employ them to investigate particular issues. Even though they don't have a police badge, they are nevertheless subject to the law and are not allowed to act in a police capacity. To put it briefly, detectives are astute thinkers who apply their senses— eyes, ears, and brains— to solve complex puzzles. They ensure that the truth is revealed and assist in keeping people secure. Road to Private Investigation: How to Become a Detective Without Being a Police Officer? Now that you know who a detective is and what they are supposed to do, you might be interested in learning about how you can become one without being a police officer! Do not worry. I can be the perfect Watson for you! Here are some of the things that you need to do: 1. Educational Foundation To be a detective without a police badge, you don't need to go to police school, but learning is still important. It is definitely not one of those low-stress jobs that pay well without a degree! Think of it like training for a sport. You need to know the rules and how to play the game. Studying subjects like criminal justice or law is like that. It teaches you about the rules of being a detective. You learn about laws, how to find clues and understand why people do things. This knowledge is your tool kit, helping you solve mysteries smartly and legally. 2. Gaining Experience Think of becoming a detective, like learning to ride a bike. Before you can ride smoothly, you need to practice. For detectives, this practice is called experience. You can start by working jobs that are a bit like being a detective. For example, you could help a security team, work with lawyers, or even write reports for a newspaper. These jobs teach you how to look for information, ask good questions, and pay attention to details. It's like playing a game where you have to find hidden objects. The more you play, the better you get at finding them. That's how experience helps you become a good detective. You learn by doing things that detectives do, even if it's not the same job. 3. Developing Skills Taking up detective work is akin to being a superhero. Solving cases requires specialized knowledge. You must first have keen eyes to notice small hints that others might overlook. It's similar to realizing a tiny puzzle piece that makes the larger picture easier to see. Then, mental capacity is required. This implies that you can decipher the hints by looking at them, much like you would when completing a puzzle. You'll be asking individuals questions and needing to comprehend their responses, so you also need to be adept at communicating and listening. Finally, you need to get along with technology. Modern investigators obtain information quickly by using devices and computers. It's like having a magic wand that allows you to locate objects that are invisible to human sight. 4. Certification and Licensing A license is a specific card that is required in order to work as a detective without being a police officer. A detective's license is similar to a driver's license. You will need to demonstrate your investigative skills in order to obtain this. You may have to pass an exam or provide proof of your prior experience working as a detective. In some places, you also need to write a big essay about detective work or talk to experts who ask you tough questions. If you pass, you get your license which tells everyone you're a real detective. It's important because it's against the law to be a detective without one in many places. So, getting licensed is like passing your final exams in school. It proves you're ready to start solving mysteries on your own. 5. Building a Network Imagine you're playing a team sport. You can't win alone; you need teammates. For detectives, these teammates are other people they know in their job, like a network. It's a group of friends and helpers who can give advice, share secrets of the trade, or even offer jobs. To build this team, you go to meetings, join clubs for detectives, and talk to experienced ones. It's like making friends at school. The more friends you have, the more you learn and the better you get at your game. This network is super important because it can help you become a great detective. It's like having a secret club where everyone helps each other to solve mysteries. 6. Starting Your Career Let's say you've studied and practiced a new game extensively. You're now prepared to play for real money. It would be like embarking on a career as a detective. Now that you've studied and practiced, it's time to work. You can be bold and launch your own detective agency or work as a detective in an agency with other investigators. It's similar to choosing between starting your own sports team and joining an existing one. It may be slow in the beginning, and not many people will be aware that you are a detective. But persevere and never give up. As you continue to solve crimes, more people will eventually seek your assistance. And do not worry about the money. If police officers make money, detectives do too! It's similar to when you consistently win games and get asked to join teams. Your detective career will advance if you are persistent and diligent. It ultimately comes down to applying what you've learned to solve actual riddles. Being a Detective in the Age of Technology Being a detective in the modern world is similar to wielding a magic wand as a wizard. However, instead of a wand, detectives use technology. Technology has changed the way detectives work, making it quicker and easier to gather evidence and solve puzzles. Detectives used to perform all tasks by hand, such as going through numerous documents to locate a single crucial letter. These days, computers allow users to quickly search through thousands of records, which is comparable to having superhuman reading speed. Additionally, detectives use covert cameras and microphones in practically any location. This allows them to hear and see without actually being there— it's like having numerous sets of eyes and ears simultaneously. And there's the internet, which functions like a never-ending giant library. From their computer, detectives can obtain information about nearly anything or anybody. They can also view maps that display where individuals are going, which is similar to following other players in a computer game. However, enormous power also entails considerable responsibility. Detectives must exercise caution when utilizing technology and adhere to the law. They require a valid reason and perhaps court approval before they can snoop on anyone. Additionally, technology keeps detectives safe. They have access to devices that alert them to the presence of people or potentially dangerous objects within a structure. It's similar to having a shield around them to keep them safe. Ethics and Legality: Treading the Gray Path! There are rules you have to play by when you play a game. Investigators are in the same boat. They must adhere to the law. This implies that they are not allowed to enter someone's home or take anything without authorization. It's similar to a board game in that you can't just advance to the finish line in the hopes of winning. Ethics are comparable to sports' fair play regulations. Detectives have to maintain secrecy and be truthful. They cannot deceive others or obtain knowledge by lying. It's about treating everyone with respect and being a good sport. Protecting people's privacy is another duty of detectives. They are not allowed to snoop on people without a very solid reason, just as you wouldn't want someone reading your journal. In certain cases, such as when you ask a teacher for permission to use the library during class, they need to obtain approval from a court. Thus, conducting investigative work properly is crucial to ethics and legality. It ensures that you treat others fairly and do no harm to them. It's critical because it preserves the confidence that investigators have in the clients they serve. It's similar to being the dependable team captain, where everyone depends on you to make the right decisions. Wrapping It Up! In case you were searching for the answer to how to become a detective without being a police officer, I hope that you have found this blog helpful! If there are any other questions that you might have related to the same, please feel free to let me know. All that you need to do is scroll down until you reach the bottom of the page. Then, leave your questions and suggestions in the box below. And I will be there to answer them all for you! Additional Reading: 6 Law Fields With High Demand In 2024 Top Career Opportunities In Operations Management 51 Blue Collar Jobs/Career Options to Pursue If You Get Laid Off From Big Tech In 2024
READ MOREDetails
Who are Excavation Contractors and How to Become One in 2026?
Did you know that there has been a rise in the number of people who are working as excavation contractors? In case you didn’t, here is the wake-up call! These are the people who are recruited to work on sites so that projects can be built and certain utilities can be installed. But is that all? What are the skills that you need? What are the benefits that you will get? And most important, what about the salary? If these are some of the questions that you are curious to find out, then I have you covered! Therefore, keep on reading this blog till the end to learn more… Who are Excavation Contractors? Excavation contractors are the experts who prepare the site for new construction. They ensure everything is level, clean, and ready for the builders to arrive and start working. Not the most dangerous job in the world, they use sizable gear to move the dirt, regulate the flow of water, and excavate where needed. Additionally, they must always be concerned about the environment and everyone's safety. Excavation contractors are like the first players in a construction game. They step onto an empty land and prepare it for something new to be built. Imagine a piece of land with uneven ground, rocks, and maybe even old buildings. The excavation contractor's job is to clear all this away and make the ground flat and strong enough to hold new structures. These contractors are experts at managing the earth. These contractors are proficient in earth management. To move, dig, and shape the land, they employ large machinery. Consider them to be artists who, rather than using paintbrushes, work with bulldozers and excavators. They dig trenches for pipes, provide room for basements, and make sure rainwater runs off buildings rather than into them. Safety is a big part of their work, too. They must know how to handle their machines without hurting anyone or damaging anything. They also need to understand the different types of soil and rocks they work with. This knowledge helps them decide the best way to dig and move the earth without causing problems like landslides. Understanding the Role and Responsibility of Excavation Contractors In the construction sector, excavation contractors are crucial. They are the skilled professionals who prepare sites for new buildings, roads, or any other type of development requiring the completion of earthmoving and foundation work. It should go without saying that these experts are always important for any construction. They perform the preparatory work required to turn an empty plot of land into a livable, productive, or recreational area. It's a big job with lots of obligations. Key Responsibilities of Excavation Contractors Excavation contractors prepare the stage for all the construction magic to happen. They make sure that the ground is ready and safe for the next steps in building our homes, offices, and roads. Excavation contractors have a list of important jobs to do before any building can start. Here's what they focus on: Site preparation and grading: These are similar to painting a blank canvas. Contractors clear the area of trees, rocks, and other obstructions. They then check to see if the ground is level. This process, known as grading, is essential because it prevents buildings from sinking or tilting. Trenching: Digging large, narrow ditches for utilities or foundations is known as trenching. These are necessary for installing pipes or wires underground and for laying the foundations or bases of buildings. Ensuring Drainage and Erosion Control: Contractors are also heavily involved in water management. They sculpt the terrain to direct precipitation where it belongs, avoiding flooding and soil erosion. Operating Heavy Machinery: Excavation contractors are trained to use big machines like bulldozers, which push dirt and rocks, and backhoes, which dig and lift. They must be very skilled to operate these safely and efficiently. Following Environmental and Safety Guidelines: Rules govern how to protect nature and keep people safe on a construction site. Excavation contractors must know these rules well and always follow them. How to Become an Excavation Contractor in 2026? Now that you are aware of what an excavation contractor is and what they are responsible for, it is time to understand how to become one. Ad if that is something that you have been searching for, then I have you covered! So here are the steps that you would need to take: 1. Education: While you do not require a college degree to begin a job as an excavation contractor, completing high school is something mandatory. Having a strong foundation in math and science is beneficial since it will enable you to measure and solve difficulties on the job. Some people also take special classes to learn how to use big machines safely. These classes can give you a head start and show employers that you're serious about this work. So, education for excavation contractors is about having a solid high school foundation and learning the skills for the job. 2. Training: Similar to several blue-collar jobs for women and men, this one, too, requires training. After finishing school, the next step is to learn the job by doing it. Many start as helpers, watching and learning from experienced workers. Some might drive smaller machines at first, getting the feel of the controls. Over time, they get to handle bigger equipment. It's like being an apprentice, where you learn by working on real projects. This hands-on training is key because it teaches you the tricks of the trade, like how to dig just right without making mistakes. It's all about practice and getting better each day. 3. Certification: Obtaining a certification is similar to receiving a badge of knowledge. It can make you stand out, but it's not always necessary. For excavation contractors, certification denotes completion of further coursework and passing exams demonstrating proficiency with large machinery and a thorough understanding of workplace safety. It's how you declare to the world, "I'm a pro." Furthermore, it can provide access to greater employment opportunities and career advancement pathways. Consequently, becoming certified is a wise decision, even though it's not necessary. 4. Licensing: Think of licensing as your official ticket to the world of excavation. In many places, you need a license to show you're allowed to do the job. It's like a driver's license but for digging and moving earth. To get this license, you usually have to pass a test that checks if you know how to handle heavy equipment and understand the rules of construction safely. Once you have it, you can officially call yourself an excavation contractor. It's a big step because it means you're trusted to take on big projects and do them right. 5. Starting Your Business: Establishing your own excavation company is the best course of action when you're ready to work for yourself. It's comparable to sowing a seed for the future. A solid business plan that outlines your financial requirements and customer acquisition strategy is essential first. After that, you get the money to purchase equipment and cover other expenses like insurance. The laws pertaining to operating a business are also covered. It's a major step, but it's thrilling because you can take full control and build a company that has the potential to last for many years. Skills Required Proficiency in operating heavy machineryKnowledge of construction principles and safety standards Ability to read and interpret blueprints and site plansStrong problem-solving and decision-making skillsGood physical condition and stamina The Market in 2026 for Excavation Contractors I know that this is something everything gets worried about. There will be a plethora of new prospects in the excavation contractor industry in 2026. The demand for knowledgeable contractors with the ability to prepare the property is rising as more individuals wish to construct homes and businesses. Excavation now involves more than just digging and shifting soil. Satellites and computers are used by contractors to ensure that they are excavating in the proper location and manner. They need to consider the planet as well. Since it is everyone's goal to develop without harming the environment, contractors must learn how to operate with minimal waste and mess. This entails employing low-pollution machinery and devising methods for repurposing the soil and stones they remove. Being an excavation contractor also means being a lifelong learner. Contractors must stay up to date with the latest innovations in machinery and construction techniques. They must be eager to try new things and quick learners. As a result, there will be plenty of opportunities in the market in 2026 for astute contractors who value the environment and are eager to learn new things. Needless to say, many people became excavation contractors after getting laid off from big tech companies! After all, being involved in laying the foundation for the future is an exciting time to be in business. Challenges and Opportunities for Excavation Contractors When it comes to excavation contractors, let me tell you one thing: it is not an easy path! The weather is one of the main obstacles. The task must be done regardless of the weather, which occasionally requires navigating dust storms or mudslides. Apart from that, there is stress that comes with it. Tight deadlines can often result in lengthy days and a great deal of stress in order to do the task on time. Safe to say, being an excavation contractor is not a low-stress job that pays well without a degree! Safety is still another important concern. When operating huge machinery, contractors need to use considerable caution. This is because using such machinery puts oneself or others at risk for injury. They must thus keep an eye on the environment to make sure that their work does not have a detrimental effect on it. However, these difficulties also present excellent chances. Learning how to operate the newest, safer, and more environmentally friendly machinery is just one of the many things one can learn. Contractors with these skills are highly sought after. Additionally, there's the opportunity to specialize in tasks like working in extremely difficult environments like mountains or deserts or underwater excavation. In 2026, being an excavation contractor means building the foundations of the future. It's hard work, but it's also exciting because every day is different, and there's always a chance to grow and improve. Wrapping It Up! The foundation of each building project is the excavator contractor. Those who want to work in this industry should concentrate on obtaining the required training, experience, and certifications as we go toward 2026. An excavation contractor's profession can be lucrative and fulfilling with commitment and hard work. There are a number of difficulties that come with the profession, including inclement weather, pressed deadlines, and safety hazards. It does, however, also present chances for advancement, specialization, and the fulfillment of creating the foundation for future advancements. Learn More About: What Are 10 Manufacturing Industries? Commercial And Residential Construction: Key Difference The Power Of Heavy Machinery In The Construction Industry After A Construction Accident: Worker’s Rights, Compensation, And Legal Recourse
READ MOREDetailsApp for Tracking Time at Work: Must-Have Features You Should Know About!
Are you tired of constantly losing track of time at work? If so, you might find an app for tracking time at work to be quite useful. However, choosing the right one can be challenging with the many options available. Don't worry; I've got you covered. In this post, I'll guide you through the process of building the perfect time tracking toolbox so that you can effectively boost your productivity and efficiency. App for Time Tracking at Work: How They Make a Difference? Workplace time monitoring applications are crucial because they benefit organizations and workers in a number of ways. They give employers a comprehensive view of how staff members spend their time, including which jobs take the longest and which ones could be distracting. By identifying inefficient areas, managers can set more realistic timelines and increase productivity, which can result in improved project management. These apps can be eye-opening for workers. This is because they show how much time they have spent on certain tasks. This can enhance their workflow and help them concentrate on the tasks they do well. Time monitoring also guarantees accurate billing, which helps businesses avoid overpaying or losing money due to errors and ensures that workers are paid appropriately for the time they have worked. The Core Features and Functions of Time Tracker at Work Let's start with the foundation - the core function of any app for tracking time at work. The basics should allow you to capture the time spent on various tasks effortlessly. And here's how the top time tracking apps achieve this in three main ways: Simple timers: You can quickly start and stop timers with just one click or keystroke. This is perfect for tasks with clear start and end points, like phone calls or writing reports. Automatic tracking: This function is great for repetitive tasks requiring constant focus as it will help detect your activities, such as using specific software, and automatically log the time, reducing the need for manual intervention. Manual entry: Despite automation, there will always be times when manual entries are necessary. A user-friendly interface for logging time spent on various tasks or breaks is essential. Analytics and Reporting Raw data is helpful, but the critical aspect lies in its analysis. A great time tracking app should give you visible and clear reports to help you understand how time is spent. Time distribution reports: This feature shows where your time goes on projects, clients, or different tasks. You can spot where you are spending too much time and where you can do better. Activity breakdown: This is like a detailed diary of your day. You can see how much time is spent on emails, meetings, real work, and not-so-productive stuff. Trends over time: These reports help see patterns in time use over weeks, months, or even years. It's like a map of where you lose time and how to be more productive in the long run. Collaboration and teamwork In fast-paced work setups, it's super important to track time across teams smoothly. Team dashboards: This helps you clearly see how your team uses time to boost accountability and make projects run even smoother. Shared projects and tasks: You can monitor time spent on shared work to spot issues and ensure efficient collaboration to produce seamless results. Billable hours tracking: Easily track time spent on client projects and create precise invoices for billable services. This is a great way to ensure fair compensation and simplify the billing process. Usability and user interface The best app for time tracking at work becomes an extension of your workflow, not a cumbersome add-on. Here's what to look for in terms of user interface (UI) and user experience (UX): Intuitive interface: A clean and intuitive UI is key. The app should be easy to navigate and allow you to start tracking time with minimal setup time. Customizable dashboards: You should be able to personalize your dashboard to display the information that matters most if needed. This ensures you have a quick snapshot of your time usage at a glance. Multiple platform availability: To work seamlessly across devices, it is suggested to choose an app that offers desktop, web, and mobile versions for effortless time tracking, regardless of location. Security and data privacy Time tracking data is sensitive on so many levels, so it's important to keep it super secure and private: Secure login and data encryption: Look for an app with strong encryption to protect your data. It's also good if the app offers extra security, like two-step verification. Following privacy regulations: It is always mandatory that the app comply with rules like GDPR and CCPA. This way, you have control over your data, and it stays safe. Integrations Establishing connections between your time-tracking software and other everyday tools can improve how well you track your work hours, increase productivity, and provide insightful data. Sync with your calendar: This feature lets you link your time-tracking software with your calendar to automatically track the amount of time you spend on planned tasks. This gives you a thorough picture of your time usage. Combine with communication tools: You can monitor the amount of time you spend on particular discussions or tasks by integrating your time-tracking software with communication platforms like Microsoft Teams or Slack. This will help you see where your time is being spent. Link with productivity apps: Being able to integrate your app for time tracking at work with productivity tools such as project management platforms, to-do lists, or mind mapping software helps break down data overload and boosts your overall efficiency. Advanced Features of Time Tracking App for Work You should know that a perfect time-tracking app does more than just log your hours. It should be able to take control of your time and work smarter. If you're someone who loves having control and flexibility, you'll be glad to know that some apps offer advanced features that take time tracking to the next level: Idle time tracking: Ever wonder how much time you spend scrolling through social media or taking unplanned breaks? With idle time tracking, you can pinpoint periods of inactivity and learn how to minimize distractions to stay focused. Offline tracking: A bad internet connection disrupts your productivity. A few apps let you keep tracking your time even when you're offline and then sync the data once you're back online. Customizable reports: You should be able to tailor the app's automated reports to your unique needs. This function allows you to analyze your time usage from different perspectives and gain valuable insights to help you work more efficiently. Categorization and tagging: This will help you organize your tasks by project, client, or type of work. It makes reporting more insightful and helps you understand where your time is best spent. Detailed notes: Sometimes, a time entry needs a little extra context. With detailed notes, you can capture important details about your tasks and make better time estimates for similar future situations. Bottom Line Investing in a well-equipped app for tracking time at work is a significant step towards greater efficiency and productivity. With the right features in your toolbox, you'll clearly understand where your time goes, determine areas for improvement, and ultimately achieve more in less time. So, explore the options and find the perfect time-tracking app to unlock your full potential. If you have any other questions related to the same, please feel free to let me know. Scroll down until you reach the bottom of the page. Then, leave your comments and queries in the box below. I will be there to answer them all for you! Learn More About: Is A Time Card App Really Necessary? Data Points To Yes! Enhancing Team Collaboration With Managed Services For Microsoft Teams
READ MOREDetails
Top 15 Low-Stress Jobs Without a Degree that Pay You Well!
Considering today’s fast-paced world, it is only natural that more and more people are searching for low-stress jobs that might even come without a degree. You see, not everyone will have the means to pursue a college degree, spend loads of money, and then choose a career in which they will have to hustle until the end. Not everyone is okay with living a life in which they cannot even breathe. According to the Bureau of Labor Statistics (BLS), more and more people are now applying for jobs that come with the least amount of stress but several benefits. If you are also tired of your day-to-day life, or have been laid of from a high tech company, and want to take up a job that provides you with enough monetary security and low stress, then I have you covered! So, keep on reading this blog till the end to learn more… Why are People Searching for Low-Stress Jobs? As I already told you, there has been a surge in the search for low-stress jobs worldwide. And you might be thinking, why so? Does it have a lot of benefits? The answer to that is YES. People are always on the run to improve the quality of their lives, so they do not want to add excessive stress. One of the best things low stress can offer is a healthy work-life balance. This balance can allow individuals to spend more time with their families and pursue their hobbies. Additionally, having a low-stress job comes with several health benefits. For instance, chronic stress can lead to health problems. Having a job that ensures you have the time to relax can also contribute to better mental as well as physical health. There is yet another reason why more and more people are looking for low-stress jobs. These jobs come with a degree of autonomy, ensuring you have creative freedom and control over the tasks you are supposed to do! Lastly, these jobs also offer many financial benefits. People automatically flock toward them because they offer stability and security without high-pressure job roles. Best Low-Stress Jobs Without a Degree in 2024! Now that you know about the reasons why people are shifting towards low-stress jobs, it is time for you to get to what you have been searching for the list of the best low-stress jobs without a degree! So, without further ado, let us get straight into it! 1. Courier Firstly, on the list of low-stress jobs that do not need a degree is that of someone who is in courier services. They are responsible for transporting packages and paperwork from one location to another. If you plan to become one, you can ride a bike or drive a car to pick up and drop off the stuff. You may also need to occasionally get the signatures of the people who are at the receiving end of their parcel. This job does not require a degree, offers a flexible schedule, and is definitely not mentally and physically taxing. 2. Floral Designer Secondly, The next one on this list is the job of a floral designer. These are the people who are in charge of flower arrangements for events like birthday parties and weddings. The job of a floral designer does not need a degree. It also offers a flexible work schedule, mainly picking flowers and arranging them to make them look nice. They are also in charge of helping customers choose the flowers. This is a job that lets you use your creativity at work every single day. Additionally, if you are a woman looking for blue collar jobs but want something easier, this is something you are looking for, you might look at this job! 3. Makeup Artist Thirdly, being a makeup artist is something that most people are trying to become. Most of us look at it as a low-stress job because of the fact that it comes with a flexible working schedule. Additionally, you get to be creative and try something new on your clients! You might have seen that several influencers on the internet showcase their creativity. This goes on to prove that you do not even need to have a degree to do this job. All you need to know is how to do make-up and work with cosmetics, and how to experiment! 4. Travel Agent Fourthly, being a travel agent is something that you can try if you want to have a low-stress job that pays you well. They are primarily responsible for making the travel arrangements for their clients. They need to search the greatest deals and book the tickets for traveling, staying, and offer travel guidance. It's a career that involves assisting others and is frequently done online, which contributes to its low-stress factor. 5. Roofer In case you did not know, a roofer is someone who is in charge of the professional construction and installation of the roof. They are also responsible for maintaining and repairing the roofs of their clients. Additionally, they inspect the roofs (in case there are any damages), repair the holes and the broken shingles in the roof, and make it weather resistant. Considering the fact that the tasks of the roofers are seasonal, it ensures that they have the flexibility to work and choose their projects depending on their 6. Hairstylist The next one on this list is the job of being a hairstylist. Similar to makeup artists, these people work with individual clients on specific occasions. They interact with the people while working for themselves or at a salon. While these people do need a license to practice, they do not need an educational degree. All you need to do is enroll in a state-approved program in cosmetology. So, if this is something that you are interested in, it is best that you get to work, as these are some of the growing industries that have literally zero pressure! 7. Painter Are you someone who likes to work with colors? If your answer is yes, then it is best that you become a painter. As a professional service provider, you might have to paint the building, the interior, or the surface. 8. Massage Therapist You probaby did not think that this would be on the list, right? Becoming a massage therapist is frequently regarded as a low-stress job that does not require a degree. Massage therapists operate in peaceful environments, such as spas, and provide treatments to assist clients relax or ease pain. While certification may be required, the employment itself is generally tranquil and provides an opportunity to improve the well-being of others, which may be both rewarding and stress-free. 9. Maintenance Technician If you know how to become an electrician, becoming a maintenance technician will automatically come to you. These people are in charge of keeping a building safe. For this, they evaluate and repair whatever issues a building might face regarding electrical systems, HVAC appliances, and more. You may have seen them work at hospitals and other residential facilities. These people work on a client-to-client basis, which ensures that they have the flexibility to choose their work. 10. Security The next one on this list is the job of a security guard. In most cases, it is considered a low-stress job that doesn't require a degree. Security guards ensure the safety of people and property. They monitor entrances, check visitors, and sometimes work with law enforcement. It's a job with a routine and doesn't typically involve high-pressure situations, making it relatively stress-free. 11. Shipping Clerk Just as the name suggests, the task of a shipping clerk is to manage the shipments that come in and go out of a company. These jobs are considered to be of low stress that you can have without a degree. They primarily handle paperwork, organize packages, and sometimes track inventory. It's usually a routine job with regular hours and not much pressure, making it a good option for those seeking a calmer work environment. 12. Cook As we all know, a cook is a culinary professional that makes meals for customers and guests at various locations. They frequently prepare for shifts by cutting, slicing, chopping, and peeling items and organizing work areas. They then cook and plate meals based on menus and customer choices. Cooks are most commonly found in restaurants, but they are also employed by schools, hotels, medical facilities, nursing homes, and other organizations. 13. Upholsterer An upholsterer uses upholstery, or soft covers, to create and fix furniture. They regularly assist customers in updating outdated furnishings. In order to alter their appearance and enhance comfort, upholstery professionals can also add springs, padding, and fabric to newly purchased couches, chairs, and stools. Upholsterers typically obtain their trade through apprenticeships with seasoned industry professionals or through on-the-job training. 14. Welder Next one on this list is a welder. These are the experts who are responsible for working with metals and fusing them together. For this, they use a welding torch, a specialized instrument that produces extreme heat. They ensure the integrity of the safety equipment they use to safeguard both themselves and other people, inspect materials before welding, and keep the right amount of heat throughout the process. One can witness welders at work on a wide range of machinery and structures, including automobiles, ships, buildings, bridges, and pipelines. 15. Housekeeper Lastly, housekeeping is commonly regarded as a low-stress career that does not require a degree. Housekeepers clean and maintain areas, keeping them tidy and sanitary. They could work at hotels, hospitals, or private residences. The job entails basic duties that may be completed at a regular pace, which many people find manageable and stress-free. Wrapping It Up! If you are searching for the best low-stress jobs without a degree, I hope that this blog has helped you. If you have any questions related to this, please feel free to let me know. All you need to do is scroll down until you reach the bottom of the page. Then, leave your comments and suggestions in the box below. I will be there to answer them all for you! Learn More Also: Best Paying Jobs In Electric Utilities Central Top 11 Most Dangerous Jobs in the World In 2024 Step-By-Step Guide On Becoming An Esthetician In 2024 How Many Jobs Are Available In Industrial Machinery/Components?
READ MOREDetails
Is There Such Thing As A Functioning Alcoholic?
You might have heard the term “functioning alcoholic” and wondered what it even means. Then you might be searching the meaning of the term and what it means to be a functional alcoholic. Then let's throw some light on the meaning of functioning alcoholic for your better understanding. We often relate alcoholism with people who are addicted and unable to function properly in their lives. This stereotype of alcoholic individuals seems to be not accurate. This is because several individuals who are alcoholics seem to function properly and deal with their daily tasks properly. If this is the case then why are these individuals living a regular life while being alcoholic? While other groups of alcoholic people are addicted to alcohol but cannot function properly because of their addiction. Therefore in this article, we not only discuss what is a functioning alcoholic but also how they differ from those with more visible signs of alcohol dependency. Perception About Individuals Battling Addiction Your concept or perception of an alcoholic will change when you learn how a functioning alcoholic person works. They are capable of living or maintaining a normal life while battling alcohol addiction. At one glance you might not even know this person might be alcoholic as they are capable of doing all their daily duties smoothly. Therefore, why was this term created which means someone who is functioning even when dealing with addiction? This challenges the common stereotype of an alcoholic person who lives an undisciplined and disheveled life. The term “functioning alcoholic” could be used to describe a person’s condition but it is not officially recognized. In the field of psychiatry, the Diagnostic and Statistical Manual of Mental Disorders (DSM-5) doesn't recognize this term officially. However, several professionals use this term to describe a specific alcoholic person's condition. So understanding the phenomenon of the functioning alcoholic is important as it helps identify people who are going through this hardship. When you recognize a functional alcoholic you can help them get the right treatment which will get them better. More often than not, functioning alcoholics hide their struggles with addiction while maintaining a normal facade. So, it becomes harder for you to recognize them and get them correctly diagnosed. Therefore you must read this article to know how to identify a functioning alcoholic. So that you can help them get the right treatment for recovery. What Is A Functioning Alcoholic? A functioning alcoholic is someone who appears to live a normal life while dealing with alcohol addiction. These individuals you will observe can do all the regular tasks and maintain a lifestyle without alcohol overriding their lives. Even being addicted to alcohol they can hold down a job and fulfill family obligations. Not only that they can excel in some areas of their lives without alcohol overriding their entire life. Therefore, it becomes hard for you to identify these individuals who look perfectly normal from the outside while dealing with addiction. These individuals know how to keep their professional and social lives separate from their addiction. You see, functional alcoholics are aware of their alcoholic addiction which helps them hide it easily. They become skilled at hiding their shortcomings from the world. However, this addiction of a functioning alcoholic does not affect anyone other than themselves. It does affect their own lives if kept unchecked in the long run. As they continue to hide their struggle with alcohol it becomes much more troublesome as time goes on. Functioning Alcoholics Live In The Grey Area Of Addiction A functioning alcoholic lives in the grey area of addiction where addiction coexists with competence. While they are functioning like a regular individual they also hide their addiction from their friends, family, or colleagues. So, they operate much more separately than an alcoholic consumed with addiction and a normal non-alcoholic. So how will you recognize a functioning alcoholic when they are living just like any ordinary person? You see functioning alcoholics often rationalize their drinking habits as rewards for their accomplishments. So, if they can get their work done they reward themselves. Again if they do their duty towards their family they would reward themselves with a drink. Again their coping mechanism of dealing with the stress of daily responsibilities is through alcohol. So when they accomplish their responsibilities day-to-day they reward themselves with alcohol. But this facade of normalcy is fragile as they become more dependent on alcohol over time. As they start to deal with life problems with alcohol, this results in psychological issues. Maintaining a long-term facade of alcohol addiction is not the only problem a functional alcoholic faces but health problems too. High Functioning Alcoholism vs. Traditional Alcohol Use Disorder Traditionally you could identify an alcoholic person from their visible signs of dysfunctions. These dysfunctional problems were frequent performance issues, relationship problems, and deteriorating health. In contrast, high-functioning alcoholics may lead seemingly successful lives, masking their dependency behind a façade of competence. They may hold prestigious positions, maintain social connections, and even drink expensive wine without raising suspicion. Despite their ability to keep up appearances, high-functioning alcoholics often deal with a significant internal struggle. They might spend considerable effort hiding the extent of their drinking from others and themselves. This can involve elaborate routines to cover up the smell of alcohol and secret drinking sessions. Again a functional alcoholic persistently worries about being discovered because of their addiction. You will see that the stress of maintaining a double life can be extremely problematic in the long run. In the long-term, this coping mechanism with alcohol can only affect negatively both physically and mentally. Along with the stress of hiding addiction with alcohol and dealing with life’s problems a functioning alcoholic is bound to break down at some point. This will lead to their worst fear of revealing their true nature. It's this dual existence that differentiates high-functioning alcoholism from other overt alcohol use disorders. Other alcohol disorders are more visible due to their impact on an individual's life. Recognizing The Signs Of Alcohol Abuse There are significant risks to being a functional alcoholic despite its outward appearance. Because their pattern of drinking can be more than seven drinks per week. This leads to health risks in the long term. Again continuous dependence on alcohol to deal with life can have adverse effects on the person’s psychology. From binge drinking episodes to the inability to stop drinking despite its negative consequences can be some of the recognized risks of alcohol addiction. They may also experience withdrawal symptoms when trying to quit or cut back on alcohol consumption. Recognizing signs of a high-functioning alcoholic can be challenging as they are good at hiding their addiction. Therefore, it's essential to identify these individuals and get them diagnosed correctly and get these individuals treated. It's important to note that these behaviors can be subtle and easily overlooked, especially when the individual is still managing to fulfill their personal and professional obligations. Over time you will see that the consequences of high-functioning alcoholism become visible. Be it strained relationships, personality changes, mental health issues, and physical health problems related to alcohol abuse. You will start to see its effects on a functional alcoholic. Risk Factors And Consequences Certain factors can increase the likelihood of high-functioning alcoholism, including genetic predisposition, environmental influences, and untreated mental health issues. While they may avoid some of the immediate consequences associated with traditional alcoholism, such as job loss or legal troubles, high-functioning alcoholics are still at risk for severe health problems, including certain cancers and mental health issues. These health problems can include liver disease, heart disease, and neurological impairments that may not become evident until later in life. The psychological consequences are equally concerning, potentially leading to depression, anxiety, and other psychiatric disorders that can deteriorate the quality of life. Moreover, high-functioning alcoholics may face social consequences over time, such as eroded trust in relationships, marital strife, and a gradual withdrawal from social activities as they prioritize alcohol over personal connections. Despite maintaining a veneer of normalcy, the cumulative effect of these risk factors and consequences can lead to a tipping point where the individual's ability to function at a high level is compromised. It is crucial to recognize these long-term risks and understand that the lack of immediate, visible consequences does not diminish the urgency for intervention and treatment. Seeking Support And Treatment For The High Functioning Alcoholic Addressing high-functioning alcoholism requires a comprehensive approach involving medical professionals, support groups, and rehab centers in Los Angeles, specializing in addiction medicine. Loved ones play a crucial role in encouraging their family members or close relatives to seek help, but it's essential to approach the situation with empathy and understanding. Initiating this conversation can be delicate, as it often involves breaking through a wall of denial built up by the individual over time. Friends and family need to be informed about the nature of high-functioning alcoholism, to offer non-judgmental support, and to avoid enabling behaviors that can perpetuate the addiction. The process of seeking support often begins with an honest self-assessment or an intervention by concerned loved ones. This step is vital in helping the individual recognize the extent of their problem and the impact it has on their life and the lives of those around them. Professional interventionists can be instrumental in this phase, providing the guidance needed to navigate what can be a highly charged situation. Once the individual acknowledges the need for help, the next step involves finding the right treatment program. Treatment can range from outpatient therapy sessions that accommodate the individual's work schedule. Or a more intensive inpatient program where you will be required to take a temporary step back from daily responsibilities. The choice of treatment should be tailored to the individual's specific circumstances, taking into account their level of addiction, personal responsibilities, and the presence of any co-occurring mental health conditions. Throughout the recovery journey, ongoing support is essential for maintaining sobriety. Aftercare programs and sober living communities offer continued guidance and support, helping the individual to reintegrate into their daily life with new coping skills and a renewed focus on health and wellness. Support And Treatment Facilities Support groups like Alcoholics Anonymous provide a vital lifeline for individuals struggling with alcohol use disorders, offering a sense of community and understanding. These groups facilitate peer-to-peer support and shared experiences, creating a space where individuals can speak openly about their struggles without fear of judgment. Treatment facilities offer residential treatment or outpatient tailored programs designed to address the unique needs of high-functioning alcoholics, providing medical supervision during the withdrawal process and equipping them with coping strategies for maintaining sobriety. These facilities often employ a multidisciplinary approach, combining medical treatment, psychological counseling, and behavioral therapy to address the complex nature of addiction. The programs may include individual therapy sessions, group therapy, educational workshops on addiction, and relapse prevention planning. In addition to traditional treatment methods, some facilities offer holistic therapies such as meditation, yoga, and art therapy, recognizing the importance of treating the whole person. The Importance Of Mental Health Resources Recognizing that alcoholism is not solely a physical dependency but also a mental health problem is crucial. Access to more mental health resources, including therapy and counseling, can help individuals address underlying issues contributing to their alcohol use and develop healthier coping mechanisms. These resources are vital in treating the emotional and psychological aspects of alcoholism, which often include stress, anxiety, depression, and other mental health disorders that may co-occur with substance abuse. By providing a supportive environment for open discussion about mental health, individuals can gain insights into the emotional triggers that lead to drinking and learn new strategies for managing these triggers. Therapy can also assist in repairing relationships damaged by alcohol abuse, rebuilding trust, and improving communication skills. In addition, counseling can offer guidance on how to establish a balanced life. You can set achievable goals, and create a supportive network that fosters their long-term recovery. Treatment programs need to integrate mental health services as a core component of addiction recovery, called dual diagnosis treatment. This integration ensures that individuals receive a holistic approach to their treatment, addressing all facets of their well-being. As society continues to destigmatize mental health issues, the hope is that more people will feel empowered to seek the help they need without fear of judgment or stigma. Ultimately, enhancing the availability and accessibility of mental health resources is a critical step in supporting the recovery journey of functioning alcoholics. Their lasting sobriety helps improve their mental health issues. High Functioning Alcoholics: Is There Such A Thing? High-functioning alcoholics can often seem to have it all together, balancing significant responsibilities while battling their addiction in silence. They are typically individuals who, despite heavy drinking, seem to lead productive lives. They often excel in their careers, maintain social relationships, and uphold daily routines. This can make it difficult for others and sometimes even for the individuals themselves to recognize the problem. as their success often masks the underlying issues. We can help individuals struggling with high-functioning alcoholism by raising awareness and providing support. This will help them regain control of their lives and improve their overall life. Conclusion It's crucial to understand that high-functioning alcoholism is a real and serious condition. When you acknowledge its existence you take the first step towards addressing the unique challenges it presents. With the right resources and support systems, you can improve functioning alcoholic individuals to live a life free from alcohol. You can find them the help they need to recover from alcohol dependency. Therefore you need to know about functional alcoholism and identify functional alcoholic individuals. Read Also: 10 Reasons To Stop Drinking Alcohol Today Can Vaping Really Help You Kick Your Smoking Habit? The Advantages And Disadvantages Of Non-Alcoholic Spirits Famous Alcoholics And The Symptoms Of Their Addiction
READ MOREDetails
Top 11 Most Dangerous Jobs in the World In 2026!
In a world where most of us complain about having 9-to-5 jobs, there are times when we forget how difficult life can be for others who probably have some of the most dangerous jobs in the world. Last week, I went to a cafe with my friends, and all we were doing was complaining about our jobs, the minimal money, the fright of getting laid off, and the exhaustion. However, that is when Samantha said something like, “But we are privileged. At least we do not have to work as hard as a farmer under the sun!” And she is right! We are fortunate. That is when I started thinking about the people with the most dangerous jobs in the world. I started searching for the riskiest jobs and how people dealt with them. Want to know about them? I have you covered! So, keep on reading till the end to learn more… Most Dangerous Jobs in the World in 2026! Miners, underwater welders, oilfield workers, police officers, commercial fishermen— the list can go on when we start talking about the most dangerous jobs in the world. Technically speaking, if I actually sit down and list all of them, the list will be endless. That is the reason why I have listed the twelve most dangerous jobs. So, without further ado, let us get started with this list: 1. Commercial Fishermen Commercial fishing is like a high-stakes poker game with Mother Nature. These brave souls battle wild waves, slippery decks, and unpredictable weather. Imagine doing a tango with a storm—it's no picnic. Think massive nets, winches, and sharp hooks. Commercial fishermen wrangle these tools while dancing on a moving boat. One wrong move, and it's trouble. Ever heard of bycatch? It's when unintended creatures (like dolphins or turtles) get caught in the nets. Despite efforts to reduce it, bycatch remains a serious issue. When it comes to commercial fishing, you can easily forget 9-to-5. These fishermen work grueling shifts, often in the dead of night. Sleep-deprived and battling fatigue, they're like nocturnal warriors. Out at sea, these fishermen are on their own. Help isn't a phone call away. It's just them, the boat, and the vast ocean. 2. Logging Workers Logging is like a wild adventure in the forest but with serious risks. These workers deal with heavy machinery. Loggers handle chainsaws and logging machines, dealing with massive weights and unstoppable tree momentum. They work on uneven, rough ground and treacherous terrain, where a wrong step can lead to disaster. That is not all! Rain, snow, lightning, and extreme cold— nature throws curveballs at them as they have to work in literally all weather conditions. And guess what, there are times when these workers have to stay away from home for extended periods of time, working in remote locations. Sometimes they're far from help, making emergencies scarier. 3. Aircraft Pilots and Flight Engineers Aircraft pilots and flight engineers are challenging and risky professions. While passengers enjoy safe air travel, these professionals face unique hazards. Pilots navigate the skies, dealing with equipment failures, unpredictable weather, and potential mid-air collisions. Flight engineers manage aircraft systems during flight. Long hours and irregular schedules can lead to fatigue and impaired judgment. Their fatality rate is approximately 58.4 deaths per 100,000 workers. Soaring through the clouds isn't always smooth sailing! 4. Roofers The job of a roofer is to install asphalt, shingles, metal, or several other materials required to ensure that the roof of a house is waterproof. However, this is a low stress job for which you do not need a degree. Roofers spend their days perched high above the ground. One wrong step can lead to a dangerous fall. They handle substances like tar and chemicals, which can harm health. Roofers work with flames and hot asphalt, risking burns and accidents. Carrying heavy materials like shingles and tools is part of the job, and it strains their bodies. Moreover, they work with saws, nail guns, and other tools that are essential but also pose risks. Additionally, roofers brave rain, wind, and extreme heat. Imagine working on a slippery roof during a storm! 5. Refuse and Recyclable Material Collector Talk about unsung heroes, and these people will be the first in line. Being a Refuse and Recyclable Material Collector might not seem hazardous at first glance, but it's actually quite risky, with their fatality rate as high as 44.3 deaths per 100,000 workers. These workers handle hefty garbage bins and recyclables daily. Lifting and tossing these loads can strain muscles and cause injuries. The refuse truck itself is a major hazard. Workers jump on and off it, and accidents involving the truck are common. Imagine getting hit by your own workplace! Refuse collectors are at risk of being struck by passing vehicles. When they stand on the truck or work near traffic, accidents can happen. Additionally, garbage contains sharp objects, broken glass, and even toxic chemicals. Exposure to these materials poses health risks. Employers should use safer equipment, like automated side loader trucks, and ensure trucks have alarms. Workers must stay alert and wear high-visibility vests near roads. 6. Structural Iron and Steel Workers If you have something to thank the structural iron and steelworkers for, you must do it for the cities they built for us. They place and join the steel girders and other essential pieces to make the structural framework of any/all building. Now, you might be wondering why I am saying that their job is dangerous. Apart from the fact that their fatality rate is about 37.0 deaths per 100,000 workers, let me tell you what makes their jobs risky. These workers install and connect steel beams for buildings and bridges. Imagine working at dizzying heights, where falls are a constant threat. Carrying hefty steel components is part of the job. The strain on muscles and joints can lead to injuries. These workers brave rain, wind, and extreme temperatures. Harsh weather conditions increase the danger. Ironworkers use welding equipment overhead. Burns and eye injuries are real risks. Additionally, safety gear is crucial. Helmets, harnesses, and caution are their lifelines. 7. Delivery and Truck Drivers A blue-collar job for both women and men, delivery and truck drivers' jobs are considered among the most dangerous because they spend a lot of time on the road, which increases their risk of being in an accident. They often drive in unfamiliar areas, adding to this risk. Additionally, they face threats from criminals who may attack them, steal their cargo, or even their vehicles. The rise in crimes targeting delivery drivers has made this job increasingly perilous. They also risk injury from other hazards like tripping while delivering packages or being attacked by animals. 8. Farmers, Ranchers, and Other Agricultural Managers Next on the list of the most dangerous jobs in the world is that of the farmers and agricultural workers. And you might be thinking, “Why so?” Let me tell you why! You see, Farm life isn't all sunsets and hayrides. You might not know this, but the fatality rate of people working in agriculture is somewhere around 24.7 deaths per 100,000 workers. They work with heavy machinery like tractors, which can cause serious injuries. They also deal with unpredictable animals and harsh weather, which can be risky. Plus, they use harmful chemicals like pesticides and fertilizers. The injury rate for these workers is much higher than the average for all jobs, making it one of the riskiest professions. 9. First-line Supervisors of Construction Trades First-line supervisors of construction trades have a dangerous job because they work on construction sites, which are places with many risks. Falling debris, electrical mishaps, and heavy equipment— these are some of the things that they have to work with! They oversee the work and ensure everyone's safety, but accidents can happen. Workers might fall from high places, be hit by falling objects, or be injured by machines. They also have to make quick decisions, which can be stressful and lead to mistakes if they are not careful. Plus, they work outdoors, so bad weather can make the job even more risky. All these factors make their job one of the most dangerous. 10. Electrical Power-Line Installers and Repairers This is not supposed to be a surprise, right? We all know how dangerous the work of people working in this field can be. However, just knowing how to be an electrician does not mean that you will be able to do this job. They work with high-voltage electricity and often at great heights. If they touch the wrong wire or if a tool slips, they could get a severe electric shock or fall. That is not all! Apart from the technical dangers of the work, they also do physically tough work, which can lead to injuries. Plus, they have to be outside in all kinds of weather, which can make their job even harder and more risky. One wrong move, and they can literally be dead. 11. Miner Last but not least, the job of a miner is definitely going to be on this list. Just imagine the site: dark tunnels and headlamps. This is what the office of a miner looks like. And considering the fact that their fatality rate is nearly 35 deaths per 100,000 workers, it is only natural that a lot of people think twice about people actually becoming one! They work deep underground where cave-ins can happen. They face toxic air, extreme temperatures, and the risk of explosions. Miners use heavy machinery in tight spaces, which is risky. The earth can be unpredictable, with sudden tremors causing landslides. Despite safety improvements, mining still has a high rate of fatal accidents. It's a tough job with many hazards that can cause both immediate harm and long-term health problems. Wrapping It Up! Apart from these, there are several jobs that are among the most dangerous ones in the world. And yes, for most of the people who are actually working in these sectors, it is time that we salute them for their hard work. However, there is one thing that you must keep in mind. While it is true that these jobs are dangerous, they offer a lot of security. This means even if something unfortunate happens to you, be rest assured that the family will be taken care of. In case you were searching for the most dangerous jobs in the world, I hope that this blog has been helpful to you. If you have any other queries related to this, please feel free to let me know. All that you need to do is scroll down until you reach the bottom of the page. Then, leave your comments and suggestions in the box below. And I will be there to answer them all for you! Learn More Also: Best Blue Collar Jobs For Women In 2026! Is Medical Specialities A Good Career Path? – 12 Best Jobs 51 Blue Collar Jobs/Career Options To Pursue If You Get Laid Off From Big Tech
READ MOREDetails
Must-Have Fashion Items From The United States
The United States, a melting pot of cultures and influences, boasts a vibrant fashion scene. Fashion in United States is never been the same all the time round as it got some new dimensions within a few years. You should get through the details of it while managing your fashion styles and glamour with complete ease. Ensure that you do not make things too complex from your end. Additionally, this can make your life easier in the long run. Fashion Items That Define You In The United States There are several factors that you should be well aware of when you want to establish yourself in the USA. Ensure that you know the style gestures that make you feel like a US guy. 1. The Timeless Denim Jacket: The Denim Jacket is the new fashion statement of the US style that can make you the style icon of your city. A Timeless denim jacket with a pointed collar, button closure, and chest pockets remains a staple ever since. You should understand these facts from your end while making the selection of a Denim jacket. 2. The All-American T-Shirt: The Blank canvas for your personal style is also the real fashion in the United States. This is also the American Casual Wear. Marlon Brando is an iconic T-shirt that makes its mark in the pop culture of America. You can look for T-shirts with a clean, flattering fit. As it comprises a heavy cotton look with a timeless outfit. 3. The Classic Button-Down Shirt: Tailored and versatile, the button-down shirt is a must-have for both men and women. Brands like Brooks Brothers, founded in 1818, have perfected the classic oxford button-down. These shirts can be dressed up for work or down for a casual weekend look. Opt for crisp cotton poplin fabric and a well-fitting silhouette for maximum impact. 4. The Effortless Little Black Dress: Coco Chanel may have popularized the little black dress, but American actresses like Audrey Hepburn made it a symbol of effortless chic. The key to this wardrobe essential is finding a style that flatters your body type. Look for simple cuts and high-quality fabrics that will last for years. 5. The Blue Jeans: An American Icon: Blue jeans are quintessentially American. Levi's 501s, introduced in 1893, are the gold standard. Denim jeans have transcended their workwear origins to become a fashion staple worn by people of all ages and backgrounds. The variety of washes, cuts, and styles allows for endless outfit possibilities. 6. The Preppy Polo Shirt: The preppy polo shirt, popularized by Ralph Lauren, injects a touch of collegiate charm into any outfit. These cotton pique shirts, typically featuring two or three buttons on a placket, come in a variety of colors and can be dressed up with chinos or down with shorts. 7. The Comfortable And Cool Sweatpants: The rise of athleisure has made sweatpants an acceptable (and often preferred) choice for everyday wear. American brands like Champion have been making comfortable sweatpants for decades. Look for joggers or sweatpants in a thicker fabric with a slightly tapered leg for a more put-together look. 8. The Statement Sneaker: From classic Chuck Taylors to high-tech athletic shoes, sneakers are a defining feature of American footwear. New Balance, a brand known for its quality and comfort, has been a favorite for athletes and sneaker enthusiasts for decades. Sneakers can elevate a casual outfit or add a sporty edge to a dressier look. 9. The Western-Inspired Boot: The cowboy boot, a symbol of the American West, has become a fashion statement. Brands like Frye offer a variety of boot styles, from classic knee-high pull-ons to ankle boots. Western boots add a touch of personality and can be surprisingly versatile, pairing well with jeans, skirts, or dresses. 10. The Vintage-Inspired Baseball Cap: Baseball caps, once strictly associated with the sport, have become a popular fashion accessory. American brands like New Era offer a variety of styles and colors. Baseball caps can add a casual touch to any outfit and are a great way to shield your face from the sun. What Are The Future Trends In US Fashion Apart From Clothing There are several future trends in US Fashion. If you are a fashion freak, then you must be well aware of it. Some of the fashion freaks are beyond the clothing. So, let's get into the details to have a better idea of it. 1. Smart Jewelry Imagine necklaces that track your health condition. This is the e new age vintage of US fashion accessories. You need to understand the latest fashion in United States that can assist you in achieving your goals with complete ease. The best part is the smart jewellery will notify you of incoming phone calls as well. All these pieces of jewellery can be functional with proper integration of your daily life activities. You can try these exciting accessories to meet your fashion requirements with complete ease. 2. AR/VR Accessories Augmented reality glasses will project all the digital designs on your physical accessories thus allowing you for constant customization. You cannot ignore these facts from your end as well. Virtual reality experiences your Avatar in the real world could involve the whole metaverse. This can boost the chances of your brand value in a constant manner. You cannot make your selection and choices on the incorrect end. 3. Lab Grown Materials You can look for some innovative materials like vegan pearls and lab-grown leather. You will get things done in perfect order while meeting your requirements with complete ease. This can easily reduce the environmental impact as it is an eco-friendly product. You should not make things work in the wrong direction that can assist you in meeting your needs with complete ease. Try to keep things in perfect shape while getting things done in perfect order. 4. Upcycled Treasures You can revamp the vintage find, but you need to reconstruct the pieces that can be trendy at times. As it adds a unique touch of promoting complete sustainability thus, it can boost the chances of your uniqueness to a considerable extent. Thus, it has a unique touch of promoting sustainability. You should find the best solution that can assist you in meeting your goals with complete ease. Additionally, you need to find out the best options that can make things work in the correct order. 5. 3D Printed Accessories All the customization will hit a new level with some 3D-printed accessories. It must be tailored to some of the specific styles as per your body measurements. Here, you need to keep things in perfect order. Thus, it can boost the chances of your unique fashion US style with new colors and dimensions. You cannot afford to make things happen in the wrong direction while you want to groom yourself in US style. 6. Tech Enabled Bags Handbags for women that can give wireless charge to your phone or it can have a GPS tracking system inbuilt in it. This can be a traveler's dream that can make things work perfectly well in your favor. Expect features that merge fashion with proper functionality. You should be well aware of it while meeting your requirements with complete ease. Ensure that you follow the best process from your counterpart. Final Take Away Hence, these are some of the core factors that you must be well aware of while you should be well accustomed to it. You must ensure that you do not make things too complex from your end. You can share your views and comments in our comment box. This will help us to know your take on this matter. Once you make your choices in correct order things will become easier for you in meeting your needs. Ensure that you know the attire that suits the US outfit. You must try out the accessories and outfits that signify you as a pure American. Do not waste this opportunity to become something different in all ways. Learn More About: Fashion Style Every Modern Woman Must Know The Future of Women’s Fashion: Shopping Online Meaningful Beauty Reviews: Should You Try Cindy Crawford’s Products?
READ MOREDetails
Graduation Celebration Ideas: A Memory Of Lifetime!
Graduation celebration ideas will help you to rejoice in the best moments of your life that you left out. Not only achievement important but also the time you spend with your friends preparing notes is also important. You should call your friends and peers who were there with you on the journey of your graduation. Celebrate it to remember every moment that you spend with struggle and overcome it with flying colors. Ensure that your celebration must be complete from all ends and there should not be any wish left over from your end. Try to make sure that you do not make things too complex from your end. Graduation Celebration Ideas Of 2024 There are several graduation celebration ideas for 2024 that you must be well aware of while meeting your needs with complete ease. Some of the effective ideas that you can implement here are as follows:- 1. Virtual Celebration Utilize technology by hosting a virtual graduation party where friends and family from near and far can join in the party. Sending out graduation announcement cards adds a thoughtful touch. Set up a video call with decorations, music, and themed backgrounds to create an inviting atmosphere for raising a toast to your achievements and sharing moments with the people you love. 2. Mini Parade Arrange for a parade where friends and family can drive past your home to express their support with signs and balloons. Spruce up your yard or driveway with decorations like banners and streamers to bring joy to the occasion. 3. Outdoor Potluck You can plan a potluck for your guests. Here, you can ask your guest to prepare some of the food items from their home and put them in the party. Make arrangements for some fun games so that together you can enjoy the party with a fun atmosphere spreading all around. 4. Personal Graduation Celebration In this form of celebration, you can call all your friends and share the entire story and journey of your graduation to proceed further in your life. This can be an interesting move from your end to start the new journey of your life before ending the days of graduation. 5. Memory Lane Tribute Video Create a compilation of photos, videos, and heartfelt messages, from friends, family members, teachers, and mentors to make a video honoring your graduation. Include words of encouragement from each of them. Play the video during your celebration while reminiscing about the memories you've shared. 6. Themed Graduation Feast To celebrate reaching this milestone in your education, host a dinner party inspired by a travel destination or hobby. Choose a theme that reflects your personality and interests such as a fiesta night, a pasta dinner party, or a Hawaiian luau BBQ. Prepare the venue with care. Organize a selection of dishes and suggest to guests to dress up in outfits that coordinate with the theme. Remember to show appreciation by sending graduation thank you cards to all who attended. 7. Camping Adventure Set off on a camping trip to celebrate your graduation amidst the beauty of nature. Whether it's a laid back weekend in a park, or an adventurous backpacking journey in the wilderness. Camping offers a chance to disconnect from technology, connect with loved ones, and reflect on your achievements under the starry night sky. 8. Photo Booth Fun Set up your photo booth at your graduation party with props, backdrops, and camera or smartphone for guests to capture fun moments. Design a backdrop featuring your school colors, graduation year, or personal message. Provide props like graduation caps and diplomas for posing with. It's a great way to capture memories with friends and family. 9. Volunteer Spread kindness by organizing a charity fundraiser or volunteer activity as a way of giving back. Choose a cause that's meaningful to you such as education, healthcare, environmental conservation, or social justice. Encourage your loved ones to join you in making an impact on the community. Planning a charity event, organizing a donation campaign, or engaging in a day of volunteering are all wonderful ways to positively impact the lives of others. Celebrating with service work will make your graduation very memorable. 10. Time Capsule Celebrate your graduation with a time capsule where you and your loved ones can contribute nicknacks, letters, and keepsakes to be sealed and opened in the future. Include photos, newspaper clippings, and handwritten notes that capture this time in your life and reflect your hopes for what lies ahead. Seal the time capsule and choose a date to open it. When you open it in a few years, you can reflect on your journey and the progress you've made since then. What Things To Avoid In Graduation Celebration? There are certain things you can avoid in your graduation celebration as they can spoil your fun and enjoyment. So, you should stay away from these things from your end. Let’s find out the things that can spoil your party. 1. Alcohol You should stay mindful of the consumption of alcohol, especially if there are any underage guests. If you have a celebration outdoors, then you should encourage responsible drinking. Plenty of non-alcoholic options you must keep to your drivers. This will help you to avoid not ruining your graduation party with complete ease. 2. Food Don’t spend lots of money on buying food items that can have the chance of being wasted. You need to take care of these facts as well while reaching your goals with complete clarity. Additionally, avoid waste of food as things can go wrong if you are not careful. 3. Unattended Guests If there are any pools of open bodies of water, then you must ensure that there exists adult supervision. You cannot make your choices on the incorrect end while reaching your needs with completely. Ensure that you follow the right solution from your end while meeting your objectives with complete clarity. 4. Loud Music You should be considerate of the neighbors if you want to employ loud music in the process of your celebration. As there can be heart patients who may not be comfortable with it. So, enjoy your graduation completion without disturbing your neighbors. Here, you have to stay alert about these types of facts while meeting your career goals in the future. 5. Limited Guest List You should prepare a limited guest list if you want to avoid the wastage of food and money. You cannot afford to make your choices out of the dark. Ensure that you know the means to have a better solution to your problems with complete ease. 6. Activities Focused On Age Group If you have a mix of ages who are attending your party, you must plan the activities that cater to everyone. You should keep things in proper shape while reaching your aims with complete ease. Ensure that you follow the correct process to meet your enjoyment goals with ease. Final Take Away Hence, if you want to celebrate the victory of your life, like the completion of graduation. Then these methods can be helpful for you. You should remember the reason for failure in your life as well as also celebrate the cause of success as well. This will boost your motivation level. You can share your views and opinions in our comment box. This will help you in meeting your needs with complete ease. Ensure that you follow the perfect solution that can assist you in reaching your objectives in life with ease. Celebrate the achievements of your life to remember them for your entire lifetime. You need to remember this day to explore the chances of future success in your life. Read Also: How Many Jobs Are Available In Major Pharmaceuticals? How To Become A Physician Assistant In 7 Years Or Less
READ MOREDetails
Best Ways To Become An Electrician In 2024
What is the one thing that you cannot imagine your life without? And I am talking about the basic necessities right now! If your answer is electricity, you are correct! Probably because of the growing demand for the same, the search for “how to become an electrician” has increased considerably on the internet over the years. And why won’t that happen? After all, just like many blue collar jobs, it is a job that comes with some of the most essential benefits that one can think of. Additionally, you do not even need to have a very high qualification. If these perks have got you curious, then I have you covered! Keep on reading this blog till the end to learn more… What Does an Electrician Do? When it comes to electrical equipment in homes and businesses, an electrician handles a wide variety of tasks. They also maintain external electrically-harvesting infrastructure such as cell towers and power poles. Among their other responsibilities are: Installations: In a home or office structure, electricians usually install a wide variety of electronic equipment, such as built-in electronic appliances, light fixtures, and telephone poles. In order to prevent any electrical faults or outages, they make sure that every component is functioning properly. Repairs: An electrician is typically in charge of making repairs when an electrical system or gadget malfunctions. They apply their critical thinking abilities to identify the root cause of an issue before working quickly and effectively to find a solution. Maintenance: An electrician may conduct routine checks to ensure that an electrical item is still operational and running as intended after installing or fixing it. They make tweaks to improve the electrical machine or device's performance after determining whether it is wasting electricity needlessly. Blueprint Development: The ability to read and analyze technical blueprints and diagrams is essential for an electrician to do their tasks well. These plans may also be created and reviewed by senior-level electricians to make sure they adhere to the necessary performance and safety requirements. Checks: Electricians frequently plan recurring checks to look for any problems or possible safety risks with an electrical machine. If they find problems, they may resolve them right away or, if further work is needed, arrange for a professional to visit. Replacements: An electrician may swap out outdated or broken equipment for brand-new models. Because they are safer to use and help to minimize faults, replacements are required. How to Become an Electrician: Step-by-Step Guide In this fast-paced world, people are always on the lookout for shortcuts. They need to ensure that they get what they want in the shortest time possible. And that is the same for degrees and jobs. Among these, becoming an electrician probably takes some of the shortest time, which might be why people often want to know how to become an electrician. Now that you are ware if what an electrician does, let us get straight to the point. Here are some of the things that you need to do if you want to become one: Education This is the first step of the entire process that you must keep in mind. Having a good education that helps you specialize in the field is something that you need to have if you want to become an electrician. High School Diploma or Equivalent: A strong foundation is key. Courses in algebra, geometry, and basic electronics during high school set the stage for a successful career in electricity. Technical Training: Post-secondary technical training is where you'll learn the intricacies of electrical systems. These programs often include modules on residential wiring, commercial electrical systems, and even industrial applications. Training The next thing that you need to have is proper training. Considering the fact that becoming an electrician is one of the most dangerous jobs in the world, it is important that you take part in an apprenticeship program. Registering The first thing you will have to do in this case is to register for your program. Apprenticeships are the golden ticket in this trade. They blend classroom learning and real-world experience, as well as paid training that leads to mastery. Duration And Experience During your apprenticeship, you'll clock in thousands of hours of training, which is essential for honing your skills. You'll learn not just how to install and repair but also how to troubleshoot and innovate. Licensing Next up is licensing. You might wonder why it is that important, but it is. The first thing you will need to start working as an electrician is a license. To get that, you must take a test that asks questions about electrical work and the rules electricians have to follow. Besides getting a license, you can also get several certifications, which will go a long way. You can choose the type of certification you want in a specific field. These certifications are great when it comes to searching for jobs. There are times when people get preferences over others just because they have extra certifications. Why Should You Become an Electrician? You might be wondering if there are any perks or benefits of being an electrician. To answer that, YES. There are several reasons why you should try to become an electrician. However, if I have to point out a few, here they are: 1. Job opportunities Due to the necessity for their valuable talents by corporations, institutions, and individuals, electricians have a wide variety of career prospects. Governments, businesses, and manufacturing can hire electricians. Their skills are essential for large-scale electrical system maintenance and repair, such as municipal power networks. Additionally, they assist with the installation, maintenance, and replacement of home electrical appliances like generators, HVAC systems, washers, and dryers. The electrician is responsible for restoring power when a facility or a region as a whole loses power. Additionally, there are chances for specialization and career progression. Among them, these are a few that you should know about: electrical contractor Solar panel installer Automobile electrician Industrial electrical contractor Designer of electrical systems 2. Doesn't require a Degree What a lot of people are unaware of is the fact that this is one of those jobs for which you do not need a degree. Yes, that’s right! To work as an electrician, one is not specifically required to hold an undergraduate or bachelor's degree from an institution. This enables a person to save money that they could have used on supplies, lodging, and tuition. Even if it's not compulsory, attending a community or technical college to obtain a two-year degree or diploma in a profession like electrical technology is still a possibility. This can assist you in setting yourself apart from other applicants who lack the same credentials. 3. Good Salary Because they work with high-risk materials and have essential expertise, electricians are paid fairly well. An electrician makes, on average, $56,111 a year, or about $25 per hour, across the country. This estimate may differ depending on a number of factors, including the person's location, employment history, job experience, credentials, and any other qualities. Additionally, overtime labor is available to electricians, allowing them to increase their pay. An electrician may bargain for higher compensation as they get more expertise and experience. 4. Positive Job Outlook The U.S. Bureau of Labor Statistics projects that employment growth for electricians will be 9% over the next ten years, which is typical for all occupations. According to this forecast, there will be 84,700 more work opportunities for electricians, many of which will arise from employee transfers and retirement. Career gains for electricians may follow the emergence of alternate power sources, such as solar and wind energy. Forecasts suggest that installing these alternative power sources to power grids, commercial buildings, and private houses would require electricians in the upcoming years. 5. Self-Employment Opportunities This is a realistic career path for you to choose if you wish to work as an electrician while also becoming an entrepreneur or freelancer. Self-employed electricians may operate as independent contractors or as business owners, hiring and supervising a group of other qualified experts for their small electrical firm. This gives you more career autonomy by letting you decide on your own pay scale, project timelines, and working hours. Working for yourself also typically entitles you to tax write-offs through your firm, which can result in year-end financial savings. Wrapping It Up! In case you have been searching for “how to become an electrician, I hope that this blog has been of help to you. If there are any other queries related to the same, please feel free to let me know. All you need to do is scroll down until you reach the bottom of the page. Then, leave your comments and suggestions in the box below. I will be there to answer them all for you! Until then, stay safe and keep safe! Learn More About: Is Electric Utilities Central A Good Career Path? Electrical Services Guide: What You Need To Know Las Vegas Electricians Share Fun Lighting Ideas for Your Home
READ MOREDetails
Role Of Sound Design In Creating Memorable Advertisements
Sound design in advertisements plays a crucial role in creating memorable experiences for viewers. It is the art of crafting sound elements to evoke emotions, convey messages, and enhance the overall impact of an ad. Sound design is like the invisible magic behind an ad's scenes. It's all your sounds, from the music to the little details. Moreover, it can make you feel happy, excited, or even scared. It can also help you remember the ad long after seeing it. However, let's explore how sound design influences the effectiveness of advertisements. How Does Sound Design Work? Let's explore some ways sound design makes ads unforgettable: Setting the mood: Imagine an ad for a refreshing drink on a hot day. The sound of ice clinking in a glass can make you feel cool and thirsty. Ultimately, it makes you want the drink even more! Building suspense: What if the ad is for a new thriller movie? Creepy sound effects and a tense score can make you feel on edge. However, you will be dying to know what happens next! Making you laugh: Funny sound effects can be the secret of a hilarious ad. A cartoon character's wacky squeaks or a silly sound when someone trips can make you chuckle. Finally it makes you remember the ad. Highlighting key moments: Sound design can draw your attention to important parts of the ad. Moreover, a dramatic drumbeat might emphasize a product launch, or a whooshing sound could show a car speeding by. Importance Of Sound Design: More Than Music And Sound Effects Sound design is not just about music and wacky sound effects. Here are some other things sound designers use: Voiceover: A friendly voice explaining the product can make you feel like you are having a conversation. Foley sounds: These are everyday sounds recreated in a studio. Think of the crunch of potato chips or the rustle of clothes. They add a layer of realism to the ad. Layering: Sound designers can layer different sounds to create a rich and textured soundscape. This can be anything from bustling city noises to the hum of a machine. Silence: Believe it or not, silence can be powerful too. A quiet moment in a loud ad can make you pay attention to what's happening on screen. The Main Components In Sound Design The role of sound design in advertisements is quite important because sound is one of the most important elements in reaching your campaigns. Sound design is an integral part of the entire marketing process. Moreove, with the help of sound desinging, you can evoke the emotions, attitudes, and behaviors of the target audience. However, in this section, we discuss and explore some of the main concepts associated with sound design. Sound Design To understand the role of sound design in advertisements, we must first understand it thoroughly. Sound design is the process of creating the original sound. Besides, it also helps modify the existing ones. Ultimately, it suits the purpose of the advertisement campaigns. Sound design enhances immersion, design, and the campaign's ultimate appeal. It also assists in creating and restoring memories. Moreover, sound design professionals can create a distinctive logo and an ambient soundtrack to set the entire mood. Sound design is an important part of this overall brand design. Sound Editing Sound editing is one process for arranging and modifying sounds. It helps create an audio track that is coherent and consistent throughout the entire brand campaign. There is a lack of consistency in the sound output and design of the entire campaign. This is where the experts have their own role to play. The sound editors are responsible for working continuously on coherence. Moreover, the editor adjusts teh volume and pitch and, at the same time, the timing of the sound to enhance or alter the sounds. This is one part of the entire development. The sound designers Sound Mixing This is one of the most important concepts within the periphery of sound design. It is the process of combining different sounds into an audio track. The experts usually balance each sound's levels, dynamics, and frequencies. The sound mixing creates a harmonious audio that creates an impact. They also de-emphasize some of the sounds according to the main objective of the campaigns. A sound mixer can create the right amalgamation of music, sound, and voice. Moreover, they use diverse techniques to mix the sound and create a distinctive effect. Creating The Most Engaging And Memorable Sound You have understood the role of sound design in advertisements. However, in this section, we discuss some tips and techniques that can help you design the most effective and memorable campaigns. First, you have to define the values and personality of the brand Before creating the sound, you must have a clear idea of what your brand states and stands for. Discuss with the professionals the mood and style that you wish to convey with the help of your brand. At the same time, you have to create the intent. Other than this, you have to select from the sound effects through which you can select the right message for your audience. Again, you need to use the elements of sound that help create the right contrast. It helps create coherence, consistency, and, at the same time, flow. The Power Of Sound Branding Great sound design can even help create a brand identity. Think of the iconic jingle for a fast-food chain or the roaring lion for a car company. These sounds become instantly recognizable and create a strong connection with the brand. Sound design is a powerful tool in advertising. It can evoke emotions, enhance brand identity, create memorable experiences, and ultimately drive consumer behavior. By understanding the role of sound design and using it effectively, advertisers can create ads that resonate with their audience and leave a lasting impact. So next time you see an ad that stays with you, take a moment to listen. You might be surprised by how much the sound design has to do with it! Learn More Also: What Does Sound Dampening Mean? 5 Awesome Tips to Help You Sound Better When Recording Presenting Atkin Guitars: Artisan-Crafted Wonders With Astonishing Sound!
READ MOREDetailsPopular

Technologies For Creating A Startup Idea
20 Feb 2023

How to Download Facebook Videos on Android?
07 Feb 2019

7 Rules of Effective Ecommerce Web Design
28 Jan 2021

Why Are Online Transactions Convenient?
07 Dec 2023
