Smart Reasons Why You Should Buy Real Estate from Home Builders in Sunshine Coast

Published on: 30 July 2020 Last Updated on: 09 August 2021
Sunshine Coast

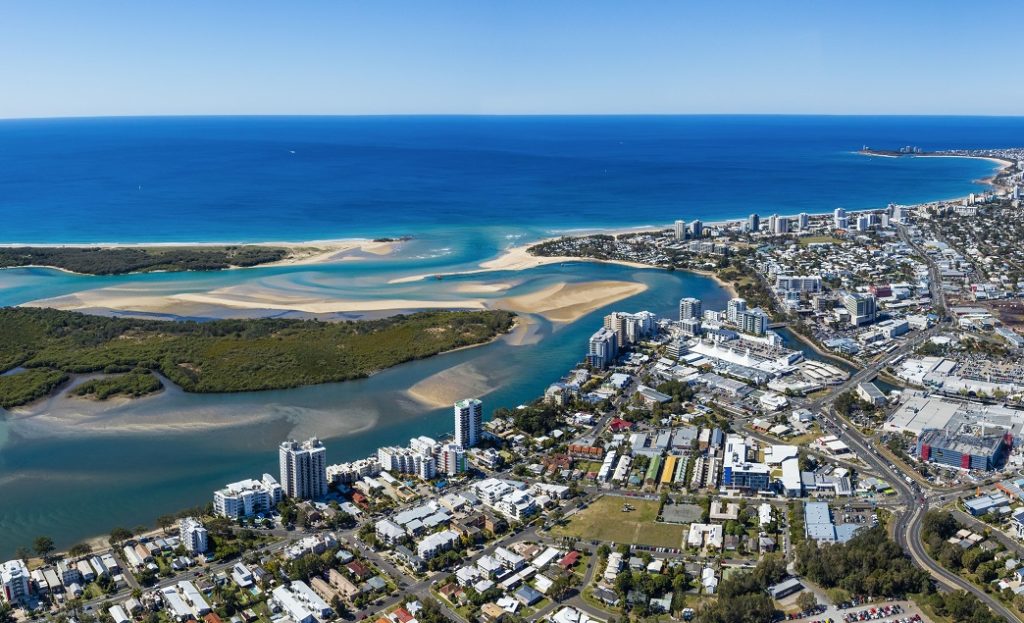
The Sunshine Coast is geographically located in South-East Queensland, with an urban area that spans about 60 kilometers from Tewantin to Pelican Waters. It is an upcoming spot for both commercial and residential real estate. Buying real estate, whether for commercial or residential purposes, is one of the most sophisticated financial decisions you can ever make. A real estate investment has several benefits, such as huge upside potential, amazing returns, and even tax advantages.

If you are probing for your next real estate investment but don’t know where to look, you have come to the right place. This article will give you smart reasons to buy real estate from home builders, Sunshine Coast.

Massive Potential

Despite being considered the third most populated area in Queensland and the ninth most populated area in the country, Sunshine Coast has not yet reached its full potential. This should be good news for real estate investors because there is a huge upside potential, which means massive investment returns.

Investing in an area that has massive potential but is still underdeveloped is a huge advantage. This is because the value of real estate appreciates over time, according to experts. The earlier you buy, the larger your possible returns will be, when your real estate investment materializes.

Accessible and Awesome Geographical Location

Sunshine Coast is less than 100 kilometers away from the city of Brisbane, making it quite accessible. It only takes less than an hour to drive from Brisbane to the wonderful beaches of the Sunshine Coast.

The 65-kilometer stretch of the Sunshine Coast is home to unbroken beaches, which include Noosa Main Beach, Sunrise Beach, Sunshine Beach, and Shelly Beach, to name a few. These beaches are arguably considered as the world’s most mesmerising beaches.

Buying real estate from home builders in the Sunshine Coast is truly a wonderful investment because of its strategic location that offers accessibility and beauty. Also, the neighborhood and community are great and will surely make you feel like home.
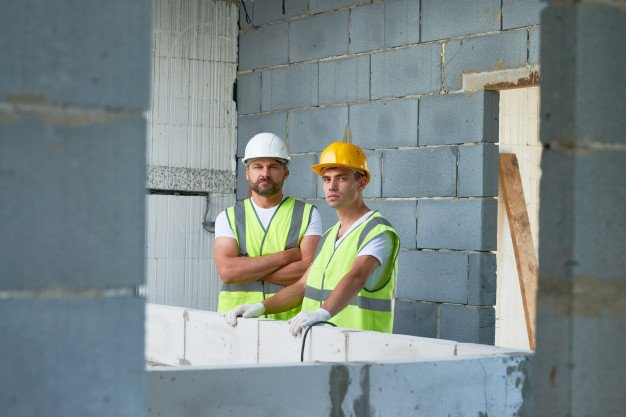
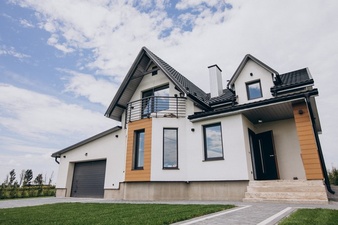
Less Hassle

One of the biggest disadvantages of buying raw land is that after doing transactions with real estate developers, you still need to talk to a construction firm for your plans on building your home. This process is simply taxing and causes a lot of hassle. Fortunately, buying house and land packages offers a solution to this predicament.

You can never go wrong with investing in house and land packages from home builders in the Sunshine Coast because of the ease of transaction. You no longer have to do transactions with multiple companies because home builders will be responsible for both land and house construction.

You may go through Sustainable Home Builders In Australia

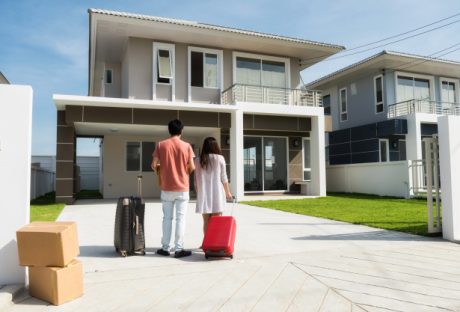
Turn Your Investment into a Rental Asset

Sunshine Coast is poised to become a promising tourist destination because of its amazing coastline home to Australia’s best beaches. This means more and more tourists will be visiting Sunshine Coast during family vacations and summer trips.

You can benefit from this future demand by owning a piece of residential real estate in Sunshine Coast and renting it out to families that need a place to stay during their vacation.

You can also register your home to websites and rent it out as accommodations for tourists that visit Sunshine Coast. This is certainly advantageous because you are earning money passively, through rental income. By doing this, you get good cash flow from your real estate investment that can increase your monthly income by upwards of 10%.

From the reasons mentioned above, investing in Sunshine Coast real estate is, without a doubt, a sound financial decision. Owning a piece of real estate in this wonderful area is something that you won’t regret because of the potential it offers in the coming years.

Read Also:

Content Rally wrapped around an online publication where you can publish your own intellectuals. It is a publishing platform designed to make great stories by content creators. This is your era, your place to be online. So come forward share your views, thoughts and ideas via Content Rally.

View all posts

Leave a Reply

Your email address will not be published. Required fields are marked *

Related

Radon Test

What Is A Typical Radon Test Fee? Understanding Costs And Factors

When considering the safety of your home, radon testing is a crucial step. Radon is an odorless, colorless, radioactive gas that can pose serious health risks if present at high levels. To determine if your home is at risk, professional radon testing is advised. The cost for this service can vary based on several factors, including the size of your home and the complexity of the testing required. The fee for a radon test typically ranges from $146 to $716 for a professional inspection. This range factors in the methods used for testing, the size of the area being tested, and whether additional diagnostic tools are required. Understanding these costs is essential, especially considering the potential health implications of radon exposure. Keep in mind that while DIY test kits are a less expensive initial option, ranging from $10 to $50, they often include laboratory analysis fees.  However, it is recommended to use professional test services as they include requirements about the placement of tests, analysis, and recording and including proper test conditions for a final risk assessment For those seeking the most accurate assessment of radon levels in their home, hiring a professional is generally the most reliable option.  Understanding Radon Testing Radon testing plays a crucial role in maintaining a healthy indoor environment, as radon exposure is a known health risk. This section will detail the significance of radon testing and outline the typical process involved. The Importance of Radon Testing Testing for radon is essential because this odorless, colorless gas is the second leading cause of lung cancer after smoking. Radon naturally emanates from the decay of uranium in the soil, and without testing, there's no other way to determine if your home's levels are safe. Regular radon testing ensures that any dangerous concentration is identified and mitigated promptly, protecting you and your family from the associated health hazards. How Radon Testing Works To conduct radon testing, various devices are available, ranging from passive kits to sophisticated radon monitoring solutions. Passive devices, like charcoal canisters, collect radon samples over a specific period. In contrast, active devices like the Model 1028 XP: Professional Continuous Radon Monitor continuously measure levels, providing more dynamic data. These active monitors are preferred for their ability to deliver real-time measurements and create detailed reports, informing you about fluctuations in radon levels and allowing for a comprehensive understanding of your indoor air quality over an extended period. Factors Influencing Radon Test Fees When you're looking to test your home for radon, various factors will determine the cost. Understanding these can help you budget more effectively for a radon test. Test Duration The length of time a radon test takes can affect the price. Short-term tests may last from 2 to 90 days, while long-term tests exceed 90 days; the latter typically being more expensive due to the comprehensive data they provide. Type of Test You have options between DIY radon testing kits and professional radon testing services. While an at-home kit can cost between $10 and $75, professional service includes the necessary expertise and equipment, incurring higher fees. Test Location The price of a radon test can vary depending on your geographic location. For instance, tests conducted in regions with known radon prevalence may involve additional precautionary steps, potentially increasing the cost. Professional Expertise Opting for a certified radon inspector adds value as they bring specialized knowledge and accuracy. The complexity of your home's structure can also necessitate more time-consuming and thus, costlier, inspection methods. Average Cost of Radon Testing When exploring radon testing for your home, you'll find that prices can vary widely based on location and the type of test you select. Understanding these costs is essential for planning your budget effectively. By Region The cost of radon testing can differ depending on the region due to factors like demand, the prevalence of radon, and labor costs. In some areas, testing can be as affordable as $100, while in others it might reach up to $1,200. For example, homeowners can expect to pay an average of $420 for a radon inspection. By Test Type Radon testing varies not only by price but also by the methodology and duration of the test. Short-term tests may range from $10 to $30 for home test kits, whereas professional long-term testing or the use of a continuous radon monitor could cost significantly more. Tools like a continuous radon monitor might incur higher upfront costs but provide more detailed information over time. Additional Costs and Considerations When budgeting for radon testing, it's important to factor in not just the base cost but also potential additional expenses. These can vary depending on several factors, including whether you require a more thorough inspection or if follow-up testing is necessary. Mitigation System Inspection If your property already has a radon mitigation system in place, you'll need to include the cost of an inspection to ensure it's functioning correctly. This typically involves checking the system's components like the fan and the vent and can add to your overall expenses. Follow-Up Testing After the initial radon test, follow-up testing may be recommended, especially if levels are close to or above the EPA's action limit. You may need short-term follow-up tests for a quick verification, or long-term tests for a more accurate assessment, impacting your total testing costs. Home Size and Test Complexity The size of your home and the complexity of the test required can also affect the cost. Larger homes or those with multiple foundations may need several test kits or longer testing periods, potentially increasing expenses. Remember, these costs are on top of the typical radon inspection fee which can range from $146 to $716, with an average of around $420. Your specific costs will vary based on these additional factors and the options you choose. Choosing a Radon Testing Provider When faced with the task of selecting a professional to conduct your radon test, focusing on their expertise and the variety of services offered will ensure you receive a reliable and thorough assessment of radon levels in your home. Certifications and Qualifications Certifications: Make sure the provider you choose is certified to perform radon testing in your state. The National Radon Proficiency Program (NRPP) and the National Radon Safety Board (NRSB) are two leading certification bodies. A certified tester will have a sound understanding of radon testing protocols and state-specific requirements. Qualifications: Beyond certifications, assess the provider’s experience and training. Years in the field and specialized knowledge can greatly influence the accuracy of your radon test results. Experienced professionals will also be adept at using the most current and effective testing methodologies. Service Comparisons Range of Services: Compare different providers based on the scope of services they offer. Some may only conduct tests, while others provide comprehensive services including radon mitigation. It's crucial to understand whether follow-up services are available, should your test results show high radon levels. Test Types: Ensure they offer both short-term and long-term testing options to suit your specific needs. Equipment Used: High-quality, calibrated equipment yields more accurate results. Verify the type of devices used in testing. Pricing: Prices can vary, with professional radon inspection costs ranging between $146 to $716, with a common average being around $420. While cost is a factor, it shouldn't be the sole criterion. Lower prices may not always guarantee the same level of service as providers charging industry-standard fees. Interpreting Test Results Before you proceed with any steps following a radon test, it's crucial to accurately interpret the results. The test reveals the radon concentration levels in your home, allowing you to make informed decisions on necessary measures. Understanding Safe Levels Radon levels are commonly measured in picocuries per liter (pCi/L) in the United States. The Environmental Protection Agency (EPA) states that there is no completely safe level of radon exposure. However, levels less than 2 pCi/L are considered acceptable, while readings between 2 and 4 pCi/L suggest a moderate risk that warrants your attention. It's important to know that some organizations, like the World Health Organization (WHO), suggest more stringent action if levels surpass 2.7 pCi/L. Low radon levels: (<2 pCi/L) Moderate radon levels: (2-4 pCi/L) High radon levels: (>4 pCi/L) Conclusion Professional radon testing can vary in cost, generally ranging from $146 to $716 with a national average of around $420. Factors that can influence your radon inspection fee include the size of your home and the type of test conducted. For those preferring a more economical approach, DIY radon test kits are priced between $10 and $50 and include lab analysis. It's important to ensure accurate results, which might lead you to opt for a professional inspection over a DIY approach. Read Also: How Pests Control Maintains The Aesthetic Appeal Of Your Home Guide To Making Your Home Guest-Ready On Time Exploring Ideas For A Biophilic Home Design

READ MOREDetails
deal with a difficult landlord

How To Deal With A Difficult Landlord

Landlords are a necessary part of renting. Unfortunately, a property that is otherwise perfect might come with a terrible landlord. In the ideal situation, your landlord will be someone you get along well with. But what happens when your landlord is difficult to work with? Fortunately, you can take steps to deal with this. To this end, we have put together a list of ways to deal with a difficult landlord to help you out. Check your lease agreement First things first: look over your lease agreement again. Is the issue you are concerned with covered in the lease? Then you know how to proceed. Of course, this could also work against you, if your landlord’s behavior is covered by the lease. Because of this, before you sign a lease agreement, it is very important to properly read through it. On the flip side, if your landlord’s behavior is directly contradicting the lease, you have a legal way to make them stop. Alternatively, if you can’t landlord’s willing to give you a good lease agreement, it might be time to start considering if you want to continue renting an apartment vs buying a house. Look through your lease agreement before doing anything else, to make sure there isn’t an easy solution to your problem. Research rental laws The first step you should take is informing yourself on how you can, legally, deal with a difficult landlord. This will depend on what your exact complaint is. As such, you will want to go to the Residential Tenancy Branch website and learn about your rights as a tenant. There are laws to help you against unreasonable landlords. For example, there is an established law about how much money they can as for a security deposit. There are also laws to protect your privacy, maintenance requests, and anti-discrimination. Related Resource: How Did COVID Change Landlord-Tenant Laws Pick your fights A tenant is required to ask their landlord about any repairs, from minor to major, before they take action. But, what if your landlord is unresponsive? Well, chances are, if they are already uninterested then asking for every minor repair to be handled will make them more uninterested. So, in this situation, you should only choose high-priority issues to fight over. Legally, a landlord is required to keep their property in livable condition, however, this might mean something different to you than your landlord. So if you have to choose what needs to be fixed, then prioritize fighting over the bigger problems. Alternatively, it might be better to avoid these issues entirely and start hunting for a new apartment. If your landlord is generally unresponsive, try to only argue about important issues when you can. Speak with the other tenants Speaking with the other tenants about your issues is generally a great idea. After all, a group of tenants can more easily deal with a difficult landlord. So, ask around. Are the rest of the tenants experiencing the same issues? Check if there’s a tenant’s association, and file a complaint through them as a group. Generally speaking, groups have more success getting results than individuals filing complaints. Be prepared to leave Unfortunately, in some cases, it might not be possible to deal with a difficult landlord. Or, dealing with them might not be worth it. In cases like this, you should be ready to move out on short notice. Of course, moving out on short notice isn’t something that’s easy to do, and it shouldn’t be done without a good reason. So, always go through every other option before deciding to do this. But, if this is the only solution, you should be prepared to leave your current apartment in a week or two. Moving out is a solution that should only be considered when there are no other options. Alt-tag: couple carrying moving boxes downstairs Document everything thoroughly If you have proof, then resolving your complaints tends to be much easier. Always make your requests in writing, and keep your landlord’s replies. Do this through email, letters, or texts. If your landlord then visits you in person, make a record of the date and things discussed. Keep copies of payment requests or any agreements whatsoever. If possible, take photo or video evidence with some sort of timestamp on it to help with proving your point. Be respectful No matter how difficult your landlord may be, do your best to stay respectful when interacting with them. After all, by being disrespectful, you are only giving them more reason to be unreasonable. Try to be calm in your communications, and try to work with your landlord. Maybe they will even decide to be nicer to you in the future. If this doesn’t help, it might be time to start planning a move. Experts from vanexpressnj.com note that you should always have your move planned in advance for situations like this. Never miss your payments An easy way to help you deal with a difficult landlord is to never miss your payments, and generally be a good tenant. Follow your lease thoroughly, make sure your payments are on time. Keep the apartment clean and don’t cause trouble for the other tenants. By doing this, you avoid giving your landlord anything to say against you when you file your complaint. Look for additional help If you’ve spoken to your landlord, sent a letter, and filed complaints, but nothing came out of it, then it’s time to search for additional solutions. When you have tried everything and you just can’t reach an agreement with your landlord, then you should consider filing an appeal at the Residential Tenancies Branch. The Residential Tenancies Branch (RTB for short) can mediate between you and your landlord in situations like these. An agreement reached through this is final, binding, and enforceable. Afterword Dealing with a difficult landlord isn’t easy. If they decide to be unreasonable, or unresponsive, there is almost nothing you can do to easily solve the issue. We hope you found this list of ways to deal with a difficult landlord helpful, and you luck in dealing with your issues. Read Also: How to Protect Your Property as a First Time Landlord? What To Look For When Renting A Property In St Albans: Checklist & Advice 5 Ways to Become a Profitable Landlord 6 Expert Tips for Finding The Right Home to Buy 6 Expert Tips for Finding The Right Home to Buy

READ MOREDetails
Road Construction

Top 7 Safety Tips For Road Construction

Road construction comes with many risks of injury. Some of the causes include dangerous equipment, the risk of collision, falling objects, and exposure to harmful objects. Before starting road construction, identifying all potential hazards in the work zone can minimize the risk of injuries. Hazards include things like oncoming traffic, pedestrian walkways, and power lines. The weather should also be taken into account when starting construction. Top 7 Road Construction Safety Tips Here are some tips to follow to ensure a safe road construction project. 1. Control Traffic Not many people follow traffic rules and it may lead to accidents even without road construction. So special care should be taken when you start working on a road. Make sure to mark the construction zone properly with barriers and cones. It is also crucial to place a warning sign before the zone to alert the incoming driver. At night it is preferable to use neon-colored traffic zones to make them more visible. 2. Create a Site Safety Program To ensure the safety of the workers, it is crucial to implement a site safety program. The staff should be given occupation safety training. Make them aware of the potential hazards and how to use certain equipment to minimize injuries. Most importantly, contractors should be well-equipped with advice on how to deal with emergency situations when the on-site manager is not around. 3. Avoid Blind Spots On a construction site, it is common to find vehicles and heavy equipment moving around constantly. Although many sites use the best water carts by TTi Water Trucks on the same truck to minimize the use of vehicles, there is still a need to avoid traffic in the construction zone. Operators should make sure to all visual aids and devices are attached, and alarms and lights are working properly on equipment. For workers who are walking on the site, make sure to stay in visual contact with any drivers. The drivers operating the vehicles usually have a limited range of sight when driving. 4. Use Personal Protection Equipment Just like other construction projects, PPE should be worn by the staff when working inside the construction area. Even if visiting for an inspection, it is necessary to wear basic PPE such as a helmet and vest to avoid any risk of falling objects. Some common pieces of personal protection equipment include steel-toed boots, hard hats, highly visible clothing, and headphones for noise protection. Especially at night, site workers should wear a jacket or vest with fluorescent orange or lime yellow reflective material. It can allow others to see that someone is at work even from far away. 5. Use Caution for Heavy Machinery When using heavy machinery, more steps should be taken to ensure the safety of the operator and everyone else on the site. Below are some precautions for operators to follow: Apply brakes when vehicles are not in use.Wear a seatbelt at all times.When the machine is parked on an inclined path, put a block around the tires.Check the mirror at all times.Use a spotter when unloading and loading equipment. 6. Stay Hydrated When workers perform construction during the day they are more exposed to heat. This is why they are more susceptible to heat-related illnesses. Therefore, they also get dehydrated quickly compared to others. Workers should drink plenty of water and fluids like sports drinks and coconut water. On extremely hot days, work should be stopped to avoid health problems like heatstroke and heat exhaustion. 7. Hire a Safety Manager Lastly, you need someone who is competent in handling and monitoring safety requirements. A safety manager should be able to identify existing and predictable hazards in the surroundings. They can then identify the hazardous or unsanitary working conditions for the employees. Additionals: Commercial and Residential Construction: Key DifferencesCrucial Reasons To Choose Prefabricated Construction MethodsSurprise Costs to Consider When Starting a Construction CompanyCommercial Construction After COVID-19: How Developers Can Adapt

READ MOREDetails