


Category: Home Improvement
ContentRally is a leading source of reliable news and trending topics on Home Improvement. Get hard-to-find insights and advice on Home Improvement from industry-specific leaders.

Things You Can Do to Your Apartment to Raise Its Value
Any real estate investment aims to increase its value. It should be worth more than what you spent on it. There are both low-cost and more expensive and in-depth techniques to raise the value of your apartment. You've come to the perfect site if you want to increase the value of your Los Angeles apartments. The renovation of your apartments is bringing a new fresh modern look to your home. But when you are thinking of renovating your place, you are stepping one step back thinking about the budget. But these solutions are easy and cost-effective. 4 Easy Tips To Raise Your Apartment Value You are spending hours renovating your apartment. But do you know that you can use some simple tips and increase the value of your apartment within a few hours? Yes, you pick the right one. You can apply some simple tips and increase the value of your apartment. Here are four easy tips for it: 1. Paint Painting your apartment is one of the most straightforward and cost-effective improvements you can make. Freshly painted rooms appear cleaner and more modern, which adds value. When choosing paint colors, remember that neutrals appeal to the largest number of individuals, making your home more appealing. A single-gallon amount of paint typically costs around $35.That leaves sufficient extra money for Painter’s brush, rollers, painter's tape, and drop cloths. So go out and grab a few gallons and get to work. 2. Repair Blinds And Light Fixtures Window blinds can take a beating from families and just everyday wear and tear. If yours are in need of repair, new blinds, or even a different style of window treatment, such as a flowing panel of fabric, it may be time to replace them. This slight modification can restore a room's fresh, lively appearance. A new light fixture might sometimes be all that is required to modernize and brighten a room in your apartment. You generally don't want anything too contemporary or out of the ordinary, but anything with a classic appearance that fits well with any decor would suffice. Look for sales, and you'll be able to stick to your budget. 3. Replace Hardware What creative, attractive, or appealing hardware can accomplish for a kitchen or bathroom will astound you. Replace those hideous 1980s cabinet knobs and drawer handles with something more modern. You can go for a nice rustic look, fun and showy beach house look, an ultra-sleek and trendy look, or anything else that works with your existing cabinets and vanities. At least one of your friends has exceptional taste. Call this person, flatter him or her and offer to buy lunch if they’ll come shopping with you to pick out some hardware for your apartment kitchen and bathrooms. 4. Curb Appeal Take a look at your landscaping (or lack thereof) to see what thoughts your house evokes. Consider what you can do to improve your home's curb appeal so that potential buyers will come to your door. A potential homebuyer's decision to buy or not buy your house will be based on how they feel when parking on your street. Renovating your front entry will make a terrific first impression. Make a small change like painting the front door or, if you can afford it, purchasing a new door. Your home's value will skyrocket, and your new entrance will entice visitors to come inside and create memories. Even if your apartment front door is built of steel, paint it with a finish that makes it look like wood. To add to the charm of your front door, consider installing a doorbell, doorknob, or perhaps a knocker. Conclusion: Are you heading to change the interior design of your apartment? These four tips are not time taking, and these four are the easy, cost-effective solution to increase the value of your home. Not only for the selling every few years we like to see some changes in our apartments. This is a straightforward, innovative approach to change the entire look of your apartment. What types of designing plannings are you currently following? Do not forget to share your opinion in the comment sections. Read Also: Ideas for Modern Flooring Designs for Home Improvement Plans 5 Interior House Painting Tips
READ MOREDetails
Unveiling home décor ideas for Christmas
Have you been caged in your house for a long-time? Do you need a break this Christmas? Well, the best activity, you can think of is his home décor. The best thing about decorating your home on Christmas is that it gives you this inner happiness. You get this sense of fulfillment. However, what is essential is that you need to keep your budget into consideration. You do not want to stress your bills later on. After defining your budget, think of décor ideas that fit your concept. Decorating your home this Christmas 1. Choosing the best Christmas lights When you think of décor, then the first thing that comes to your mind is lights. You cannot miss out on the Christmas lights at all. If you want to get hold of the best Christmas lights, then consider searching Christmas lights in Melbourne. There is no denying the fact that light adds life to your home. It looks charismatic and gives life to the room. Now, most people worry about the bills when opting for lights. Well, you need not worry at all. The reason is that there is a way out of the problem. You can go for an LED lighting system. When you go for LED bulbs, then they are cost-efficient. Plus, they can last for up to 50,000 hours. If you want to go for some other fancy lights, then there is one important rule to follow. The lights should be able to withstand the climate. 2. Decorate your home with few items When decorating the house, most people tend to clutter their homes. It is a wrong approach which you should not follow. The best strategy will be to decorate your home with few items. There is no denying the fact that few items tend to have a strong presence. 3. Avoid using too many colors for home decor Sometimes you end up using too much color when decorating the house. Well, it will also not be a smart strategy on your part. What you need to do keep in mind is that too many colors will start to give a chaotic look to your house. You will not want this to happen at the end of the day. Your Christmas tree is your central décor point. What you need to do is use a single color for your Christmas tree. The best thing about using a single color for the Christmas tree is that it helps in giving a calm look. 4. Create your own décor items You do not always have to opt for expensive items. You can even have your own individual décor items. What you can do is cut pieces of paper and decorate them. If you have dark interiors, then consider decorating your home with metallic items. The best thing is that it helps to give harmony to your home. Never underestimate the significance of simple décor items. For example, you can also use flowers for home décor. Try out all these décor ideas and you will not be disappointed. Your house is bound to look out of a catalog. Read Also: Mirrors For Sale – Finding a Perfect Home Decorative Item How to cut down your home decor costs? Read here
READ MOREDetails
Does Your Flat Roof Need To Be Replaced? Spot The Warning Signs
Most homeowners with flat roofs know that summer is the perfect time to inspect flat roof membranes to ensure there are no tears, rips, or punctures. But if you don’t have a lot of experience with membranes, it isn’t always easy to know what damage looks like. Understanding the warning signs that your roof may need to be replaced is essential for all homeowners, but especially for those whose houses include areas of flat roof: while flat roofs have many distinct advantages, they do wear out more quickly, so being able to monitor the state they are in is important. 4 Warning Signs Of The Problematic Repair Need Roof Needless to say, if you are experiencing ceiling leaks, the spread of mold, or other internal issues related to the roof, you should call an expert in flat roof repairs to address the problem immediately. But if you want to be proactive about your roof, here are some things you can look for: Check out the four signs, which are quite serious clear signs for repairing your flat roof. You should not neglect the repair work if you are finding any of these signs. 1. Ponding Water The first warning sign that repairs will soon be needed is drainage issues. If water stays on your roof for days after it rains, then your roof is probably in trouble. Flat roofs are designed to channel water through internal and external drains quickly, and if you have noticed little ponds forming on the roof deck, you'll want to get the problem looked at. The main reason for the ponding water is the uneven surface of the roof and mismanagement of the drainage system. So to prevent it, always pay attention to smooth out the surface of the roof. And if your roof is showing these types of ponding problems. Start the repairing process as soon as possible. One of the most common types of roofing membrane is EPDM rubber. These membranes are meant to adhere tightly to the roof deck, but over time they can grow loose in certain areas, leading to wrinkles or bubbles. While these problems do not pose an immediate threat, they do indicate that your membrane will soon need to be replaced. These types of cracks are very hard to find, especially with your naked eyes. For finding the cracks and the damaged parts, water is the best medium. If you find small bubbles in certain areas of the flat roof in the rainwater. Pay immediate attention to solve the issues. Because from here the problems are going to start. Small issues often lead to bigger problems for homeowners as well as business owners. When water gets under the membrane, it rots the decking and ruins insulation. A professional crew has the tools for immediate leak mitigation to stop moisture from spreading. This is a way to save money before a full replacement is needed. It keeps the property dry while you plan for a permanent fix. You may also like: Top Roofing Tips 2. Wrinkles In The Membrane One of the most common types of roofing membrane is EPDM rubber. These membranes are meant to adhere tightly to the roof deck, but over time they can grow loose in certain areas, leading to wrinkles or bubbles. While these problems do not pose an immediate threat, they do indicate that your membrane will soon need to be replaced. These types of cracks are very hard to find, especially with your naked eyes. For finding the cracks and the damaged parts, water is the best medium. If you find small bubbles in certain areas of the flat roof in the rainwater. Pay immediate attention to solve the issues. Because from here the problems are going to start. 3. Flashing Separating From Roof In places where your roof abuts a wall or parapet, it is common to reinforce the seam using metal flashing. While this flashing is designed to last for decades before it needs to be replaced, it can start to separate from the roof over time, opening a gap that can lead to leaks. If you have noticed problems with your flashing, you should call a flat roof repair company for a professional inspection. You may also like: Roof Repair: Should You Hire Roofers or DIY? 4. Open Seams Most roofing membranes are applied in strips with overlapping seams that are closed using a sealant. But in cities like Toronto that see major seasonal shifts in temperature, these seams can open over time. Even a small open or torn seam poses an immediate risk, so if you’ve noticed this problem on your roof, call flat roof repair Toronto experts who can help you reseal the hole or replace the damaged section. Flat roofs have many advantages over pitched roofs — they’re cheaper, more efficient, and easier to replace. But they also require more regular maintenance, especially in spring and fall. Conclusion: You should inspect your flat roof regularly, and if you notice any of the problems above, get in touch with a professional roofing company for a professional consultation to see whether or not the time has come for it to be replaced. Once you start repairing in time, your entire house repairing cost is going to reduce in seconds. Small cracks are repairable. But the big gaps are challenging. So it is better to start repairs in time. Read Also: Roofing Painting Contractor Leads: Ask Before Hiring One 5 Myths about Roofing Services to Avoid Foundation Moisture Maintenance: 6 Tips for Home Repair
READ MOREDetails
Everything you need to know about glamming your home with curtains
Considering drapes or curtains but stuck on which style and design to choose? Well, this article is for you. We shall delve into all the details that you ought to know when looking for curtains for your home. Sheer curtains The sheers are made from a translucent fabric that softly filters light. These curtains do not darken the room, but they allow plenty of natural light to fill it. The sheer curtains also ensure that passers-by cannot get a glimpse of your house hence protecting your privacy. It is for this reason that sheers make great living room curtains. Pair your sheers without blackout curtains for an unmatched level of privacy. The custom curtain combination gives you complete control over light levels and helps in regulating room temperature due to the insulating blackout fabric. Curtain fabric The fabric is the first to consider when purchasing curtains. The choice of fabric will determine their functionality in your home. You should choose various fabrics for different rooms. The patio curtains offer the best fabric. Blockout curtains These curtains are also referred to as blackout curtains and are primarily predominant in Australian homes. These curtains prevent light from entering through the windows hence resulting in a darker room. They also help in insulating your home. During the winter months, the thick-lined fabric gets your home warm, while during the hotter ones, the fabric prevents hot air from passing via the windows. Linen curtains It is regarded as one of the best fabrics you can select for your home despite being overlooked. These fabrics have several practical advantages. For starters, linen is a durable and robust fabric making it a worth trying investment. It has an anti-bacterial fabric with hypoallergenic features and is exceptionally absorbent. For this reason, it is the best for anyone in the family who is prone to allergies. Curtain length One of the essential steps in getting suitable curtains is ensuring you have the correct measurements. Poorly installed or ill-fitting curtains will make even the most stylish of rooms look unattractive and disorganized. Walk with an expert to determine the length of your curtain. You will have a sit down with him to know what you want to achieve in your home. Provide a sense of height to a room by hanging a fabric higher than the window. For a classic look, go with curtains that skim the floor. Curtain color Take all the time when choosing a color for your curtain since it is an investment for your home. There are a variety of drapes and curtains with different beautiful colors that can you can select. The living room area should have bright colors since it the eyes of everybody. White and grey curtains are the most popular choices. Summary Curtains literally “add life” to your home. Get a professional who will guide you in determining all the above-shared information, and you will bring happiness to your home. Read Also: Remodeling Tips for New Homeowners How to Keep Your Bathroom Clean All the Time How Do You Match Sofas With Accent Chairs?
READ MOREDetails
Living Ideas In Small Bedroom House Plans With Efficient House Designs
In small bedroom house plans, a one-bedroom house plan is for individuals who want to live alone due to some reasons. Small bedroom plans can be done according to the couple’s interests and their preferences on behalf of the limited space. Get useful inspirations about one-bedroom house plans, which have great importance for small families or couples. In small home planning, normally guest houses, accessory dwelling units, and retirement home ideas are best. Living in all-bedroom house plans normally represents budget-friendly ideas that require less maintenance. There are several reasons to choose the small house plans. Why Are People Driving To One Bedroom House Plans? Choices of the different options for perfect bedroom house plans depend upon the personal interests of the people and their preferences to proceed with standards approaching styles. Every time the big space in your bedroom designs plans is not necessarily. Modern people, especially those leading a fast life, are more likely to choose a small cozy, well-ventilated, balanced interior room as their bedroom. Here are some advantages of the small one-bedroom house plan for the modern fast-forwarding people. The less square footage planning can be done with the help of experienced and well-acknowledging experts who know planning very well. Some people live alone due to their job purpose, so they need small bedroom house plans instead of large spaces. So buying small house plans and design small living houses can be cost-effective for such people who want to live alone and take an interest in living in a peaceful environment. Less maintenance and fewer expenses are required for modern 1 bedroom house floor plans to meet your objectives as well as to live with peace. You do not need to waste money on the decorations of unused home areas. Because the small house plans can cover the empathy space and match your interest’s levels, the compact house plans are minimizing the cost of unused decorative items. Planning of a single person or living with your spouse can be a cost-effective and wise decision-making plan to achieve your objectives and to approach with smart choices to get the best and verified response at the time of your needs. One Bedroom Design Is Always Meet Up the Objectives One-bedroom homes are considered more effective and safer as compared to multiple-story homes. Due to having lots of expensive materials, bigger home plans are not considered the best and perfect as small homes. Bigger homes are for the luxury life, and more space means more time for maintenance. And fewer working professionals have extra time during your working age. This is the main reason working professionals and students always keep voting for the one-bedroom house plans. Here are the points which make the one-bedroom house plans the most robust one. 1 The bedroom house plan is an instant and reliable source for interested communities to meet their objectives and then proceed with easy and simple approaching plans. Get some help from professional house planners who have the experience to design small homes. Getting started with small house plans with efficient house design can be cost-effective and a nice plan to proceed with smart choices. One-bedroom home ideas need less space but proper planning to design homes according to the interests and trust levels of the interested people. Style of 1 bedroom house plans can always impress its residents to meet with their objectives and then proceed through fast and easily accessible resources. You have to know how to get satisfied and how to match up with your innovative interior interests. The straightforward strategies are always the most effective way to improve your modern small bedroom house plans. Conclusion: From the modern-day aspects, the small is beautiful. This is the reason the tiny house and one-bedroom house concepts are introduced. Good ventilation, well Insulated, Thermal Windows, and Airtight Construction can play a vital role in meeting your objectives. There is a massive range of ideas and valuable inspirations that can proceed to approach the intelligent feature small bedroom house plans and make sure how to get satisfied from the practical, inspiring feature plans. Read Also: Five Bedroom Rug Ideas – Area Rugs and Decorating Ideas 3 Tips on How To Plan The Best Cheap and Fabulous DIY Bedroom Makeover Seven Simple Ways for Achieving Cozy Bedroom Environment
READ MOREDetails
5 Great Reasons Your Home Needs a Wood-burning Stove
When autumn begins to fade into winter, the temperature starts to reduce and gets even colder. The need to keep the house warm also arises. You definitely have some other form of heating your home since this won’t be your first winter. But your being here means that you are considering an alternative heating method. The efficiency of wood-burning stoves is one of the many reasons one should be the alternative on your mind. But there are also so many other reasons and they would all be discussed in this article. But first, what are wood-burning stoves? What Are Wood-burning Stoves? Wood-burning stoves are home appliances that are made of metals like steel or cast iron and are used for heating the house. As the name implies, wood is the fuel for the stove and it is burnt inside a fire chamber that is usually enclosed. The gases and fumes they produce have to be taken out of the room either through a flue or a chimney just like a traditional fireplace. Although these stoves have existed for a long time, they only just rose in popularity. And this is because more people have begun to appreciate their benefits. But what are these benefits? Let’s find out below. Reasons You Should Get a Wood-burning Stove The following are the major reasons a wood-burning stove is a great heating system for the home… 1. Efficiency The heat that this heating system produces is very impressive. Your home gets to enjoy a great form of heat output with one of these burner stoves. This means that the house will get warm effectively and a lot more quickly. They come in various sizes and energy levels, this way you can select one that will adequately suit your home’s size 2. Stylish and Decorative They not only get your house adequately warm, but they also provide aesthetics as they look so great. When one is placed in a room in the home, it is sure to become a new point of attraction by adding style and character to the room. There are a lot of styles to choose from like contemporary or classic and so much more. You simply need to be deliberate when you shop for the burner and ensure you get one that will match the home’s décor. 3. Gives Your House a Homely Ambiance When the weather is chilly and bent on making everyone miserable, one way to beat the weather is to get cozy at home. And a wood burner is sure to provide that homely ambiance that is much needed during this time. The cozy heat from the burner and the roaring flames inside the fire chamber provide a calm and soothing visual impact that will leave you comfortable in no time. Visit https://apnews.com/article/a53e297b6fbc4481a0c917dc41c3842f to find out other ways you can stay comfortable during the cold season. You can sit in front of the fire with a cup of coffee while watching the flames dance. 4. Good for the Environment We are in an age where eco-awareness is at its peak and a lot of people are trying their bests to do right for their environments. One way to contribute towards this goal of a better environment is a wood burner. How is this burner environmentally friendly you may ask. Well, it is because wood which is the fuel of this type of burner is carbon neutral even though it releases carbon dioxide. The amount of carbon dioxide that is produced equals the amount that is consumed by trees which takes the carbon dioxide and then releases oxygen. This way, the burners do not impact the carbon dioxide level in the environment. 5. Cost-Efficient Energy price is constantly going up and people are beginning to find it more expensive heating up their homes with electrical and gas means. Wood burners on the other hand are very energy efficient and thus help you save money that would otherwise have been used on the energy required by other home heating systems. You will surely find this heating method a lot more economical as you will notice an obvious reduction in your heating bill. The heating bill is reduced and not cut off because you may still have to make use of the central heating where you haven’t placed a wood stove. The initial cost of getting the burner bought and installed may be on the high side compared to other heating systems. But, we assure you that it would only be a matter of years for this cost to be gotten back through the energy-saving nature of the burner. If you need to learn about more of its benefits, you can check here. Conclusion Getting a wood-burning stove may very well be the best decision you may make when it concerns heating your home. This article discusses 5 great reasons why this heating system is great for your home. Read Also: 5 Things You Should Know About Heating and Cooling Tiny Homes Advantages Of Using A Water Heater At Home
READ MOREDetails
9 Home DIY Decorating Tips
For new homeowners, there is nothing more exciting than the prospect of owning your first home. This is a place that you can share with your family and make memories in. Of course, for your home to truly feel special you need to do the work to make it look as stunning as it possibly can, so not only do you get to impress your neighbors, but you will be able to give your family a feeling of warmth and belonging by manipulating the aesthetics to suit their tastes. If you don't want to spend money by hiring a professional interior designer at the moment, here are some quick ways for you to decorate your home! 1. It All Starts At the Facade The facade is the first thing that your guests see when they enter your home. It is fair to say that the facade will create a more lasting first impression compared to the other parts of your home. One thing that you can do to make your home feel inviting is by giving your front door a nice playful hue, perhaps one of the primary colors of red, blue, or yellow. This gives your house a very impressive aesthetic, which many of your guests will surely appreciate. In fact, it is actually a very popular tradition to paint the front door red as a sign of welcome, which is something that started in the early days of the United States but is something that is still practiced today. 2. Keep Everything Light and Subtle So this approach is a little different from your front door, but you should keep the colors of the interior of your home very light and very subtle. Remember, you want to tickle the senses with the color of your front door, but you want to calm them down with the color of your walls and furniture. The reason why is simple: the colors of the interior surround you and your guests, from all sides. That is why having a very profound color indoors has the potential of absolutely overwhelming your guests. Light-colored walls of white or gray particularly go well with natural light. 3. You Can’t Get Enough Natural Light Speaking of natural light, you should make sure that you maximize it within your home by removing any obstructions from the outside or from within that could obstruct it. Natural light is beautiful and it can easily improve the aesthetic of your home. 4. Mirrors, A Must Have For Every Room Of course, if your home is not situated in an area that permits too much natural light, there is a little secret that you can so that you can recreate the effect of having tons of natural light in your home. That is, of course, with the careful and creative use of mirrors. You should have a mirror hung in every room because it can bounce light around to give your home better brightness and artificially create the feeling of having tons of light from coming from the outside. 5. Make Good Use Of Art The oldest trick in the book when it comes to making your home look fancier and more luxurious is to buy art and carefully choose the right areas of your home to feature them in. You have to remember that art is very subjective, so you shouldn’t feel the need to buy pieces that are too expensive to enhance the aura of your living room. It is purely visual, there are tons of paintings out there that you can buy for under $50 that would look great on your wall. To the untrained eye, which accounts for most eyes, the difference between those pieces of art and the most expensive ones will be completely negligible. If it looks good and fits the color scheme of your home, buys it! 6. Add An Electric Fireplace Earlier we talked about the home being the perfect place to make your loved ones feel nice, loved, and warm. There is no better way to recreate this warmth in your home than to feature an electric fireplace with mantle. Not only are electric fireplaces very practical for people who live in colder states, but they are very symbolic and traditional as well; an ideal setting for having deep conversations and telling fun stories in the presence of the people you care about. Not only are electric fireplaces very practical for people who live in colder states, but they are very symbolic and traditional as well; an ideal setting for having deep conversations and telling fun stories in the presence of the people you care about. You can also consider in using bio ethanol burners, powered by clean and renewable bioethanol fuel, offer an eco-friendly and versatile solution for adding warmth and ambiance to any space without the need for a chimney or vent. 7. Lighting that Matches the Room This tip is a little bit more technical but it can be very powerful if you use it correctly. You should have different types of lighting in your home and you should match with the room it is in. There is ambient lighting that exists purely for the purpose of illumination, which would work great in the living room. There is also such a thing as accent lighting, which provides very decorative and very pleasing highlights. These types of lights are perfect for places where you entertain like the dining room. 8. Don’t Forget to Declutter This is probably something that you hear time and time again from people that are interested in home decorating, less is definitely more. Having that said, you have to constantly look at the parts of your home that you feel may look a little overwhelming and find ways to declutter. Maybe your bookshelf has too many books, or maybe your furniture is too closely packed together. 9. Low Ceiling? No Problem One of the first things that realtors talk about when they are trying to sell an expensive home is high ceilings, they are just magnificent to behold and they can give the home a very grandiose appearance. Of course, if these types of homes are not exactly within your budget, there are some visual tricks that you can try to artificially reproduce this look. Using custom drapes, using large mirrors, and using design elements that feature vertical stripes will all make your ceiling look higher. Styling a Stunning Home So those are some of the simple ways you can make your home look great in a way that does not break the bank. Always remember, however, that design may give you a beautiful looking house, but it is the people in it that truly turn it into a home. Read Also: How to Improve Your Living Conditions in a Small Living Space 5 Tech Items You Can Display as Decor Home Improvement Hacks to Add to Your Space
READ MOREDetails
Foundation Moisture Maintenance: 6 Tips for Home Repair
Foundation maintenance is not something most homeowners plan for. It can be time-consuming, expensive, and complicated. It can also cause you great pain and aggravation if it is done incorrectly. Many homeowners make the mistake of trying to handle foundation repair on their own. You should also go towards the foundation maintenance services that help you to make your home safe and secure. Unfortunately, this can lead to even more problems than the original problems and can cost you much more money in the end. 1. Inspection: Foundation maintenance tips that include inspections are necessary because repairs can get costly if they are not done correctly the first time. This is because the damage could have been lessened if the repair was made properly. If you notice a crack that is slowly getting worse and appears to be getting worse, then you should call in an expert immediately. You should also make sure there are no other cracks that could be causing your home foundation damage. 2. Clay Soils: Another foundation maintenance tip involves inspecting your clay soils. Do you have clay soils in your yard? If so, you need to know what type of soil your foundation is built on and how to correct it. There are certain plants and trees that can actually damage your foundations and these should be avoided at all costs. 3. Repair Foundation Cracks: In addition to avoiding having your home foundation damaged, another way to avoid it is by repairing foundation cracks. There are different types of cracks including wooden cracks, concrete cracks, and more. Some homeowners prefer to repair their home foundation first and then worry about the type of cracks they have or the damages they may have incurred. It is important to repair any type of cracks that may be causing damage to your home. 4. Check Gutters and Sewage Systems: Along with foundation repairs, homeowners should also make sure their gutters, downspouts, and sewage systems are working properly. Gutters and downspouts should be checking on a regular basis to make sure they are not clogged with leaves, twigs, or other debris. Downspouts should be inspected for leaks that may cause damage to your home. There are many foundation maintenance tips for homeowners that include checking on the condition of these two vital components. 5. Hire Foundation Repairing Company: One of the most important foundation maintenance tips for homeowners is to hire foundation repair companies when it comes to checking for leaks around your home. Most of the time, leak detection can be completed without the help of an expert. One of the best ways to check for leaks around your home is to use an inexpensive non-intrusive infrared camera. If you find any areas around your home that appear to be leaking, this will be an excellent time to consult a foundation maintenance company. 6. Proper Drainage System: Homeowners should also make sure that they have a proper drainage system throughout their homes. Proper drainage allows materials such as liquids and grime to seep away from the foundation and stay away from being eroded by the soil. Many homeowners also underestimate the importance of proper drainage. Without the proper amount of drainage in place, there is a greater risk of foundation damage. A professional foundation moisture maintenance company will be able to determine if you do not have adequate drainage. Read Also: Improve Your Home With Concrete Lifting Services Why You Must Embrace Green Home Technologies? Safety Triangle: Three Things Your Soon-To-Be House Must Have
READ MOREDetails
Why to Choose Stamped Concrete for the Hardscape Elements of Your Property?
Whether you’re planning out the build of a new property or looking to make some upgrades around your current home, stamped concrete is the perfect choice for beautiful hardscape elements. Not to mention, there is no better way to personalize design than by using ever customizable concrete. Now without further ado, let’s get into the reasons why you should choose stamped concrete for the hardscape elements of your property. What Are Hardscape Elements? For anyone confused over what exactly hardscape elements of a property are, hardscape elements are all the permanent, structural components of the landscape surrounding your home. In general, the most common hardscape elements that are used in a home’s landscape design include: Decks, Driveways, Patios, Pathways, Retaining walls, and Structures (gazebos, sheds, etc.) When it comes to materials used to create hardscape elements, there is a wide range of choices to consider. Typically, the most commonly used materials for hardscaping are concrete or pavers, such as flagstone, slate, worn rock, wood, or brick. Compared to concrete, pavers are a more expensive material. Ultimately, the material choice depends on the budget and personal preference of the property owner. Now that we know what hardscape elements are, let’s get into why to use stamped concrete! Stamped Concrete Design is Limitless: A huge advantage of using stamped concrete for a property’s hardscape elements is that the design options are never-ending. Unlike pavers that can’t be changed, stamped concrete is the only material that can be adjusted right up until it’s about to be poured. That means you can change everything from the color to the pattern and design right up to the last minute. Not to mention, stamped concrete can flawlessly imitate the look of expensive pavers at a much lower cost. That means you can use stamped concrete to create a gorgeous patio that looks like flagstone or wood in the exact color you want. Stamped Concrete is Less Labor Intensive: Laying pavers, like loose stone, piece by piece is going to be a time-consuming job. On the other hand, stamped concrete is less labor-intensive and can even go over existing concrete or stone as an overlay! Using stamped concrete services is the perfect way to start enjoying a new deck or patio without having to wait weeks or months for installment. Stamped Concrete Never Needs Resetting: After installing hardscape elements, you want to be able to enjoy them. However, with pavers, that’s not always the case because those materials, like stone, can become loose over time and turn into a tripping hazard instead. In other words, the best way to avoid twisted ankles around the pool each summer is to use stamped concrete and avoid having to replace or reset pavers. Stamped Concrete Requires Minimal Maintenance: That’s right, stamped concrete is the perfect choice for a hardscaping material that will be simple to clean and take little to no maintenance to keep its beautiful, patterned appearance. Spend more time enjoying the hardscape elements of the property and less time cleaning them when you used stamped concrete to design your perfect outdoor landscape. Read Also: Modern Home design ideas for crowded families 6 Interior Design Tips to Make Your House a Home
READ MOREDetails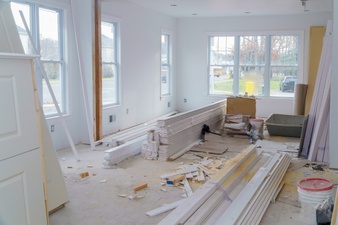
Remodeling Tips for New Homeowners
Everyone has their reason for embarking on a home remodeling project, but the thrill remains the same, especially as a new homeowner. Perhaps, you want to improve the value of your home or want it to fit your style? Regardless, it's an exciting project that comes with a lot of work— sometimes more than bargained. It can be devastating to embark on a remodeling project only to realize halfway that it's unachievable. So, whether you will be getting the assistance of a remodeling company or you'll be handling this project alone, here are five tips you should know before starting. 1. Try to ask for help: It takes more than a pair of jeans and a well-equipped toolbox to produce quality work on a renovation project. First off, as an amateur, certain tools aren't suitable for you. Secondly, YouTube tutorials may not always have all the answers and solutions you need. So, except remodeling is something you have years of experience in, don't shy away from asking for help. A simple Google search should come in handy in this respect. For example, if you live in Houston, Texas, a quick search for Houston, Tx remodeling company should deliver some viable results. 2. Make a priority list: While some people can afford to stay in hotels during home renovations, you may not have that luxury and will have to keep living in your home during the renovation. The best way to avoid feeling overwhelmed by the home renovation process is to tackle time-sensitive projects first, like water damage or a leaking roof. Additionally, areas of the house you use frequently should be a top priority. That way, you can still go about your daily life even though your home is under renovation. 3. Set a budget: Contrary to what some TV shows make us believe, remodeling a house can run your account dry, especially if you don't have an accurate budget. So, the next step after drawing out a plan would be to determine your budget and financing. Although budgeting isn't the most fun thing to do (as it requires you to find a balance between the available finance and your dream design), it's an essential part of the remodeling process because it helps you gauge your expectations. Your budget should ideally include everything from the costs for permits to building materials, labor, painting, and cosmetic touch. It's easier to stick to your budget if it's accurate. So, make sure you get a contractor to review it or request cost estimates from professionals. You can look up companies in the Houston area that offer free estimate and consultation services to save costs here. 4. Remember the big picture: When taking up a remodel project, it's essential always to keep the big picture in mind. Remember that energy costs, water bills, and repair expenses can add up quickly in the future. So, make sure you include them all in your plan. Furthermore, since you're remodeling, you may want to invest in sustainable appliances that respect resources and support sustainable living. This is especially vital for a bathroom renovation. This area of the home can spike up your future heating and water costs. In a nutshell, you need to consider ways to save money both now and in the future; your bank account will thank you for these decisions in years to come. 5. Don't focus solely on design: Sure, many of us have a design that fits our style in mind before embarking on a remodel project. Perhaps, it's your kitchen, bedroom, or study that concerns you. However, you'll have to find a balance between getting the design you want and maintaining functionality. Many contemporary homes now blend functionality with design. For instance, if you have a small kitchen space, you may want to consider forfeiting some fixtures like the planning desk that no one really uses. That way, you save on space and maintain functionality. Read Also: Home Improvement Hacks to Add to Your Space Ideas for Modern Flooring Designs for Home Improvement Plans 6 Interior Design Tips to Make Your House a Home
READ MOREDetails
Who Is Responsible For My Sewer Pipes?
The basic guidelines are the same across the world, if the sewer pipes are on your property then you are responsible for them. The only real exception to this is if the sewer pipe going through your property is shared. This means it is the main connection to the public sewer line for several houses and happens to go across your yard. This generally happens when several houses are clustered together and set back from the main sewer line. It is simpler and cheaper to connect the houses together and then direct the sewage to the mains pipes. However, this doesn’t mean you are not responsible. Joint sewer pipes do not become the responsibility of the water board. Instead, the responsibility is shared between the houses the pipe serves. This is something you should be made aware of when you come t purchase a house as it can be more complicated organizing repairs and especially emergency plumber. The reason for this is that all homeowners should agree on the plumber chosen and the costs before one can be called. This ensures that everyone will pay their fair share. But, as mentioned, it can be much harder to negotiate this, the larger the group of houses the more difficult it is. The simple solution is to have a fund that deals with repairs, including sewer pipe issues. Blockages: If you have a sewer pipe blockage then it will probably be your responsibility to sort it out. The easiest way to ascertain this is to have a sewer diagram done. This will help you to confirm that the pipe is your sole responsibility or that it is shared. You can then assess where the pipes run and, by using a sewer camera you can locate the exact distance into the pipe where the clog is. This will make it easier to decide the best course of action to remove the clog. Don’t forget that the simplest way to confirm it is your responsibility is to check with your neighbors to see if they have a clog. If it is just your home then the clog is in your pipes and you need to resolve the issue. If the clog is affecting several homes you can call the water board who will handle the issue for you. Dealing With Issues: Clogs are generally a result of damaged pipes. This can happen over time, especially if you have been digging in your yard and the pipes are getting old. It can also be the result of tree roots getting into your pipes. This damages the pipes and causes a clog, creating an array of issues. Knowing where your sewer pipes run will help you to consider the likelihood of root damage as you can assess how close trees are to your pipes. Don’t forget, a good plumber will sort these issues for you in no time and will save you a lot of hassle. Even if you prefer to resolve issues yourself, you may find a professional is the best option when dealing with sewer pipes. Read Also: 5 Best Type of Plumbing Pipe 5 Important Tools For Pipe Recovery Operations
READ MOREDetails
Swimming Pool Cleaning and Maintenance: Cheap Online Pool Supplies
When the summer heat starts kicking in, doesn’t it feel good to jump into the pool? Spending hours in the soothing water, swimming, and having a relaxing time takes all the summer heat away. And if you have a pool in your backyard, you can go swimming anytime you want, right? The only problem is, keeping the pool clean and hygienic to swim. If you are getting inside the water, it’s essential to make sure the water won’t harm your skin or hair. Pool cleaning and maintenance are almost as important as taking a bath every day. The easiest way is to follow a certain procedure and regular practices to keep the water clean. You might also want to buy some cleaning chemicals. While pool cleaning can get a bit costlier, there are some easy-to-use and cheap online pool supplies available to save your day. Here is how you can maintain the pool and enjoy a swim round anytime in a day. Pool Maintenance Basics - Maintaining a pool is a three-step process and is pretty easy once you get used to it. Step 1: Water Circulation As much as the water keeps circulating, the pool is going to stay healthy. The water will carry any invisible dirt and debris towards the filters to keep itself clean and harmless. Ideally, the pool filters and pumps should keep the water running all the time. But considering the electricity situation, that might not be possible. It will be cheaper if you follow a certain timetable to keep the water running. The best solution would be to turn on filters and pumps during the night hours till the morning. A good 8-hour routine would be enough for water circulation. Step 2: Cleaning The Pool and Equipment The circulating water will carry and trap any debris into the pump baskets and filters. To maintain those tools functioning, clean all the pump baskets and filters. You might have sand filters or cartridge filters. Cleaning both the filters is easy and doesn’t need a lot of work. There are some automatic, robotic vacuum cleaners and filters that can do the cleaning themselves so that you can invest in that as well. Now, to clean the pool, first, pick up the skimmer and get all the visible debris out. Then brush and clean the walls, steps, ladders to get rid of any collected dirt that might harm the water. Brushing on alternate days would be a good idea. Cleaning can never be enough, be more generous in this step. Shine the pool and the water. Step 3: Pool Chemistry Pool Chemistry might sound tricky and complex to understand for beginners. But it isn’t. A couple of sanitizers and chemicals are going to help you maintain the pH of the water. Ideally, the pH of the pool water should be between 7.2 to 7.6, and the alkalinity range should be 100-150 ppm. Get some pool test strips to test these ranges and use the chemicals accordingly. Have pool chlorine and dispensers in handy all the time. If you have a saltwater pool, then you can get salt supplies at a cheaper rate online at Watson’s. Test the water every other day to make sure it’s safe to enter. Final Words: Pool cleaning and maintenance activity is actually as fun as swimming. Once you understand and sync into the whole process, it’s quite easy to do it at least once a week. Get into the cleaning mode, and your pool will stay functional for a longer time. Next time you host a party, your pool will be shining with crystal clear water. Read Also: Top 5 Tips in Designing Your Swimming Pool Renting a villa in Malta with a private pool 5 Hotel Housekeeping Tricks You Need To Clean Your Bathroom
READ MOREDetailsPopular

Technologies For Creating A Startup Idea
20 Feb 2023

How to Download Facebook Videos on Android?
07 Feb 2019

7 Rules of Effective Ecommerce Web Design
28 Jan 2021

Why Are Online Transactions Convenient?
07 Dec 2023
