












7 Delicious & Exotic Snacks For Your Next Cocktail Party

Published on: 13 June 2023 Last Updated on: 11 February 2026
Cocktail Party

Are you that lucky cocktail party host this weekend among your friends? If you are, then you must be wondering what exception you can make this time that people will love.

We know that you can manage the ‘cocktail’ part. So, we have gathered seven delicious & exotic snacks for your next cocktail party that will win the hearts of your guests and makes you the star host of the month!

However, these snack ideas are so overwhelmingly good that people may request you to make them again and again. Here, you will find quick and easy dishes to prepare, although you may need to visit the supermarket to get the ingredients.

Without further ado, let’s get started with the recipes so that you can pick which snacks you want to prepare and make the list of ingredients.

1. Salmon Tartines for Fish Lovers

Salmon Tartines for Fish Lovers

Recipes with Salmon and avocado are always a delicacy; when you prepare it with wasabi, it will deliver a heavenly feel with your fast bite. And guess what, you need only 15 minutes to make it.

Ingredients:

To prepare this dish, you have to gather the following ingredients:

  • Puff pastry,
  • Sashimi-quality salmon,
  • Mirin,
  • One avocado,
  • Low-sodium soy sauce
  • Ginger,
  • Lime juice,
  • Caster sugar,
  • Rice vinegar, and
  • Wasabi paste.

Cooking Method:

To prepare the recipe, follow the steps below:

  • Preheat the oven to 200 degree Celsius and cut the pastry according to your preferred shape; place them on a lined tray over the baking paper and bake for 10-12 minutes till golden in color and allow them to cool down. Your tartine base is ready.
  • While baking, process the avocado with wasabi. To do that, take a small pan and dissolve sugar in water over low heat. When it cools down, take an avocado, wasabi, lime, and sugar in a blender, add salt or any other seasoning if you want, and set aside.
  • Prepare a dressing by mixing mirin, vinegar, soy sauce, and ginger in a small pot.
  • After you have prepared everything, take a pastry base and place avocado, salmon, and cress. Serve with a drizzle of dressing.

2. Elk Jerky Cheeseboard for Slow Eaters

How about serving an Elk Jerky cheeseboard at your cocktail party? This cheeseboard is a great addition to the food you can serve because it not only has a posh vibe but also serves a unique version of your regular charcuterie board due to the gamey elk.

Elk goes well with many reds including Cabernet Sauvignon, which can complement this strong-flavored jerky with its earthy notes. You can also pair it with lighter-style cocktails made from scotch, gin, or tequila, as they go well with these types of dried meat.

You can add a variety of cheese to such a board, including emmental, brie, gouda, and blue cheese.

3. Carrot Muffin for Sweet Tooths 

If you want to prepare a carrot muffin for your cocktail party ahead of time and you love baking, then this dish is a must for you to try.

Ingredients:

This dish is easy to prepare and only needs eight ingredients.

They are:

  • Yogurt (Greek style),
  • Ready mixture for making carrot cake,
  • Carrots,
  • Pecans,
  • Eggs,
  • Aperol,
  • Pure cane sugar, and
  • Vegetable oil.

Cooking Method:

To prepare the recipe, follow the steps below:

  • First, you will make a labneh. Take a bowl and set a fine sieve over it. Put the yogurt inside, wrap it with the sieve, and hang it over the bowl in the refrigerator overnight.
  • Preheat the oven to make muffins at 170 degrees Celsius.
  • Grate the carrot coarsely and mix it with the cake baking mix. You can add pecans to the mix.
  • Take the muffin glasses, and bake them for at least 35 minutes. To make sure they are evenly baked, insert a skewer in the center, and if it comes out clean, your muffins are ready.
  • If you want to soak the muffins with Aperol syrup, place water, sugar, and Aperol on a small pan and keep stirring until the sugar is dissolved over medium heat.
  • Place the muffins in a line and pour syrup over them. Let the muffins soak in the syrup for 5 minutes.
  • Add the icing mix with labneh to make frost, and use your creative ideas to décor the muffins.

4. Four Crispy Buffalo Wings for Savory Hunters

Nothing can beat the taste of chicken wings. And the crowd will devour it within a minute if you can make it extra crispy outside and juicy inside. Here’s the recipe:

Ingredients:

To make Buffalo wings, you’ll need the following:

  • Chicken wings (defrost if frozen),
  • Baking powder,
  • Salt,
  • Butter,
  • Franks hot sauce,
  • Sugar.

Cooking Method:

To prepare the recipe, follow the steps below:

  • Tap the wings with tissue paper to absorb the extra water after washing. Toss the wings with baking powder and salt; it will absorb the extra moisture from the chicken's skin, making it crispier.
  • We are not using hot oil in this recipe as we are going to bake the wings. The science behind baking the wings and making them crispy is to start baking using low temp at first and increasing the temp after a few minutes. Set the tray on the lower shelf of the oven at 250F/120C.
  • Low temperature will melt the fat first, and high temperature will make the skin super crispy when you place the wings on a higher oven shelf at 425F/220C.

5. Sausage Rolls for Meat lovers

Sausage Rolls for Meat lovers

You know that your friends love meat. But you don’t want to worry about arranging a bbq in the backyard. So, prepare these bite-size sausage rolls to calm the meat cravings of your guests.

Ingredients:

To make sausage rolls, you’ll need:

  • Pork,
  • Onion & Garlic,
  • Breadcrumbs,
  • Puff Pastry,
  • Bacon,
  • Fennel Seeds,
  • Salt & Pepper.

Cooking Methods:

Follow the easy-peasy steps below to cook off sausage rolls:

  • Take a pan and cook bacon, onion, garlic, and celery,
  • Mix with the pork,
  • Place the puff pastry, put the mix on it, roll it over, and cut it into small portions.
  • Place them on a baking tray and brush with egg.
  • Bake them for 30 to 40 minutes until golden brown.

This snack serves its best when you are keeping the option of exciting games at your party. Whether it’s a two-player board game or a multiplayer one, people can have more fun when they have something delicious to eat.

6. Coconut Shrimp for Peaky Eaters

Every party has those guests who will not eat anything that’s too oily or too sweet. To tackle those peaky eaters, you can cook coconut shrimp, which will go well with whiskey cocktails.

If you are not hiring any bartenders and decided to become one for the day, check out these whiskey cocktail recipes for home bartenders!

Ingredients:

You will need the following items for this quick bite.

  • Jumbo Shrimp,
  • Flour,
  • Shredded coconut,
  • Beaten egg,
  • Pepper,
  • Pranko breadcrumbs,
  • Garlic powder,
  • Oil and salt to taste.

Cooking Method:

Follow the steps below to have the best shrimp dish of your life.

  • Wash the shrimp and season them in a bowl with pepper and salt,
  • Take two flat dishes. Mix flour and garlic powder in one of them; in the other, mix coconut and breadcrumbs.
  • Take one shrimp and dredge it in the flour mixture; after that, dip it in the beaten egg and dredge again in the coconut mix. Follow the steps for each shrimp.
  • Refrigerate for an hour (or overnight if you want to prepare the night before and serve hot the next day).
  • Deep fry in a pan full of oil till golden brown color and season with salt and pepper after the whole batch is done. Place them on a baking sheet with a cooling rack so that they can absorb the dripping oil. 
  • Serve it with sauce or mango salsa.

7. Salsa for Lazy Hosts
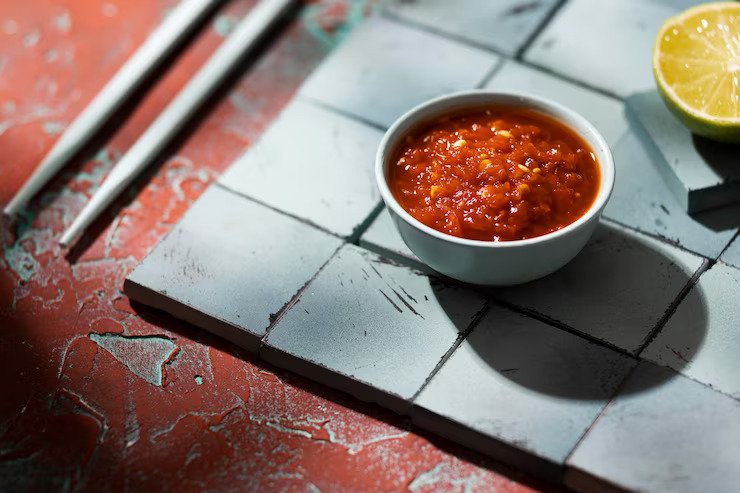
Salsa

When it comes to cocktail parties, you need easy, quick recipes that will take less time to prepare so that you don’t get stuck in the kitchen while others are enjoying the evening, and this salsa will take only two minutes.

Ingredients:

Here goes the items you need to get together:

  • Crushed tomato,
  • Coriander leaves,
  • Green chiles,
  • Garlic,
  • Lime,
  • Jalapeno,
  • Cumin, and
  • Sugar.

Serve with tacos, fajitas, burritos, nachos, or quesadillas. You can buy them at any store.

Cooking Method:

All you need to do is blend all the ingredients mentioned above. However, make sure to use good quality canned tomatoes, if not fresh ones. You need to blend for a few seconds and see the consistency. Keep blending if you like it smoother.

But don’t blend too much if you like it chunky.

Conclusion:

With this list of seven delicious & exotic snacks for your next cocktail party, you will be able to welcome your guests with warm hearts and warm food on the counter.

Even though cocktails are the main stars of your party, these bite-size, easy-to-prepare snacks will make your evening even better alongside the drinks. Prepare the snacks while ensuring the recipes have variety, such as spicy, sweet, savory, vegetarian, and non-veg options.

Read Also:
Arnab is a professional blogger, having an enormous interest in writing blogs and other jones of calligraphies. In terms of his professional commitments, He carries out sharing sentient blogs.

View all posts

Leave a Reply

Your email address will not be published. Required fields are marked *

Related

How To Freeze Dry Food

How To Freeze Dry Food At Home Fast? – Steps To Follow

How to freeze dry food? - To freeze-dry your food, you need first to freeze your food and then dry it under pressure to remove water content. This process is called lyophilization. In fact, it is one of the best methods to use if you want to dry your food. Actually, it is a common practice in both the pharmaceutical and food industries. In this article, you will learn how to freeze dry food at home with simple methods. However, before that, you will also understand the freeze-drying process and the types of food you can freeze-dry. Moreover, you will also learn the benefits of freeze-drying and essential tips to freeze-dry your food successfully. Hence, to learn more, read on to the end of the article. Understanding Freeze Drying Freeze drying is a process where you remove water from a food material by freezing it. Then, you turn the ice into vapor by putting the item under pressure. Hence, you can see that this process is a dehydration technique where you sublimate the water in a product. It means that the water content in your product changes from a solid state to a gaseous state (sublimation). Here, the water does not turn into liquid. Generally, this method is helpful when you want to preserve any perishable materials. Here, the goal is to extend the shelf life of the material. In this case, you freeze the material and reduce the pressure. Then, you add heat to allow the frozen water in the food (material) to change directly to vapor. How Does Freeze Drying Work? Freeze drying consists of three stages: freezing, sublimation, and desorption. Here is an explanation of the three stages: 1. Freezing This process involves freezing the food at a very low temperature. Generally, you have to freeze to -30 to -50°F. 2. Sublimation (Primary Drying) In this stage, you have to pass mild heat over the frozen material while the material is under vacuum. Hence, the ice crystals vaporize into water vapor. After that, you remove the water vapor with the help of a vacuum pump. 3. Desorption This is the second stage of drying. Here, you have to remove all the remaining moisture from the surface of the food. Benefits Of Freeze Drying Food The following are the major advantages of freeze-drying that will benefit you a lot: Generally, the foods that you freeze-dry retain up to 97% of their nutritional value. For instance, the food retains vitamins, minerals, and antioxidants. Those foods have a long shelf life. Moreover, you do not need to store it in cold chains. Once you freeze-dry your food, you will end up removing 98% of its water content. Hence, you will reduce its weight by 90%. Thereby, it will be easy for you to carry that food on camping and backpacking trips. Freeze-dried food is easy to prepare. This is because you just have to add water to rehydrate them. Moreover, the shape and size of the food remains intact. Also, freeze-drying helps in preventing the growth of pathogenic organisms. You can preserve a wide range of foods with freeze-drying. This includes meat, fish, fruits, vegetables, eggs, ice cream, and more. When you freeze-dry food, it does not get brown or caramelize. However, this is quite common when you dry food traditionally. How To Freeze Dry Food At Home? Here are the steps you must follow to freeze dry food at home: Wash your food items that you want to freeze-dry. Also, remove dirt and residues from the food. This way, you can ensure food safety. Cut your food into small pieces. This way, you can make the freeze-drying process faster. Place your food on a flat tray. Moreover, make sure to spread the food evenly. Basically, if you spread your food properly, you can freeze the food evenly. Place your food in your freezer, and set the temperature correctly. Then, place the food in your freezer for two weeks. Actually, you need this time to remove the moisture in the food. After the completion of two weeks, remove the trays from the freezer. After that, quickly place the food items in airtight bags. Make sure to take out one tray at a time to ensure that the food does not rehydrate. Make sure to place the food bags in the freezer, and also in a cool, dark spot. Check the food after a couple of days. This way, you ensure whether all the food is dried-up or not. Tips For Successful Freeze Drying The following are some essential tips by following which you can successfully freeze dry your food: 1. Preparing the Food Harvest the food produced when it is ripe. Then, wash the food, remove the damaged parts, and prepare it as desired. This is because if you cut your food into small pieces, it will dry faster. 2. Arrange the Food Place your food on a tray and arrange it into pieces. Also, make sure to place those pieces in such a way that they do not touch each other. 3. Use A Freeze Dryer With the help of a freeze dryer, you can automatically lower the temperature. Moreover, a freeze dryer also helps you to create a vacuum. 4. Store The Food Once you freeze-dry your food, store it in an airtight container. Also, you can store it in a bag which you can vacuum-seal it. 5. Cook Raw Foods: One of the drawbacks of freeze-drying is that it does not kill harmful bacteria. Hence, you must cook freeze-dried foods thoroughly before consumption. Related: The Importance Of Proper Cutting When Preparing Meals Common Uses For Freeze-Dried Ingredients The following are some of the common uses of freeze-dried foods: Works as essential food supplies at times of emergencies. They have a long shelf-life and you can use it to maintain food quality. You can use freeze-dried food in stews, soups, baked goods, etc. You can eat freeze-dried food as a healthy snack any time. If you freeze-dry your seasonings, you can retain the flavor and freshness for years. Wrapping Up You now know how to freeze dry food. Generally, in manufacturing, food companies and manufacturers prefer freeze-dried food over regular food. This is because they are easy to prepare and are portable and lightweight. Also, such food removes the moisture from the food to make it compact. Do you have more suggestions for freeze-drying to offer? Please share your ideas and opinions in the comments section below.

READ MOREDetails
vegans

What dressings Are Good For Vegans – Mimi’s Laphet  

Vegans prepare salads as an important part of their staple diet putting greens, vegetables, beans, and fruit inside. After stirring the mixture, the question appears on what seasonings to use. The color and the fresh textures are the most fantastic attractions of the vegan’s salad platters. Flavoring should be salubrious for providing the benefits of elements to the body in the complete form without increasing calories. People can buy easy vegan salad dressing, select ingredients independently, or order the ready useful products created by others.  The second variant saves time because that is not needed to search for fresh qualitative compounds everywhere and to process for further adding to food.  3 Key Benefits Of The Salad Dressings For Vegans With the proper application of dressings, salads will be rich in fiber and nutrients. It is possible to use multiple bases such as olive oil, tofu cheese, Greek yogurt, lemon juice. Each named component has obvious benefits.  Here are three key benefits of well-balanced salad dressings for vegans. 1. The Choice Of Natural Vegan Salad Dressing It is a failure to think that all healthy vegan salad dressings are plain in their taste because there is a great variety of available products nowadays. The Vegans can feel the notes of spiciness, light tartness, and sourness.  However, the most impressive is the combinations of different relishes in one seasoning. Everything is plant-based and full of the goddess of earth and nature, from the seasoning to the dipping sauce. Today the market offers are extended, and vegans can open new facilities for themselves. For instance, not every Australian knows what Laphet is. These are tea leaves that are popular in Myanmar, where they indicate the symbol of hospitality. Mimi’s Laphet provides healthy vegan salad dressings that also include other natural ingredients.  2.The Effectiveness Of Vegan Salad Dressings     The eye-pleasing colorful platter is the primary feature of the salad dressings for vegans. An easy vegan salad dressing positively influences the whole body. Eaters notice the changes over time of consuming the flavoring. They manifest both visually and physically. When you want to beat the summer heat, the plant-based vegan salad is quite effectively keeping you cool. The salad for the vegans is not only looking delicate and gorgeous.  For beating the summer heat and when you want to preserve the glow of your face, the plant-based vegan salad is the ultimate choice. All ingredients of the vegan salads are edible and full of health benefits. So for the summer, do not forget to order some vegan salad to spice up your meal in Mimi’s Laphet. 3.Vegan Salad Full Of Goodness  Progressive seasonings are an alternative to vinegar, fat sour cream, and other substances. By selecting healthy food, you put well-being first place. Robustness is something people shouldn’t save on. Therefore, purchase your own jar of condiment to receive satisfaction by virtue of delicious relish and attractive texture.     Affirmative features lie in the following sighs: Reducing weight thanks to burning fat, vegans get the result of a quicker metabolism. Harmful elements are rapidly excreted from the stomach and intestines. Biotic components soften the work of the digestive system. Anti-inflammatory and antibacterial action. The presence of garlic eliminates viruses that threaten favorable microflora and cells and strengthens vegans’ body immunity and ability to fight irritants.  The stopping temps of aging. Tea leaves affect the condition of the brain and nervous system. The brain controls all operations inside and stimulates the excellent work of organs. The decline of stress is an additional advantage too.  Lowering the level of sugar inside helps prevent diabetes. The practical opposition to cancer and other oncology diseases because of the antioxidants. Sesame seeds with extra herbs contain protein supporting the development of muscles.   Conclusion: The vegan salads are keeping your energy balance. A vegan dressing maintains the necessary saturation of the organism. People feel more lively after consuming a vegan salad. At the same time, heaviness in the stomach is not characteristic. It is able to increase powers on physical activity as well. These salads are keeping the vegans energetic and physically active by providing a balanced diet. Read Also: 5 Best Vegetables You Should Try Growing In Your Garden Looking for a Gardener: 8 Questions to Ask Before Hiring a Professional DIY Ways to Control Pests in Your Garden

READ MOREDetails
how to thicken chili

How to Thicken Chili – Tried and Tested

A cold winter night with a delicious dish of chili is all you need to enjoy your moment. But wait, Are you left with too much liquid in your chili? Ah! No need to worry at all. There are numerous ways on "how to thicken chili". Honestly, you don’t want a thin chili because there is nothing better than a cheerful bowl of thick chili as your winter dish. Many times, just to thicken the chili, people cook it more than it is necessary. Later, other ingredients in it fall apart and turn to mush.  Don’t panic. There are effective and easy ways to thicken chili at your home, and all of these methods are tried and tested. Just be sure to use at least some of these methods to thicken chili before your precious moment turns into sour. How To Thicken Chili - Tried and Tested You may be wondering that cooking your dish for a little longer will make your chili thick. But do you know that you are mushing other ingredients in it? So, you must know other effective ways about how to thicken chili. Below listed are the perfect ways to thicken chili for the perfect night. 1. Flour - Standard Thickening Method: Wheat flour is composed of proteins, sugars, lipids, starch, and enzymes. It is used for making different types of foods. Flour is widely used for thickening chili in most of the kitchens. It really works great. Now its time to try for yourself as well. Ingredients:  30ml or two tablespoons of flour and 60ml or ¼ cup of cold water. How to Use? Take a separate bowl. Mix flour and water thoroughly in it.  Make sure that the resulting mixture has no lumps and is smooth. Then add the flour mixture in your thin chili while cooking it in medium-high heat. Stir constantly. Let the mixture boil and thicken well. It will hardly take few minutes. Make sure to continue stirring an additional few seconds to see if you are able to detect flour in your chili flavor.  So, here is your hearty chili dish! Now, it is much thicker and tastier than before. You can even serve this to your guests. 2. Arrowroot- Best Thickening Agent: Arrowroot contains Vitamin B, Iron, Potassium, low-protein, starch, etc. It is widely used as a thickening agent in all household kitchens. It is a starch that is extracted from the arrowroot plant. When you will use arrowroot in your dish, then it will give an amazing surface gloss to your liquid chili.  Ingredients: 5ml or 1 tablespoon of Arrowroot and 5ml or 1 tablespoon of cold water. How to Use? Take a separate bowl. Mix thoroughly water and arrowroot to turn it into a smooth paste. Make sure that you add only a small amount of arrowroot as it is potent and flavorless. Then add slurry into your thin chili cooking it in medium heat. Stir constantly below the boiling point. Then after 1 to 2 minutes, your thin chili will thicken instantly. Arrowroot adds gloss like appearance to your chili dish making your dish thicker and delicious. I have used this method and got the result, so now it’s your time! 3. Cornstarch- Anti-sticking Agent: Cornstarch is also known as Maize starch which is extracted from the maize grain. It is a food ingredient that is used in thickening soups and sauces. Cornstarch gives a moderate glossy appearance and when mixed with liquid, it rearranges itself.  Ingredients: 15ml or 1 tablespoon of cornstarch and 15ml or 1 tablespoon of cold water. How to Use? Take a separate bowl. Mix thoroughly cornstarch and water before mixing it to chili. After adding cornstarch paste to chili, heat it in a medium to high flame. Stir it well until the bubbles start appearing. Wait for few minutes to see the results. If you still feel that your chili should be thicker then you can add more cornstarch and water on it.  Then let it cook for an additional few minutes. You can use cornstarch to thicken your chili because it will not alter the taste of your dish of chili as cornstarch is flavorless. Other Simple Ways to Thicken Your Thin Chili: 4. Mix it in Tomato Paste Now, no need to worry about how to thicken chili. If you want your chili only a little thick then you can use this method. Tomato is one of the main elements in chili. So adding it to your mixture won’t alter its taste and makes your chili thicker. Ingredients: 170 grams of tomato paste. How to Use? I am suggesting that you should use fresh handmade tomato paste. Since tomato paste is recognized as bitter in taste, so you can add a pinch of sugar in it. Sugar will add a mild sweetness to your dish by removing tomato’s bitterness. During the final thirty minutes of cooking add 170 grams of tomato paste into your thin chili. Slowly add tomato paste to your thin chili. You can also add it after every ten minutes if you wish (⅓ of the tomato paste). Stir constantly to combine it well. You can use tomato paste to thicken your thin chili dish. But keep all the instructions in mind so as not to make any mistakes while preparing it. 5. Use More Beans to Thicken Your Thin Chili: A bean is a seed of numerous genera of the flowering plant. They have the ability to curl up on any medium. Beans can be use to thicken your thin chili. Do you know that India is the largest producer of dry beans in the world? Yes, it is.  Ingredients: 125ml or a half-cup beans. How to Use? If your chili contains beans then strain half cup of beans. Then refry and blend it. Then again mix this mixture to your chili and cook for a few minutes. Stir occasionally to warm it well. You can use canned or home-cooked beans as per your wish.  If you still feel that your chili is thin, you can add extra beans in it but make sure you blend it well. Here you go! Your thick chili dish is ready now to serve your family. If you don’t like beans then no need to worry. You can add meats to make your chili thicker. Wrapping it Up "How to thicken chili" is one of the major problems for all the cook masters. Even I have used many methods to thicken my thin chili but all went in vain! Therefore, all the above methods are tried and tested about how to thicken chili. So, you can use it to thicken your thin chili. I know nobody likes to serve thin chili to their family or guests. Even I don’t like it. Do you?  Image source: wikihow Read Also: 3 Variants of Thin Crust Pizzas How You Can Increase the Value of Your Home with Stone Veneers

READ MOREDetails