Exploring the Three Types of Facelifts and What Areas They Can Help

Published on: 15 December 2021 Last Updated on: 28 April 2026
facelifts

Fine lines and wrinkles in the face are the most common visible signs of the aging process. Some wear them with a badge of honor, but for others, their presence on the face is an unwanted reminder of how times have changed. Now different types of facelifts services are available to minimize all signs of aging processes.

Facelifts are one of the most popular types of plastic surgery because they help to undo some of the signs of time. But there’s not just one type of facelift out there; in fact, there are three! These procedures: Mini facelifts, Mid-facelift, also known as cheek lift surgery, and a full facelift, all work to take years off of the face in different areas. 

3 Types Of Facelifts
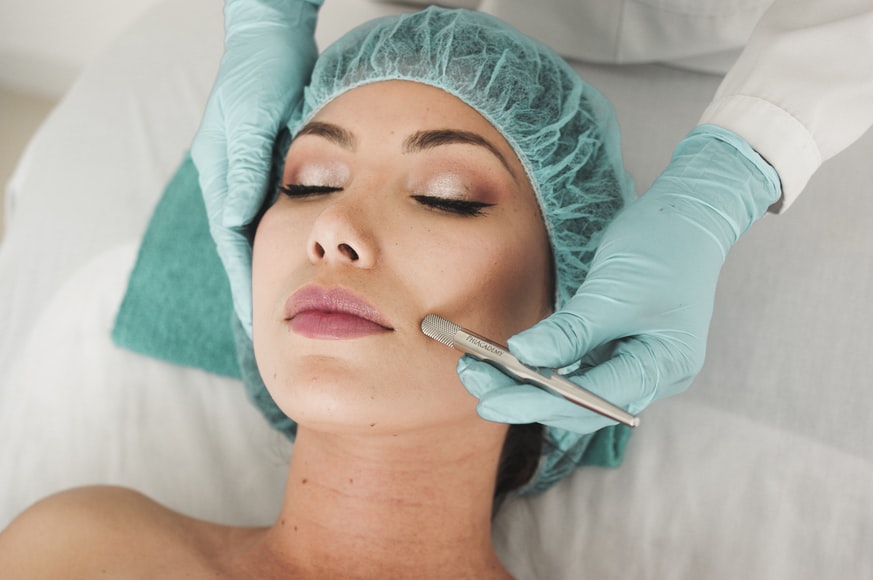
3 Types Of Facelifts

The different facelifts services are available. But according to the face mapping, every individual facelift has a different area specified.

Here’s how these procedures work and what problem areas they work to target!

1. Mini Facelift / Lower Facelift

The facelifts are a different area targeted. Not each type of facelift treats the whole face. The Mini and small area targeted facelifts are more least invasive in the facelift procedures, which target minor concerns like fine lines and wrinkles and to sag and drooping of skin in the lower portion of your face, namely treating issues such as jowl formation or jagging jawline. 

This type of facelift is excellent for those with minor concerns about sagging skin and lines around the mouth, chin, and lower cheek areas but do not yet require treatment on any areas to the upper or higher middle part of the face. Thus, this procedure is popular among those in their 30’s and 40’s to get a light refresh on their face.

2. Mid-Facelift  And Cheek Lift

A mid-area-facelift, also popular with the name of cheek filler lift, targets the middle portion of the face, namely around the nose, cheeks, and eye regions. This is a great way to smooth outlines around the eyes and allow you to appear more refreshed and redistribute fat in the cheeks to allow for a more youthful and full appearance. 

Having the cheeks placed higher and renewed in volume can help delay their drooping down to create sagging jowls, which would then require the mini facelifts to solve.

3. Full Facelift

As the name implies, the full facelifts are working to revitalize the entire face. Smoothing out wrinkles, redistributing fat, and tightening the skin is possible through a full Facelift. Choosing the right surgical approach depends on your specific goals and the current condition of your skin. Many patients find that a combination of techniques provides the most balanced and long-lasting results. If you are looking for a Facelift in Beverly Hills (or elsewhere), it is helpful to understand how these different methods address various layers of the face. A surgeon can help determine if a traditional lift or a more specialized procedure is the best fit for your needs. This personalized plan ensures that the final look is both refreshed and natural.

Because of its range, a complete facelift is a more extensive version of facelift procedures. It is usually reserved for those with more noticeable signs of aging in multiple areas of the face. However, when it comes to the process itself, two main surgical methods can be performed.

With this in mind, it is important to make an informed decision by consulting an expert specializing in procedures such as face lift sydney (or your local area). They can assess your individual needs and recommend the most suitable option.

  • SMAS Facelift:

    SMAS is an acronym that stands for Superficial Musculo-Aponeurotic System, which is the connective tissue layer in your face. This layer works to structurally support the shape of your face, keeping things tight and where they need to be. 

The SMAS facelifts are targeting this later, distributing the tissues to help reverse and correct signs of aging like deep smile lines and jowls.

  • Deep Plane:

    Deep plane facelifts are one of the most extensive facelift surgeries. This is because the incisions made in the procedure go further into the skin, reaching more profound layers of muscles and nerves so that the tissues may be more accurately and thoroughly manipulated and redistributed, resulting in excellent results.It is essential to choose a qualified and experienced Houston facelift surgeon (or one elsewhere) you trust to perform this procedure. Since the muscles and nerves are exposed during the process, there is a higher risk of damage if not handled with expert care.

Conclusion:

Now facelifts are not a very costly procedure. Even along with the facelifts, many temporary fillers are also available to treat the fine lines and all the signs of aging. If you do not want to undergo any plastic surgery treatments or painful processes. The facelifts treatments are the most suitable process for you. After the surgery, you do not require a very long time to recover.  

FAQ( Frequently Asked Questions)

Read Also:
 

Content Rally wrapped around an online publication where you can publish your own intellectuals. It is a publishing platform designed to make great stories by content creators. This is your era, your place to be online. So come forward share your views, thoughts and ideas via Content Rally.

View all posts

Leave a Reply

Your email address will not be published. Required fields are marked *

Related

Flapper Makeup

Easy And Cheap Flapper Makeup Hacks: A Complete Beginners Guide

Stage makeup might be the new norm. However, the 1920s flapper makeup is nothing short of a sensation. Artists see it as a timeless token of expressive beauty, style, and sensational glamour. Let’s check out the main touch points of the artisanal and aesthetic flapper makeup. No doubt the 1920s looks were iconic. So, it’s worthwhile to understand the styles that inspired flapper makeup. We can also try to explore the twenties’ spirit that was depicted through the bold makeup looks. After all, expressing the inner self is the prime function of beauty. Before we know in detail, can you tell what flapper makeup was precisely? Well, long eyelashes, neatly defined brows, and scarlet lips are the tokens defining flapper makeup. That’s not all. The advent of rosy cheeks for that doll-like look can also be credited to the 1920s. What Defined Flapper 1920s Makeup? Eager to get into the crux of flapper makeup? Modern makeup enthusiasts are obsessed with the right nude look or depicting a sensational minimalist look. But the 1920s saw makeup and beauty differently. Remember the characters from The Great Gatsby? The youthful quest of character and dollish overtones dominated the thoughts of the 1920s artists. Today, you won’t celebrate such layered makeup. Instead, models proposed in angled foundations with neatly chiseled jawlines are today's front runners. Moreover, the heavy blushed, and brighter skin toning of flapper makeup has found a replacement in the contoured makeup of today. So, the basics of the flapper makeup look is getting dolled up with makeup. Since the makeup was ceremonial, events like dancing and night parties were so. Many of you may think- What about nails? Trust me, your favorite ombre nail designs 2024 versions would not have made any mark in that look. The face was still the epitome of beauty. Types Of Flapper Girl 1920s Makeup There were many flapper styles during the 1920s. In our imagination, the bold 1920 makeup girl would have liked some of these flapper styles: 1. The Classic Decor Dark and smoky eyes dominated this look. Remember the goth scenes with grim female characters? Yes, you’re thinking right. Sharp eyebrows, blood-red lips, and pale white complexions complemented the classic flapper makeup look. 2. The Bob Rain or shine, girls would go gaga over a playful twist. The definition of the bold flapper makeup completed with the faux bob. Short hair was the norm of the day. No commitment. Just do a contemporary transition and have fun! 3. The Cost-Effective Version Flapper makeup had a cost-effective version, too. If you don’t want your flapper makeup experiment to cause a hole in your pocket, here’s your solution. Firstly, grab any light foundation. Go for the wet n wild photo focus matte/gloss liquid foundation. It costs $5.47 and is available in classic, beige, and other shades. You can also go with the e.l.f. Flawless Finish Foundation. The latter would be better for the glossy, bold look. It covers uneven skin tones like MAC, The Whoo, or any in that category. Remember, the foundation is the basis of the cost-effective flapper makeup. Secondly, your primary role is to create smoky eyes using your regular eyeshadow palette. Lastly, go for a cheap radiant red lipstick for those popping red lips. BAAM! Your pocket friendly flapper makeup looks completed in 30 minutes or so. 4. The Zombie Flapper Makeup Look Today, I suggest a mattifying primer with a matte foundation, contour for cheeks, and dark shades for eye sockets. Of course, a makeup setter spray to top it up. But do you want to know how a 1920s makeup flapper would look like? Complement your flapper style with an authentic macabre look. Create a makeup base to begin with. After that, create defining under-eye circles, draw cracks, and apply fake blood in patches and splashes on your skin. Could you spot the difference? The 1920s flapper is so much more high definition than today’s looks. That’s the beauty of the bold makeup sensation we’ve left behind. How To Use 1920s Flapper Makeup: Tutorial The prime element in your 1920s flapper look would be how you groom your eyes. The eyes are an actual package here. Similarly, I’m talking about eyebrows, lashes, lids, and under-eye. Secondly, you must draw bold lips. No extraordinary treatment. But well-defined bright lipstick.   Lipstick However, I find that MAC’s Locked Kiss Transfer Resistant Creamy Matte would be an iconic lipstick I’d choose for realistic flapper makeup. After all, you must make your lips feel soft, thick, and plushy yet neatly chiseled. Mascara, eyeliners, eye shadows, etc After that, we will focus on the eye section. First, apply your eye shadow. You will find film stars staging dark eye shadows at that time. I also feel that the darker eye shadows preserved the real essence of the flapper makeup. It’s not the twenty’s spirit if it’s not bold and defining! For parties, most women flaunted their dark, smoky eyes. I was so hooked on that look. Indeed, my suggestion for eye shadows would be the same. Secondly, we will focus on the eyeliner. Start by drawing a thin line with your eyeliner. Let the top lash line be smudged; use a thin eye shadow brush. However, something still seems incomplete. Complete your eyeliner effect with an added eye shadow shade on the eyeliner. Caution: The to-eye shadow layer should only go down the point once the smudged eyeliner liner is marked. Otherwise, you won’t be able to conceal the extra eye shadow. I prefer the NYX eye pencils for the above. However, you can go with the brand of your choice. Thirdly, I would suggest a lash mascara brush. Brush your mascara more towards the center of your traditional long eyelashes. Don’t focus much on the sides. Brow Pencils Finally comes the eyebrows. The typical choice would be long and thin eyebrows. Meanwhile, don’t forget to use brow pencils to perfect your brows. Certainly, thin, chappy, or sparse eyebrows won’t make sense if we’re speaking flapper makeup here. However, there’s something more important here. Don’t draw a clean eyebrow arch. Rather, slop downwards. Most experts would not go any further. However, I am skeptical about the look and more about the finish. So, I would like yur blush to be perfect as well. Don’t taper the blush. Instead, try to give it a rounded appearance. After all, the blush is the crux behind the more youthful look. Other than the face, hands and feet also mattered in the 1920s. Back then people knew what is pedicure. The introduction of hemlines popularized nail care and pedicure trends. But nail makeup was not highly defined. So, they did not know what is builder gel. Related: Get Part Ready In No Time with These Hair And Makeup Hacks! The Flapper Era: A Cultural Revolution The flapper makeup is no less than a revolutionary look. It was the prime movement that resulted in the rise of a subculture. When a group of young people wished to defy social norms and sexual definition, they chose the flapper over minimalist makeup. Moreover, flapper makeup was a strong connotation of the fact that 1920s women were trying to break free. They needed to make accurate, bold statements that came in the first look. Flapper makeup looks aligned with style, approach, and cultural tastes. For example, flappers liked jazz. They also had bold lifestyles. Key Elements Of Flapper Makeup That’s easy. Flapper makeup uses all high-definition components. So, there was minimal layering in the makeup. Firstly, the flapper's makeup is incomplete without dark and smoky eyes. Secondly, a pale white skin tone is a definition look for a flapper. Don’t go by the racial connotation of the makeup essentials. After all, these elementary things defined a revolutionary generation. After dark eyes, flappers could not feel complete without firm lips and blush. Iconic Flapper Makeup Products Here are the main kits you would find in the makeup box of any flapper: 1. A heavy-duty mascara 2. Sets of long eyelashes 3. White toners, foundations, contours, etc. for base makeup 4. Eyelash curler 5. Eye pencil 6. Lipstick 7. Powders for touch up Flapper Makeup Techniques I have defined the flapper makeup essentially briskly already. So, I will talk about five master flapper makeup techniques only- 1. Have thin and long eyebrows and use a kohl liner for the best effect 2. Don’t forget false lashes. 3. Create a smoky eye effect as it would suit you 4. Plumm red, burgundy or any rich shade of red would do good 5. Carry Face powder Flapper Makeup In Modern Culture Days have changed. People don’t prefer the bold look that may seem prosthetic to the modern generation. However, bold makeup was an expression of revelation from shackles for women back then. So, it’s natural that the essence of flapper makeup still exists today. If you’re curious too, here are two unmistakable things that have become timeless. Firstly, the smoky eyes look. Women still use the smudgy and messy eye-shadowed look for that bold statement. Secondly, we see the cupid’s bow lips quite often. That is another gift of the flapper makeup era. If you want to know more about flapper makeup or want to offer tips, comment your doubts or queries in the following section. I will check the comments in no time! Additional Resources: Polish Your Creativity: A Colorful Journey into Self-Care With Nail Polish Smashbox Primer: Use It To Make Your Makeup Last Longer Essential Eye Care Tips That Can Improve Eyelash Hygiene

READ MOREDetails
what is pedicure

What is Pedicure? Process, benefits, Cost, and Guide

Among all cosmetic treatments, pedicure is one cool thing. All of you know what is pedicure. So, I won’t go into the basic nitty gritty. However, we have to focus on all four segments of it equally. Certainly, nail and cuticle care are the most important. The term pedicure is coined from the Latin “pedis,” meaning “of the foot,” and cura. Generally, when you speak of pedicure, it implies cosmetic pedicure. However, pedicures can be used for therapy and medical purposes, too. In this article, we will discuss the perks of pedicure and the outcomes you expect of it. We will also suggest some tips for DIY pedicures at home. But first, let’s start with what is pedicure. It is one of the beauty enhancers and, of course, maintaining better nail and foot hygiene. After all, the function of beauty is marinating better outer health. How often do you get a pedicure? A pedicure is a process of skin exfoliation. However, you may think of it as a skin treatment, too. It is a complete package of nail care, skin care, cuticle care, and dead skin removal. Now, the question is, how often do you need this set of treatments? The ideal gap is a month. In between these 30 days, the skin can regrow and regenerate. However, you must not overdo it. Firstly, the skin may feel irritated if pedicures become frequent. But pedicure isn’t one straightforward process. You may frequently repeat switching your Polish grade. But don’t barge into the exfoliation process every time. Types of Pedicures I already mentioned- a pedicure is not a simple process. So, it’s crucial to discuss the types of pedicures and their importance for your skin health and hygiene. Basic Pedicure It is the most common form of pedicure. It includes cuticle refining, shaping, and polishing. This package costs $35 and takes around 30 minutes. Spa Pedicure Next in line is a spa pedicure. It is a smooth process. People generally visit salons to get it done. First, it involves a deep cleansing and massage of the feet. The average cost of your spa pedicure could be $50 to $60. But experts say getting it done from a good spa for better effect is better. Paraffin Pedicure If you want a hydrating nail and cuticle treatment, go for the paraffin pedicure. Most of you may know what is pedicure. But do you know about paraffin and gel pedicures? Most nail designs 2024 updates include gel treatment.  Firstly, a paraffin pedicure is a process where salon specialists use paraffin wax to reduce cracks and barriers. After that, they moisturize the feet. If you have cracked or frizzy skin, you must get a paraffin treatment once or twice a year. Gel Pedicure Here, nail treatment is the prime focus. Most importantly, experts curate your nails with UV or LED light after applying builder gel. But what is builder gel? It is a natural viscose gel base that increases nail strength, thickness, and length. It adds a gloss glass look to the nails. However, the look would last two weeks at best. Stone Pedicure One of the seldom-used types of pedicures is the stone pedicure. It is no prosthetic treatment. However, the spa specialists only use stones to massage the feet. The prime benefit of the same is better blood circulation in your feet. Hence, the skin remains naturally well. Benefits of Pedicures Pedicure sessions have specific benefits for sure. Some of these are apparent, and others are long-term gains. Here are the prime benefits you expect out of a pedicure: Your Skin Health Pedicures help to improve skin health. Hence your skin will immediately look fresher and youthful. It is the most significant outcome of the exfoliation process. Better blood circulation If you want better massage and foot care during pedicures, go for a classic and a stone treatment. What is pedicure? It is the mere exfoliation of the skin so that it respires better. Meanwhile, blood circulation through and around the cutaneous players also improves. It keeps the skin fresh and youthful as well. Exfoliation A pedicure is the best way to remove dead cells from the two upper layers of the skin. Hence, it prevents skin infection since all toxins are given away. Stress relief The pedicure process releases endorphins. Hence, you feel calm and breezy. Meanwhile, your feet feel relaxed as the blood circulation improves. Other Benefits There are other benefits of pedicure, too. Most importantly, it can resolve foot odor issues. At the same time, it can release muscle tension and cure back pain to some extent. What to Expect During a Pedicure Let's see what makes up a classic pedicure session. What is a pedicure? It is the treatment of your skin. There are 6 to 7 basic steps of this treatment. It starts with soaking your feet in warm, lather-rich water. Consequently, your nails and the skin of your feet will become mushy. After that, it is time for exfoliation. The process involves using a foot tile to remove the upper dead skins. Thirdly, pedicure involves nail care, too. Most importantly, the trimming, filing, buffing, etc. Moreover, there is cuticle work to be done. The last three steps are: Moisturizing Massaging, and Polishing The process lasts between 30 to 90 minutes. However, there are two types of pedicure treatment. These are basic and luxurious. Other than small detailing like nail shaping, gel polishing, and cuticle work, the rest is the same for luxury treatment. How much does a pedicure cost? In the US, the cost of pedicure might vary. It may range from $20 to $75. However, the average price of a basic pedicure from a standard salon would be $45. It is also apparent that the salon brand and location would be reasons for variation in the prices of the same pedicure services. DIY Pedicure at Home A DIY pedicure is easy. However, you need to prepare the ingredients from scratch using natural elements when you do it first. After that, you can reuse the same products and save time and resources. To do the same, you need a natural scrub first. A pumice stone can be one. It can substitute cosmetic foot scrubs. But the treatment should start the same way it does in any salon. Firstly, soak your feet in a bucket or tumbler. Combining lukewarm water, Epsom salts, and a few drops of essential oils. Remember, what is pedicure? It treats the external skin and blood vessels on the inner lining. So, a home pedicure can be as effective as a salon treatment. Just use the proper steps and a set of the right organic ingredients. Done with soaking? Apply Pumice stone for natural foot scrubbing. Once done, just trim your toenails and push back the cuticles. Finally, apply a base coat to the nails. Any nail color would do. At the end, apply the topcoat. While applying it, you should check out the best ombre nail designs 2024 ideas. Flaunt your best nails before Christmas! Massage the feet with moisturizer, lotion, or oil to finish the process. Choosing the Right Salon Finding the right salon for a pedicure can give you a heck of a time. So, keep this basics in mind when selecting one: 1. Ask friends and family members for recommendations. Meanwhile, check the ratings, reviews, and recommendations for that salon on local community groups. 2. Read customer reviews and expert opinions of the listed salons. 3. Most importantly, know your budget. The services that cost $30 at your local salon might cost you $150 at Bastian Gonzalez. So, choose wisely. 4. Book an experienced nail technician. Novices may often do it wrong, causing nail infections and plumps. 5. Hygiene is the first thing you should check when you visit any nail salon. Meanwhile, check the cleanliness as well. Common Myths About Pedicures Go, get your pedicure done in a sweep. Many people don’t know what is pedicure. They often create or spread false rumors about the process. I’ve heard people say paraffin pedicure is for people with dry feet and heavy skin barriers. However, it is a process that benefits anybody. Secondly, knowing that a stone pedicure is for relaxation only gives me a good laugh. However, the truth is that it can relax your whole body. It can also relieve you from muscle and bone-related diseases. Don’t Go for a Professional Pedicure! I won’t say that ever. However, it is one of the most outstanding rumors about pedicure. Just ignore such small talk! Meanwhile, enjoy your pedicure session. Also, let me know your experience at your local salon. We will survey who has the best salons in their area. Share the article and ask people to comment on the same too.

READ MOREDetails
can you dye wet hair

Can You Dye Wet Hair? Here Is The Reason For It

Many questions are arising associated with washing the hair and drying, but now the most frequent question that comes to your mind is, can you dye wet hair? Yes, it sounds a little bit different than the usual hair fashion-related question. But the answer indeed is yes, you can.  Some hairstylists think dry hair dyeing can improve your hair texture naturally, and the end result is more natural than coloring dry hair. The wet hair dying technique is called wet balayage. This is a similar hair-dying technique to dry balayage techniques. Only here is a simple difference. It only applied to wet hair. Why Do You Want To Dye Wet Hair? The dying of wet hair may not be a common practice, but when we are talking about the comparison with dry hair coloring, here are some positive effects of wet hair dying. The dye of the wet hair is the best to work for achieving a subtle result. The hair damage is less than usual dry hair coloring. If you want to apply any semi-permanent hair color, then this technique is the best. The hair color promotes better absorption on the wet strands. The semi-permanent hair colors are more Ammonia-free. This type of coloring is becoming less harmful to your hair. Wet hair coloring promotes the natural hair look. This dying wet hair is a more user-friendly approach when you are dying your own hair at your home. These all are the basic positivity of applying the color on the wet hair. When you want to dye your hair at home, wet hair dying is the most user-friendly and time-consuming procedure. All you have to do is just apply the color in the middle of the bath; after that, wash it off. Benefits Of Dying The Wet Hair When you are applying the hair color at home, wet hair colorings are the best possible way to get the desired result. If you have any queries about you can dye wet hair? Then here is the list of multiple benefits of dying wet hair. 1. The Wet Hair Strands Are More Absorbent  The wet hair strands are more absorbent than the usual dry hair. The hair color easily melts into the hair, and more easily, you will get the desired color look. The equal distribution of the color is also an attractive part of the wet balayage coloring. The color of the hair is distributed equally after the applications. The color change is quite simple. The hair color does not give you a drastically changing look. But if you want a good coverage color or anything which is a permanent hair color, then this color is not for you. The temporary and the demi temporary colors are working best as the wet color. Both of these colors have very less harmful substance init. 2. Best Hair Colour When You Are A Beginner When you are a just startup color applicant, then the wet color is the best-suited hair color. The beginners are more prone to make a mess when they are applying the color. The wet color is just covering all messes.  First, shampoo your hair and then apply the dye to the wet hair. This will give you a more subtle result. These semi-permanent and semi-permanent hair colors are not working well on greasy hairs. This technique is quite easy and time-saving rather than the other coloring techniques. The working professionals and the people who do not have much time to go to the salon are more comfortable using this technique. 3. Gives You A Natural Flowy Look When you are asking the question, can you dye wet hair? Then the first answer which comes to our mind is yes. Not only yes, but the more natural and flowy look is also given through this type of coloring. The implementation is simple, and the drastic change of the hair color can not be found with the use of these temporary hair colors. You can expect mild color and a soft texture change of the hair. The distinctive funky colors are better to work as the wet hair color. How Can You Dye Wet Hair? We all call this dying technique the wet balayage. This technique is simple and effective, and long-lasting more than your expectations. Here are the four simple steps of applying the dye to wet hair. Step1 Wash your hair by applying the shampoo. Step2 Do not use the conditioner, serum, or any oil after washing the hair. Step3 Then just pat dry the wet hair. Step4 We need a damp surface to apply the hair color. Step5 Check the ingredients list before applying the hair color on your wet hair. As wet hair is more fragile than dry hair. Better to use semi or semi-permanent hair color for your hair. When our hair is in the wet state, the hair’s inner cortex layer is also open, promoting better absorption. Step 6 Read the instructions which are written on the package before starting the hair dying application. Step 7 Then wear a pair of gloves. Step 8 And take an amount on the small bowel as per your requirements. Step 9 Then apply the hair color with the applicator brush. Step 10 You can apply the color to the small sections of your hair.  Step 11 You can also apply the hair color just like any hair care product. Step 12 Apply a good amount of color because, with every wash, it will become lighter.  Conclusion The wet hair dye applications are easier to apply on the hair. These hair colors are less harmful with respect to the other type of hair dyes. The wet hair colors are more for the hair’s benefit and for improving the texture of the hair textures. Can you dye wet hair will no longer be a worry for you if you follow the mentioned points. But it also has some disadvantages. You have to choose the correct hair color for you, which has a less harmful substance within it. If you need simple temporary hair color, then these hair colors are the best time-saver for you. Therefore, I have tried my best to give you answers on how can you dye wet hair and the reasons for the same. You can also mention some more in the comment sections below.  Read Also: How Many Jobs Are Available In Real Estate Investment Trusts? How to Download Game Of Thrones Putlocker Online for Free? 0123Putlockers And Servers – Watch Movies Online Is Real Estate Investment Trusts A Good Career Path?  Which Type Of Portfolio Might A Young Investor Who Is Not Afraid Of Risk Choose?

READ MOREDetails