Bedtime Beauty Routine: Secrets And Tips

Published on: 22 February 2024 Last Updated on: 22 April 2026
Beauty Routine

Your beauty rest skincare routine is as important as the morning one so let’s learn together which are the secrets behind this daily practice.

The list of benefits behind this routine is quite a long one. To begin with, you cleanse away impurities. Throughout the day, your skin accumulates dirt, oil, pollution as well as makeup. Cleansing your skin before bed removes these impurities and, as a consequence prevents clogged pores, breakouts, and dullness.

A good beauty rest skincare routine supports skin repair and regeneration. While you sleep, your skin goes into repair mode, working to undo the damage from the day and regenerate new cells. A skincare routine before going to bed provides your skin with the necessary nutrients and hydration to support this process, allowing it to function optimally.

Moreover, this can maximize the efficacy of skincare products. Many skincare products, such as serums, treatments, and moisturizers, work best when applied at night. This is because your skin is more receptive to active ingredients while you sleep, allowing them to penetrate deeply and deliver maximum benefits.

During your bedtime skincare routine, you can address specific skin concerns. It is the perfect opportunity to target specific skin concerns, such as fine lines, wrinkles, hyperpigmentation, acne, or dryness. By using targeted treatments and products tailored to your skin's needs, you can focus on these concerns more effectively and achieve better results over time.

Skincare routines at night boost relaxation and self-care. Any bedtime skincare routine can be a relaxing and comforting ritual that helps you unwind from the stresses of the day. Taking the time to care for your skin can also be a form of self-care, promoting feelings of well-being and enhancing your overall sense of self.

Last but not least, this routine can prevent premature aging.

If you follow it consistently, you can help prevent premature aging by providing everything your skin needs to stay healthy and resilient. Which includes:

  • Hydration.
  • Nutrients.
  • Protection.

As a result, eventually, this can help minimize the appearance of fine lines, wrinkles, and other signs of aging over time.

What should NOT be done in a bedtime skincare routine
common skincare mistakes

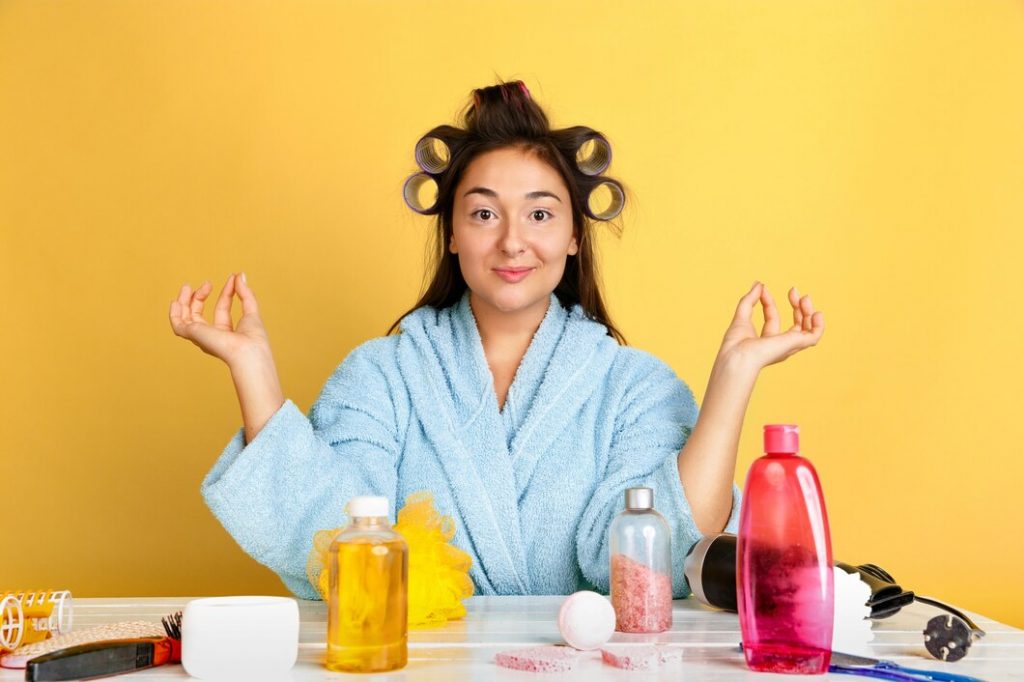
Like in any other beauty routine, there are certain things you should avoid to ensure that your skin remains healthy and rejuvenated.

Here is a list of the things you should consider in order to avoid common skincare mistakes in your bedtime routine that can help you ensure that your skin stays healthy, refreshed, and rejuvenated while you sleep.

  • Do not sleep with makeup on: One of the most important things to avoid is going to bed with makeup still on your face. Makeup can clog pores, trap dirt and bacteria, and prevent the skin from breathing properly, leading to breakouts and lack of vividness. Always make sure to thoroughly remove all makeup before going to bed.
  • Never skip cleansing: Even if you do not wear makeup, it is important to cleanse your skin before bedtime to remove impurities, excess oil, and environmental pollutants that have accumulated throughout the day. 
  • Avoid using harsh or abrasive exfoliants: While exfoliation is beneficial for removing dead skin cells and promoting cell turnover, using harsh or abrasive exfoliants can damage the skin's barrier and cause irritation. Always use gentle exfoliants with mild ingredients, and limit exfoliation to 2-3 times per week.
  • Do not apply active ingredients that increase photosensitivity: Some skincare ingredients, such as retinoids and alpha hydroxy acids (AHAs), can increase the skin's sensitivity to sunlight. It is advisable to use these ingredients in your bedtime routine to minimize the risk of sun damage. However, if you do use them at night, be sure to apply sunscreen during the day.
  • Try not to overload the skin with too many products: It is always important to nourish and hydrate the skin before bedtime, however, using too many products can overwhelm the skin and potentially cause irritation or breakouts. Just follow a simple and effective skincare routine with a cleanser, moisturizer, and any targeted treatments or serums that address your specific skin concerns.
  • Avoid products with strong fragrances: Fragrances in skincare products can be irritating, especially for sensitive skin, and may disrupt your sleep. Fragrance-free or lightly scented products are always advisable to minimize the risk of irritation and promote relaxation.

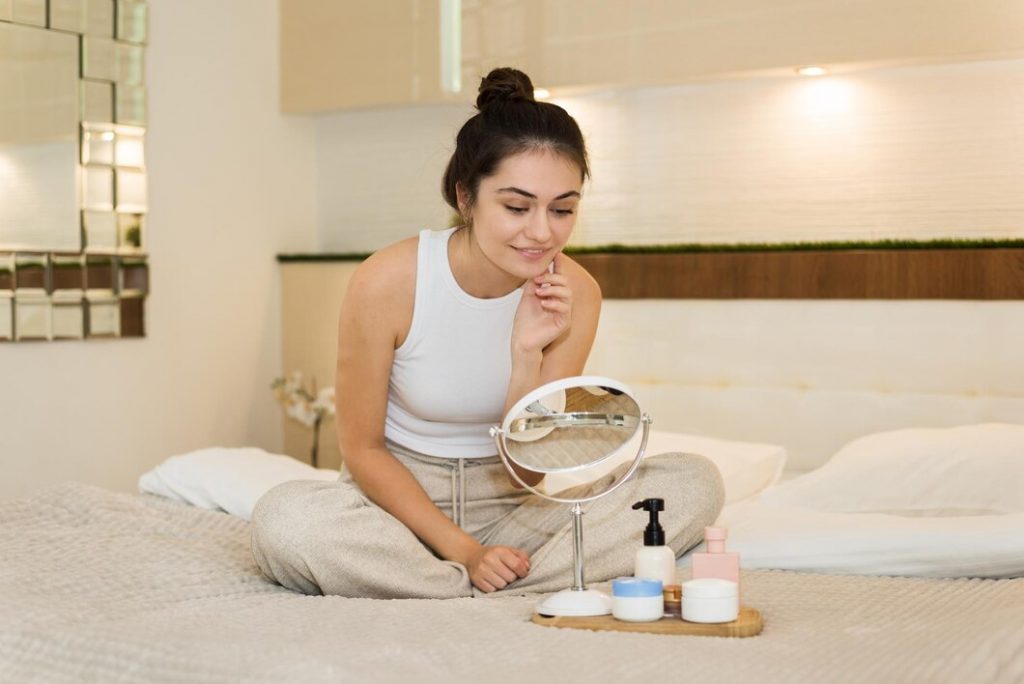
My bedtime beauty routine step by step
bedtime beauty routine step
  1. Makeup remover: Remove any makeup with a gentle makeup remover or cleansing oil.
  2. Cleanser: Follow up with a cleanser to thoroughly cleanse your skin and remove any remaining impurities.
  3. Exfoliator ( only 1-3 times a week): Use a gentle exfoliator to remove dead skin cells and promote cell turnover for a brighter complexion.
  4. Toner: Use a toner to rebalance the skin's pH and prepare it for the next steps.
  5. Serum: Use a serum containing ingredients like retinol or hyaluronic acid to target specific skin concerns such as fine lines, wrinkles, or hydration.
  6. Eye Cream: Gently pat on eye cream to hydrate the delicate skin around the eyes and reduce the appearance of dark circles or any other unwanted marks.
  7. Moisturizer: Apply a richer moisturizer or night cream to provide intense hydration and repair the skin overnight.
  8. Lip Treatment: Don't forget to apply a nourishing lip balm or treatment to keep your lips hydrated while you sleep.

Read Also:
Abdul Aziz Mondol is a professional blogger who is having a colossal interest in writing blogs and other jones of calligraphies. In terms of his professional commitments, he loves to share content related to business, finance, technology, and the gaming niche.

View all posts

Leave a Reply

Your email address will not be published. Required fields are marked *

Related

Dental Care Procedures to Improve Your Smile

Important Routine Dental Care Procedures to Improve Your Smile

Going to the dentist requires that you take an active role in your dental health care and maintenance. Although professionals are trained to look out for dental issues and to clean your mouth to meet standards of optimal health, you should still pay attention to the specific dental procedures your dentist or dental hygienist recommends and performs during your appointment. In this article, we discuss the routine dental care that should commence during your routine visits. Here are three routine dental care procedures for a brighter, healthy smile. 1. Consistent Teeth Cleanings: While you should already be brushing your teeth at least twice a day, when you go to the dentist, make sure that you’re given professional teeth cleaning. The devices that dentists use to remove plaque and build-up in the mouth are much more effective than your daily brushing. For this reason, you must make sure that a teeth cleaning is performed at each of your visits. Without this routine cleaning, you are more susceptible to gum disease, and issues like gum disease and cavities. 2. Ask For a Deep Cleaning: In addition to your routine teeth cleaning, you should also ask your dentist to perform deep cleaning at one of your yearly appointments. The purpose behind deep cleanings is to ensure that the area beneath the gums stays healthy. The focus is to target the buildup that has accumulated underneath the gums. In doing so, you will further reduce your risk of gum disease, teeth whitening, and other dental complications that could compromise your health. 3. Teeth Whitening and Strengthening Services: If you are interested in preserving the appearance of your teeth, you might also consider asking your dentist to perform a routine teeth whitening service at one of your appointments. Choose teeth whitening for a cost-effective way to maintain a brighter smile. Your provider might be willing to perform the teeth whitening themselves or will offer you at-home professional-grade products that you can use to complete the teeth whitening yourself. You can expect to pay around $50 for a professional teeth whitening by your dentist. In addition to routine brushing and flossing, you can reduce acid buildup with regular fluoride treatments. Fluoride makes it easier for your teeth to resist acidity. Your enamel becomes more deeply protected and less likely to dissolve. Many kinds of toothpaste contain fluoride, which is part of the reason dentists recommend brushing twice a day. The more you work to build up your resistance to dentin decay, the healthier your teeth will remain. Fluoride treatments only take a few minutes to complete, so be sure to inform your dental provider that you are interested in a quick fluoride treatment when it is time for your regular visit. The Bottom Line: It is wise to trust your dental professional, but that does not mean you should not keep track of your dental health on your own. Check off these routine treatments as you go about your yearly checkups for the best dental health possible. Read Also: The Process of Invisalign How To Get a Better Smile Whatever Your Budget What Is A Good Alternative To Wearing Dentures?

READ MOREDetails
Natural Stain Remover

8 Effective Natural Stain Remover

As daunting as laundry maybe, it’s more challenging for you to do it when your clothes have stubborn stains. Some stains will not even budge with the usual stain remover you use, and it is not the best way to use laundry detergents with harsh chemicals. What about natural ingredients for removing stains? Are they an effective method? You need to be patient in removing stains with natural ingredients. It takes time than using a one-size-fits-all stain remover. If you use the natural ingredients correctly, it will be a highly effective method. As we go further, remember, always treat stains from the back and avoid rubbing the stain. Your cupboards or cabinets are filled with these natural ingredients. Start removing tough and stubborn stains with natural and environmentally-friendly stain removers. Keep them in your green laundry routine. Here are some of the commonly available effective natural stain remover for daily usage: 1. Lemon Juice: Lemon juice has similar properties to bleach. That’s why you should be careful and handle it properly as you may damage your clothes. You can best use lemon juice to remove food stains on white clothes. Simply cut a lemon in half, wet the cloth, and squeeze it on the stained area. Let the lemon juice settle on the fabric for 30 minutes or more, depending on the stain. Rinse the clothes before you launder the clothes. The lemon extract provides a refreshing scent making it one of the best natural deodorizing agents. 2. Baking Soda: Baking soda has several purposes, and it is an excellent option to remove tough stains. Since it is a mild alkaline, it can sip through the fabric and remove the strong stains. There are two ways to apply baking soda on stained clothes. You can add the baking soda into the water of a laundry load, or you can create a paste out of it. Creating a baking soda paste only requires you a small amount of water. If you opt for the paste method, apply it to the stained area. You can scrub it gently to prevent damaging the fabric. 3. Borax: It’s silly to think about the misconception about borax. Some thought it is a harsh chemical because it is associated with the 20 Mule Team. However, borax is a naturally occurring mineral made of oxygen, water, sodium, and boron. Although it has no toxic fumes and is environmental-friendly, it can cause skin irritation and not ingest it. If you have hard water, it is best to add borax to the laundry load to soften the water, boost the detergent’s performance, and control the odor. You can see borax in the ingredients of most homemade laundry detergent. 4. Dishwashing Liquide:   Although it is unlikely for some to use dishwashing liquid as stain removers, it is an effective one. It can break down grease and stubborn stains. Stains that are made from greasy foods can break down the oil. If you are fond of gardening, dishwashing liquid and hydrogen mixture can effectively remove grass stains. It’s easy to use the dishwashing liquid, squirt enough amount of soap on the stained portion. Scrub the dish soap gently and rinse. Launder the clothes in the usual manner. You can also soak your clothes in soapy water for hours, then rinse and launder them the usual way. 5. Distilled White Vinegar: Another effective natural ingredient to remove stubborn stains is white vinegar. It’s the perfect alternative for chemical-based products. But since it is an acid-based ingredient, you have to handle your clothes with care. Mix the white vinegar with water to make it less acidic. Treating stains with vinegar needs the help of dishwasher detergent to scrub off stubborn stains. Wet the stained part of your cloth, place enough dishwasher soap, and gently rub it with an ice cube. The tough stains will come off. There will be leftover stains, applying the distilled white vinegar to cut through the stain. Rinse the cloth and launder it in the usual way. 6. Salt: The most accessible natural ingredients for stain removal is salt. You can have it almost anywhere. If you are out for a lovely dinner and a sauce spilled on your favorite dress, you only have to ask the waiter for a salt. Let’s say a tomato sauce dripped on your dress, remove the sauce with a tissue and place a pinch of salt on the stain. The fresh stain will disappear after 15 minutes. If there are still residues on the cloth, damp a napkin and gently tap on the stain. Moreover, salt is not only an excellent stain remover. It can also brighten the color of your clothes. You can wash your regular clothes with a saltwater solution to bring life to your faded wardrobe items. 7. Hydrogen Peroxide: Remember the bubbly oxidizing agent in your medicine cabinet? Hydrogen peroxide is an excellent alternative to chlorine bleach. You do not have to use a harsh chemical to whiten your clothes. Since hydrogen peroxide is an oxidizing agent, it can break down water and oxygen, making it safer for the environment. If you are having trouble with yellowish discoloration in the underarm and stains from curry, red wine, or nail polish, hydrogen peroxide is the best solution. 8. Meat Tenderiser: If you do not know, your meat tenderizer in the kitchen is an effective stain remover! It works best for protein-based stains. Did your baby vomit on her bib? You only have to wet the stained clothing and sprinkle the meat tenderizer on it. Let it settle for half an hour before your launder it in the usual manner. Meat tenderizers break down meat proteins to make them tender and more comfortable to chew. Thus, stains from body fluids such as vomit or blood are easily broken down because of their protein components. There you go! 8 natural ingredients to effectively remove the stubborn stains you are dealing with without using harmful and harsh chemicals. Single-handedly remove the stains. However, if the stains happened in delicate fabrics, it is best to bring your clothes to dry cleaning. Read Also: Different steps on how to clean pet stains on the couch 10 Trends About Homemade Carpet Cleaner You Should Know 10 Tactics To Maintain Clear Windows

READ MOREDetails
Flapper Makeup

Easy And Cheap Flapper Makeup Hacks: A Complete Beginners Guide

Stage makeup might be the new norm. However, the 1920s flapper makeup is nothing short of a sensation. Artists see it as a timeless token of expressive beauty, style, and sensational glamour. Let’s check out the main touch points of the artisanal and aesthetic flapper makeup. No doubt the 1920s looks were iconic. So, it’s worthwhile to understand the styles that inspired flapper makeup. We can also try to explore the twenties’ spirit that was depicted through the bold makeup looks. After all, expressing the inner self is the prime function of beauty. Before we know in detail, can you tell what flapper makeup was precisely? Well, long eyelashes, neatly defined brows, and scarlet lips are the tokens defining flapper makeup. That’s not all. The advent of rosy cheeks for that doll-like look can also be credited to the 1920s. What Defined Flapper 1920s Makeup? Eager to get into the crux of flapper makeup? Modern makeup enthusiasts are obsessed with the right nude look or depicting a sensational minimalist look. But the 1920s saw makeup and beauty differently. Remember the characters from The Great Gatsby? The youthful quest of character and dollish overtones dominated the thoughts of the 1920s artists. Today, you won’t celebrate such layered makeup. Instead, models proposed in angled foundations with neatly chiseled jawlines are today's front runners. Moreover, the heavy blushed, and brighter skin toning of flapper makeup has found a replacement in the contoured makeup of today. So, the basics of the flapper makeup look is getting dolled up with makeup. Since the makeup was ceremonial, events like dancing and night parties were so. Many of you may think- What about nails? Trust me, your favorite ombre nail designs 2024 versions would not have made any mark in that look. The face was still the epitome of beauty. Types Of Flapper Girl 1920s Makeup There were many flapper styles during the 1920s. In our imagination, the bold 1920 makeup girl would have liked some of these flapper styles: 1. The Classic Decor Dark and smoky eyes dominated this look. Remember the goth scenes with grim female characters? Yes, you’re thinking right. Sharp eyebrows, blood-red lips, and pale white complexions complemented the classic flapper makeup look. 2. The Bob Rain or shine, girls would go gaga over a playful twist. The definition of the bold flapper makeup completed with the faux bob. Short hair was the norm of the day. No commitment. Just do a contemporary transition and have fun! 3. The Cost-Effective Version Flapper makeup had a cost-effective version, too. If you don’t want your flapper makeup experiment to cause a hole in your pocket, here’s your solution. Firstly, grab any light foundation. Go for the wet n wild photo focus matte/gloss liquid foundation. It costs $5.47 and is available in classic, beige, and other shades. You can also go with the e.l.f. Flawless Finish Foundation. The latter would be better for the glossy, bold look. It covers uneven skin tones like MAC, The Whoo, or any in that category. Remember, the foundation is the basis of the cost-effective flapper makeup. Secondly, your primary role is to create smoky eyes using your regular eyeshadow palette. Lastly, go for a cheap radiant red lipstick for those popping red lips. BAAM! Your pocket friendly flapper makeup looks completed in 30 minutes or so. 4. The Zombie Flapper Makeup Look Today, I suggest a mattifying primer with a matte foundation, contour for cheeks, and dark shades for eye sockets. Of course, a makeup setter spray to top it up. But do you want to know how a 1920s makeup flapper would look like? Complement your flapper style with an authentic macabre look. Create a makeup base to begin with. After that, create defining under-eye circles, draw cracks, and apply fake blood in patches and splashes on your skin. Could you spot the difference? The 1920s flapper is so much more high definition than today’s looks. That’s the beauty of the bold makeup sensation we’ve left behind. How To Use 1920s Flapper Makeup: Tutorial The prime element in your 1920s flapper look would be how you groom your eyes. The eyes are an actual package here. Similarly, I’m talking about eyebrows, lashes, lids, and under-eye. Secondly, you must draw bold lips. No extraordinary treatment. But well-defined bright lipstick.   Lipstick However, I find that MAC’s Locked Kiss Transfer Resistant Creamy Matte would be an iconic lipstick I’d choose for realistic flapper makeup. After all, you must make your lips feel soft, thick, and plushy yet neatly chiseled. Mascara, eyeliners, eye shadows, etc After that, we will focus on the eye section. First, apply your eye shadow. You will find film stars staging dark eye shadows at that time. I also feel that the darker eye shadows preserved the real essence of the flapper makeup. It’s not the twenty’s spirit if it’s not bold and defining! For parties, most women flaunted their dark, smoky eyes. I was so hooked on that look. Indeed, my suggestion for eye shadows would be the same. Secondly, we will focus on the eyeliner. Start by drawing a thin line with your eyeliner. Let the top lash line be smudged; use a thin eye shadow brush. However, something still seems incomplete. Complete your eyeliner effect with an added eye shadow shade on the eyeliner. Caution: The to-eye shadow layer should only go down the point once the smudged eyeliner liner is marked. Otherwise, you won’t be able to conceal the extra eye shadow. I prefer the NYX eye pencils for the above. However, you can go with the brand of your choice. Thirdly, I would suggest a lash mascara brush. Brush your mascara more towards the center of your traditional long eyelashes. Don’t focus much on the sides. Brow Pencils Finally comes the eyebrows. The typical choice would be long and thin eyebrows. Meanwhile, don’t forget to use brow pencils to perfect your brows. Certainly, thin, chappy, or sparse eyebrows won’t make sense if we’re speaking flapper makeup here. However, there’s something more important here. Don’t draw a clean eyebrow arch. Rather, slop downwards. Most experts would not go any further. However, I am skeptical about the look and more about the finish. So, I would like yur blush to be perfect as well. Don’t taper the blush. Instead, try to give it a rounded appearance. After all, the blush is the crux behind the more youthful look. Other than the face, hands and feet also mattered in the 1920s. Back then people knew what is pedicure. The introduction of hemlines popularized nail care and pedicure trends. But nail makeup was not highly defined. So, they did not know what is builder gel. Related: Get Part Ready In No Time with These Hair And Makeup Hacks! The Flapper Era: A Cultural Revolution The flapper makeup is no less than a revolutionary look. It was the prime movement that resulted in the rise of a subculture. When a group of young people wished to defy social norms and sexual definition, they chose the flapper over minimalist makeup. Moreover, flapper makeup was a strong connotation of the fact that 1920s women were trying to break free. They needed to make accurate, bold statements that came in the first look. Flapper makeup looks aligned with style, approach, and cultural tastes. For example, flappers liked jazz. They also had bold lifestyles. Key Elements Of Flapper Makeup That’s easy. Flapper makeup uses all high-definition components. So, there was minimal layering in the makeup. Firstly, the flapper's makeup is incomplete without dark and smoky eyes. Secondly, a pale white skin tone is a definition look for a flapper. Don’t go by the racial connotation of the makeup essentials. After all, these elementary things defined a revolutionary generation. After dark eyes, flappers could not feel complete without firm lips and blush. Iconic Flapper Makeup Products Here are the main kits you would find in the makeup box of any flapper: 1. A heavy-duty mascara 2. Sets of long eyelashes 3. White toners, foundations, contours, etc. for base makeup 4. Eyelash curler 5. Eye pencil 6. Lipstick 7. Powders for touch up Flapper Makeup Techniques I have defined the flapper makeup essentially briskly already. So, I will talk about five master flapper makeup techniques only- 1. Have thin and long eyebrows and use a kohl liner for the best effect 2. Don’t forget false lashes. 3. Create a smoky eye effect as it would suit you 4. Plumm red, burgundy or any rich shade of red would do good 5. Carry Face powder Flapper Makeup In Modern Culture Days have changed. People don’t prefer the bold look that may seem prosthetic to the modern generation. However, bold makeup was an expression of revelation from shackles for women back then. So, it’s natural that the essence of flapper makeup still exists today. If you’re curious too, here are two unmistakable things that have become timeless. Firstly, the smoky eyes look. Women still use the smudgy and messy eye-shadowed look for that bold statement. Secondly, we see the cupid’s bow lips quite often. That is another gift of the flapper makeup era. If you want to know more about flapper makeup or want to offer tips, comment your doubts or queries in the following section. I will check the comments in no time! Additional Resources: Polish Your Creativity: A Colorful Journey into Self-Care With Nail Polish Smashbox Primer: Use It To Make Your Makeup Last Longer Essential Eye Care Tips That Can Improve Eyelash Hygiene

READ MOREDetails