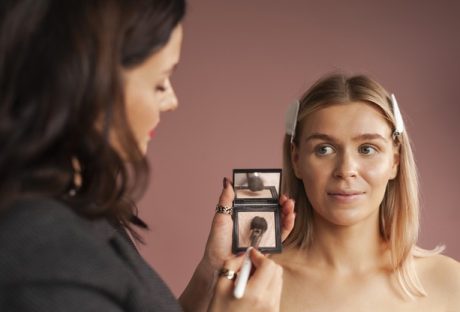
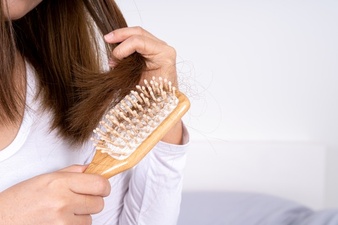
Likely causes of your hair loss:
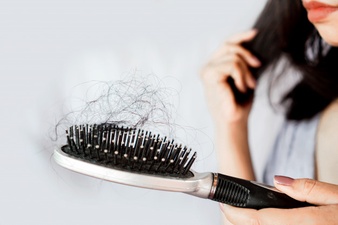 There are several possible factors that affect hair loss, some more than others. Here is the full list, below:
 There are several possible factors that affect hair loss, some more than others. Here is the full list, below:


20 Feb 2023

07 Feb 2019

28 Jan 2021

07 Dec 2023
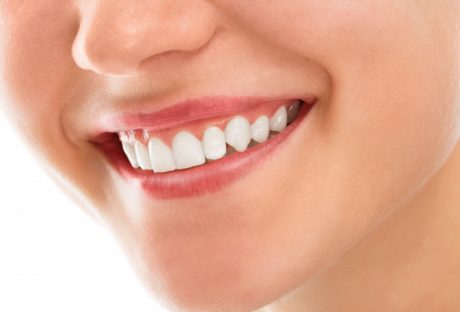
Going to the dentist requires that you take an active role in your dental health care and maintenance. Although professionals are trained to look out for dental issues and to clean your mouth to meet standards of optimal health, you should still pay attention to the specific dental procedures your dentist or dental hygienist recommends and performs during your appointment. In this article, we discuss the routine dental care that should commence during your routine visits. Here are three routine dental care procedures for a brighter, healthy smile. 1. Consistent Teeth Cleanings: While you should already be brushing your teeth at least twice a day, when you go to the dentist, make sure that you’re given professional teeth cleaning. The devices that dentists use to remove plaque and build-up in the mouth are much more effective than your daily brushing. For this reason, you must make sure that a teeth cleaning is performed at each of your visits. Without this routine cleaning, you are more susceptible to gum disease, and issues like gum disease and cavities. 2. Ask For a Deep Cleaning: In addition to your routine teeth cleaning, you should also ask your dentist to perform deep cleaning at one of your yearly appointments. The purpose behind deep cleanings is to ensure that the area beneath the gums stays healthy. The focus is to target the buildup that has accumulated underneath the gums. In doing so, you will further reduce your risk of gum disease, teeth whitening, and other dental complications that could compromise your health. 3. Teeth Whitening and Strengthening Services: If you are interested in preserving the appearance of your teeth, you might also consider asking your dentist to perform a routine teeth whitening service at one of your appointments. Choose teeth whitening for a cost-effective way to maintain a brighter smile. Your provider might be willing to perform the teeth whitening themselves or will offer you at-home professional-grade products that you can use to complete the teeth whitening yourself. You can expect to pay around $50 for a professional teeth whitening by your dentist. In addition to routine brushing and flossing, you can reduce acid buildup with regular fluoride treatments. Fluoride makes it easier for your teeth to resist acidity. Your enamel becomes more deeply protected and less likely to dissolve. Many kinds of toothpaste contain fluoride, which is part of the reason dentists recommend brushing twice a day. The more you work to build up your resistance to dentin decay, the healthier your teeth will remain. Fluoride treatments only take a few minutes to complete, so be sure to inform your dental provider that you are interested in a quick fluoride treatment when it is time for your regular visit. The Bottom Line: It is wise to trust your dental professional, but that does not mean you should not keep track of your dental health on your own. Check off these routine treatments as you go about your yearly checkups for the best dental health possible. Read Also: The Process of Invisalign How To Get a Better Smile Whatever Your Budget What Is A Good Alternative To Wearing Dentures?
READ MOREDetails
Many questions are arising associated with washing the hair and drying, but now the most frequent question that comes to your mind is, can you dye wet hair? Yes, it sounds a little bit different than the usual hair fashion-related question. But the answer indeed is yes, you can. Some hairstylists think dry hair dyeing can improve your hair texture naturally, and the end result is more natural than coloring dry hair. The wet hair dying technique is called wet balayage. This is a similar hair-dying technique to dry balayage techniques. Only here is a simple difference. It only applied to wet hair. Why Do You Want To Dye Wet Hair? The dying of wet hair may not be a common practice, but when we are talking about the comparison with dry hair coloring, here are some positive effects of wet hair dying. The dye of the wet hair is the best to work for achieving a subtle result. The hair damage is less than usual dry hair coloring. If you want to apply any semi-permanent hair color, then this technique is the best. The hair color promotes better absorption on the wet strands. The semi-permanent hair colors are more Ammonia-free. This type of coloring is becoming less harmful to your hair. Wet hair coloring promotes the natural hair look. This dying wet hair is a more user-friendly approach when you are dying your own hair at your home. These all are the basic positivity of applying the color on the wet hair. When you want to dye your hair at home, wet hair dying is the most user-friendly and time-consuming procedure. All you have to do is just apply the color in the middle of the bath; after that, wash it off. Benefits Of Dying The Wet Hair When you are applying the hair color at home, wet hair colorings are the best possible way to get the desired result. If you have any queries about you can dye wet hair? Then here is the list of multiple benefits of dying wet hair. 1. The Wet Hair Strands Are More Absorbent The wet hair strands are more absorbent than the usual dry hair. The hair color easily melts into the hair, and more easily, you will get the desired color look. The equal distribution of the color is also an attractive part of the wet balayage coloring. The color of the hair is distributed equally after the applications. The color change is quite simple. The hair color does not give you a drastically changing look. But if you want a good coverage color or anything which is a permanent hair color, then this color is not for you. The temporary and the demi temporary colors are working best as the wet color. Both of these colors have very less harmful substance init. 2. Best Hair Colour When You Are A Beginner When you are a just startup color applicant, then the wet color is the best-suited hair color. The beginners are more prone to make a mess when they are applying the color. The wet color is just covering all messes. First, shampoo your hair and then apply the dye to the wet hair. This will give you a more subtle result. These semi-permanent and semi-permanent hair colors are not working well on greasy hairs. This technique is quite easy and time-saving rather than the other coloring techniques. The working professionals and the people who do not have much time to go to the salon are more comfortable using this technique. 3. Gives You A Natural Flowy Look When you are asking the question, can you dye wet hair? Then the first answer which comes to our mind is yes. Not only yes, but the more natural and flowy look is also given through this type of coloring. The implementation is simple, and the drastic change of the hair color can not be found with the use of these temporary hair colors. You can expect mild color and a soft texture change of the hair. The distinctive funky colors are better to work as the wet hair color. How Can You Dye Wet Hair? We all call this dying technique the wet balayage. This technique is simple and effective, and long-lasting more than your expectations. Here are the four simple steps of applying the dye to wet hair. Step1 Wash your hair by applying the shampoo. Step2 Do not use the conditioner, serum, or any oil after washing the hair. Step3 Then just pat dry the wet hair. Step4 We need a damp surface to apply the hair color. Step5 Check the ingredients list before applying the hair color on your wet hair. As wet hair is more fragile than dry hair. Better to use semi or semi-permanent hair color for your hair. When our hair is in the wet state, the hair’s inner cortex layer is also open, promoting better absorption. Step 6 Read the instructions which are written on the package before starting the hair dying application. Step 7 Then wear a pair of gloves. Step 8 And take an amount on the small bowel as per your requirements. Step 9 Then apply the hair color with the applicator brush. Step 10 You can apply the color to the small sections of your hair. Step 11 You can also apply the hair color just like any hair care product. Step 12 Apply a good amount of color because, with every wash, it will become lighter. Conclusion The wet hair dye applications are easier to apply on the hair. These hair colors are less harmful with respect to the other type of hair dyes. The wet hair colors are more for the hair’s benefit and for improving the texture of the hair textures. Can you dye wet hair will no longer be a worry for you if you follow the mentioned points. But it also has some disadvantages. You have to choose the correct hair color for you, which has a less harmful substance within it. If you need simple temporary hair color, then these hair colors are the best time-saver for you. Therefore, I have tried my best to give you answers on how can you dye wet hair and the reasons for the same. You can also mention some more in the comment sections below. Read Also: How Many Jobs Are Available In Real Estate Investment Trusts? How to Download Game Of Thrones Putlocker Online for Free? 0123Putlockers And Servers – Watch Movies Online Is Real Estate Investment Trusts A Good Career Path? Which Type Of Portfolio Might A Young Investor Who Is Not Afraid Of Risk Choose?
READ MOREDetails
Fine lines and wrinkles in the face are the most common visible signs of the aging process. Some wear them with a badge of honor, but for others, their presence on the face is an unwanted reminder of how times have changed. Now different types of facelifts services are available to minimize all signs of aging processes. Facelifts are one of the most popular types of plastic surgery because they help to undo some of the signs of time. But there’s not just one type of facelift out there; in fact, there are three! These procedures: Mini facelifts, Mid-facelift, also known as cheek lift surgery, and a full facelift, all work to take years off of the face in different areas. 3 Types Of Facelifts The different facelifts services are available. But according to the face mapping, every individual facelift has a different area specified. Here’s how these procedures work and what problem areas they work to target! 1. Mini Facelift / Lower Facelift The facelifts are a different area targeted. Not each type of facelift treats the whole face. The Mini and small area targeted facelifts are more least invasive in the facelift procedures, which target minor concerns like fine lines and wrinkles and to sag and drooping of skin in the lower portion of your face, namely treating issues such as jowl formation or jagging jawline. This type of facelift is excellent for those with minor concerns about sagging skin and lines around the mouth, chin, and lower cheek areas but do not yet require treatment on any areas to the upper or higher middle part of the face. Thus, this procedure is popular among those in their 30’s and 40’s to get a light refresh on their face. 2. Mid-Facelift And Cheek Lift A mid-area-facelift, also popular with the name of cheek filler lift, targets the middle portion of the face, namely around the nose, cheeks, and eye regions. This is a great way to smooth outlines around the eyes and allow you to appear more refreshed and redistribute fat in the cheeks to allow for a more youthful and full appearance. Having the cheeks placed higher and renewed in volume can help delay their drooping down to create sagging jowls, which would then require the mini facelifts to solve. 3. Full Facelift As the name implies, the full facelifts are working to revitalize the entire face. Smoothing out wrinkles, redistributing fat, and tightening the skin is possible through a full Facelift. Choosing the right surgical approach depends on your specific goals and the current condition of your skin. Many patients find that a combination of techniques provides the most balanced and long-lasting results. If you are looking for a Facelift in Beverly Hills (or elsewhere), it is helpful to understand how these different methods address various layers of the face. A surgeon can help determine if a traditional lift or a more specialized procedure is the best fit for your needs. This personalized plan ensures that the final look is both refreshed and natural. Because of its range, a complete facelift is a more extensive version of facelift procedures. It is usually reserved for those with more noticeable signs of aging in multiple areas of the face. However, when it comes to the process itself, two main surgical methods can be performed. With this in mind, it is important to make an informed decision by consulting an expert specializing in procedures such as face lift sydney (or your local area). They can assess your individual needs and recommend the most suitable option. SMAS Facelift:SMAS is an acronym that stands for Superficial Musculo-Aponeurotic System, which is the connective tissue layer in your face. This layer works to structurally support the shape of your face, keeping things tight and where they need to be. The SMAS facelifts are targeting this later, distributing the tissues to help reverse and correct signs of aging like deep smile lines and jowls. Deep Plane:Deep plane facelifts are one of the most extensive facelift surgeries. This is because the incisions made in the procedure go further into the skin, reaching more profound layers of muscles and nerves so that the tissues may be more accurately and thoroughly manipulated and redistributed, resulting in excellent results.It is essential to choose a qualified and experienced Houston facelift surgeon (or one elsewhere) you trust to perform this procedure. Since the muscles and nerves are exposed during the process, there is a higher risk of damage if not handled with expert care. Conclusion: Now facelifts are not a very costly procedure. Even along with the facelifts, many temporary fillers are also available to treat the fine lines and all the signs of aging. If you do not want to undergo any plastic surgery treatments or painful processes. The facelifts treatments are the most suitable process for you. After the surgery, you do not require a very long time to recover. FAQ( Frequently Asked Questions) Read Also: Clay Masks for Smooth and Shiny Face 6 stunning long hairstyles for oval faces 5 Most Exciting Facial Treatments For Smooth & Gorgeous Skin
READ MOREDetails