Food Pyramid 2024: A Simple Guide To A Balanced Diet

Published on: 03 December 2024 Last Updated on: 09 February 2026
Food Pyramid 2024

If you want a guide to healthy eating habits, the USDA Food Pyramid 2024 is one of the best sources you must refer to. To stay healthy, you need different types of nutrients in your body.

Hence, you must consume a variety of foods from each of the major food groups. Basically, the food pyramid makes healthy eating easier.

In this article, you will learn about the food pyramid and how it works. Here, the article will contain a brief explanation of each shelf in the pyramid. Moreover, you will learn about the major changes in Food Pyramid 2024.

Finally, you will get essential tips to follow the pyramid for a healthy lifestyle. Hence, to learn more, read on to the end of the article.

Food Pyramid 2024: What Is It?

Food Pyramid 2024: What Is It

With the help of a food pyramid, healthy eating will be easier for you. Basically, it shows different groups of food and how much food in these food groups you need to have a healthy diet. For instance, if you eat the right amount from each food group, you will have a balanced diet.

It is important to eat well. This has both short-term and long-term benefits. By eating well, you can feel good, look your best, and maintain a healthy weight.

Moreover, in the long term, with the help of a healthy and balanced diet, you can reduce heart risks. Apart from that, eating healthy will also help you deal with diabetes, osteoporosis, and some types of cancers.

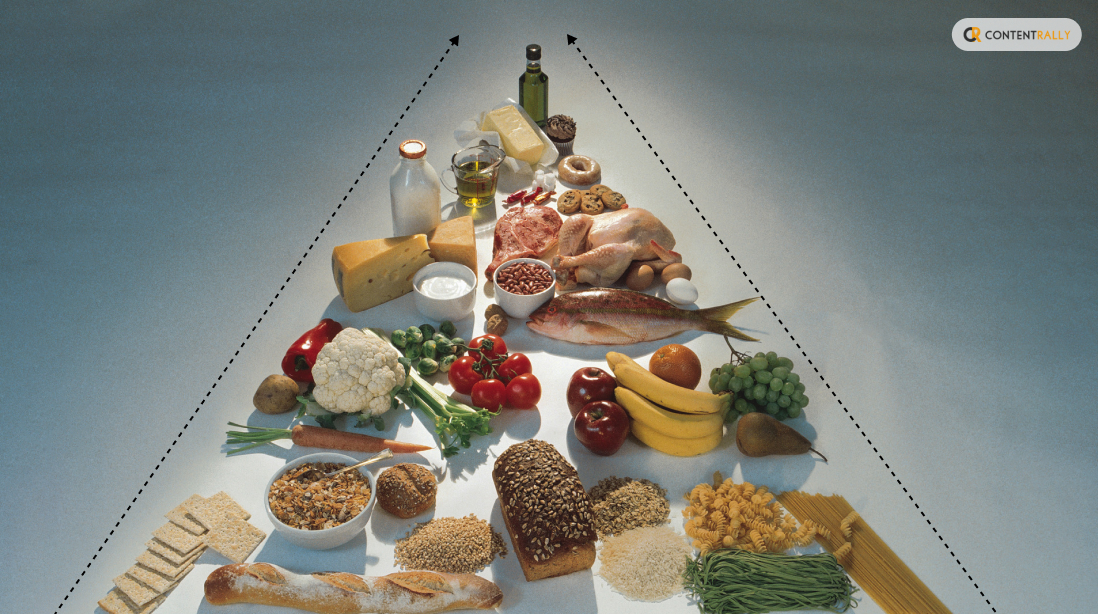
The recent food pyramid has equal parts of healthy fats, fruits, vegetables, and whole grains at the base. However, almost three decades ago, the base had carbohydrates.

Currently, the food pyramid is an improved version and caters to the actual needs and demands of an actual person.

Basically, when you are looking at the food pyramid, use it as a guideline for your diet. Do not use it to follow a strict diet.

Hence, if you want a diet chart as your starting point to lead a healthy lifestyle, the pyramid is a good option. However, you must modify it as per your diet, lifestyle, and eating habits.

Explaining Each Shelf of the Food Pyramid 2024

Explaining Each Shelf of the Food Pyramid 2024

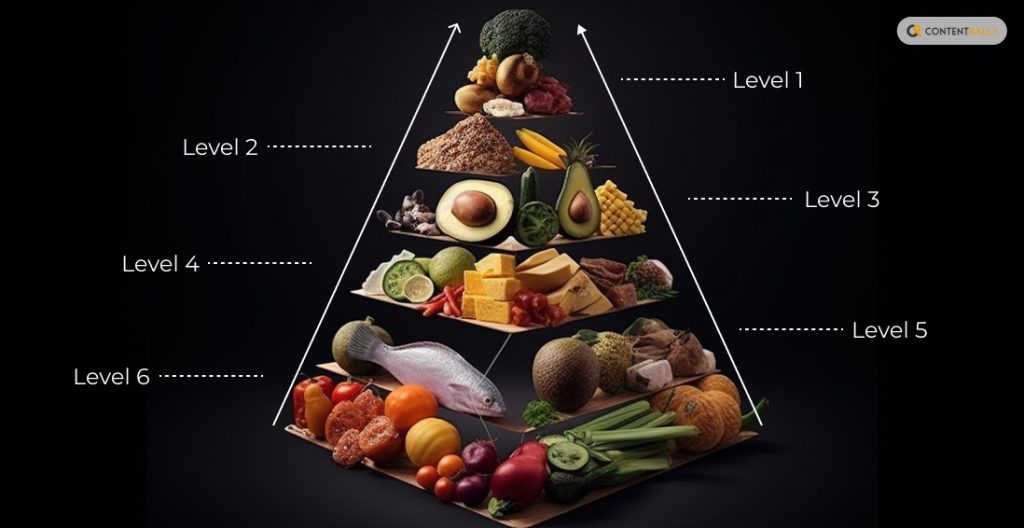
The food pyramid consists of five main shelves. Basically, there is a shelf for every food group. Here, the most important shelf is at the bottom of the pyramid, while the least important is at the top of the pyramid.

The following are some basic details of each of the shelves on the food pyramid:

Level 1

This level consists of vegetables, fruit, and salad. Basically, you can eat plenty of these food items every day.

Level 2

Here, you have starchy foods. These consist of whole-meal cereals like bread, pasta, potatoes, rice, etc., which you can have with every meal. In fact, having a wholegrain diet is one of the best options to consider for a healthy diet.

Level 3

The next level of diet belongs to dairy. Here, you must focus on consuming milk, yogurt, and cheese. Moreover, to choose the level of fat, you can go with reduced fat or low fat.

Level 4

This level consists of meat, chicken, poultry, eggs, fish, and nuts. Here, you must ensure that you choose lean meat options. Also, make sure to have fish at least twice a week, especially if it is oil. This will help you consume essential fatty acids and protein.

Level 5

The fifth level consists of fats, spreads, and oils. Basically, these are not fully essential, and you must consume them in small amounts. Moreover, choose unsaturated or reduced-fat oils only.

Level 6

These are non-essential foods and have high amounts of salt, sugar, and fat. Hence, this shelf is of the least importance. You must have these foods at least once or twice a week.

Major Changes in the Food Pyramid 2024 from Earlier Ones

Major Changes in the Food Pyramid 2024 from Earlier Ones

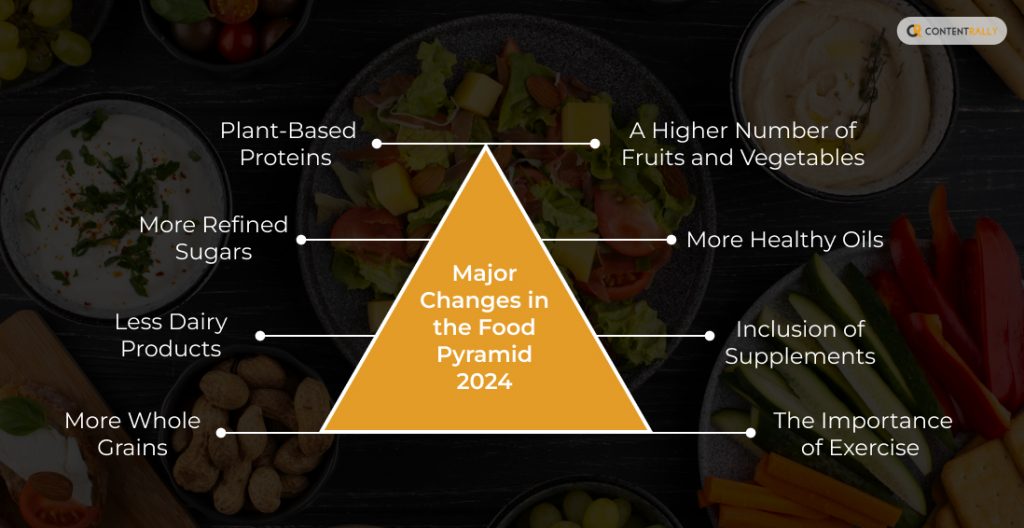
The following are some of the major changes you can find in the Food Pyramid 2024 from earlier food pyramids:

1. Plant-Based Proteins

Modern science and nutrition understand the importance of plant protein such as legumes, tofu, and tempeh. These protein sources are not only beneficial for your health, but they also have a lower environmental impact.

2. More Refined Sugars

Sweets, sugary beverages, processed snacks, and desserts are on the top shelf of the pyramid. Hence, it is better to avoid them. However, if you have a sweet tooth, look for natural options like fruits.

3. Less Dairy Products

A few years ago, people considered a glass of milk as a healthy option. However, the Food Pyramid 2024 suggests you cut full-fat dairy products. Rather, it suggests you stick to low-fat dairy products or plant-based dairy alternatives.

4. More Whole Grains

The old days of refined grains are over. Now, the food pyramid suggests you include whole grains as the base of your diet.

For instance, you can include quinoa, buckwheat, brown rice, and whole wheat bread. Basically, these items are rich in fiber and nutrients. Hence, these should be an important part of your diet.

5. A Higher Number of Fruits and Vegetables

The importance of green vegetables and fruits is increasing with time. Hence, you must include veggies that are rich in nutrients. Apart from that, you must also include fruits in your daily diet for better health.

6. More Healthy Oils

Earlier, oil was present on the top shelf of the food pyramid. However, experts now encourage the use of healthy oils. For instance, to include healthy oils in your diet, you must consider virgin oils, nuts, seeds, olive oil, etc. However, you must not overuse them.

7. Inclusion of Supplements

The world of health and nutrition is understanding the importance of food supplements like multivitamins and multi-minerals.

In fact, these supplements help fill up the shortage of nutrients in your body. Moreover, you also need Vitamin D in your body, which you can only get from certain food options.

8. The Importance of Exercise

No matter how much healthy you eat, you must exercise your body. Actually, exercise and diet go hand in hand. Hence, always exercise when you are following the Food Pyramid 2024.

Related: Great Health Benefits You Get From A Protein Coconut Bar

Tips To Follow Food Pyramid 2024

Tips to Follow Food Pyramid 2024

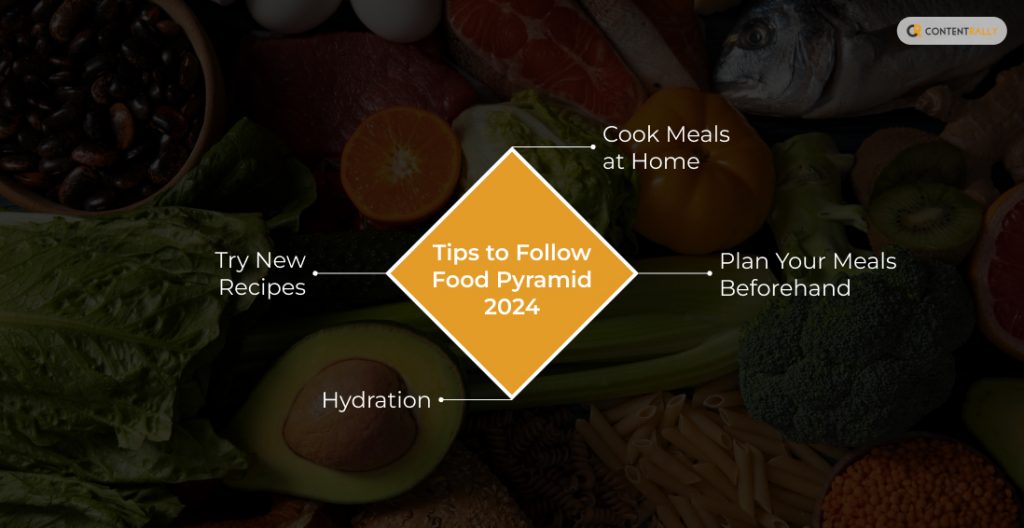
One of the first things you must understand regarding the USDA Food Pyramid 2024 is that you do not need to strictly follow it. Here, all you need to do is integrate it with what your diet already is.

The following are some simple tips you must consider in this case if you want to have a healthier lifestyle:

1. Cook Meals At Home

Of course, you might not have enough time to cook your meals at home. However, to start with, you can cook one meal per day. Moreover, if you cook at home, you can use fresh products and will also have control over portion sizes.

2. Plan Your Meals Beforehand

By planning your meals, you can save a lot of time and money. However, if you consider planning for the week too much, you can start by planning what you need to buy from the grocery store. Here, you can refer to the pyramid. Also, by sticking to the pyramid, you can save yourself from impulsive purchases.

3. Try New Recipes

By trying new recipes, you can include food that you have not tried before. As a result, you can expand your food pyramid. Also, this will give you a chance to include healthy options in your meals. Moreover, you might end up discovering a recipe that you really enjoy.

4. Hydration

Apart from a healthy diet, you also need to drink enough water. Make sure to drink plenty during the day. This will help your body stay hydrated. Moreover, it will support your overall health as well.

Start Following Food Pyramid 2024 Now

The Food Pyramid 2024 offers a nutritious, balanced, and environment-friendly diet. Hence, if you incorporate each level of food into your diet, you can benefit a lot in the long run.

However, you do not need to strictly follow the diet. All you need is to align your current diet with the Food Pyramid and change slowly.

Do you have more suggestions on how to follow the Food Pyramid 2024? Please share your ideas and opinions in the comments section below.

Read Also:

A passionate writer and an avid reader, Soumava is academically inclined and loves writing on topics requiring deep research. Having 3+ years of experience, Soumava also loves writing blogs in other domains, including digital marketing, business, technology, travel, and sports.

View all posts

Leave a Reply

Your email address will not be published. Required fields are marked *

Related

slider-img

How to Harvest Potatoes: A Complete Guide from Planting to Storage 

If there is something that I have learned in life, it is about gardening. Well, almost everything if not all. And if there is one thing that took me some time to master, it was knowing how to harvest potatoes at home!  Potatoes are one of the most versatile and popular vegetables in the world. They can be cooked in many different ways, such as boiled, baked, fried, mashed, or roasted. Moreover, they are also rich in carbohydrates, fiber, vitamin C, potassium, and antioxidants. But how do you grow and harvest your own potatoes at home? You see, potatoes are not like cilantro or other plants. These are tubers.  In this article, I will show you everything you need to know about how to harvest potatoes, from planting to storage. So, if that is something that you are interested in knowing, then I have you covered! Keep on reading this blog till the end to learn more...  How to Plant Potato Seeds or Tubers?  The first step in how to harvest potatoes is to plant them. You can start with either potato seeds or tubers. Potato seeds are small, round, and black, and they are usually sold in packets. Potato tubers are the actual potatoes that you eat, and they have eyes or buds that can sprout new plants. You can buy certified seed potatoes from a nursery or garden center, or use organic potatoes from the grocery store.  Here are some if the steps that you must take to plant them:  Planting Potato Seeds  To plant potato seeds, you need to sow them indoors in pots or trays filled with moist potting soil. Place them in a sunny spot and keep the soil moist but not soggy. The seeds will germinate in about two weeks and produce small green shoots. When the shoots are about 3 inches tall, you can transplant them outdoors in your garden or in containers.  Planting Potato Tubers  To plant potato tubers, you need to cut them into pieces, each with at least one eye. You can do this a few days before planting to let the cut surfaces heal and prevent rotting. Alternatively, you can plant whole small potatoes with several eyes. To prepare the soil, you need to loosen it and add some organic matter, such as compost or manure.   You also need to make sure the soil is well-drained and slightly acidic, with a pH of 5.0 to 6.0. You can use a soil test kit to check the pH level and adjust it with lime or sulfur if needed.  Planting Potato Pieces  To plant the potato pieces, you need to dig a trench about 4 inches deep and 12 inches wide. Place the pieces about 12 inches apart, with the eyes facing up. Cover them with 3 inches of soil and water well. As the plants grow, you need to hill up the soil around them to cover the lower stems and prevent the tubers from being exposed to sunlight, which can turn them green and bitter. You can also mulch the soil with straw, leaves, or grass clippings to retain moisture and suppress weeds.  How to Care for Your Potato Plants?  The second step in how to harvest potatoes is to care for your potato plants. You need to water them regularly, especially during dry spells, to keep the soil moist but not waterlogged. You also need to fertilize them every two weeks with a balanced organic fertilizer, such as fish emulsion or seaweed extract. Also, you can add some wood ash or bone meal to provide extra potassium and phosphorus, which are essential for tuber formation.  You also need to protect your potato plants from pests and diseases, which can reduce your yield and quality. Some of the common potato pests are:  Colorado potato beetles, which are yellow and black striped insects that feed on the leaves and can defoliate the plants. You can handpick them and drop them in a bucket of soapy water, or use an organic insecticide, such as neem oil or pyrethrin.  Potato leafhoppers, which are small, green, winged insects that suck the sap from the leaves and cause them to curl and yellow. You can spray them with a strong jet of water, or use an organic insecticide, such as garlic or hot pepper spray.  Wireworms, which are thin, brown, worm-like larvae that bore into the tubers and cause holes and tunnels. You can trap them with pieces of carrot or potato buried in the soil, or use beneficial nematodes, which are microscopic worms that parasitize and kill the wireworms.  Common Potato Diseases  One of the most common reasons why a potato cannot grow or survive is the diseases. If you were wondering what some of these can be and how to deal with them, I have you covered!  Some of the common potato diseases are:  Late Blight: It is a fungal disease that causes brown spots on the leaves and stems, and black or brown lesions on the tubers. It can spread rapidly and destroy the entire crop. You can prevent it by planting resistant varieties, avoiding overhead watering, and removing any infected plants and tubers. You can also use a fungicide, such as copper or sulfur, as a preventive measure.  Scab: This is a bacterial disease that causes rough, corky patches on the tubers. It does not affect the taste or edibility of the potatoes, but it reduces their appearance and storage quality. You can prevent it by planting resistant varieties, maintaining a slightly acidic soil pH, and avoiding excessive nitrogen fertilization.  Potato Virus Y: Lastly, this is a viral disease that causes mosaic patterns, mottling, or yellowing on the leaves, and misshapen or knobby tubers. It can reduce the yield and quality of the potatoes, and it can be transmitted by aphids or infected seed potatoes. You can prevent it by planting certified virus-free seed potatoes, controlling aphids, and removing any infected plants and tubers.  How to Determine When Your Potatoes Are Ready to Harvest?  The third step in how to harvest potatoes is to determine when they are ready to harvest. This depends on the type and variety of potatoes you planted, and the size and maturity you want. There are two main types of potatoes: early and late. Early potatoes are ready to harvest in about 10 to 12 weeks (about 3 months) after planting, and they produce small to medium-sized tubers that are tender and thin-skinned. They are best for boiling, steaming, or roasting.  Late potatoes are ready to harvest in about 15 to 20 weeks (about 4 and a half months) after planting, and they produce large, starchy tubers that are firm and thick-skinned. They are best for baking, mashing, or frying.  Early Harvesting  To harvest early potatoes, you can start digging them up when the plants begin to flower, or when the lower leaves start to yellow. You can use a garden fork or a spade to gently lift the plants and tubers from the soil, or you can use your hands to feel for the tubers under the soil. You can harvest as many or as few potatoes as you need, and leave the rest in the ground until you are ready to use them. You can also harvest some of the young, tender leaves and stems, which are edible and nutritious.  Late Harvesting  To harvest late potatoes, you need to wait until the plants have died back completely, or until the first frost. This allows the tubers to develop a thicker skin, which helps them store better. You can use a garden fork or a spade to dig up the entire row of plants and tubers, or you can use a potato digger, which is a special tool that lifts and separates the tubers from the soil. You need to be careful not to damage or bruise the tubers, as this can cause rotting or spoilage.  How to Dig Up, Cure, and Store Your Potatoes?  The final step in how to harvest potatoes is to dig up, cure, and store your potatoes. This is important to preserve the quality and shelf life of your potatoes, and to prevent them from sprouting, rotting, or shrinking. Here are the steps to follow:  Digging Up  After digging up your potatoes, you need to brush off any excess soil and remove any damaged, diseased, or green tubers. Do not wash your potatoes, as this can remove the protective skin and invite bacteria and fungi. You can wash them just before cooking or eating them.  Curing  You need to cure your potatoes for about two weeks in a cool, dark, and well-ventilated place, such as a basement, garage, or shed. This allows the skin to harden and heal any minor cuts or bruises and enhances the flavor and texture of the potatoes. The ideal temperature for curing is between 50°F and 60°F, and the ideal humidity is between 80% and 90%. You can spread your potatoes in a single layer on a newspaper, cardboard, or wooden crate, and avoid exposing them to light, which can turn them green and bitter.  Storing  You need to store your potatoes in a cool, dark, and dry place, such as a cellar, pantry, or closet. The ideal temperature for storage is between 40°F and 50°F, and the ideal humidity is between 65% and 70%. You can store your potatoes in paper bags, cardboard boxes, mesh bags, or wooden crates, and check them regularly for any signs of sprouting, rotting, or shriveling. You can also store your potatoes in a root cellar, which is an underground or partially underground structure that maintains a constant temperature and humidity. Additionally, you can also store your potatoes in a clamp, which is a mound of straw, hay, or leaves covered with soil, that insulates and protects the potatoes from frost and rodents.  Wrapping It Up!  If you want to know about how to harvest potatoes, I hope that this blog has been of help to you. However, if there are any other queries related to the same, please feel free to let me know. All that you need to do is scroll down till you reach the bottom of the page. Then leave your comments and suggestions in the box below. And I will be there to answer them all for you! Read Also: How to Harvest Lettuce: A Step-by-Step Guide for Fresh and Crispy Salads Everything You Need To Know About Harvesting Basil!

READ MOREDetails
how to thicken chili

How to Thicken Chili – Tried and Tested

A cold winter night with a delicious dish of chili is all you need to enjoy your moment. But wait, Are you left with too much liquid in your chili? Ah! No need to worry at all. There are numerous ways on "how to thicken chili". Honestly, you don’t want a thin chili because there is nothing better than a cheerful bowl of thick chili as your winter dish. Many times, just to thicken the chili, people cook it more than it is necessary. Later, other ingredients in it fall apart and turn to mush.  Don’t panic. There are effective and easy ways to thicken chili at your home, and all of these methods are tried and tested. Just be sure to use at least some of these methods to thicken chili before your precious moment turns into sour. How To Thicken Chili - Tried and Tested You may be wondering that cooking your dish for a little longer will make your chili thick. But do you know that you are mushing other ingredients in it? So, you must know other effective ways about how to thicken chili. Below listed are the perfect ways to thicken chili for the perfect night. 1. Flour - Standard Thickening Method: Wheat flour is composed of proteins, sugars, lipids, starch, and enzymes. It is used for making different types of foods. Flour is widely used for thickening chili in most of the kitchens. It really works great. Now its time to try for yourself as well. Ingredients:  30ml or two tablespoons of flour and 60ml or ¼ cup of cold water. How to Use? Take a separate bowl. Mix flour and water thoroughly in it.  Make sure that the resulting mixture has no lumps and is smooth. Then add the flour mixture in your thin chili while cooking it in medium-high heat. Stir constantly. Let the mixture boil and thicken well. It will hardly take few minutes. Make sure to continue stirring an additional few seconds to see if you are able to detect flour in your chili flavor.  So, here is your hearty chili dish! Now, it is much thicker and tastier than before. You can even serve this to your guests. 2. Arrowroot- Best Thickening Agent: Arrowroot contains Vitamin B, Iron, Potassium, low-protein, starch, etc. It is widely used as a thickening agent in all household kitchens. It is a starch that is extracted from the arrowroot plant. When you will use arrowroot in your dish, then it will give an amazing surface gloss to your liquid chili.  Ingredients: 5ml or 1 tablespoon of Arrowroot and 5ml or 1 tablespoon of cold water. How to Use? Take a separate bowl. Mix thoroughly water and arrowroot to turn it into a smooth paste. Make sure that you add only a small amount of arrowroot as it is potent and flavorless. Then add slurry into your thin chili cooking it in medium heat. Stir constantly below the boiling point. Then after 1 to 2 minutes, your thin chili will thicken instantly. Arrowroot adds gloss like appearance to your chili dish making your dish thicker and delicious. I have used this method and got the result, so now it’s your time! 3. Cornstarch- Anti-sticking Agent: Cornstarch is also known as Maize starch which is extracted from the maize grain. It is a food ingredient that is used in thickening soups and sauces. Cornstarch gives a moderate glossy appearance and when mixed with liquid, it rearranges itself.  Ingredients: 15ml or 1 tablespoon of cornstarch and 15ml or 1 tablespoon of cold water. How to Use? Take a separate bowl. Mix thoroughly cornstarch and water before mixing it to chili. After adding cornstarch paste to chili, heat it in a medium to high flame. Stir it well until the bubbles start appearing. Wait for few minutes to see the results. If you still feel that your chili should be thicker then you can add more cornstarch and water on it.  Then let it cook for an additional few minutes. You can use cornstarch to thicken your chili because it will not alter the taste of your dish of chili as cornstarch is flavorless. Other Simple Ways to Thicken Your Thin Chili: 4. Mix it in Tomato Paste Now, no need to worry about how to thicken chili. If you want your chili only a little thick then you can use this method. Tomato is one of the main elements in chili. So adding it to your mixture won’t alter its taste and makes your chili thicker. Ingredients: 170 grams of tomato paste. How to Use? I am suggesting that you should use fresh handmade tomato paste. Since tomato paste is recognized as bitter in taste, so you can add a pinch of sugar in it. Sugar will add a mild sweetness to your dish by removing tomato’s bitterness. During the final thirty minutes of cooking add 170 grams of tomato paste into your thin chili. Slowly add tomato paste to your thin chili. You can also add it after every ten minutes if you wish (⅓ of the tomato paste). Stir constantly to combine it well. You can use tomato paste to thicken your thin chili dish. But keep all the instructions in mind so as not to make any mistakes while preparing it. 5. Use More Beans to Thicken Your Thin Chili: A bean is a seed of numerous genera of the flowering plant. They have the ability to curl up on any medium. Beans can be use to thicken your thin chili. Do you know that India is the largest producer of dry beans in the world? Yes, it is.  Ingredients: 125ml or a half-cup beans. How to Use? If your chili contains beans then strain half cup of beans. Then refry and blend it. Then again mix this mixture to your chili and cook for a few minutes. Stir occasionally to warm it well. You can use canned or home-cooked beans as per your wish.  If you still feel that your chili is thin, you can add extra beans in it but make sure you blend it well. Here you go! Your thick chili dish is ready now to serve your family. If you don’t like beans then no need to worry. You can add meats to make your chili thicker. Wrapping it Up "How to thicken chili" is one of the major problems for all the cook masters. Even I have used many methods to thicken my thin chili but all went in vain! Therefore, all the above methods are tried and tested about how to thicken chili. So, you can use it to thicken your thin chili. I know nobody likes to serve thin chili to their family or guests. Even I don’t like it. Do you?  Image source: wikihow Read Also: 3 Variants of Thin Crust Pizzas How You Can Increase the Value of Your Home with Stone Veneers

READ MOREDetails
negative effects of portobello mushrooms-

Positive And Negative Effects Of Portobello Mushrooms: Tasty Treat Or Health Hazard?

Although mushrooms have been used in cooking and customs for over a millennia, their popularity has increased recently. Previously unfashionable and difficult to market, portobello mushrooms are now in high demand all across the world. These big, meaty mushrooms taste fantastic when grilled, stuffed, or used as a meat substitute in burgers and sandwiches. They also have a delightfully rich flavor. But do portobello mushrooms have any health benefits over other foods? What are the negative effects of portobello mushrooms? Here we will talk about different methods to incorporate portobello mushrooms into your diet and their positive and negative aspects. What Are Portobello Mushrooms? Image Source: tastingtable.com The delicious Agaricus bisporus fungus, which also produces cremini and button mushrooms, is the source of these large mushrooms. Actually, despite being in various stages of development, all of these mushrooms are the same. The biggest and darkest of the three mushrooms, portobellos are the most mature. They can occasionally reach a width of around 6 inches and have a deep brown color. Large-scale portobello mushroom cultivation is famous all over the world. These mushrooms, however, are from the meadows of Eurasia and North America in the wild. They have a less spongy texture than other mushrooms. These mushrooms have a meatier texture which makes them a good substitute in vegan and vegetarian meals. Portobello mushrooms are generally thought to be a fantastic source of important nutrients that are good for your body. It is believed that portobello mushrooms are rich in beneficial plant-derived nutrients like B vitamins, selenium, potassium, copper, and selenium. If they are exposed to UV radiation while developing, they can also be a rich source of vitamin D. Mushrooms were initially not acceptable to the general public and to persuade people to add them to their shopping baskets- voluntarily. In order to make that happen they were given the rather glitzy-sounding name Portabella in the 1980s. Today, 90% of all mushrooms produced in the USA are portobello mushrooms. They are also a common addition to recipes by professional chefs at restaurants and for recipes cooked at home. Next time you see these delectable mushrooms you're shopping and they're labeled portabella rather than portobello, don't worry—they're the same! Many people think that mushrooms, in general, offer a number of health advantages. The same is true of portobello mushrooms, which are a rich source of protein, fiber, and important vitamins and minerals. However, it is important to remember that there has been little research on the health advantages of portobello mushrooms. It cannot be suggested for consumption without necessary caution.   Benefits Of Portobello Mushrooms Image Source: a-z-animals.com Here are three positive health benefits of having portobello mushrooms based on popular research: Portobello mushrooms are an excellent addition to any diet because they lower fat and calories, like all mushrooms. Portobello mushrooms have a low calorie and fat content of 22 per 100 grams. They also contain 2.11 and 1.3 grams of protein and fiber. High concentrations of B vitamins riboflavin, niacin, and pantothenic acid enrich portobello mushrooms. They are essential for many bodily functions, like energy production and the metabolism of macronutrients. According to research, portobello mushrooms are rich in potassium, which is essential for maintaining muscle health and strength. 128g of cooked portobello mushrooms contain 440mg of potassium. It is roughly 9% of the daily adult intake. Negative Effects Of Portobello Mushrooms Image Source: cdn.britannica.com Like any meal, portobello mushrooms may not be suitable for everyone. The following are a few possible drawbacks of portobello mushrooms: Allergic Reactions Portobellos and other mushrooms may cause an allergic reaction in certain people. The degree of allergic reactions can vary. It can range from minor symptoms like irritation and hives to more serious ones like breathing difficulties or anaphylaxis. Consumption of portobello mushrooms can cause a severe reaction if you have a mushroom allergy. Digestive Problems Portobellos and other mushrooms contain chitin, a form of carbohydrate. Humans find chitin difficult to digest, and for some people, it can be uncomfortable. If ingested in large numbers or not cooked well, mushrooms can cause symptoms like bloating, gas, or upset stomach. Risks Of Contamination If you don't handle, preserve, and prepare portobello mushrooms correctly, they may become contaminated with bacteria, molds, and other hazardous germs. In this regard, they are much like other mushrooms. Food poisoning from eating contaminated mushrooms can cause symptoms like nausea, vomiting, diarrhea, and abdominal pain. Medication Interactions Portobello mushrooms, like several other foods, may have an effect on how some medicines work. For instance, they might impact how some medications and anticoagulants work. To be certain. There are no reported interactions. However, you can talk to a healthcare provider or pharmacist if you are taking drugs. How To Cook Portobello Mushrooms? Image Source: zardyplants.com Portobello mushrooms are ideal veggies in a variety of ways, including grilled, stuffed, and fried. However, you can also serve them on their own. They are very popular in Italian recipes like spaghetti and even as toppings on pizza. In a variety of vegetarian and vegan meals, including burgers and steaks, portobello mushrooms' are an ideal meat substitute. Here are a few of our favorite methods for preparing delicious portobello mushrooms: You may substitute a grilled portobello mushroom for a traditional meat burger or eat it alone as a plant-based steak. To prepare portobello mushrooms for pasta dishes and sauces, put them in a skillet and cook briefly until fork-tender. Portobello mushroom stuffing is an all-time favorite! Load a generous amount of cheese into the mushroom's center before baking it in an oven until it turns golden. Slice up a few of these chewy deliciousnesses. Put them on toast or toss them over for a savory stir fry! How To Choose The Right Portobello Mushrooms? Image Source: boomieskitchen.com Pick fresh, firm portobello mushrooms when you're shopping. Avoid portobello mushrooms that have bruises, or that have soft patches, as they are not suitable for consumption. You must consume fresh mushrooms right away because they are bad for your health when old. Fresh portobello mushrooms are best when in a paper bag or their original container in the refrigerator. These fresh mushrooms should be kept in an airtight container and kept at room temperature. It will prevent the formation of dangerous bacteria that could cause botulism. To help avoid cross-contamination, wash your hands both before and after handling portobello mushrooms. Before preparing and eating, immediately wash mushrooms under running water. Other than water, there is nothing else you need to use to clean your mushrooms. Never pre-wash mushrooms since the dampness will hasten their deterioration. Wrapping Up So it appears that portobello mushrooms may be more than we originally thought! There are so many good reasons to include portobello mushrooms in your diet. The possible health advantages and their distinctive texture and flavor make them super palatable. Remember that the negative consequences are not all-encompassing and might not be relevant for everyone. When included in a balanced diet, portobello mushrooms are a generally healthy and safe food option. However, it is advised to speak with a healthcare provider or allergist for specialized guidance if you have known allergies. Learn More About: 7 Benefits Of Eating Protein Rich Snacks 5 Ways To Use Medicinal Mushroom Extracts Great Health Benefits You Get From A Protein Coconut Bar

READ MOREDetails