How Many Exercises Per Workout You Must Do? – Let’s Find Out

how many exercises per workout

It is important to exercise and stay in shape if you are on a fitness journey. However, if you are on a busy schedule, you might think about how many exercises per workout you must do to be efficient. This is a question that is important to both an amateur and an advanced individual who is looking for a good workout schedule.

In this article, you will learn about how to make a workout schedule based on your needs and demands. Hence, this article will primarily answer the question, “How many exercises per workout must you do?” Apart from that, you will also learn about various factors that influence the number of exercises.

How Many Exercises Per Workout You Must Do?

How Many Exercises Per Workout You Must Do_

When you ask, “How many exercises per workout must you do?” – the direct answer is three to five exercises for a group of muscles. For instance, if you are working out your leg muscles, you must not do more than three to five exercises in a day.

Although it is the general guidance for most people, it is important to learn why this is the case. This is because the number of exercises in your case depends on your needs and demands. When you target a muscle group, you can be effective with your exercises. Also, you will not end up overwhelming or overtraining yourself.

Basically, when you have a better idea of how many workouts you must do while you exercise, you can plan your fitness goals easily. Also, a low but effective number of exercises in a workout will help you track your results better.

However, if you are a beginner, you can start with two exercises for each muscle group. For example, to hit your chest muscles, you can start with bench presses and push-ups. On the other hand, you can start training your triceps with diamond push-ups and tricep push-downs.

Factors Influencing the Number of Exercises

Factors Influencing the Number of Exercises

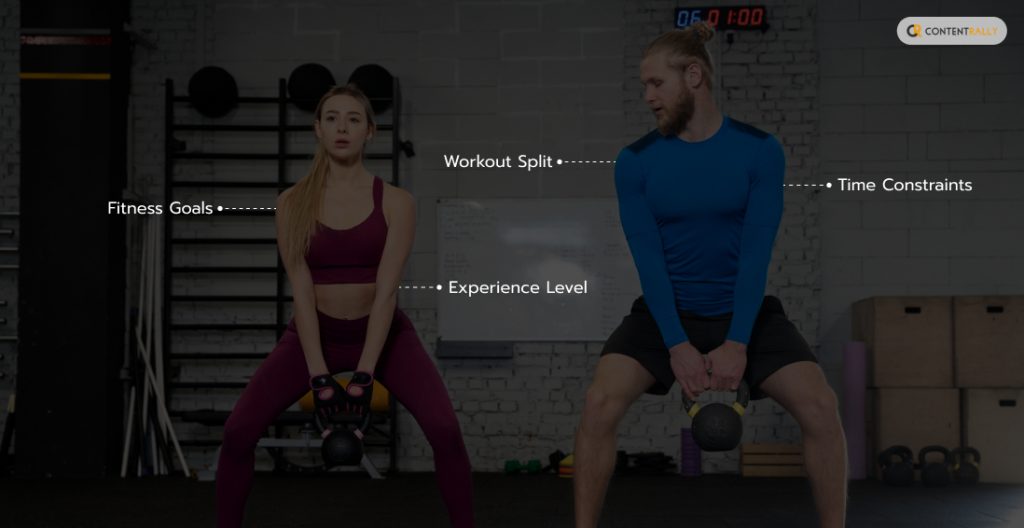
There are many factors that influence the number of exercises you need to do in a workout. Generally, these include a combination of personal preferences and how you design your training program:

1. Fitness Goals

As a beginner, you can start with simpler and fewer exercises. However, for advanced individuals, fitness goals fall into one of these categories: Strength vs. endurance vs. hypertrophy (muscle growth).

a. Strength Training (Rep range: 2-6)

Here, your focus is on lifting heavy weights, and your repetitions are low. This helps you to activate your muscle growth and helps to force production. Basically, this technique is common among powerlifters.

b. Endurance Training (Rep range: 6-12)

Endurance is your muscle’s ability to perform activities for long periods of time. To increase your muscle endurance, you must do lighter weights with high repetitions. This is a good idea for someone who wants to be more athletic.

c. Hypertrophy Training (Rep range: 15+)

Here, your goal is to increase the size of your muscles. Hence, you train with moderate weights with moderate repetitions. Generally, this is common among bodybuilders.

2. Experience Level

In fact, when you have a good experience with weights, you can perform a higher number of exercises per session. This is because individuals with more experience have the ability to handle higher-intensity workouts.

Also, they can handle higher volume because their muscles are developed. Apart from that, they have enough knowledge about technique, and they have higher endurance. Hence, they can incorporate more exercises into their workout routine.

As you gain more experience, your muscles become strong and resilient. Hence, it can handle a higher repetition count with each set. On the other hand, if you do regular exercises, you have better aerobic capacity, which is a higher level of fitness. Hence, you can perform more exercises with less fatigue.

3. Time Constraints

With more time constraints, you can significantly decrease the number of exercises you do in a session. This is because when you have a time limit, it will restrict the amount of time you dedicate to exercise. Hence, many individuals choose to dedicate less time to workouts when they have busy schedules.

Basically, time constraints are a major barrier for many when it comes to regular exercise. This prevents you from engaging in physical activities that you might like. Moreover, this also influences the type of exercise that you choose to perform. Hence, you select those activities that you can do in shorter timeframes. For example, high-intensity interval training.

4. Workout Split

With workout splits, you can focus on fewer muscle groups in a single day. This enables you to perform higher-volume exercises to target specific muscles of your body. In fact, with a split routine, you can do a higher number of exercises for each muscle group in one week. Apart from that, a workout split will also help you in faster recovery.

Moreover, with a split outline, you can also perform a higher number of sets and reps for every muscle group that you target. This is because you are using more exercises to target a muscle group.

Also, workout splits allow for more number of rest days between your training sessions. Hence, there is a better chance for recovery, and you can also prevent overtraining.

Guidelines for Number of Exercises Based on Goals

Guidelines for Number of Exercises Based on Goals

No matter what exercise you choose to do, it is important to focus on proper form. Apart from that, you must also ensure adequate recovery time. The following are a few guidelines you can consider if you want to consider how many exercises per workout you must follow:

1. For Strength Training

If you want to gain strength with your workouts, you must focus on compound lifts (e.g., squats, deadlifts, bench presses). Basically, you have to lift heavy weights with low repetitions. This will increase your maximal strength.

Here, the rep range is 2-6 reps per set. Also, you must stick to 3–5 exercises per workout. Additionally, you must ensure longer rest periods between your sets. This will help you to recover faster.

2. For Hypertrophy (Muscle Growth)

In hypertrophy, the focus is to lift moderate weights with higher repetitions. This will help you to maximize muscle growth. Here, the rep range is 8-12 reps per set. Also, you must stick to 5–7 exercises per workout.

Some examples of hypertrophy include bicep curls, shoulder lateral raises, leg extensions, chest flies, etc.

3. For Endurance and Conditioning

Here, the emphasis is on functional movements and higher repetitions. Basically, you have to perform exercises for longer time periods and also at a moderate intensity. This will increase your cardiovascular health and stamina.

Here, the rep range is high, and there are fewer rest periods between sets. Also, you have to perform 4–6 exercises per workout. In fact, the rest periods are fewer to ensure your heart rate stays at a higher level.

Some examples of endurance and conditioning training include running, cycling, swimming, jumping jacks, burpees, etc.

Factors to Consider While Structuring a Workout

Factors to Consider While Structuring a Workout

Here are a few factors you must consider while you structure your workout routine:

  • Your workout routine depends on your lifestyle, schedule, and physical activities. Apart from that, it also depends on your current strength and size.
  • Without specific goals, you cannot structure your workout routine. Basically, you have to find the best ways to chalk out your goals.
  • Make sure that there are enough rest and recovery periods between two training sessions. This will help in muscle growth, and will not overstrain your muscles.

Structure Your Workout Now

How many exercises per workout? – Now you know that it is better to have 3 to 5 workouts in a single training session. Apart from that, you also need enough rest and recovery time between two consecutive training sessions. However, if you are performing endurance and conditioning, the recovery periods will be fewer.

Do you have more suggestions on how to structure your workout routine? Please share your ideas and opinions in the comments section below.

Read Also:

A passionate writer and an avid reader, Soumava is academically inclined and loves writing on topics requiring deep research. Having 3+ years of experience, Soumava also loves writing blogs in other domains, including digital marketing, business, technology, travel, and sports.

View all posts

Leave a Reply

Your email address will not be published. Required fields are marked *

Related

Nerves vs. Excitement

Nerves vs. Excitement: How To Manage Nerves And Perform At Your Best

Anyone who has ever been called to come and speak or perform in front of a public gathering knows the importance of holding nerves. From the time we are in school, some of us have dreaded raising our hands and speaking out the right answer even though we know what we are. We have looked at astonishment at so-called confident individuals and wondered what makes them do things that we cannot. Common terms like ‘performance anxiety, ‘stage fright’, ‘nervousness’, etc. are all common emotions and feelings that we harbor. The key is- how do we overcome the same? In this resource article, we are going to help a lot of people come to grips with their nerves. If you are someone who dreads talking in front of a crowd, we recommend that you stick around till the end of the article. Being ‘Nervous’ Versus Being ‘Excited’- How a Change in Terms Can Help: ‘I am too nervous; I can’t go out there and speak’! According to leading psychologists, a simple interchanging of the terms nervous and excited can go a long way in dispelling the fear. Rather than say or think that you are getting the nervous try and say to yourself that you are feeling excited. What you need to understand is that nervousness is associated with being a negative feeling. On the other hand, excitement is something that is deemed to be positive. This simple exercise wires your brain in a specific way, which then lets the body flow from the same feeling. For example, as soon as your brain starts comprehending that you are nervous, it sends a signal to your body, which then results in stomach pains and churnings. This is why you need to start feeling excited and look forward to the opportunity. There is a lot of energy that builds up in the body in such situations. The key is to effectively manage the same productively and positively. The ‘Fight’ and ‘Flight’ Instinct that Defines a Nervous State of Being: To understand these better leading scientists have spoken about the ‘Fight and Flight Syndrome’. They point out that whenever the brain is faced with a complex and problematic situation, it does one of two things- It either wants to escape and run away from the scenario. Or, It starts to swing madly to bring the situation under control. However, in some instances, and I am sure, you are going to relate to this, the brain goes into a hung position. Meaning, it neither fights nor flights. In this situation, the resultant action is a freeze! You get frozen and cannot do anything. According to experts, the fight or flight instinct needs to be properly managed by telling your brain some important things. What are those things? In very simple words, not every such scenario is going to be a life and death one. Meaning it is not at all serious and does not amount to anything. Once your brain can understand this, it starts processing emotions and feelings differently. Following this, it then sends these signals to the rest of your body. List of 5 Important Ways to Help Overcome Nervousness- In this section, we compile the top recommendations from the leading mental health experts to combat nervousness- 1. Undertake Adequate Preparation- According to scientists, 50% of all nervousness results from inadequate preparedness. This means that the more you are prepared, the lower will be your levels of nervousness. Reflect on your school days. Remember when did not know the answers to the question the teacher was asking, how you would try to avoid making eye contact? However, if you were prepared, you would not do the same. Practice makes perfect when it comes to combating nervousness. 2. Focus on ‘You’ providing Value to the Audiences- Whenever we are nervous, we keep thinking about ourselves. However, the key in this regard is to shift focus to the audiences that are sitting right in front of you. Start thinking of all the value, information, education, and enjoyment that you are going to give to the audiences. This will put you in comfortable headspace. Let me in you on a little secret. Audiences want everything should be about them. So, you can simply shift the spotlight on them. 3. Take Help from your Friends and Family Members- Leading comedians and artists have pointed out how having their near and dear ones in the audience helps them overcome stage fright. This is a simple, yet effective solution to combating nervousness on stage. Many also point out how they keep looking for their near ones in the audience and use them to make eye contact with different sections of the audience. This boosts their confidence and makes their brain understand the support there is on offer. 4. Breathe, Relax and Take it Easy- Remember, this is not a life-and-death situation. No one is perfect and even the best ones make mistakes. Once you can tune your brain accordingly, you will be able to get a hold of your nerves. Try breathing and being patient at all times. You can do mistakes, it is alright. Realize that you’ve done the work. The more relaxed you are, the better will you be able to convey. There will always be errors, and you should not worry about making them. 5. Engage with Positive Relaxation Techniques- In the last few years, relaxation strategies like Yoga, Massages, Aromatherapy, etc. have become very popular. They help channel positive energy within the body and calms down the senses. Regular meditation is great for your body mentally, as well as physically. By making such healthy practices a part of your daily life, you will be able to control your emotions in a much better way. Try meditating for 15 minutes every morning and see the difference. The Final Word: At the end of the day, you need to realize that we are all humans. We have a range of emotions, feelings, and characteristics that make us special in our way. No two individuals are the same and we must acknowledge the same. By paying attention to all the pointers in the article, you too can expect to combat nervousness and be better prepared for the next time you face the audience. Read Also: 5 Protein Enriched Food To Improve Mental Health 6 Effective Ways to Improve Your Mental Health

READ MOREDetails
signs of drug use in teens

Not On the Straight and Narrow: 4 Telltale Signs of Drug Use in Teens

Did you know that 6.1 percent of 8th graders, 9.6 percent of 10th graders, and 12.4 percent of 12th graders admit they have used an illicit drug recently? With such shocking statistics, it's clear to see there is a growing problem among young people. During the troublesome teen years, it's common to experiment with new things. But this may lead your child down a dark path. You may wonder how to tell if your child is using drugs. Fortunately, there are clear telltale signs of drug use in teens. Read on to find out if your loved one has fallen off the straight and narrow. Telltale Signs of Drug Use in Teens: During their teens, young people have to deal with many physical and emotional changes. This can make it difficult to pinpoint whether drug use is the problem or it's simply a case of rebelliousness. Looking for these next four signs will help you to know for sure. 1. Use Your Senses: When your teen comes home, what can you smell on their breath, on their clothes or in their hair? Are their eyes red with constricted pupils? Signs of crack use also include blistered lips or burnt fingers. Your teen may also rapidly lose weight, as they will be spending their allowance on their fix instead of food. If they are inhaling drugs they may also have respiratory problems, such as coughing or constant sniffing. If they are injecting they may have track marks on their arms. 2. Behavioral Changes: Another way to tell if someone is on drugs is if you notice their behavior has changed dramatically. Of course, arguing, anger, and moodiness may be part of the troublesome teen years. But if you also notice them defying your house rules, disappearing for long periods of time, and other reckless behavior it may be a sign of using. After a night out with friends, is your teen clumsy, laughing hysterically, and obnoxious? Or do they look exhausted, jittery, or queasy? These behavioral signs are common with teens who take drugs. 3. Caught in the Act: If you find drugs in their room or on their possession you've caught them in the act. Some other drug-related paraphernalia may include: Tiny plastic bags with powder residue Roll-ups Tin boxes Syringes Burnt teaspoons or crack pipes If you find any of these items, try not to overreact. Confront your teen, it may be an honest mistake after all. 4. Social Changes: Your teen's grades may be declining dramatically. Or they may keep on skipping school and other social activities that they previously enjoyed. Another sign of someone on drugs is if your teen ditches their friends to hang out with another unknown crowd. You may also notice items or money missing from your home. This may mean your teen is stealing to fund their habit. Monitor any alcohol you have in the home as they may use it for payment. Time to Take Action: If you can see any or all these signs of someone on drugs, it's time to take action. Encourage them to get support from professionals. Lincoln Nova Vital Recovery has created a unique program that can help people to recover from addiction. Find out more here. Some Things are Worth Fighting For: Of course, these signs of drug use in teens may vary from person to person. But one thing is for sure: they are going to need you to fight alongside them on their road to recovery. To keep your family close-knit and strong in times of distress, check out these fundamental pillars of a happy family. Read Also: American Healthcare And Its Woes Passing A Marijuana Urine Drug Test- How To Pass Pee Narcotics Tests

READ MOREDetails
Vaping

How to Solve Some Problems of The Vapes

There are many reasons for the short circuit of the atomizer. If it is short-circuited protection, there is no danger. If the mechanical mod may cause the battery to explode, the short circuit of the atomizer is not a particularly serious problem, but it still needs to be taken seriously. The cause of the atomizer short circuit and its solution. After cleaning the atomizer, it will be installed and used without causing a short circuit. This situation is very simple, just remember to wipe dry after cleaning the atomizer, it is best not to use it immediately. The bottom electrode is low, and the top of the electrode of the host is not touched, resulting in a short circuit. Try to slightly rotate the electrode screw on the bottom of the atomizer a little. Check if the heating wire lock screw is tightened and re-wire the wire if necessary. Check if the bottom electrode is too tight, screw it out, and replace it with another electrode screw if necessary. How to avoid short circuit of a mechanical mod? Always check the resistance and short circuit of the atomizer. Unlike general-purpose vapes, mechanical mods can be ignited even when the atomizer has been short-circuited. Here, the resistance of the short circuit refers to zero or near zero, but most tanks do not let the resistance be less than 1.5 ohms, which ensures that the battery is not overstressed. When using a new atomizer, be sure to check the atomizer resistance and confirm that there is no abnormality before screwing it onto the mechanical battery compartment. If you use an RBA, don't let the resistance be too low, because too low a resistance will make the battery pressure too high. It is best to control the resistance between 2.4 and 3.0 ohms at the beginning to ensure safety. Although the atomizer is not so easy to short-circuit, it is best to use a multimeter to test. The specific test method is this, remove the battery, connect the battery compartment and the atomizer, put one probe of the multimeter to the positive pole of the battery compartment, and the other probe touches the surface of the battery compartment. If the multimeter shows a non-zero resistance value, it means that there is a current, so there must be a short circuit. When testing the resistor with a multimeter, be aware that the multimeter's leads may also generate resistance. We have seen some very cheap multimeters with lead resistances even higher than 0.6 ohms. The lead resistance can be displayed by touching the two probes of the multimeter. This value needs to be subtracted when testing the atomizer to get the true resistance value. For example, if you measure the resistance of the atomizer to be 2 ohms, if the lead resistance is 0.6 ohms, then the true resistance is only 1.4 ohms. In short, the atomizer is short-circuited, don't worry, think about the above problems can be solved. After a period of use, the atomizer needs to be cleaned regularly. The inside of the atomizer will be stained with some non-volatile liquid condensate. If it accumulates too much, it will affect the atomization effect of the atomizer, which will lead to the taste odor. In addition, when replacing different flavors of smoke oil, it is also necessary to clean the atomizer beforehand to avoid affecting the taste experience. The daily cleaning frequency of the atomizer is recommended to be cleaned once a week. The following is the atomizer cleaning method 1. Hot water After the residual oil in the atomizer flows out, pour the appropriate amount of hot water, shake gently for 1-2 minutes, wait for the dirt inside to dissolve in the hot water, then slowly pour the water out to dry. Or use a hairdryer to quickly dry it. This method is simple and easy to clean, but there are still residual odors that affect the taste. 2. Vinegar The atomizer is placed in clear water mixed with vinegar and then cooked. After heating for about 10 minutes, then wash it with water and then dry it. Cleaning the atomizer with vinegar is still good. 3. Cola Soaking the atomizer in a cola drink takes about 24 hours. After taking out, the water is washed and finally blown dry. This method takes a long time and the effect is not very satisfactory. It is not recommended to use it frequently. 4. Vodka. Blow the atomizer, pour the appropriate amount of vodka, seal the atomizer mouth with your fingers, and gently shake for one to two minutes and then pour off. Rinse off with hot water and let it dry. This is a more effective method to substantially eliminate the dirt and taste of the inner wall of the atomizer. Read Also: Vaping Is Fighting The Deadly Consumption Of Nicotine 7 Things You Should Know About Owning A Vape  

READ MOREDetails