Published on: 13 February 2022
Last Updated on: 04 February 2026
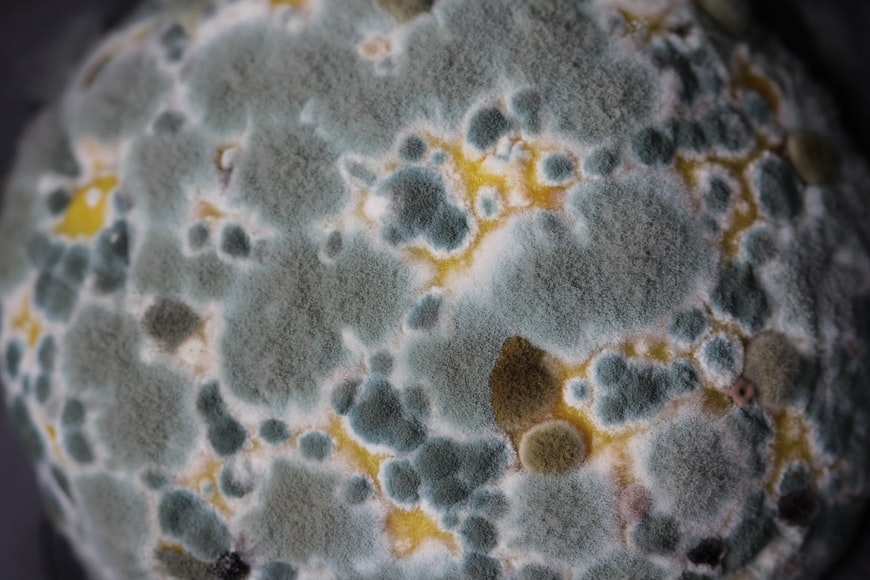
Healthy living requires a clean and safe environment, but with the prevalence of many microorganisms such as mold damage, this can be challenging. This is because they are invisible to the naked eye and release spores into the air, which cause major health problems when inhaled.
Mold is a fungus that grows in the form of hyphae, which are multicellular threads. It is composed of microorganisms that can be found almost anywhere. They are useful outside for breaking down garbage and composite materials, but when found indoors, they are extremely detrimental to human health.
Mold damage produces allergic reactions or irritation and must be removed as soon as possible. To stop it from spreading, early detection and removal are essential. Mold remediation or removal is not something just anyone can do. To achieve a proper sanitization of the entire building to avoid the existence of mold, you will need to contact professionals or follow the complete guide about damp wall treatment procedures. This way, you will be sure that your home or office will be properly treated.
Finding a good remediation service is not always a stroll in the park, especially if you have not worked with one before. However, with the right guide handy, you can easily find a professional company that will properly clean and sanitize your building. If you do not know how to find a good company, and you need recommendations on reputable companies to work with, you can visit theLong Beach mold removal company for help.
Types of Molds Damage:
Here are some common types:
Aspergillus
This type does not need much ventilation and can be found in attics, textiles, walls, dry food, and basements. It has a powdery appearance and may be white, green, or gray in color, with dark dots. It has several carcinogenic forms, but when detected within the home, it causes serious respiratory problems.
Cladosporium
This can be found in both warm and cold places. It can also be found on carpets, clothes, wood, and heating and cooling ducts, among other things. The color is usually black, or green.
Alternaria
This fungus has a white background with black dots and can be found near windows, in fabrics, bathrooms, kitchens, air conditioning units, and wallpapers. However, it is commonly found outdoors.
Trichoderma
This fungus is commonly creamy-white in appearance, but as it releases spores, it becomes green. Windows, baths, kitchens, and wood are among its favorite areas.
Penicillium
This type is fuzzy and comes in a variety of colors, including blue, green, and yellow. Basements, insulation, and carpets are all common places to find them. It is usually present anywhere a water-damaged structure is found. Penicillin, an antibiotic, is derived from it. You can learn more about penicillin by reading this article.
Key Materials for Mold Removal
Mold damage removal requires a variety of tools, depending on the size of the fungus and the type of surface to be cleaned. There are natural cleaning methods that may be utilized to get rid of it as well.
Plastic Sheet
A plastic sheet is used to separate the infected region from the rest of the room, preventing spores from spreading. It is used to block openings to air vents, doorways, and the rest of the building.
Biocide
It is critical to use a high-quality cleaning product for removing mold damage. The fungus will only be hidden if you use poor or regular household bleach or cleaning agent. Biocide is particularly effective at killing and inhibiting this bacterium's growth.
Vinegar
Despite its strength, it is quite effective against fungus. Baking soda, hydrogen peroxide, and lemon juice can all be added to it. Wear safety clothing such as goggles, gloves, and a breathing mask when using it. To remove the mixture, wipe the area with a clean moist cloth.
Sodium Bicarbonate
Baking soda, or sodium bicarbonate, has a wide range of applications, including the removal of fungus. It should be sprayed on the damaged surface after being combined with vinegar or water. After spraying, scrub the area with a brush, rinse, and then spray again.
Dehumidifier
This gets rid of the moisture and prevents future growth. It is best used after the cleaning procedure to air the place and remove any remaining moisture, but it can also be used as a preventative strategy. As a solution, a portable one can be stored in a room with an infestation.
If you need tips on how to use a dehumidifier, you can check here.
Lemon Juice
This natural cleanser is efficient, non-toxic, and has a pleasant scent. Before spraying it, clean the surface with soap and water. It can also be applied daily to keep fungus at bay. It is an excellent choice because it is both environmentally and pet-friendly.
How to Keep Mold Damage at Bay
Here are some methods to guide you:
Regular Checks
They can be found in open regions, but they can also grow in secret spots. This means that regular inspections of damp, dark areas like basements should be carried out to detect the infestation early before it worsens.
Repair any Leaks
If there is a leak from pipes or faucets, fix it immediately and dry the area. Also, inspect drains and pipelines on a regular basis. Liquid storage areas should also be checked because they can leak from their bottles.
Make Use of Cleaners
While it is necessary to deep clean your home on a regular basis, you should do so with a mold-prevention agent. Natural cleaners such as natural lemon, white vinegar, baking soda, as well as other citrus-based treatments are recommended. In addition to keeping fungi at bay, these solutions leave a fresh smell around the building.
Allow Sunshine In
Mold does not thrive in natural light and fresh air. This means that you have to open the windows and curtains to allow sunshine in. You can also turn on your ceiling fan to prevent the survival of mildew. Keep in mind that mold damage is detrimental to human health and this should guide you in taking the right steps to prevent its growth and survival. You can read articles explaining how mold affects human health for more information.
Wrap Up
Mold growth can pose a danger to human health; therefore, it should be nipped in the bud. Always inspect the bathroom, roof, pipes, and foundation for cracks, leaks, or damages. Delaying treatment as soon as the condition is discovered can worsen the condition and increase the cost of treatment, especially if toxic or black mold is present. This article outlined tips to help you prevent mold damage in a building. Feel free to check them out.
Read Also:
Content Rally wrapped around an online publication where you can publish your own intellectuals. It is a publishing platform designed to make great stories by content creators. This is your era, your place to be online. So come forward share your views, thoughts and ideas via Content Rally.
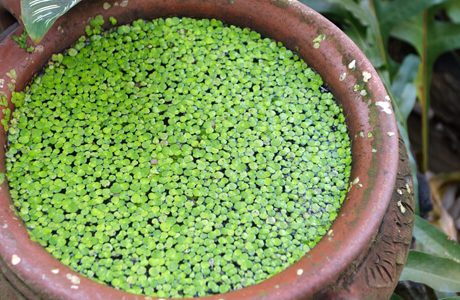
What is the fastest growing plant on earth? The answer to this question is Duckweed which is known as the fastest-growing plant in the world in 2021.
The Duckweed family consists of 37 species and can be found pretty all over the globe. Besides, this plant is also known as Wolffia, a plant that is easy to harvest and float on water. It grows very fast that you have never imagined of.
Wolffia is found everywhere in freshwater and has become a subject of fascination for scientists. This plant acts much like a weed, although it is eaten by humans, animals, and ducks.
What Is The Fastest Growing Plant On Earth?
As already discussed above, the fastest growing plant on earth is Duckweed, also known as Wolffia. This plant is a tiny type of duckweed that grows faster.
On the other hand, you are probably familiar with this plant (duckweed) that is found on ponds where several green beads seem to form a lid on water sources. The genetics underlying this strange little plant’s success has long been a mystery to scientists.
The Genome Research of February 2021 will help scientists to know how plants grow up so fast and what are the functions that allow them.
What Makes Wolffia (Duckweed) The Fastest Growing Plant In the World?
There are various reasons why Wolffia is known as the fastest-growing plant in the world. Many individuals are taking the benefit of this unusual crop as it is extremely high in protein and is a part of some Southeast Asian cuisines.
This plant reproduces very quickly. According to many types of research, Wolffia is regarded as the fastest growing plant in the globe. About forty percent of the plant’s genes are influenced by this time of day factor. Wolffia, clocks in with only 13 percent of its genes restricted by time.
Can You Speed Up Growing Rate Of Plants?
Smaller plants and trees grow faster than bigger versions of the same tree and plant because of the root ratio. These variants grow fast as they highlight a great balance of roots to top growth.
On the other hand, the plant and trees can place all their strength into top growth enables it to grow taller. And fast-growing plants only grow as fast as their roots support.
Besides, if you are growing plants, they must be planted right. In order to encourage deep root growth, you can also give continuous watering to the same.
The Final Thoughts
Duckweed is the fastest growing plant on earth and this is the correct answer to your question. The characteristics of the same are described above and if you have any queries about the same, you can specify them below in the comment section.
More Resources:
Garden Edging for Beginners
How to Maintain a Bright and Beautiful Garden During Winter
Smart Fun Gardening: How to Take Care of a Money Tree
Transforming your outdoor space into a relaxing oasis begins with the right furniture. Outdoor furniture has evolved beyond functionality, with design trends now focusing on creating a visually appealing and comfortable outdoor environment.
Embracing Natural Materials
One of the prominent trends in outdoor furniture design is the use of natural materials. Wholesale furniture suppliers are increasingly incorporating materials like rattan, teak, and bamboo into their product lines. These materials not only provide durability but also offer a natural and organic aesthetic. Incorporating natural materials into your outdoor space can create a sense of harmony with the surrounding environment.
To embrace this trend, opt for furniture pieces made from these materials, such as teak dining sets or rattan loungers. Pair them with earthy-toned cushions and throws to enhance the overall organic feel of your outdoor oasis. Using natural materials not only adds visual appeal but also promotes sustainability, making it a win-win choice.
Blurring Indoor-Outdoor Boundaries
Designs that seamlessly merge indoor and outdoor spaces continue to gain popularity. Wholesale furniture manufacturers are now producing versatile pieces that can be used both inside and outside the home. This trend allows for a smooth transition between the two spaces and expands the usability of your outdoor oasis.
Consider incorporating outdoor sofas or sectionals that mimic the style of indoor furniture. By using similar colors and patterns, you create a cohesive flow between your indoor and outdoor spaces. To make the most of this trend, install bi-fold or sliding doors that can be fully opened, providing a seamless connection between your indoor and outdoor areas.
Comfort Is Key
When it comes to outdoor furniture, comfort is paramount. Design trends now prioritize furniture that offers the same level of comfort as indoor seating. Wholesale furniture suppliers are crafting outdoor lounge chairs and sofas with plush cushions and ergonomic designs, ensuring a cozy and relaxing experience.
To create a relaxing outdoor oasis, invest in seating that prioritizes comfort. Look for deep-seated chairs and loungers with thick cushions that will cradle and support you. With added features like adjustable backs and ottomans, you can customize your seating to suit your relaxation preferences. By prioritizing comfort in your outdoor space, you create a sanctuary where you can unwind and rejuvenate.
Versatile And Modular Furniture
Flexibility and adaptability are key considerations in outdoor furniture design. Wholesale furniture suppliers are catering to this demand by offering modular furniture sets that allow for easy reconfiguration. These versatile pieces can be rearranged to suit different entertaining needs and space constraints.
To maximize the flexibility of your outdoor space, opt for modular furniture sets that consist of individual pieces that can be rearranged as needed. This allows you to create different seating arrangements for various occasions. Consider adding a modular dining set that can transform into a cozy lounge area by rearranging or removing certain pieces. With versatile and modular furniture, you can easily transform your outdoor oasis based on your specific needs.
Adding Style With Accessories And Lighting
To complete the transformation of your outdoor oasis, pay attention to the finishing touches. Wholesale furniture suppliers often offer a range of outdoor accessories and lighting options to enhance the style and functionality of your space.
Consider adding outdoor rugs, throw pillows, and planters to elevate the visual appeal of your outdoor area. Opt for weather-resistant materials that can withstand the elements. Additionally, incorporate ambient lighting fixtures, such as string lights or lanterns, to create a warm and inviting atmosphere for evening gatherings.
Conclusion
Creating a relaxing outdoor oasis begins with the right furniture choices. By embracing natural materials, blurring indoor-outdoor boundaries, prioritizing comfort, selecting versatile furniture, and adding style with accessories and lighting, you can transform your outdoor space into a haven of relaxation and beauty. Whether you are a homeowner or a furniture wholesale business, these design trends and tips will help you create an outdoor oasis that your customers or family will love.
Read Also:
Your own space: decor ideas for your private place to relax
Home Improvement Hacks to Add to Your Space
TV Wall Mount Ideas for Living Room
Regarding lawn care, Littleton's best services take a strategic and scientifically grounded approach that results in lush, healthy, and beautiful lawns. These lawns become the envy of neighbourhoods, stand out in the summer sun, and sparkle in the winter frost. One may wonder, "What's the secret to such beautiful lawns?" The answer lies in various lawn care strategies, including weed control & fertilisation, liquid aeration, overseed, revive, winter mite control, and weed kill in rock/mulch beds.
Weed Control & Fertilization
The Importance Of Weed Control & Fertilization
Weeds are often the bane of any lawn owner's existence. They are hardy, pervasive, and can quickly overtake a lawn if not adequately controlled. Littleton lawn care services understand that effective weed control combines preventative measures and targeted treatments.
Preventative Measures
One of the keys to weed control is prevention. Instead of waiting for weeds to sprout and then trying to eliminate them, the best lawn care services take proactive steps to prevent weed growth in the first place. They do this by maintaining the right balance of nutrients in the soil and ensuring that the lawn is thick and healthy to crowd out any potential weed invaders.
Targeted Treatments
When weeds infiltrate a lawn, targeted treatments eradicate them without damaging the surrounding grass. This is where expert knowledge comes into play. Different weeds require different treatment strategies, and understanding this is crucial to effective weed control.
Fertilisation
Fertilisation goes hand in hand with weed control. It's all about providing your lawn with the necessary nutrients to thrive. Keeping your property well-fed makes it more resistant to disease, drought, and weed invasions. The best lawn care services understand that a proper fertilisation schedule is critical to maintaining a lush and healthy lawn.
Why Liquid Aeration Is Essential
Aeration is a technique that helps alleviate soil compaction, allowing your lawn to breathe, absorb nutrients and water more effectively. Traditional aeration methods can be labour-intensive and involve creating physical holes in the yard. However, Littleton's best lawn care services have adopted a more modern, less invasive approach: liquid aeration.
Understanding Liquid Aeration
Liquid aeration involves the application of a liquid solution that breaks up the soil at a molecular level. This process improves the soil structure and allows grass roots to penetrate deeper. The result is a stronger, healthier lawn with improved drought resistance.
Overseed
The Art And Science Of Oversee
Overseeding is a technique used to fill in bare patches in a lawn and improve its overall density and colour. Overseeding can bring life back to a tired, worn-out lawn by sowing new grass seed over existing properties.
Timing And Technique Matter
When it comes to overseeding, timing and technique are crucial. The best times to overseed are usually in the spring and fall, when temperatures are moderate, and the new grass has the best chance of survival. The best lawn care services understand this, know the right amount of seed, and the best techniques for spreading it to ensure even growth.
Revive
Revive: A Rescue Operation
Revive is a lawn care technique designed to bring back the vigour and health of a lawn under stress. This could be due to extreme weather conditions, disease, pests, or simple neglect.
A Tailored Approach
Revive operations must be tailored specifically to the condition of each lawn in Littleton. Littleton's top lawn care services excel at diagnosing issues plaguing properties and creating an effective revitalisation strategy; this might involve altering watering practices, changing mowing methods or applying specific treatments that address disease or pest issues.
Winter Mite Control
Battling The Invisible Foe
Winter mites are an increasingly prevalent lawn pest in Littleton and can significantly damage during the cooler months. Feeding on grass, these tiny predators feed off it resulting in discoloured, thinner properties come spring.
Preventing And Treating Infestations
Winter mite control involves both prevention and treatment. Lawns can be treated with products designed to deter mites, while watering practices may also be adjusted to make lawns less inviting to these pests. Should an infestation develop, targeted treatments can be utilised to get it under control quickly.
Weed Kill In Rock/Mulch Beds
Maintaining The Beauty Of Rock/Mulch Beds
Rock and mulch beds can be a beautiful addition to a landscape but can also become a haven for weeds. However, the usual weed control methods used for lawns aren't always suitable for these beds.
Tailored Weed Control Strategies
Littleton's best lawn care services have tailored strategies for weed control in rock/mulch beds. This might involve careful hand-weeding, using landscape fabric to deter weed growth, or the targeted use of weed-killing products that won't harm the desired plants.
Conclusion:
In conclusion, the secret to a beautiful lawn is professional knowledge, careful technique, and targeted treatments. By understanding and employing strategies like weed control & fertilisation, liquid aeration, overseed, revive, winter mite control, and weed kill in rock/mulch beds, the best lawn care services in Littleton can maintain and create lawns that are indeed a sight to behold.
read Also:
5 Reasons Why You Absolutely Must Have Houseplants In Your Life
How To Plant Grass Seed On Hard Dirt? – Latest Update 2022
10 Best Bedroom Plants To Buy In 2022


 Here are some common types:
 Mold damage removal requires a variety of tools, depending on the size of the fungus and the type of surface to be cleaned. There are natural cleaning methods that may be utilized to get rid of it as well.
 Here are some methods to guide you: