How to Use a Soldering Iron

Published on: 03 September 2018 Last Updated on: 29 January 2022
Soldering Iron

Of all techniques and methods used to join surfaces, metal sheets, Iron, and other objects together, soldering is highly preferred because it does not cause any type of damage to the items being joined together. This is because the solder used to stick them together has a lower melting point than most metals and it offers durable yet reversible bonds between the items. In addition to that, although there are a few key differences between the two types of soldering gear used, they share a similar trait and they’re both easily operable, which we will discover more in this article

What Is Soldering?

There are several types of soldering using different filler metals called solder, but, they all use the same concept which is heating a filler metal between two items so that it melts and fills the seam between the two items.

Soldering is done using either individually bought soldering gear, which allows you to choose the type of tool that is most suitable for the project you are planning to work on, or a soldering station which usually is a standard combination of a soldering iron and a power supply.

Soldering Iron 

In order to learn how to use a soldering iron, one must first know its basic parts and the science behind its mode of operation.

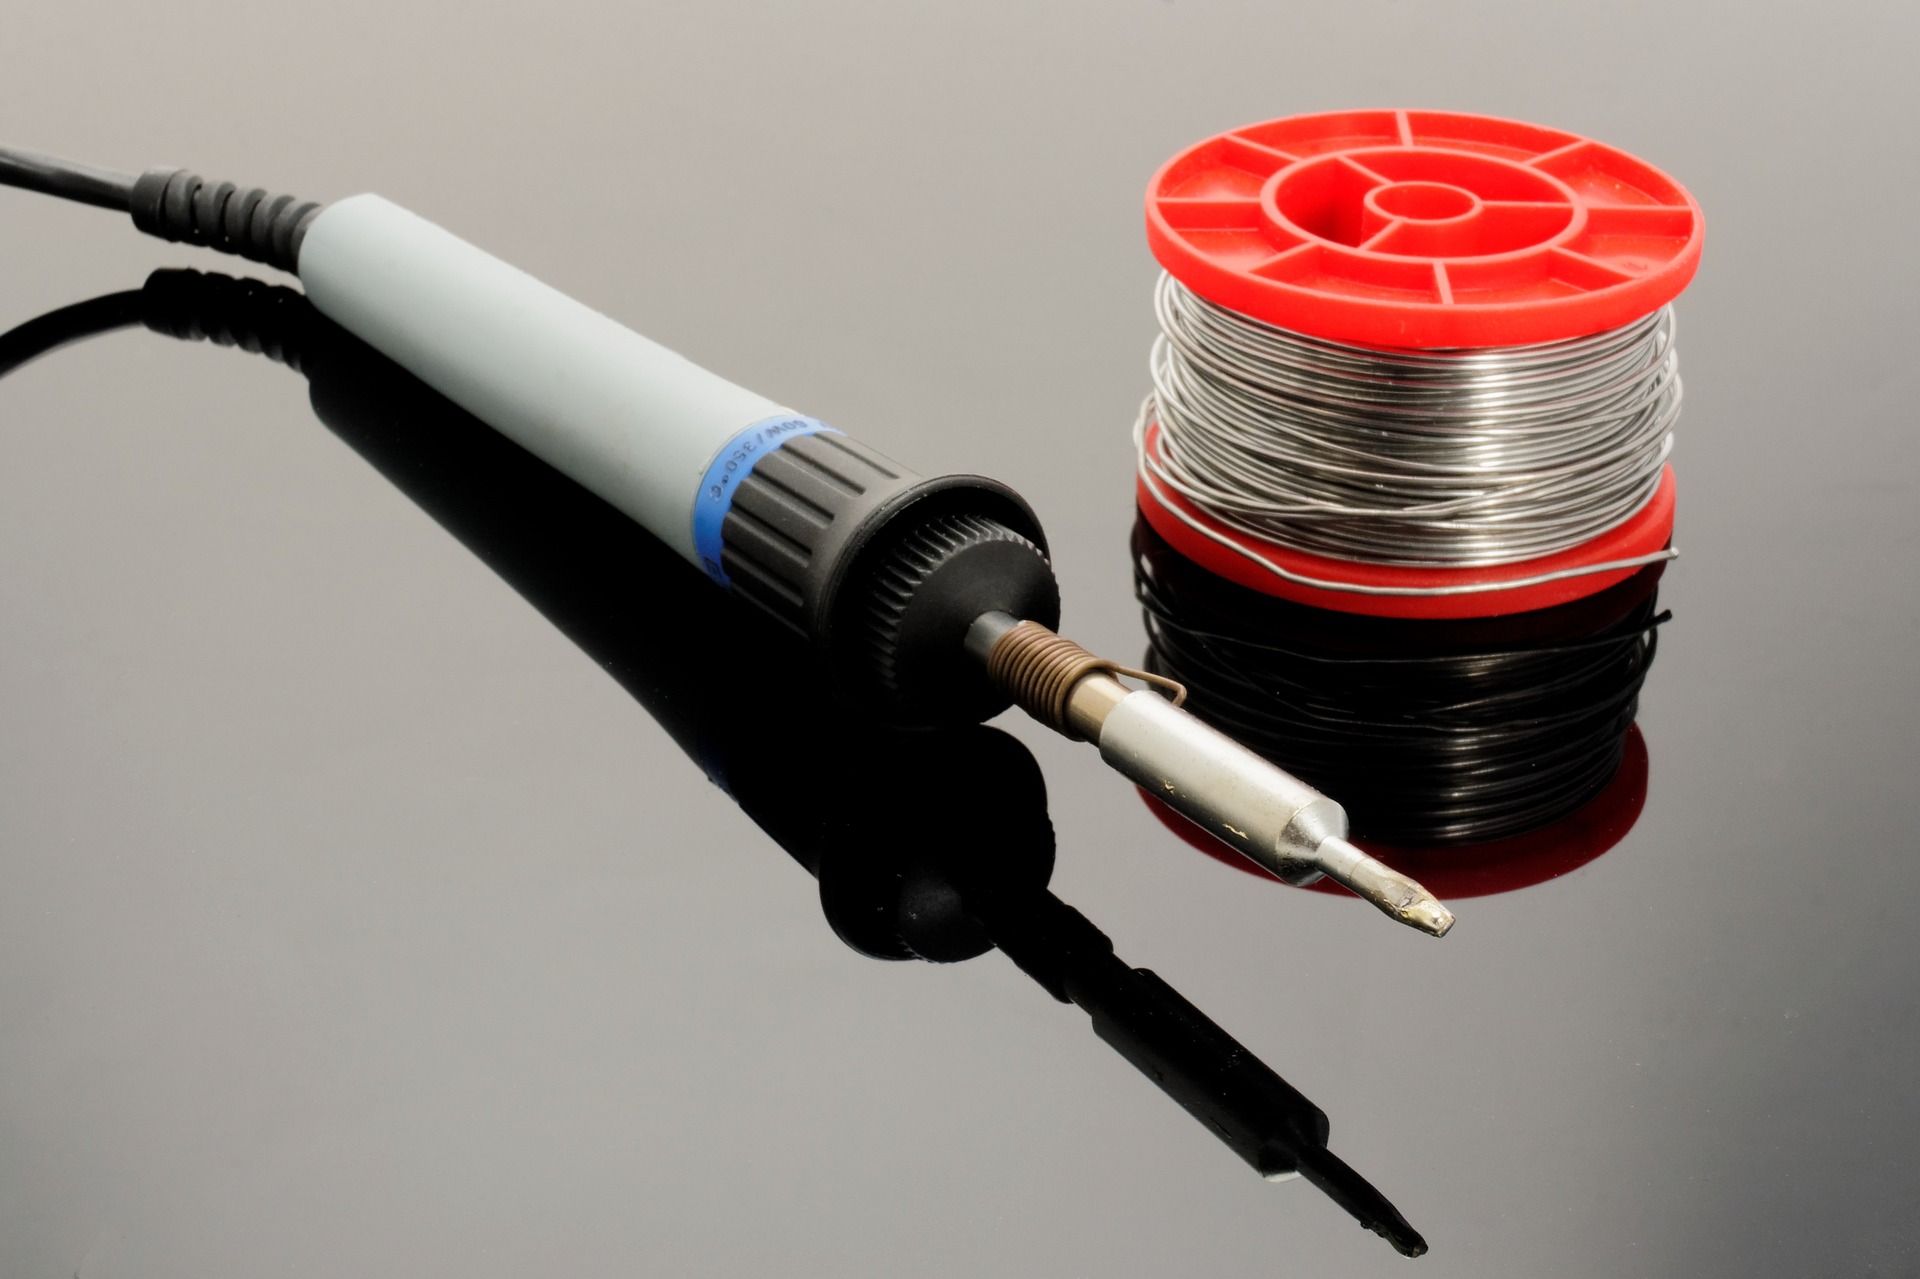
It is simply a tool that connects to a power supply, it consists of a handle that doesn’t conduct heat and a tip that heats up very quickly to high temperatures so it can melt the solder, it also cools down fast.

To Be More Specific, The Main Parts Of Soldering Iron Are:

  • Soldering tip: All soldering irons contain iron tips which are the only part that heats up; it doesn’t ooze out the solder as most people think, it simply heats the metals being joined so that when the solder is applied, it melts, but more often than not, the solder would stick on the tip. Luckily, most tips are interchangeable so, you can replace your tip in case of damage or in case you need a specialized tip to suit your uses; bear in mind that tips vary in size and shape, thus, they vary in their uses as well.
  • Wand: The wand is the handheld part of the iron that the tip is attached to. It can be made from a large number of materials that poorly conduct heat or isolate it completely so as to prevent heat from the tip from transferring to the part where the wand makes contact with the skin. Inside the wand, there are wires and metal contacts that conduct and convert the electricity from the power outlet to heat. The contradicting functions of a wand are the reason why most people prefer to buy high-quality wands from renowned brands.

Of course, there are other extras and accessories like brass sponges, cradles, and tip tinner which can be purchased individually or found in soldering stations which is actually one of the advantages of soldering stations; but, the two main parts will always remain the tip and the wand.

Step 1: Safety

First of all, before using a soldering iron, you must be familiar with standard safety precautions since the iron tends to get really hot; not to mention the fact that solder is literally molten metal. So, it would be smart of you to wear protective gear such as; safety goggles and protective gloves, because your fingers are most likely to come into contact with the tip during the first few times. You also should keep in mind to tie your hair and avoid wearing loose-fitting clothes. Moreover, it is preferable to work in a well-ventilated area since some types of solder contain lead which produces toxic fumes, it is also important to thoroughly clean your hands after handling lead-based material.

Step 2: Preparing The Tip

The tip should be regularly cleaned of any old solder because when old solder solidifies, it turns into a heat isolator due to oxidization resulting in a totally inefficient and highly wasteful soldering process. Not only that but also, slow heating means that you will have to hold the iron to the items being joined for a longer time; it would be highly inconvenient for you and very damaging for sensitive objects like PCBs.

So, when the iron is fully heated, softly drag the tip against a sponge to remove old solder. You want to aim for a shiny tip. After cleaning the tip, you should “tin” the tip; to make it last longer and conduct heat better through newfound layers of solder. Same as above, on a fully heated iron, apply a little piece of solder and lightly coat the tip with tinner; then, immediately start soldering while cleaning and tinning the tip between every couple of joints for maximum conductivity and efficiency.

Step 3: Actual soldering

With your dominant hand holding the iron and the other holding a piece of solder, touch the area where the object comes into contact with the solder and hold it there for about a second then slide the solder underneath the tip while pushing the solder rod further according to how much solder you need.

Then, make sure to pull back the solder first while holding the tip in position until all the solder melts; it usually takes about five seconds or less. Solder cools down fast so, you will not need to blow on the joint since it will only lead to a weak joint which can be identified by its oxidized, unclear, and grainy appearance. What you want to get is a smooth connection, not a lump.

Finishing touches :

After you’ve had enough soldering for the day, clean and in the tip again before you put it into storage, it helps increase its lifespan.

As you may have noticed, soldering is not that hard of a task, it only requires soldering gear, steady hands, and concentration. So, go ahead, start soldering, and don’t be afraid to get creative.

Read Also:

Content Rally wrapped around an online publication where you can publish your own intellectuals. It is a publishing platform designed to make great stories by content creators. This is your era, your place to be online. So come forward share your views, thoughts and ideas via Content Rally.

View all posts

Leave a Reply

Your email address will not be published. Required fields are marked *

Related

Night Vision Weapon Sight

What To Look For In A Night Vision Weapon Sight?

Most operations performed by the tactical members of Military & Law Enforcement are done in a low, failing, or altered light. Night vision weapons sight offer the high ability to set up the target, motivate & shoot with a pinpoint at an accurate point across the long distance during the night. As we have noticed from the pointers we are going to mention below, Several considerations are there to bear in mind when choosing the right type of night vision sights, and it relies on certain requirements or the kind of operations they may deploy. Here is the list of some parameters and a proper guide to consider while deciding or picking up a weapon sight as given below: Things To Look For In A Night Vision Weapon Sight When choosing a night vision weapon sight, a set of features need to be looked upon. Some of those features include – Resolution The soldiers or the tactical teams need to confirm that they are sighting the right target. That’s why it’s important to check the resolution of the night vision sight weapon they are getting. The resolution stands for the amount of detail someone can get through the 12-weapon sight. The measurement unit for resolution here is lp/mm (line pairs per millimeter) When considering the resolution, it’s important to note what works best for the tactical team. Here are a few resolutions and the levels of their capacity – 640 x 480: Here’s a good resolution to help the team identify the target and ready a shot. 1280:  this resolution is the best for providing exceptional image quality and target. 384 x 288: If you are going for this resolution instead, this will only provide basic thermal imaging. It’s good enough to understand if there’s a target in the place or not. Optics Quality And Electronics: The optics quality plays a huge role no matter whether it is a thermal sight or weapon sight as it hampers the performance at the top. 0 The weapon sight is a perfect combination of top-notch quality, fast optics, latest generation, and infra-red sensitivity that offer high resolution, a wider FoV, and clear vision to the operator that allows improving the device’s capability. Probably, the size, specs, and resolution of the device are the important ones and judge the quality of the device perfectly. Zoom & Magnification: The idea of choosing the maximum magnification when it comes to choosing a weapon sight, but the better one is the low magnification usually. Higher magnification results in a smaller view, and a weapon device with 4x magnification have-it-all. Thus, weapon sight is recommended. Image intensifier tubes: I2 tubes are accountable for the light amplification rather than anI2 sight. Across all years, I2 tubes are advanced and better than Generation 1 or 2 to all the newest Gen 2+ as well as three tubes. These tubes are produced by a handful of companies across the globe and the labels are different in each one. The most advanced versions of I2tubes are Gen 2+ and Gen3 responsible for a clear vision in low light, which will be measured as SNR and Ip/mm for resolution of the modern weapon sight as available on www.defendandcary.com. Weapon sight range: For tactical use, weapon sights are mounted on snipers, rifles, carbines, and LMGs with a primary motive to set up, aim, obtain, and shoot at a target during the conditions of low visibility or types of special missions. Generally, they ought to be chosen to complement an effective variety of weapons that will be used in the future. If the weapon sights have the longest ranges, then it results in larger, more expensive, heavier, and not optimal at all. Ergonomics control and easy to use: Weapon sights are too easy to use anytime and ought to be exposed to all controls while adjusting for magnification, windage, and elevation. Here’s an important point of consideration if you are getting a night vision weapon sight. Typically, it shouldn’t be a problem if you are using a tripod to aim and shoot on a still target. But, if you have to do a lot of moving around with the night vision weapon, you need something lightweight. But, it’s also important to consider that the night vision sight that is lightweight will have lesser magnification. Also, since we are talking about ergonomics, the lens size is also something we must talk about. If you have a large-sized lens, the FOV ( field of view) will become narrow. With a shorter lens, you have a wider FOV but a shorter distance. So, it’s important to first note what you need in the night vision weapon sight. Additional Factors To Consider While all the different parameters explained above are important, there are other parameters as well. You can go much deeper with your points of consideration when choosing the perfect night vision weapon sight. Mounting: one of the things to consider is whether you can mount the night visitation weapon sight on the weapon or not. Spectral Range: the range of light this weapon sight can detect is also another important area you need to consider. Display Resolution: if the display resolution isn’t up to the mark, the users won't get the right output. Field of View: It’s important to consider the field of view of the weapon's sight vision. Start-Up Time: The sight should also get ready quickly. When considering a night vision weapon sight, the start and off time are also important to consider. Wrapping Up: In the end, you need to make sure that all weapons work in a better way, and also, these pointers are covered under the same. These are the main things to take into account. First, it’s best to understand the type of operation you need the night vision weapon sight for. When it comes to imaging sights, the weapon-mounted night vision sights are the best. They are also the most waterproof ones to use. However, there are different other types of weapons sights, each serving a unique purpose. Hopefully, you found this article useful. Do share your feedback about the type of weapon sight that you think is the best. Read Also: What is an Airsoft Gun? Everything You Need To Know About Concealed Carry Holsters Not Sure How to Keep Gun Safe at Home? These Tips Work! 5 Must need Accessories for a Firearm Owner    

READ MOREDetails
Concealed Carry Holsters

Everything You Need To Know About Concealed Carry Holsters

After buying a gun, the most important thing that you need to consider is buying a gun holster. There are many types of holster in the market. Sadly, only a selected few can be used as a conceal carrot holster. Seeing how our readers are asking us about the conceal carry holsters, we decided to write an article covering everything about the conceal holsters. In this article, we will talk about holsters from We The People Holsters. What Is Conceal Carry Holsters? First things first, we are not talking about the waistband holster. Here in this article, we are talking about concealed carry holsters as a whole. A concealed carry holster is a type of holster that can help you carry firearms concealed in your clothes. There has been a lot of debate in the gun world about conceal and open carry. Many experts believe that concealed carry is best while taking care of criminals. With the concealed carry, you have an element of surprise and gold tactical advantages over your target. Why Is A Conceal Holster Better Than An Open Carry? Whether you are a veteran or a newbie, you must have surely heard about the current debate: whether concealed carry holsters are better than open carry if you are in the gun world. Well, you ask us, it is a tough call to make. There are many variables that influence choices. Attention It goes without saying, concealed carry holsters have more tactical advantages over open carry. However, there are gun owners who like to flaunt their guns to attract attention. This attention can be seen in both good and bad ways. If seen in a bad way, you lose your tactical advantage over the criminal. And as for the other way around, you can keep the anti-social people in control. Access Access is the key to effective self-defense. Most of the American carry guns for self-defense. That means the more accessible your weapon is, the safer you will feel. However, with the conceal carry, few extra layers of covers are added to the access. This makes the open carry more accessible than the concealed carry holster. Convenience While carrying your gun, you need to ensure that you are comfortable. If you are not comfortable while carrying your gun, you might find inconvenience in the long run. In terms of convenience, open carry is far better than a concealed carry holster. Conceal carry holsters are directly in contact with your skin. With time, it creates rashes on the skin and gives off a sensation of irritation. Legal restriction Every state of America caters to different rules and regulations regarding carrying firearms. Some accept open carry, while some prefer to conceal carry. In which state you are living in will determine the types of holsters you refer to. What Makes A Great Carry Holster? As we have already mentioned, there are a lot of types of the holster in the market. Unfortunately, only a selected few are good to consider a concealed carry holster. While you are in the market looking for the best conceal carry holster, ensure that it has the followings: Positive Grip. Sturdy Material. Good Retention. Good Concealment. Skin Protection. Let's explore them more thoroughly. Positive Grip This is very important. If your holster does not allow youtube to have full combat grip as soon as you grab your gun, you are looking at the wrong holster. No matter which position you're in, your holster should be capable enough to allow you a full grip on your handgun. Good Retention Another way to say retention is that your gun stays put in one position. The best way to test its retention is to keep your gun inside the holster. Turn it upside down and see whether it falls or not. Good Concealment When you are looking for a concealed carry holster, you need to ensure that the holster allows you to carry your firearm discreetly. The concealment also depends on body types. A holster might suit one person, but at the same time, it might not suit the other. Skin Protection A holster should have enough surface area to protect your skin from the gun. The guns are made of metal, which creates irritations when it comes in contact with body sweat. Frequently Asked Questions There are many things about the concealed carry holster that only a few people know about. We have presented those things in the form of Q n A. Who Can Carry Guns? Every state has its laws regarding the use of firearms. However, in our research, we have seen that Texas is the top state that permits carrying guns. In 2019, it was seen that more than 1.2 million Texas residents were holders of licensed concealed handgun permits. To carry a gun in public, you need to be at least 21 years of age and need a license to carry (LTC). When Can You Carry A Gun Without Permit? You can carry a gun only if you have LTC. However, some bills exempt you from any punishment for carrying guns without permits. For instance, according to bill 1177, you can carry a gun in a state of disaster. Senate Bill 741 Some property owners feel anxious about gun-carrying tenants. On the other hand, tenants might feel unsafe without a gun. This is where Senate Bill 741 comes into action. This bill allows gun holders to carry guns as long as they have permits. Conclusion Conceal carrying is an accessory that comes with heavy responsibility and should be adhered to with responsibility and care. You also need to be careful while handling guns. Guns are no playing thing. One mistake and a person can hurt themselves. To ensure that you are good at handling guns, you should seek professional guidance and apply for a permit and license. With that being said, we conclude our article here. We hope that this article was able to give the answer you were looking for. For more queries, you can directly contact us. Read Also: Not Sure How to Keep Gun Safe at Home? These Tips Work! How Gun and Security Gear Advanced through the Years What is an Airsoft Gun?

READ MOREDetails
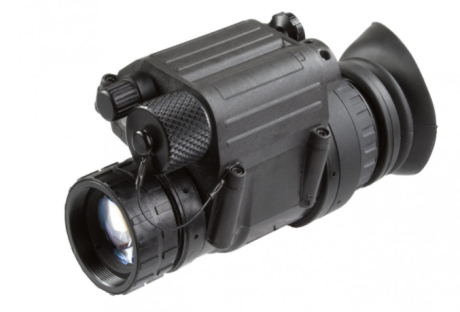
PVS 14 Monocular

What You Need to Know about Night Vision Optics?

In the past time, humans hunt the animal for food and fur. But now it is also counted in sports activities in some countries. It is part of their culture. Furthermore, in some regions, people do the hunting of animals during campaigns. Also, in developed countries, several governments allow hunting zones for hunting lovers. With advancements in technology, hunting instruments are developed, and people start hunting at night. About night vision optics for hunting, vision optics make hunting easy at night by the use of monocular. Here, we will discuss a monocular named PVS 14 Monocular. Firstly, this was the choice of armed forces for night operations, but now it is also available for the public only for hunting at night. This is available on the internet and manufactured by many companies.  To know about pvs 14 Monocular, let us proceed through its details. What is PVS 14 Monocular? it is a night vision monocular designed for the most demanding night applications like hunting and night army actions for strikes. It is light in weight, rugged, and versatile device. This allows users to see at night through one eye while viewing their surroundings or targets. Another positive aspect of this monocular, its adaptability to use on the helmet and the weapon. Details About night vision optics for hunting It is initially designed for the united states military that why its quality is high in optics. Further, its application is the same for the hunters to see the animals in the night of woods without making any noise. Its shape and size are listed below. Dimensions of the products: its size is 4.5 X 2.2 X 2 inches Weight: It weighs up to one pound. Headgear specification: multipurpose unit, Handhold Monocular, Hands-free goggle optional helmet mount. IR System: Total darkness IR System Magnification: Yes, up to 2X magnify Color option: Yes, Multi Colors Field of view: 40 degree Diopter Adjustment: -6 to +2 diopters Objective Lens: 26 mm, f/1.2 Focus Range: 9.8” to infinity Power Source: 2 AA size batteries are required Night observing distance: seen clearly up to 100 meters at night Eyepieces Size: eye pupil diameter 14mm Waterproof: Yes, it is waterproof Display screen: LCD screen Further, its package includes one protective film, one mount, one blinder, a storage bag, and a user manual. What did hunters think of PVS 14 monocular? On exploring the internet for the mentioned monocular, we found mixed thoughts of hunters. A few hunters are satisfied with this product, but it has more negative reviews on the internet. The opposing view has their opinions like the rectangular screen is not appropriately mounted when mounted on the helmet, and one of them is saying that its focus is not good when it magnifies to 2X. Furthermore, many other negative reviews are available on the internet, and buyers who buy this in the past not suggested this. Read Also: Hunting Tips For Beginners

READ MOREDetails