Published on: 30 May 2021
Last Updated on: 09 February 2026
A cold winter night with a delicious dish of chili is all you need to enjoy your moment. But wait, Are you left with too much liquid in your chili? Ah! No need to worry at all. There are numerous ways on "how to thicken chili".Honestly, you don’t want a thin chili because there is nothing better than a cheerful bowl of thick chili as your winter dish. Many times, just to thicken the chili, people cook it more than it is necessary. Later, other ingredients in it fall apart and turn to mush. Don’t panic. There are effective and easy ways to thicken chili at your home, and all of these methods are tried and tested. Just be sure to use at least some of these methods to thicken chili before your precious moment turns into sour.
How To Thicken Chili - Tried and Tested
You may be wondering that cooking your dish for a little longer will make your chili thick. But do you know that you are mushing other ingredients in it? So, you must know other effective ways about how to thicken chili. Below listed are the perfect ways to thicken chili for the perfect night.
1. Flour - Standard Thickening Method:
Wheat flour is composed of proteins, sugars, lipids, starch, and enzymes. It is used for making different types of foods. Flour is widely used for thickening chili in most of the kitchens. It really works great. Now its time to try for yourself as well.
Ingredients:
30ml or two tablespoons of flour and 60ml or ¼ cup of cold water.
How to Use?
Take a separate bowl. Mix flour and water thoroughly in it.
Make sure that the resulting mixture has no lumps and is smooth.
Then add the flour mixture in your thin chili while cooking it in medium-high heat.
Stir constantly. Let the mixture boil and thicken well. It will hardly take few minutes.
Make sure to continue stirring an additional few seconds to see if you are able to detect flour in your chili flavor.
So, here is your hearty chili dish! Now, it is much thicker and tastier than before. You can even serve this to your guests.
2. Arrowroot- Best Thickening Agent:
Arrowroot contains Vitamin B, Iron, Potassium, low-protein, starch, etc. It is widely used as a thickening agent in all household kitchens. It is a starch that is extracted from the arrowroot plant. When you will use arrowroot in your dish, then it will give an amazing surface gloss to your liquid chili.
Ingredients:
5ml or 1 tablespoon of Arrowroot and 5ml or 1 tablespoon of cold water.
How to Use?
Take a separate bowl. Mix thoroughly water and arrowroot to turn it into a smooth paste.
Make sure that you add only a small amount of arrowroot as it is potent and flavorless.
Then add slurry into your thin chili cooking it in medium heat.
Stir constantly below the boiling point.
Then after 1 to 2 minutes, your thin chili will thicken instantly.
Arrowroot adds gloss like appearance to your chili dish making your dish thicker and delicious. I have used this method and got the result, so now it’s your time!
3. Cornstarch- Anti-sticking Agent:
Cornstarch is also known as Maize starch which is extracted from the maize grain. It is a food ingredient that is used in thickening soups and sauces. Cornstarch gives a moderate glossy appearance and when mixed with liquid, it rearranges itself.
Ingredients:
15ml or 1 tablespoon of cornstarch and 15ml or 1 tablespoon of cold water.
How to Use?
Take a separate bowl. Mix thoroughly cornstarch and water before mixing it to chili.
After adding cornstarch paste to chili, heat it in a medium to high flame.
Stir it well until the bubbles start appearing.
Wait for few minutes to see the results.
If you still feel that your chili should be thicker then you can add more cornstarch and water on it.
Then let it cook for an additional few minutes.
You can use cornstarch to thicken your chili because it will not alter the taste of your dish of chili as cornstarch is flavorless.
Other Simple Ways to Thicken Your Thin Chili:
4. Mix it in Tomato Paste
Now, no need to worry about how to thicken chili. If you want your chili only a little thick then you can use this method. Tomato is one of the main elements in chili. So adding it to your mixture won’t alter its taste and makes your chili thicker.
Ingredients:
170 grams of tomato paste.
How to Use?
I am suggesting that you should use fresh handmade tomato paste.
Since tomato paste is recognized as bitter in taste, so you can add a pinch of sugar in it.
Sugar will add a mild sweetness to your dish by removing tomato’s bitterness.
During the final thirty minutes of cooking add 170 grams of tomato paste into your thin chili.
Slowly add tomato paste to your thin chili. You can also add it after every ten minutes if you wish (⅓ of the tomato paste).
Stir constantly to combine it well.
You can use tomato paste to thicken your thin chili dish. But keep all the instructions in mind so as not to make any mistakes while preparing it.
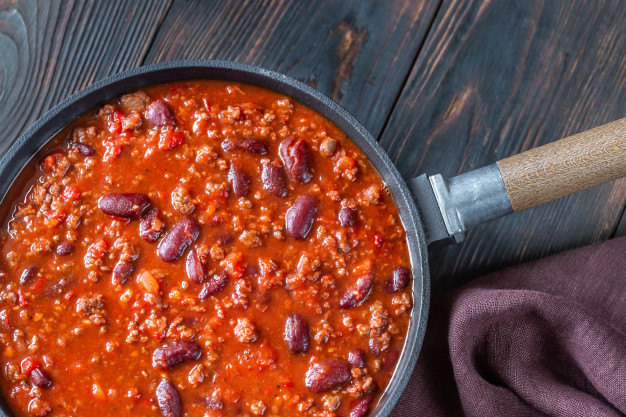
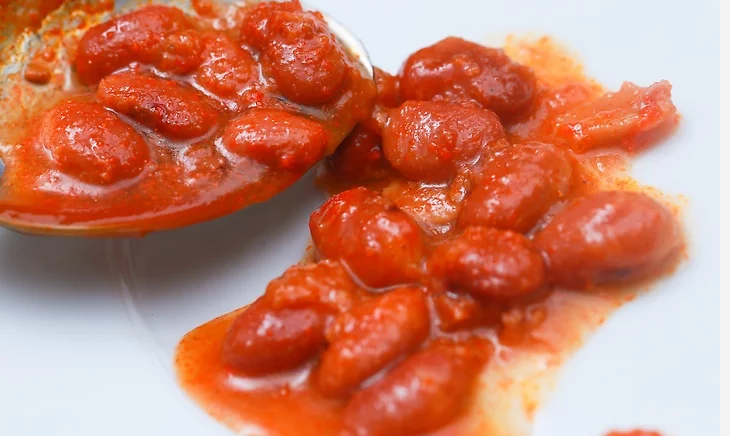
5. Use More Beans to Thicken Your Thin Chili:
A bean is a seed of numerous genera of the flowering plant. They have the ability to curl up on any medium. Beans can be use to thicken your thin chili. Do you know that India is the largest producer of dry beans in the world? Yes, it is.
Ingredients:
125ml or a half-cup beans.
How to Use?
If your chili contains beans then strain half cup of beans. Then refry and blend it.
Then again mix this mixture to your chili and cook for a few minutes.
Stir occasionally to warm it well.
You can use canned or home-cooked beans as per your wish.
If you still feel that your chili is thin, you can add extra beans in it but make sure you blend it well.
Here you go! Your thick chili dish is ready now to serve your family. If you don’t like beans then no need to worry. You can add meats to make your chili thicker.
Wrapping it Up
"How to thicken chili" is one of the major problems for all the cook masters. Even I have used many methods to thicken my thin chili but all went in vain!Therefore, all the above methods are tried and tested about how to thicken chili. So, you can use it to thicken your thin chili. I know nobody likes to serve thin chili to their family or guests. Even I don’t like it. Do you?
Image source: wikihowRead Also:
Content Rally wrapped around an online publication where you can publish your own intellectuals. It is a publishing platform designed to make great stories by content creators. This is your era, your place to be online. So come forward share your views, thoughts and ideas via Content Rally.
When you're preparing meals, there's a lot to get done. You might not think too much about how you're cutting up the foods that you use, but it can make a difference in how your dinner looks and tastes. Some of the reasons why it's important to make sure you're using proper cutting techniques when you're prepping foods include the following.
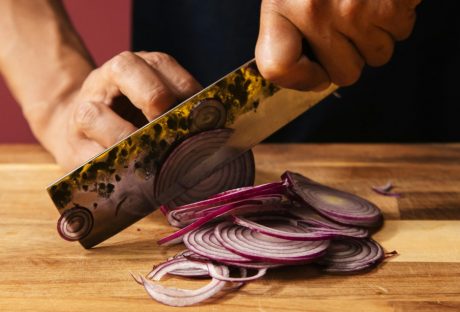
If you are planning to cook something, you probably will need to chop onions! onions play an important role with regards to bringing flavor and crunch to the dish. You can cut the vegetables into nice little cubes along with vertically chopping the food.
Read about the different ways in which you will learn to cut the onions along with keeping yourself safe! See that you don’t cut yourself.
Keep Yourself Safe When Cutting
Of course, safety should be a top priority when you're preparing meals. Knowing how you should cut an onion can help keep you safe. When you are cutting any vegetables, using the right techniques keeps your fingers out of the way, so you can cut every piece of the vegetable without getting your fingers. This could save you from a trip to the hospital or being out of commission for a while as you let your hand heal.
Make Sure Pieces Are Uniform In Size
It is important to make sure the pieces you cut are uniform in size, as this can help make sure the food all cooks evenly. There are many different methods for cutting carrots, but with any of them, if you cut some pieces large and some small, the small ones will be done cooking long before the large ones are finished. This can lead to the food not tasting as good as well as to the meal being served with some pieces that are overdone and some that might not be cooked all the way through.
Food Cut Properly Looks More Attractive
Cutting the food properly and making sure they're the right size can make the food more attractive. When you use safe cutting methods, you can do unique shapes or cut them in ways that are a little more fun or add to the presentation. Since food that looks better tends to taste better, making sure you're cutting the foods properly can mean everyone enjoys your meals more.
Make Sure Portions Are Precise
When the cut foods are plated, if there are some that are much bigger than others, it can mean that it's more difficult to get the proportions right. The plate might look more full with bigger pieces on there, but you might not be getting as much because you're only having a few of the big pieces instead of lots of the small ones. If you're portioning your plate for weight loss, this can be even more important, as you'll want to make sure you are eating enough healthy foods.
Ensure The Meal Tastes Right
Along with being more attractive and tasting better, if the pieces aren't cut properly, it can impact the overall taste of your meal. When you cut pieces that are too large for the recipe or too small, they will cook differently, even if they're all the same size. Smaller pieces when cooked may impart more flavor to the meal, so your soup could end up tasting a little too much like onions and you won't be able to taste the other flavors as much.
What Are The Types Of Cutting Techniques That Every Chef Must Know?
In the previous sections, we have discussed the important aspects to consider with the proper cutting technique. If you are a chef taking intensive training, you have to consider some of the most important aspects linked with proper technique techniques.
Therefore, you have to consider some of the important aspects linked with cutting techniques. However, here are some of the top cutting techniques that you need to master as an evolving chef So let discuss them here in this very section to get a better understanding of the entire subject.
Dice Cut
Are you looking for a proper way to cut an onion? Then you may master this very technique effective;y to get it done. This is a classic cutting technique. It involves making the fruit or vegetable small squares. In this process, you need to integrate the onion by slicing it horizontally along with keeping the roots intact!
Significance Of Cutting Onions In Different Ways!
One of the most important vegetables, onions is used in about every dish for breakfast, lunch and dinner! We also use onions in a lot of snacks, hence, you should learn how to chop onions. The flavour of onions plays an important role in chopping the pieces along with cutting them into strips.
Mincing is the first way of chopping which you can use to cook soups, raita, Manchurian balls and marinades. If you do not want to learn how to mince onions, you can use a food processor to finely mince the onions.
Chopping is another process where the size of the onions is medium. This is mostly used in dal, stir-fried veggies as it gives a delicious and nice flavour to the overall food intake. Dicing is another process where the onions are used in cutlets, dosa stuffings, paratha stuffings and omelettes.
When onions are diced, there is prominence in the dish along with the flavorful deliciousness of food. we often use half-moon cutting which is of the layer from thin or thick based on your requirements. This is mostly used in sandwiches, burgers and salads. Furthermore, the onions can be used to add a crunchiness to the food item!
Onion rings are one of the most popular food items as a lot of people eat it as a snack! You can peel the onion trim the edges and then cover it in a flour batter with salt, spices and pepper, thus creating rings of onions. When it is fried, the deliciousness is great because it can go with any sauce.
Conclusion
To sum it up, it is an important part of cooking especially when knowing the right way of chopping vegetables. If you are a cook, you will know the significance of chopping vegetables along with adding them in the form of strips. Onions are an important part of most food items, be it a sandwich, be it any protein, starting from chicken to meat, to dressing of other food items, onions are a must!
After you read the article, there are six ways to know the proper way to cut an onion and accordingly, they will help you cook different recipes. You can cook soups with onion chopping hence, after reading the article, get to learn about these different ways.
If you'd like to improve your meal prep, start by learning how to cut vegetables and other foods properly. Knowing how to cut them and the different methods you can use can help keep you safe, help ensure the food is uniform in size, and help ensure your meals always taste amazing.
Additional Reading:
8 Campfire Cooking Essentials For a Camp Kitchen That Crackles
10 Unique Kitchen Hacks to Save your Time in Kitchen and Cooking
Lift Your Home Cooking: Mysteries From HMD Bar And Grill’s Kitchen
Are you that lucky cocktail party host this weekend among your friends? If you are, then you must be wondering what exception you can make this time that people will love.
We know that you can manage the ‘cocktail’ part. So, we have gathered seven delicious & exotic snacks for your next cocktail party that will win the hearts of your guests and makes you the star host of the month!
However, these snack ideas are so overwhelmingly good that people may request you to make them again and again. Here, you will find quick and easy dishes to prepare, although you may need to visit the supermarket to get the ingredients.
Without further ado, let’s get started with the recipes so that you can pick which snacks you want to prepare and make the list of ingredients.
1. Salmon Tartines for Fish Lovers
Recipes with Salmon and avocado are always a delicacy; when you prepare it with wasabi, it will deliver a heavenly feel with your fast bite. And guess what, you need only 15 minutes to make it.
Ingredients:
To prepare this dish, you have to gather the following ingredients:
Puff pastry,
Sashimi-quality salmon,
Mirin,
One avocado,
Low-sodium soy sauce
Ginger,
Lime juice,
Caster sugar,
Rice vinegar, and
Wasabi paste.
Cooking Method:
To prepare the recipe, follow the steps below:
Preheat the oven to 200 degree Celsius and cut the pastry according to your preferred shape; place them on a lined tray over the baking paper and bake for 10-12 minutes till golden in color and allow them to cool down. Your tartine base is ready.
While baking, process the avocado with wasabi. To do that, take a small pan and dissolve sugar in water over low heat. When it cools down, take an avocado, wasabi, lime, and sugar in a blender, add salt or any other seasoning if you want, and set aside.
Prepare a dressing by mixing mirin, vinegar, soy sauce, and ginger in a small pot.
After you have prepared everything, take a pastry base and place avocado, salmon, and cress. Serve with a drizzle of dressing.
2. Elk Jerky Cheeseboard for Slow Eaters
How about serving an Elk Jerky cheeseboard at your cocktail party? This cheeseboard is a great addition to the food you can serve because it not only has a posh vibe but also serves a unique version of your regular charcuterie board due to the gamey elk.
Elk goes well with many reds including Cabernet Sauvignon, which can complement this strong-flavored jerky with its earthy notes. You can also pair it with lighter-style cocktails made from scotch, gin, or tequila, as they go well with these types of dried meat.
You can add a variety of cheese to such a board, including emmental, brie, gouda, and blue cheese.
3. Carrot Muffin for Sweet Tooths
If you want to prepare a carrot muffin for your cocktail party ahead of time and you love baking, then this dish is a must for you to try.
Ingredients:
This dish is easy to prepare and only needs eight ingredients.
They are:
Yogurt (Greek style),
Ready mixture for making carrot cake,
Carrots,
Pecans,
Eggs,
Aperol,
Pure cane sugar, and
Vegetable oil.
Cooking Method:
To prepare the recipe, follow the steps below:
First, you will make a labneh. Take a bowl and set a fine sieve over it. Put the yogurt inside, wrap it with the sieve, and hang it over the bowl in the refrigerator overnight.
Preheat the oven to make muffins at 170 degrees Celsius.
Grate the carrot coarsely and mix it with the cake baking mix. You can add pecans to the mix.
Take the muffin glasses, and bake them for at least 35 minutes. To make sure they are evenly baked, insert a skewer in the center, and if it comes out clean, your muffins are ready.
If you want to soak the muffins with Aperol syrup, place water, sugar, and Aperol on a small pan and keep stirring until the sugar is dissolved over medium heat.
Place the muffins in a line and pour syrup over them. Let the muffins soak in the syrup for 5 minutes.
Add the icing mix with labneh to make frost, and use your creative ideas to décor the muffins.
4. Four Crispy Buffalo Wings for Savory Hunters
Nothing can beat the taste of chicken wings. And the crowd will devour it within a minute if you can make it extra crispy outside and juicy inside. Here’s the recipe:
Ingredients:
To make Buffalo wings, you’ll need the following:
Chicken wings (defrost if frozen),
Baking powder,
Salt,
Butter,
Franks hot sauce,
Sugar.
Cooking Method:
To prepare the recipe, follow the steps below:
Tap the wings with tissue paper to absorb the extra water after washing. Toss the wings with baking powder and salt; it will absorb the extra moisture from the chicken's skin, making it crispier.
We are not using hot oil in this recipe as we are going to bake the wings. The science behind baking the wings and making them crispy is to start baking using low temp at first and increasing the temp after a few minutes. Set the tray on the lower shelf of the oven at 250F/120C.
Low temperature will melt the fat first, and high temperature will make the skin super crispy when you place the wings on a higher oven shelf at 425F/220C.
5. Sausage Rolls for Meat lovers
You know that your friends love meat. But you don’t want to worry about arranging a bbq in the backyard. So, prepare these bite-size sausage rolls to calm the meat cravings of your guests.
Ingredients:
To make sausage rolls, you’ll need:
Pork,
Onion & Garlic,
Breadcrumbs,
Puff Pastry,
Bacon,
Fennel Seeds,
Salt & Pepper.
Cooking Methods:
Follow the easy-peasy steps below to cook off sausage rolls:
Take a pan and cook bacon, onion, garlic, and celery,
Mix with the pork,
Place the puff pastry, put the mix on it, roll it over, and cut it into small portions.
Place them on a baking tray and brush with egg.
Bake them for 30 to 40 minutes until golden brown.
This snack serves its best when you are keeping the option of exciting games at your party. Whether it’s a two-player board game or a multiplayer one, people can have more fun when they have something delicious to eat.
6. Coconut Shrimp for Peaky Eaters
Every party has those guests who will not eat anything that’s too oily or too sweet. To tackle those peaky eaters, you can cook coconut shrimp, which will go well with whiskey cocktails.
If you are not hiring any bartenders and decided to become one for the day, check out these whiskey cocktail recipes for home bartenders!
Ingredients:
You will need the following items for this quick bite.
Jumbo Shrimp,
Flour,
Shredded coconut,
Beaten egg,
Pepper,
Pranko breadcrumbs,
Garlic powder,
Oil and salt to taste.
Cooking Method:
Follow the steps below to have the best shrimp dish of your life.
Wash the shrimp and season them in a bowl with pepper and salt,
Take two flat dishes. Mix flour and garlic powder in one of them; in the other, mix coconut and breadcrumbs.
Take one shrimp and dredge it in the flour mixture; after that, dip it in the beaten egg and dredge again in the coconut mix. Follow the steps for each shrimp.
Refrigerate for an hour (or overnight if you want to prepare the night before and serve hot the next day).
Deep fry in a pan full of oil till golden brown color and season with salt and pepper after the whole batch is done. Place them on a baking sheet with a cooling rack so that they can absorb the dripping oil.
Serve it with sauce or mango salsa.
7. Salsa for Lazy Hosts
When it comes to cocktail parties, you need easy, quick recipes that will take less time to prepare so that you don’t get stuck in the kitchen while others are enjoying the evening, and this salsa will take only two minutes.
Ingredients:
Here goes the items you need to get together:
Crushed tomato,
Coriander leaves,
Green chiles,
Garlic,
Lime,
Jalapeno,
Cumin, and
Sugar.
Serve with tacos, fajitas, burritos, nachos, or quesadillas. You can buy them at any store.
Cooking Method:
All you need to do is blend all the ingredients mentioned above. However, make sure to use good quality canned tomatoes, if not fresh ones. You need to blend for a few seconds and see the consistency. Keep blending if you like it smoother.
But don’t blend too much if you like it chunky.
Conclusion:
With this list of seven delicious & exotic snacks for your next cocktail party, you will be able to welcome your guests with warm hearts and warm food on the counter.
Even though cocktails are the main stars of your party, these bite-size, easy-to-prepare snacks will make your evening even better alongside the drinks. Prepare the snacks while ensuring the recipes have variety, such as spicy, sweet, savory, vegetarian, and non-veg options.
Read Also:
14 Whiskey Cocktail Recipes For Home Bartenders
Tips And Suggestions On How To Wear Cocktail Dresses
Why should you go to a pool party in Vegas?
Vaping is a popular hobby among many people, but keeping up with the latest trends and flavors can be tricky. Whether you're an experienced vaper or just starting, plenty of unique and delicious vape juice flavors can please any palate. Lately, people are also searching for “salt vape juice flavors sold here”.
In this article, we'll outline six trending vape juice flavors that you won't want to miss – so gather your family around for a taste test so they can see what all of the fuss is about!
Here Are The Trending Vape Juice Flavors That You Can Try With Your Family
1. Blue raspberry blast
If you're a fan of vaping and are looking for a refreshing flavor to try, you may want to check out the Blue Raspberry Blast. This popular flavor trend is gaining popularity amongst vapers, especially those who love fruity and sweet tastes.
The Blue Raspberry Blast is a flavor that is both tangy and sweet, making it a pleasant experience for your taste buds. It is perfect for enjoying with your family and friends, as it is a flavor most people will likely enjoy. Whether you're new to vaping or a seasoned pro, the Blue Raspberry Blast is worth trying out if you want something enticing and enjoyable. You can find great blue raspberry taste with Breeze Smoke Pro. Or you can suggest a similar sentence with the same anchor.
2. Vanilla bean dream
Vanilla Bean Dream is a top choice for those seeking a sweet, creamy vape juice flavor. This trending flavor combines the classic taste of vanilla with a dreamy creaminess to create a vaping experience that is both smooth and satisfying.
Vanilla Bean Dream is a great choice for those who don't want a strong or overpowering taste, and it is perfect for sharing with family and friends. With its buttery smoothness, this vape juice is a real crowd-pleaser. Whether new to vaping or a seasoned pro, Vanilla Bean Dream is a must-try flavor that will surely delight you.
3. Juicy watermelon burst
Looking for a new vape juice flavor that you and your family can enjoy? Look no further than Juicy Watermelon Burst! This trending flavor is bursting with sweet and juicy watermelon notes that are perfect for summertime.
Whether relaxing by the pool or enjoying a BBQ with loved ones, Juicy Watermelon Burst will surely be a hit. Its crisp and refreshing taste makes this flavor perfect for those looking for something delicious and easy to vape. Give it a try and see what all the fuss is about - you won't be disappointed!
4. Caramel swirl delight
If you're on the hunt for a vape juice flavor that is both sweet and irresistible, the Caramel Swirl Delight is worth a try. This trending flavor has been gaining popularity for its unique blend of rich caramel and smooth cream that explodes with flavor in every puff.
Whether you're new to vaping or a seasoned pro, this flavor is a must-try that will leave you wanting more. Plus, the Caramel Swirl Delight is a great option to share with your family and friends, as it is sure to impress even the pickiest of taste buds. So go ahead and indulge in this delicious vape juice flavor today!
5. Sweet and sour cherry bomb
If you're looking for a new e-juice flavor with your family, the Sweet and Sour Cherry Bomb is a trending option worth a taste test. This flavor features the perfect blend of sweetness and tartness, making it a deliciously unique experience that will tantalize your taste buds.
Every puff will deliver a burst of cherry flavor complemented by a tangy aftertaste, creating a complex and satisfying vaping experience. Whether you're a vape enthusiast looking to switch things up or just starting with vaping, the Sweet and Sour Cherry Bomb is a must-try flavor that's sure to impress.
6. Tangy lemon twist
If you're a fan of tangy flavors, then the Tangy Lemon Twist vape juice is worth a try! Perfect for those who aren't fans of overly sweet flavors, this juice offers a refreshing blend of tartness and sweetness that will tantalize your taste buds.
Additionally, this flavor isn't heavy or overpowering, making it an ideal choice for those who prefer a lighter vape experience. Whether you're looking to switch up your usual vape flavor routine or want to try something new with your family, the Tangy Lemon Twist vape juice is a great option to consider.
How To Choose The Perfect Vape Juice Flavor To Enjoy With Your Family?
Choosing the perfect vape juice flavor to enjoy with your family can be an exciting adventure.
First and foremost, it's essential to consider the preferences of each member of your household. Tasting different flavors together can also be a fun activity to help you find the perfect vape mood. When selecting vape juice flavors, consider a variety of flavor categories such as fruity, candy, dessert, and menthol.
Take your time to try different combinations and find a favorite that everyone in your family can enjoy. Importantly, ensure the vape juice flavors you pick are high quality and produced by a reputable company.
With a vast selection of vape juice flavors available, choosing the perfect one may take time and patience, but it'll ultimately be worthwhile.
Factors To Ensure While Trying Different Vape Juice Flavors With Your FamilyWhen trying different vape juice flavors with your family, there are a few critical factors to keep in mind for a satisfying and safe experience:
Consider the nicotine level and opt for lower concentrations if possible. This is particularly important if anyone in your family is new to vaping or sensitive to nicotine.
Be mindful of any flavor allergies or preferences and choose accordingly. Be open to trying different flavor profiles and experimenting with combinations, but always prioritize safety and comfort for everyone involved.
Always store your vape juice properly and keep it out of reach of children and pets.
Following these simple guidelines, you can enjoy trying different vape juice flavors with your family while ensuring a safe and enjoyable experience.
Bottom Line
Vaping has become a popular pastime for adults across all age groups. With increasingly diverse flavors, settling on the perfect mix can be hard. From Twisted Tobacco to Caramel Mint, there is something for everyone’s palate! In addition, this can be a great way for families to spend quality time together, whether inside or out. All you need is an e-cigarette starter kit, and you’re ready to go! Whatever flavor tickles your fancy, always remember to vape responsibly and take safety precautions when testing different flavors.
Read Also:
Top 5 Best Types of Vape Juice
How to Solve Some Problems of The Vapes
Benefits of Buying Your E Juice in NZ Online


 You may be wondering that cooking your dish for a little longer will make your chili thick. But do you know that you are mushing other ingredients in it? So, you must know other effective ways about how to thicken chili. Below listed are the perfect ways to thicken chili for the perfect night.
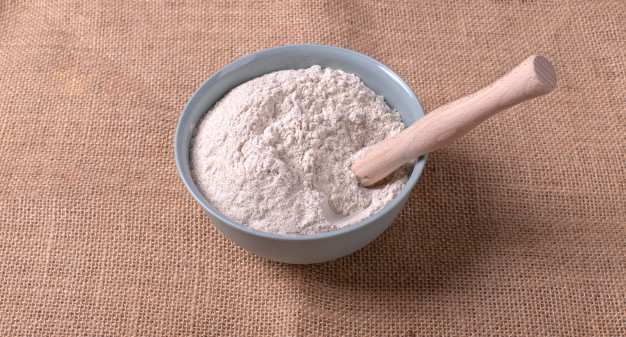 Wheat flour is composed of proteins, sugars, lipids, starch, and enzymes. It is used for making different types of foods. Flour is widely used for thickening chili in most of the kitchens. It really works great. Now its time to try for yourself as well.
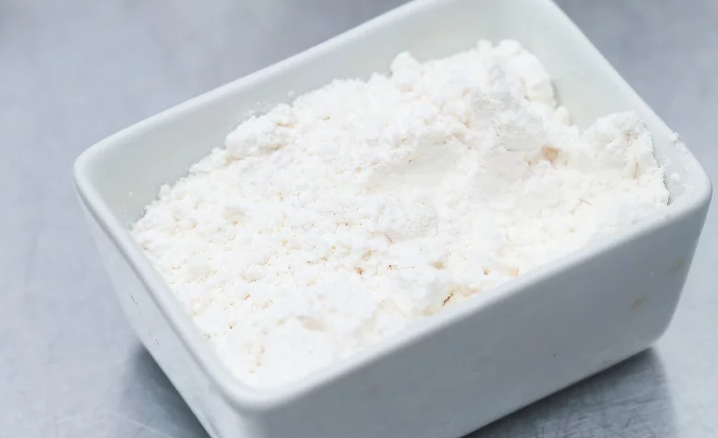 Arrowroot contains Vitamin B, Iron, Potassium, low-protein, starch, etc. It is widely used as a thickening agent in all household kitchens. It is a starch that is extracted from the arrowroot plant. When you will use arrowroot in your dish, then it will give an amazing surface gloss to your liquid chili.
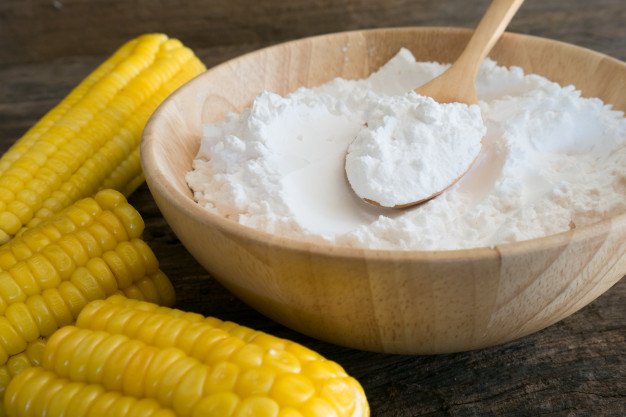 Cornstarch is also known as Maize starch which is extracted from the maize grain. It is a food ingredient that is used in thickening soups and sauces. Cornstarch gives a moderate glossy appearance and when mixed with liquid, it rearranges itself.
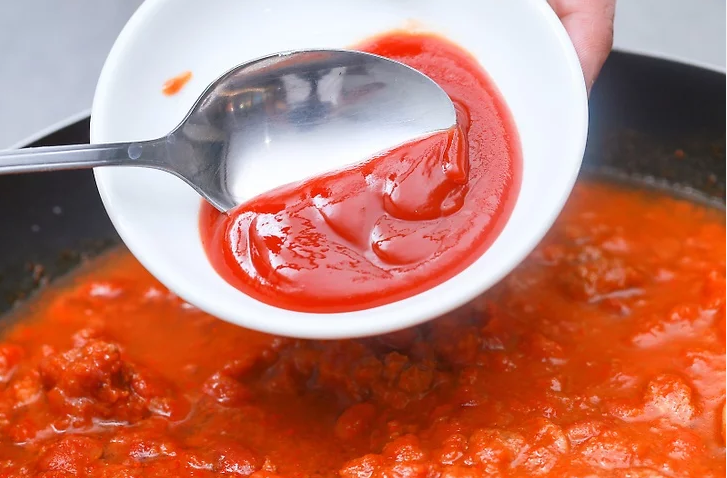 Now, no need to worry about how to thicken chili. If you want your chili only a little thick then you can use this method. Tomato is one of the main elements in chili. So adding it to your mixture won’t alter its taste and makes your chili thicker.
 A bean is a seed of numerous genera of the flowering plant. They have the ability to curl up on any medium. Beans can be use to thicken your thin chili. Do you know that India is the largest producer of dry beans in the world? Yes, it is.