Interactive Website Tools: Exploring Strategies For Engagement And Conversion

Published on: 16 August 2023 Last Updated on: 11 September 2024
Exploring Strategies For Engagement And Conversion

Beyond the aesthetics of modern web design lies a realm of functionalities designed to entice, intrigue, and encourage action. It’s not just about displaying information anymore; it’s about creating a dynamic dialogue between the site and its visitors. From clever countdown widgets that build anticipation to popups that capture attention at just the right moment, interactive tools are redefining the digital journey.

As you embark on this exploration, you’ll discover how these tools can be the key to not only attracting eyeballs but also driving tangible results. So, are you ready to unlock the next level of online engagement and conversion? Let’s dive deeper.

Interactive Tools For Websites: Why It Is Crucial

In the vast universe of the Internet, websites often face the challenging task of standing out amidst a sea of competitors. It’s no longer enough to simply be online; success hinges on how well a website can interact with its users. This is where interactive tools make a monumental difference.

The Link Between Engagement And Conversion

Every click, scroll, or hover on a website tells a story — a story of a user’s journey from a curious visitor to a potential customer. Engagement is the first step in forging a connection. When visitors are actively interacting, they’re investing their time and emotion into what the site has to offer. This active participation paves the way for conversions, whether it’s signing up for a newsletter, making a purchase, or any other desired action. Simply put, higher engagement can often translate into higher conversion rates.

Benefits Of Interactive Features For Visitors And Businesses

For visitors, interactive features offer a personalized, immersive experience. Instead of passively consuming content, they’re invited to participate, making their online journey more memorable and impactful. Whether it’s a quiz that offers tailored product recommendations or a chatbot providing instant support, these features make the user feel valued and understood.

For businesses, the advantages are manifold. Interactive tools can lead to increased dwell time, providing more opportunities for branding and message reinforcement. They offer valuable insights into user behavior, preferences, and pain points, allowing businesses to fine-tune their strategies.

Pioneering Engagement Tools: A Closer Look

Delving into the world of pioneering engagement tools reveals a medley of innovative strategies designed to enthrall users and drive conversions. Here’s a closer look at some game-changing tools that have redefined the way we interact online.

Countdown Widgets

How They Work:

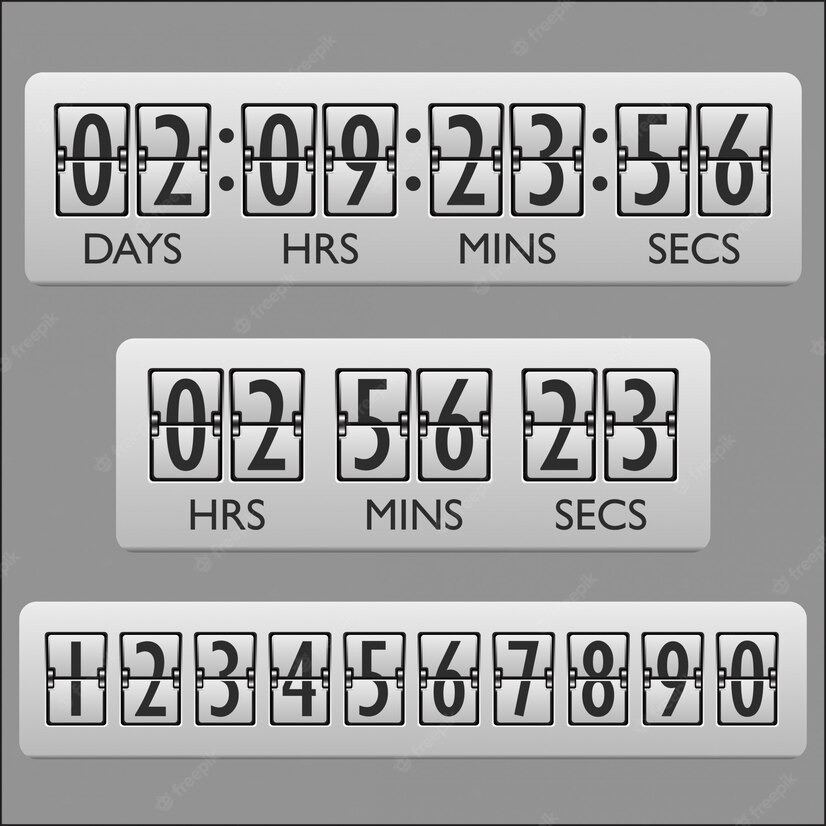
At its core, countdown widgets for websites are digital timers, ticking away the seconds and minutes of a particular event or deadline. Be it heralding the launch of a new product, highlighting the end of a sale, or marking the start of a webinar, these widgets play on human psychology. The ticking clock creates a palpable sense of urgency and anticipation, compelling users to act before time runs out.

To maximize the effectiveness of countdown widgets, it’s crucial to employ them judiciously. Overuse can desensitize users to a sense of urgency. Moreover, always ensure that the event or deadline you’re counting down to holds genuine value for the user. Pairing the widget with compelling visuals and concise, action-driven text can further amplify its impact.

Popups

Popups

Popups

Different Types Of Popups:

Popups are versatile tools that can serve various functions.

  • Informational popups. These are designed to update users about essential website changes or privacy policies. They’re typically concise and straightforward, ensuring users are informed without overwhelming them.
  • Promotional popups. They are the digital equivalents of storefront sale signs. These might advertise a limited-time offer or discount.
  • Feedback popups. They might ask for star ratings, brief comments, or even detailed reviews, helping businesses understand their strengths and areas of potential enhancement.
  • Email subscription popups. These popups invite users to stay connected by subscribing to newsletters, updates, or exclusive offers.
  • Exit-intent popups. Triggered when the system detects a user is about to close the tab or navigate away, exit-intent popups present a final, compelling offer or message.

The key to popups is moderation. Bombarding users with incessant popup messages can swiftly turn intrigue into irritation. Timing is crucial. For instance, an exit-intent popup can be a last-ditch effort to retain their attention. Similarly, understanding the user’s journey can help in strategically placing popups for maximum effectiveness without being intrusive.

Interactive Surveys And Quizzes

Surveys and quizzes engage users actively, making them feel part of a two-way conversation. When a user takes a quiz, they’re not just absorbing information; they’re sharing insights about their preferences and needs. This enables websites to tailor content and offers precisely to the user, enhancing relevancy and driving engagement.

Beyond personalization, these interactive tools are goldmines of data. By analyzing responses, businesses can pinpoint audience segments, refine product offerings, and sharpen their marketing tactics. In essence, every user interaction becomes an opportunity for businesses to learn, adapt, and evolve.

Live Chat Features

Live chat serves as a digital concierge, connecting users with businesses in real time. No more waiting on hold or navigating through tedious email threads. With just a click, users can pose questions, raise concerns, or simply chat, fostering a sense of immediacy and personalized attention.

Gamification Elements


Games aren’t just for fun; they’re powerful engagement drivers. By incorporating gamification elements like points, badges, or leaderboards, websites transform mundane tasks into exciting challenges. Whether it’s completing a profile, sharing content, or making a purchase, gamification rewards users for their actions, making their digital journey feel more like an adventure than a chore.

User Testimonials And Reviews

Nothing vouches for a brand like the voice of its customers. User testimonials and reviews provide an unfiltered glimpse into real experiences, offering prospects both validation and reassurance. These authentic narratives, beaming with praise or constructively critical, solidify a brand’s credibility, paving the way for trust and long-term loyalty.

Avoiding Overwhelm: Less Can Be More

In the intricate dance of digital engagement, it’s not always about having more tools, but about wielding them wisely. While it might be tempting to incorporate every interactive feature available, bombarding users with too many stimuli can lead to cognitive overload. It’s like walking into a room with blaring music, flashing lights, and a crowd vying for your attention all at once.

The key is to curate and prioritize. A well-placed popup can be effective, but combine it with constant notifications, quizzes, and live chat prompts, and you risk alienating the user. Remember, the goal is to guide and engage, not to overwhelm. By being discerning in our choice of interactive elements, we can ensure that users not only stay but also enjoy their digital journey.

Abdul Aziz Mondol is a professional blogger who is having a colossal interest in writing blogs and other jones of calligraphies. In terms of his professional commitments, he loves to share content related to business, finance, technology, and the gaming niche.

View all posts

Leave a Reply

Your email address will not be published. Required fields are marked *

Related

Web Flow Designer And Editor

Key Differences Between A Web Flow Designer And Editor

Webflow is a website-building platform that provides a user-friendly interface, enabling users to design and develop websites without programming knowledge. Webflow offers a wide range of features to make the website-building experience enjoyable and efficient. Two commonly used tools in Webflow are the Webflow flow designer and the Webflow editor. Although they are both integral parts of the Webflow platform, they are quite different. Thus, understanding the key differences between webflow editor vs designer will help you to make the most of the Webflow platform. This article explores the key differences between web flow designers vs editors. Webflow Designer Overview Webflow Designer is an intuitive, easy-to-use tool for creating stunning websites. Its drag-and-drop interface makes it suitable for professional web developers and beginners. It is responsible for the design of the layout, colors, fonts, and other elements that constitute the visual appearance of your site. Users can customize their design using the extensive library of website design templates and components that gives them unlimited options for web design. You can also use this tool to customize your website to fit your needs and preferences by creating visual elements like buttons, images, text, headers, menus, and more without learning code or syntax. Additionally, Webflow designer allows users to add any desired functionality to their sites, giving them complete control over their website structure. Although experienced developers can further customize their design using CSS, additional tools are not necessary. Webflow designer gets the job done perfectly. Webflow Editor Overview Webflow editor is a content management system (CMS) on the Webflow platform. It allows Webflow developers to edit and manage website content. Its easy-to-use interface allows you to create blog posts, web content, page descriptions, and landing pages without a hassle. This tool is not tied to the website structure, so you can manipulate content without changing the site’s structure or design. As such, content managers and marketers can create and manage content on the CMS without accessing the site’s core elements. Moreover, you don’t need to consult the developers and designers to create or manage content. Thus, the CMS saves you time by reducing the points of contact and makes content management flawless. Webflow editor is also an SEO-friendly tool. It allows you to optimize your website content and pages for search engines, making ranking much easier. For instance, you can optimize the page URL, meta title, and description tags for your keywords. Doing so increases the visibility of your content to search engine crawlers and gives you an edge over your competitors. The Key Differences Between A Web Flow Designer And Editor WebFlow Designer and Editor are powerful tools that allow users to build and maintain a website. However, they are distinct in their core functions and capabilities. The two terms can be confusing, especially if you are a beginner on the platform. The following differences between web flow designer vs editor will help you distinguish them so that you can use them for the best web-building experience. Functionality Webflow Designer is a visual tool that lets users design their websites from the ground up. It has numerous features, such as drag-and-drop building, custom CSS and HTML control, and a wealth of pre-built blocks and elements. WebFlow Editor, on the other hand, is a content management system (CMS) that provides an interface for creating and managing content. It offers the ability to add, edit, delete, and sort content without altering the base design of the website. With the editor, users can add pages, posts, images, and other media items to their site and set up menus, sidebars, and other customizable features. Room For Coding One exciting feature of the Webflow designer is the drag-and-drop functionality that lets you create a professional-looking site even without coding knowledge. Nevertheless, the designer allows programmers to add their code to the existing templates. This option is excellent for customization, so you can tune your site design to fit your preferences. However, the Webflow cms editor does not have the option for additional code. The reason is that the CMS doesn’t require a user to change the website design or the core structure. You can add only content blocks such as text and images – that don’t need programming. Learning Curve Another factor differentiating Webflow designer vs editor is the training curve involved in learning the two tools. Although Webflow is easy to use, the Webflow designer is harder to learn than the editor. This is true, especially if you want to design a professional site. You might want to learn tools like CSS and HTML to create custom elements for your site. The Webflow editor is easier to use and doesn’t require learning many concepts. The CMS has user-friendly features that make content management less taxing. Collaboration Another factor to consider when distinguishing a Webflow designer vs editor is collaboration ability. The Webflow designer is for web developers and designers and does not allow members to collaborate when working on a site. On the other hand, the Webflow cms editor allows members of your marketing team to edit and optimize content. Content writers, SEO experts, and marketers can collaborate and undertake marketing campaigns, increasing efficiency and effectiveness. Final Thoughts Webflow is a user-friendly platform for building professional websites. It has two main tools – Webflow designer and editor that make modern web development easier than ever. The Webflow designer is responsible for the web design, while the editor is a cms for creating and managing website content. Read Also: Key Components for Your Marketing Stack How To Foolproof Your Digital Marketing Strategy? Why Email Marketing is the BEST Digital Marketing Outreach in Singapore

READ MOREDetails
Printing Quality

Advance Copier: Printing Quality Business Cards On Your Own Computer

There is a relatively small list of things necessary to design and print business cards of your own without the help of a commercial printing company or advance copier. These things include common types of software, access to a laser or inkjet printer, business card stock. Generating business cards yourself can often yield real savings in both money and time, especially when all that is needed is a set of temporary cards or just a small number of cards. The card quality that can be achieved is more than sufficient for hobbyists or home-based entrepreneurs. Of course, if a large volume of cards is required, it is worth making specific price comparisons between DIY cards and professionally printed ones. Printer cartridges are not cheap, and if you plan to make a lot of cards, the expense can accumulate quickly. It is easy to purchase perforated, blank business card stock at most office supply retailers. There are numerous design software options for business cards both online and in stores. It may be that your existing word processing software has an integrated business card template that can make everything quite easy. The choice is yours. Essential Business Card Printing Supplies: Most office supply stores stock perforated sheets specifically made for business card printing. It is often possible to find a number of available choices in terms of colors and paper finish styles. Select and, if necessary, install the business card design program onto your computer. Those with older versions will want to locate the business card template by moving toward the "Tools" tab, choosing "Letter and Mailings," and then selecting "Labels." From there, it is necessary to choose the correct brand name of the business card stock purchased. Word versions that are from 2007 or later will click on the tab entitled "Mailings," choose "Labels" at the upper left, go to "Options" in the dialog box and select the card manufacturer, product number, and printer. Designing The Cards: Once you begin designing a business card, you will want to determine which printing method to use. Process colors or spot color may be best if you want to take your design to a commercial printer. Of course, cards that have been designed on Publisher are printable on your own desktop or sent to a professional printer, based on your unique needs. Take a close look at some of the business cards you have received along the way or check out some online examples so that you can have a strong grasp of the important elements of design. That way, your cards will turn out to be extremely appealing to the eye. Be sure to follow the software program's instructions for designing a card. You will want to include relevant text, a border, perhaps a logo, and additional elements of design, as needed. Name your file and save it in a location you can easily remember and retrieve. To steer clear of irritation and disappointment, be sure to grasp the limits on what your home printer can really do. It must be remembered that professionally printed cards will likely utilize a range of processes and techniques, based on the design chosen. These could include raised printing, engraving, foil stamping, graduations and more. Obviously, these types of enhancements cannot be recreated with a home printer. Some of the essential elements of any home-produced business card include: Name and perhaps a logo of the company Your own name and formal title within the company The physical address, telephone, and fax numbers Email contact information Address of company website Printing The Final Product: If you are not using the best printer, ink type and paper quality, your brilliant designs will not reflect into successful physical products. Most businesses make the mistake of investing in the graphic design part, while compromising on the final print quality. This is something that should be avoided at all costs. Make sure that whenever you are going to print business cards, you are doing it using the highest quality printers, inks/dyes and the best paper. This is what will help you achieve top-notch results for your business cards. Now it is time to load the perforated sheets into your own printer, taking care to follow the instructions provided with the product. Go to the file containing your design and choose "Print," which is typically found under the "File" tab. Run a practice print job of one sheet just to make sure that the design is well-aligned, prints clearly and looks the way you want it to. After this, print the rest of the sheets until you have the number of cards desired and then tear at the perforation lines. Verify that sufficient ink is available to create the full quantity so that you do not end up wasting the prefabricated card sheets. Also, take care to sit near the printer for the entire process so that you can keep an eye on print quality and address mechanical jams that can arise. The type and weight of business cards that can be done at home are limited due to the capabilities of most personal printers. If card material that is heavier than the printer can handle, jamming and potentially permanent damage can occur. Depending on the type of enterprise involved, using home-printed business cards may not be the wisest option, merely because they may be viewed as the mark of an amateur in the relevant industry. However, for certain other purposes, they fit the bill perfectly. If you are searching for an advance copier or printer for your business card needs, consider Advanced Business Copier, the #1 choice. Read Also: 7 Ways To Stop Spending So Much On Printing In Your Business How To Choose The Best Printer For Your Office Paper Authority: Basic Tips In Purchasing A Printer

READ MOREDetails
Motion Graphics

Special Stock Motion Graphics Effects

Video content is more popular than ever before. Netflix has popularised the idea of binge-watching our favorite TV shows while video-sharing social platforms like YouTube and TikTok have seen the format reach new heights. While more people are watching videos today, we’re also seeing more people creating them. This is due to both the availability and accessibility of modern video editing platforms and the ease at which they can be uploaded online and shared with the world. If you want to start making your own videos, making use of motion graphics can be a fantastic way to stand out from the crowd. Let’s take a look at some of the best special stock motion graphics effects and discuss how they can be used in your videos. 1. Lower thirds As the name suggests, lower thirds of motion graphics appear in the lower third section of your video. These play an important role; they can be used to convey key information without distracting the viewer from what’s happening in the center of the screen. We see lower thirds of graphics all the time, often far more regularly than we realize. For example, when watching a news bulletin, the lower thirds of graphics are used for things like naming an on-screen speaker, summarising a current news story, or providing breaking updates from across the world. In the news, these lower-thirds graphics are referred to as chyrons. If you’re an amateur video maker, chances are you’re not going to be tasked with editing news shows for terrestrial television. So, what else can lower thirds be used for? On platforms like YouTube, growing a following of subscribers is important, and generating lots of comments and likes on your videos can help it perform better in search results and in recommended content. Lower thirds of graphics can be used as calls-to-action, encouraging viewers to subscribe to your channel, to like the video, or to comment and start a discussion among other viewers. Lower-thirds graphics can also be useful if you’re making informative content like tutorials. They can be used to convey further information to your viewers and to deliver tips, tricks, and reminders, without obscuring the primary focus of the video itself. 2. Overlays Motion graphics effects come in a huge variety of different styles, whether you’re looking for CapCut effects or Premiere Pro effects.  One type of motion graphic effect you’re going to come across is the overlay effect. As the name suggests, overlay effects are placed over the main section of the screen, unlike lower-thirds effects which are localized to the bottom of the screen. What are overlay effects used for? This is a broad question, there is such a range of overlay effects out there, and each can be utilized to serve a different purpose. Text overlays are among the most common types. These place text directly in the center of the screen and can be used for transitioning between scenes or to deliver vital information to the viewer. Overlay effects can also include things like graphs, charts, and infographics. These are particularly common in corporate videos and in marketing material, they can be used to clearly and concisely convey complicated information in an engaging and informative way. Using an overlay effect can also be an artistic choice. They can filter footage to make it look more cinematic, with added depth and grain, or to change the color balance to suit the mood and atmosphere of your video. 3. CapCut CapCut is a video editing app made by TikTok parent company ByteDance. With over 200 million monthly users, it’s one of the fastest-growing apps in the world and is taking full advantage of the booming video creator marketplace. CapCut offers deep editing functionality, but the focus is on encouraging users to edit fun, engaging videos quickly and to share these across social media. One of the best ways to make your videos more engaging and to help them stand out in an increasingly oversaturated digital landscape is to use CapCut motion graphics. These can come in the form of small, animated figures that dance and move around, giving your content a playful, casual feel that will make your viewers feel happy and comfortable. CapCut motion graphics can also include things like arrows and pointers. These can be particularly useful for information tutorial videos, where certain elements might need to be highlighted to help viewers follow the tutorial correctly. 4. Slideshows Slideshows are perhaps the most basic form of motion graphics, but they still have a place in today’s world. Slideshows are simple sequences of images. They can be used to tell a story, convey a message, or simply show off some exciting, eye-catching images. Much of the creativity in slideshows comes from the transition effects used as one slide moves to the next. However, be careful not to overdo it with these transitions, as this can detract from the content of your slideshow. Conclusion Motion graphics are an incredibly important part of video editing. Use this guide to learn all about the different types and how they can be used in your videos. Read Also: Movavi Video Suite Review: A Comprehensive Tool to Create Videos Ways To Fix YouTube “Something Went Wrong” Prompt! The Ultimate Streaming Guide to Watch TV Online

READ MOREDetails