5 Interior House Painting Tips

Published on: 22 August 2019 Last Updated on: 31 October 2024
house painting

Owning a house which you can modify according to your personal desire, is always something permanent and something incredibly profound. A home with well-painted walls and beams should tell the story of who you are and what you love. New paint with vibrant colors can change your mood, and make your home your favorite place to live in.

Interior house painting can be a very intimidating and challenging task if you decide to take it upon yourself. You have two options, to either do it by yourself or hire a professional painting company to look over the project.

If you opt with the first choice, these tips and techniques will help you to paint your own home, according to your likings, within a very friendly budget. When you want to paint your Boynton Beach home, be sure to give Gustafson Painting a call.

The following steps are a guide on how to paint a house to meet your expectations:

1. Self Choosing Colors:

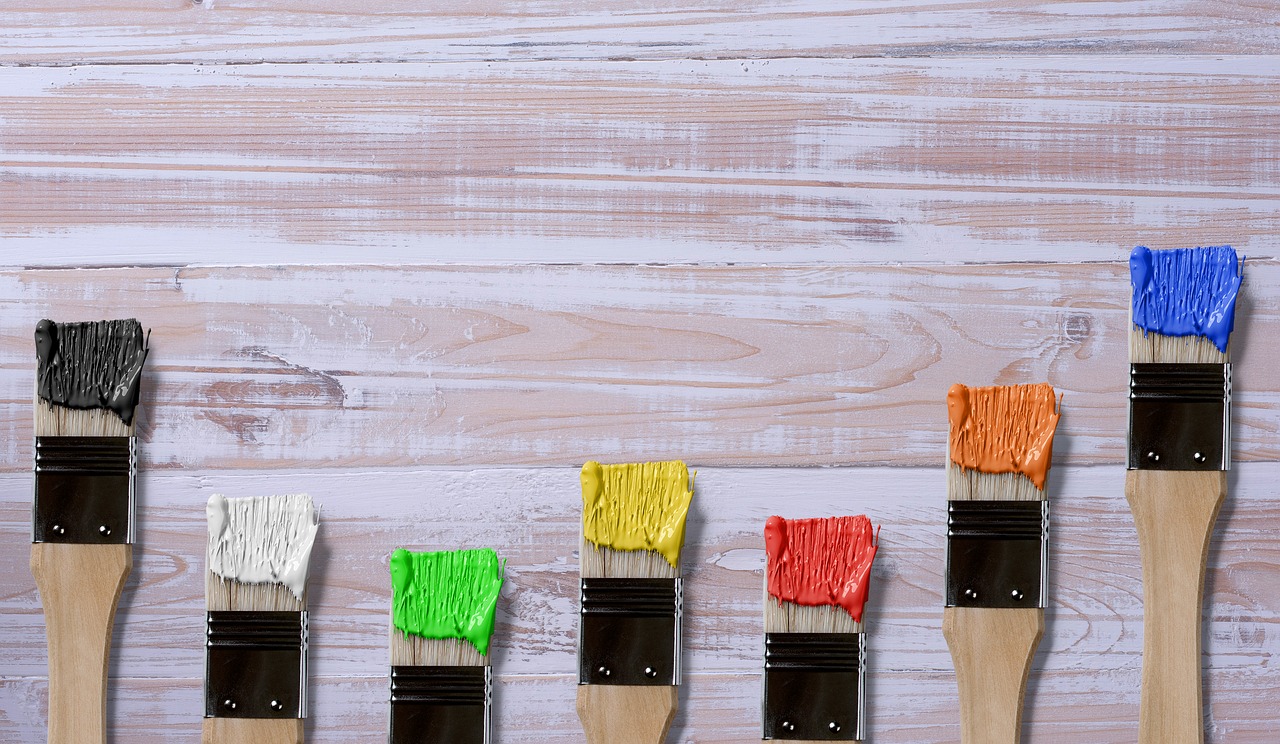
The critical step, to begin with, is to choose a color which you like. Or at least you should have a good idea of what color combination suits your home, i.e. which colors you would like to paint to your rooms and which colors to paint washrooms, kitchen, etc.

Select the color palettes and plan out which color combination gives your rooms the vibrant energy. Every color has its functions, e.g. Blue, green and purple are all relaxing colors. Moreover, other deep and shocking colors such as red, pink and yellow can be used in rooms which are mostly in use during the day, giving your rooms a lively, gaudy look.

Colors

2. Gathering Tools and Equipment:

After this, you have to pick all the tools and equipment which are needed for painting the house; which includes sanding and scraping tools, wire brush, respirator, paint rollers, plastic sheets to cover the carpets and your valuable stuff, work gloves, drop cloth, ladder and scotch tape. This will ensure you are ready and won’t have to leave your task in between, to search for something.

3. Repairing Damaged Parts:

Once you have organized everything, the next step is to remove any dirt and dust buildups from the walls by using a pressure washer. After this, you can apply epoxy filler to cracks and fractures by using a putty knife. Allow it to let it dry.

Once this is done, fill the gap around windows, doors, and ceilings to ensure a better coat of paint. When this is dried up, then feel the wall with your hand to ensure if there are any uneven spots left behind. Then, apply the primer to prepare the walls for paint when all damaged parts are repaired.
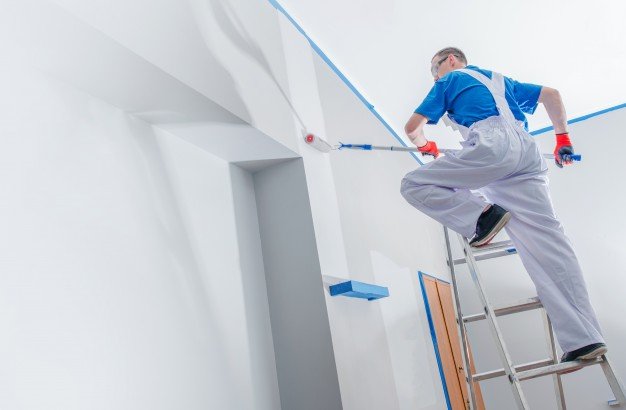
4. Brush the Walls:

Brush

Before painting the walls with a roller, you should brush the walls. To brush the walls, mean to paint the corner of walls, ceilings, and trims. You can choose from paintbrushes which come in many shapes and sizes. The traditional method to paint the walls through brush is by the use of metal cans, which can be very difficult for you to carry along with the brush and can result in poor results. But nowadays, there are proper paint pails which will make the whole task a lot easier for you.

5. Ready to Paint Ahead!

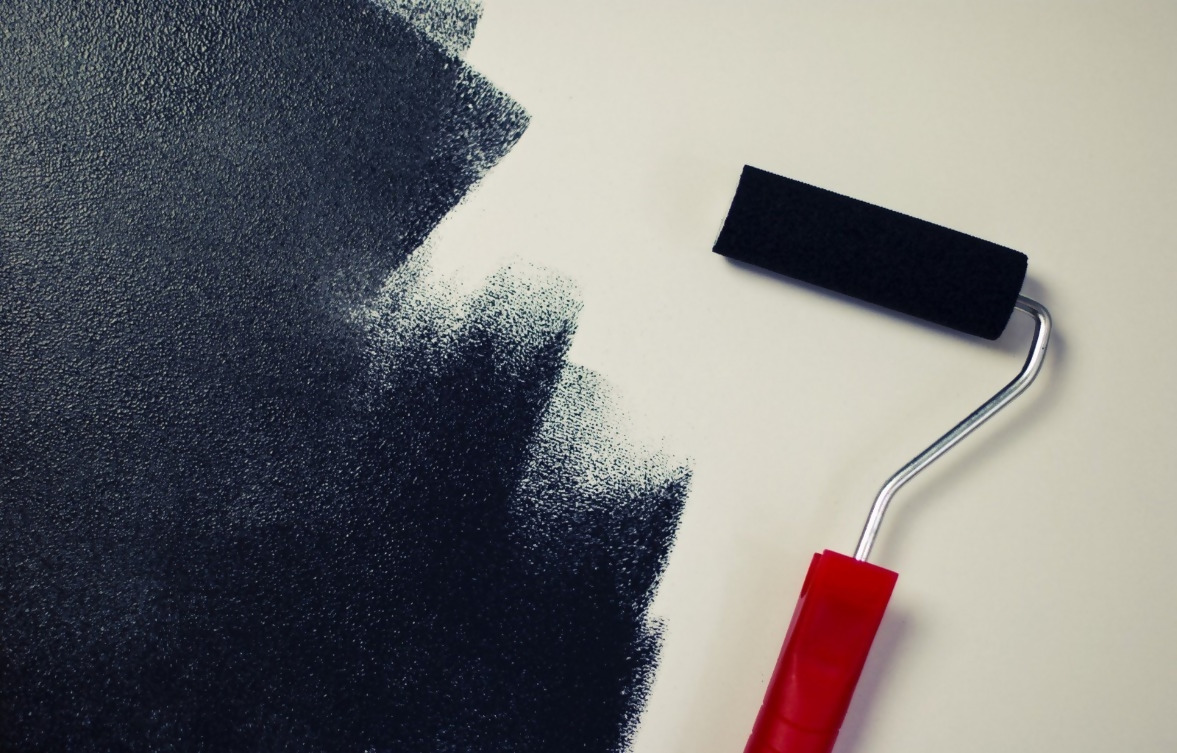
Finally, you are ready to paint with the rollers. But wait, before this you should mix a primer with paint to give a fresh and everlasting look. If you paint without using a primer, then the paint would peel off. For this, you have to scrap all the paint away, clean the surface before applying the first coat and after that, apply the second coat of your own choice.

This is one way when you do not use a primer. But if you are using a primer with paint, then it will not cause any problem even if the first coat is not applied. And the most important order of painting as suggested by the experts of house painters in San Diego is that you should paint the trim first, then ceilings, and then walls. It will provide better adhesion throughout and will enhance the ability of the topcoat.

Another pro tip is that don’t forget to open the windows and doors of your house during painting, as it provides better ventilation and the paint dries off quickly and efficiently. At the end of the painting, do the cleanup. Wash all the brushes and other stuff which you have used in the process. At last, give your house a final touch by placing all of the favorite furniture in place, to give your dream house a new look!

With these interior house painting tips from the most experienced of the San Diego painting company, you will get pro results for your residence!

Read Also:

Content Rally wrapped around an online publication where you can publish your own intellectuals. It is a publishing platform designed to make great stories by content creators. This is your era, your place to be online. So come forward share your views, thoughts and ideas via Content Rally.

View all posts

Leave a Reply

Your email address will not be published. Required fields are marked *

Related

Mistakes that Expats Make when they Move Overseas

Mistakes that Expats Make when they Move Overseas

Moving overseas can be incredibly stressful, to say the least. The last thing that you want is to make a lot of mistakes along the way. If you want to make sure that you are making the most out of every bit of money you have, then this guide will really help you out. Lack of Research Research is paramount if you want to relocate abroad. It’s a huge decision so you have to make sure that you know everything there is to know about your location and the things that there are to do there. You also need to know which items you can and cannot take with you. Some countries stop you from being able to bring certain items with you, which can include food or even alcohol. It’s also helpful to think about how you are going to move your belongings. An international moving firm can help you out a lot here, so make sure that you keep that in mind. Poor Organisation Poor organization is another mistake that so many people make. As soon as you know where you are going to move and when you then need to start organizing things. You need to think about what belongings you have, what you are going to take with you, and what you plan on leaving behind. The sooner you do this, the better. If you do, then you will be far less inclined to make even more mistakes and you may even find that you are able to relax more leading up to the big day. Now would also be the time for you to look into your overseas pension or pensions for expats, if you know that you are going to be retiring abroad. You may well have planned your move way ahead of time, but Time Management you’d be surprised at how quickly the moving date creeps up on you. It’s vital that you do your research and that you manage the time you have effectively. It helps to get things done early and never leave tasks until the last minute if there is a chance that they can be done way earlier. When you have arrived, you would be surprised at how long things will take. Not Packing Properly If you are sending a huge amount of stuff through a removal company then there’s a high chance that you will get there before your stuff does. For this reason, you have to make sure that you factor things like this into your packaging. Your suitcase should be full of your everyday clothes as well as things such as toiletries. If you want to be safe, take enough clothes to last you a few weeks. If you do this then you are covered if you are ever delayed. In addition to this, you have to make sure that you pack as sensibly as possible. If you are moving somewhere you know is hot, you won’t need jumpers in your suitcase, but you may need to put some sunscreen in there so you can cool your skin down and protect yourself from harmful UV rays. Read Also: Finding The Right Moving Company 8 Steps to Move in Your New House

READ MOREDetails
Clean Blocked Drains

7 Ways to Clean Blocked Drains in Your Home

The drains in your home really do take a lot of abuse. Not only are things sometimes accidentally flushed down toilets and drains, but they also naturally collect all of the dust, hair, and whatever else is in the air. Over time, your pipes are bound to get clogged at some point.Clean Blocked Drains cxan make things work for you in all the aspects. Of course, a plumber can clear out a clog in a snap. But, here are seven things that you can try on your own first without using harsh chemicals which could harm your pipes. 7 Ways to Clean Blocked Drains in Your Home: 1. Find the clog: It might not be that deep. In a toilet, it's generally somewhere in the base. And, in sinks, it's often in the trap underneath it where hair and other debris will settle. There are a few different tools that you can use to attack the clog from the outside of the drain. Trap cleaner: You can find one at your local hardware store. It's usually made of plastic and is about the length of your arm. It has ridges along the sides and is designed to fit inside of your drain. You can use it to fish out anything that might be clogging the trap. Drain snake: It's the same idea as the trap cleaner, only it's longer and has a hose that rolls up, so it can get to clogs that may be deeper inside of the drains. Wire coat hanger: In a pinch? Just grab a wire coat hanger, unwind it, fashion it into a long hook, and use it to clear the trap. 2. Use a plunger: It's a basic home necessity for toilets. And, it can also be used for sinks. All you need is a solid suction and you may get the same results on a sink drain that you would with a toilet. In a sink, it might help to have a little standing water while you are plunging. 3. Dish Detergent: You can use it in toilets and sink drains. Pour it straight down the drain or into the toilet, about a quarter of a cup. The detergent will settle on the clog, and start to break it down. Let it sit for a few hours, run some hot water, and try plunging. The soap is sometimes strong enough to break up the clog. 4. Boiling Water: This would be more effective for a sink drain. Pouring boiling water directly down the drain could break up the clog. You could add boiling water, wait a few minutes, try plunging, and repeat the process a couple of times, if necessary. Just make sure the water isn't still boiling while you are plunging to protect yourself from any scalding. 5. Use a wet/dry vac: Wet/dry vacs are great for many purposes, including clearing clogs in your drain. If the clog isn't too deep, you can use it to either pull the clog out or push it down the drain. It's a good idea to try to pull it out first to remove the clog from your plumbing system. But, sometimes pushing it will also clear the clog and allow it to drain. 6. Clean the trap: If you are dealing with a clogged sink, you can usually access the trap underneath the drain. Most likely, that's where the clog will be. If you're handy with home repairs, here's a quick how-to. You'll need a plumber's wrench. Have a bucket underneath to catch the water. Unscrew the fittings on the top and bottom of the trap. Remove the trap and clean it out. An old toothbrush is perfect. Clean out the surrounding pipes. Put it back together. A plumbing company such as Red Dog knows all about unblocking drains so if you are not confident taking apart the pipes in the drain, it may be worth hiring a professional. 7. DIY Clog-removing Recipes: You may actually have a few things in your pantry that can be used to clear up clogged drains. Here a few different ideas that you can try before calling a plumber. Mix salt and baking soda: Combine equal parts of salt and baking soda, maybe a half-cup of each. Pour it directly into the clogged drain, and let it sit for a few minutes. The salt and baking soda will settle on the clog and start to eat away at parts of it. Then, pour boiling water down the drain. If there is standing water in the sink, you can also include plunging the drain in the process to get things moving around. Combine baking soda and vinegar: Mix together equal parts of white vinegar and baking soda, maybe a half-cup of each. Stand over the sink when you mix them. The reaction of the two substances will result in an almost immediate fizz. Pour everything down the drain. This one is best to let sit for a few hours or overnight. Afterward, try rinsing the drain with hot water. Sodium Hydroxide: More commonly known as caustic soda, you can find it at your local hardware store if you don't already have it on hand. You will mix 3 cups of soda with about a gallon of water. The mixture will get warmer and begin to fizz. Pour all of it directly into the drain. Wait for a half-hour or so, and pour boiling water down the drain. If it seems a little better, but still draining slowly, you can repeat the process. Unfortunately, some clogs are either too deep or too intense for any of these home remedies. If you've tried everything, and you just can't seem to get that clog cleared on your own, give Brisbane Drain Cleaning by Conrad Martens a call today. Our team of dedicated service professionals will quickly assess your individual circumstances and easily get your drains cleared. Let us show you have we've built our reputation of providing dependable service focused on quality of workmanship to the entire Brisbane area since 1982. Read Also: 8 Plumbing Myths Busted 3 Reasons Why Business Organizations Need To Get The Drains Cleaned Regularly

READ MOREDetails
Bedroom Makeover

3 Tips on How To Plan The Best Cheap and Fabulous DIY Bedroom Makeover

Tired of the current look of your room but don’t have a budget for renovations? It’s time for you to take a breather and read this guide for a thrifty chic’s way in achieving a bedroom makeover! No girl would want to keep the same look for her room in ages. And from time to time a girl would need to change their style. From the all pink room to modern and mature, but it is not an easy process at all. Changing a whole room setting will take time and a lot of brainstorming. Read also: Kitchen Renovations Must Be Done At Regular Intervals Choose What You Like In choosing your desired style, there is a number of choices. The color choices may range from neutral color styles to a preppy college girl’s choice. But sticking to your interest is the best call, and from there you can start planning which theme you desire the most. Do you want your room to have a bigger bed? Or maybe a bigger space? New closet? The planning is really up to you. After that, you can start thinking of what bedroom furniture do you want to buy, keep and throw away. Changing your bedroom style is best when you are cleaning up. You can easily clear spaces as you segregate your stuff and that spare space could be for decorating the room. Read also: Avoid These 4 Mistakes During Multi Family Housing Renovation Don’t Throw It All A basic rule when doing any home makeover is not to throw things away for they can still be of use to you. Well, of course, you would first need to clean up the clutter in your room and carefully assess if your trinkets, furniture, clothes, papers, and other stuff can help your room’s “new look” or not. The reason why you are not advised to throw anything away is that of DIY (Do-It-Yourself) projects that would need recycled materials. DIY has become popular with millennials today as it can show a person's creativity. But if you lack the artistic talent for such, DIY projects also have tutorials and are easy to do. Other than that, DIY projects cost less. Take Control Another tricky part of doing a bedroom makeover is taking control. Well, of course, you have control on which furniture will be at the best place, but other than that you have to take control of mixing and matching. Mixing and matching the patterns and colors is important for a mismatch of colors and stuff can bring disaster to your room. Don't make it too floral or colorful because it would look suffocating and stuffy. Instead, you should pick a maximum of three color tones that creates harmony when combined. The pillow population also matters, because even though it is cute to have a lot of pillows on your bed, it shouldn’t take half your bed space only. Two sets of the right size of bed pillows and a body pillow or a neck roll are all you need. Don't forget to consider your room lighting too. It can be in any shade of your liking. The lighting may be a bit dark, medium light or too light. Takeaway Doing makeovers is fun. Doing it for your room is exciting because it can be all about you. Remember not to be afraid when doing redecoration and renovations because freestyling for your room is not a  crime as long as you are comfortable with it.

READ MOREDetails