Roof Repair: Should You Hire Roofers Or DIY?

Published on: 23 August 2019 Last Updated on: 21 November 2024
Roof Repair

There is a lot that we need to prepare for while living in this world.

Growing up, most of the things we did were focused on preparing us for the future. Our education is a prime example of such a plan, and it has given us a lot of opportunities as we grow older.

Now that we are adults, we learn to face problems before it even starts. It can be anything from our daily lives, like planning ahead of our week. Calculating each moment of our lives in order to manage it better has been one of our continuous goals.

However, there are so many moments in our lives that we cannot prepare for at all. For example, the weather these days is truly unpredictable.

How Does Unpredictable Weather Affect The Roof?

How Does Unpredictable Weather Affect the Roof

It can rain in the morning, and then the sun will scorch you in the afternoon. It might be summer on normal days, but the air feels like it is winter. There are a lot of weather anomalies that are happening every day in our world right now. It affects all o

ur lives, even in the littlest way possible. Your schedule, for example, can be affected by unexpected bad weather. Canceling your plans seems like the best option, even though you don’t want to. Some of your plants in the garden can also be affected.

Not every vegetation is hard enough to stand the unpredictability of the elements. The weather can also affect our house. See how it works here: abc.net.au.

There is nothing more important in managing a household than cleaning the house itself. It is one of the most tiring things you can do during your rest days. Yet, it is a very important task since it keeps our home livable.

Cleaning our own homes should be an integral part of every household. It acts as a productive activity for children before they go out and play. The parents can also plan out how the house will look like from the inside out.

It can also be considered as bonding time for the whole family if you want it to be more enjoyable. You can even use this time to check for any kind of repair needed around the house.

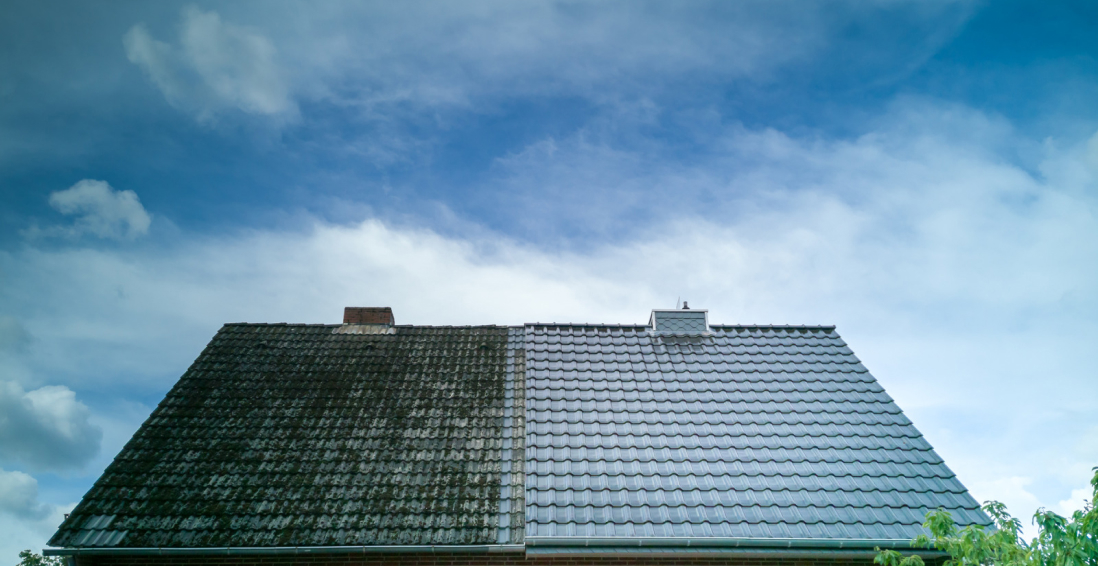
One of the most vulnerable parts of the house is the roof. It is very obvious since it protects the entire structure from any harm above. It also helps ventilate your whole house along with the ceiling. However, most roofs are always under siege by the elements.

The unpredictability of the weather does not help maintain our roofs either. Click here to see why cleaning every season is important. Should you clean your roof?

Probably not.

This leads to more damage and can affect the interior of your household. This leads to more problems, which can be really bothersome at any point in our lives. However, you can always look for solutions.

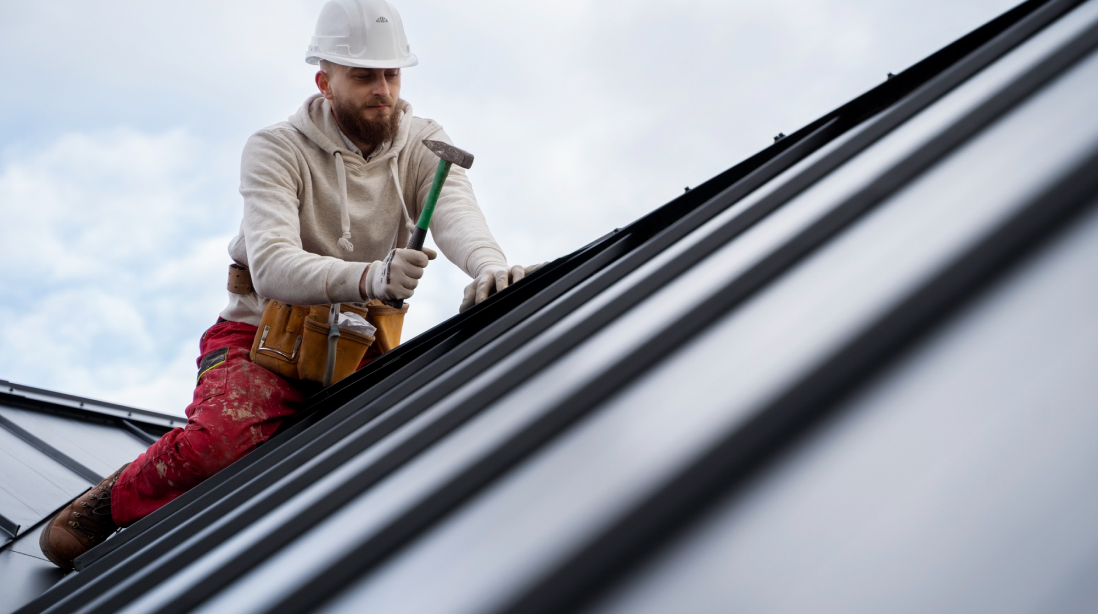
You can always hire a professional roofer to solve these problems. They are usually well-trained and can spot a problem on your roof with ease. Roofers can repair and help maintain the quality of your roof.

Some companies even offer a free roof inspection for their clients. If needed, they can help you install a new roof as well, especially if the damage is extensive. Hiring them may cost you money, but it will save you all your time and effort.

You don’t even need to worry about the repair anymore, as they will do it for you. Check out the dome of the roofing experts around your area and see which ones you like best.

Why Should You Pay Special Attention To The Condition Of Your Roof?

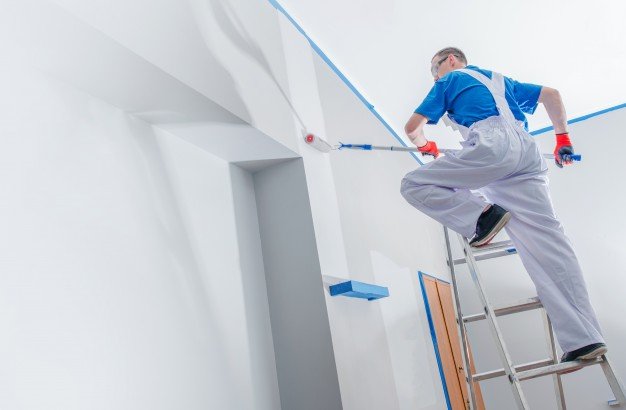
Before you do anything rash, remember that doing the roof repair on your own can be a bit challenging and dangerous. On one hand, it saves you a lot of money since you do not need to pay for the labor anymore.

You can also customize your roof to your heart’s content. However, you need to have the talent and skill to repair your own roof. Accidents may happen and can lead to more expenses for your family.

Always choose the best equipment and materials for your roof repair. Most websites these days offer reviews on different products for your roofing needs, so try checking that out as well. As usual, it will depend on your choice whether you will hire or do it all yourself. The only aspects that should always matter are your safety and security.

Related: How Often Do You Need A Roof Inspection?

Disadvantages Of DIY Roof (…or any) Repair

Disadvantages of DIY Roof (...or any) Repair

Doing roof repairs on your own can seem like a good idea at first. After all, it saves you money, right?

But before you grab that ladder and start working, consider some of the drawbacks of going the DIY route.

Safety Always Comes First

First off, safety should always be a top priority. Roof repairs can be dangerous. If you’re not experienced and do not have the right (professional) safety gear, you’re putting yourself at risk of falling, especially when dealing with high or steep roofs.

Then, there are unpredictable slippery surfaces, uneven footing, and handling tools at heights, which make the task even riskier. One misstep, and you could end up with injuries that lead to hospital bills, which would definitely be more expensive than hiring a professional in the first place.

They are not DIY Quick Fixes (…IT IS A ROOF!)

Another important factor is time. Roof repairs aren’t quick fixes. Especially for someone who isn’t trained.

What might take a professional a few hours could take you all weekend, or worse, a week. The time that could be spent on more productive activities might be wasted on a project that becomes more complicated than expected.

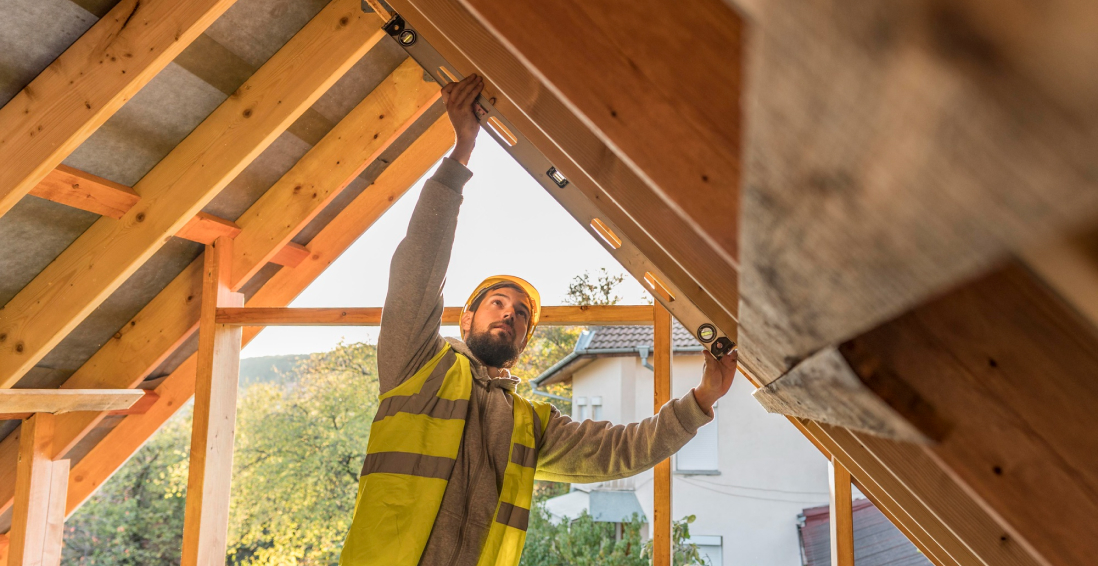
You Require A Certain Skill

Additionally, you require a certain advanced level skill level. Roof work isn’t as simple as patching a hole or replacing a tile. There’s a science to understanding the structure, how water flows, and ensuring everything is sealed properly.

Without the right knowledge, you may unknowingly create bigger issues, leading to leaks or even structural damage over time.

What About the Tools?

Let’s not forget about materials and tools. If you’re doing the repair yourself, you’ll need to purchase all the materials and specialized tools needed for the job.

However, professionals usually get discounts on these supplies, and they already have all the tools, which could save you a lot of money in the long run.

In the end, while the DIY route may seem appealing, the risks often outweigh the benefits. Your safety, time, and the quality of the repair are all factors that deserve careful consideration. So, before you commit to fixing your roof alone, weigh your options carefully.

Read Also:

Content Rally wrapped around an online publication where you can publish your own intellectuals. It is a publishing platform designed to make great stories by content creators. This is your era, your place to be online. So come forward share your views, thoughts and ideas via Content Rally.

View all posts

Leave a Reply

Your email address will not be published. Required fields are marked *

All Comments

Good post! We will be linking to this particularly great post on our site. Keep up the great writing

Related

Decorate a Room

How to Decorate a Room with no Cost

It is hardly found a person who does not like to stay in a bedroom. Most of the people in the world like to spend at least one-third of their life in the bedroom. So, it is highly important to decor your bedroom according to your desire. Redecorating your bedroom creates a relaxing environment and helps you to provide a better night's rest. For making a stylish bedroom, you don’t have to spend a lot of money.  There are several ways to decorate a room. Now you can take a look at our ideas. Pick the favorable ideas for you. Different Ways You Can Apply To Decorate A Room  There are multiple ways you can apply to decorate your room in the best possible ways. 1: Take the dimension of your room and furniture: To do this, you can use a measuring tape to measure the room dimensions. You can use graph paper to sort out and write your taken measurement. This measurement may include: Floor plan, size of doors, windows, etc. You can take the measurement of the furniture. Written your taken measurement on the graph paper. At that time, determine which furniture should go at which area of the room. Before rearranging, sort out which furniture is not required anymore. After planning that, you can get some free space. Now it is time to decide which new furniture is required for filling your available space. ( Consider suitable free space for walking, playing with children. etc) 2: Tools requirement: You need some important hand tools to run the work. For working at the room, list the available tools you have or you have not. Purchase the unavailable tools from the market. It is not a waste of money. These tools are your permanent asset. 3: Cleaning the room: Unnecessary items can be donated. If you find something that is not usable anymore, throw it out. You may clean out all the areas in your room as well as under your bed. If you get some newspapers, books, those are not required anymore; you can sell off these items. The important newspapers, books should be arranged on bookshelves. 4: Color the walls: You can use different types of color for your room. You can use a single color for all walls or the different color for a different wall. Normally, white color or similar to white color reflects the light. Black color or similar to black color reduce the reflection of light. An important thing that does not give chance to feed the color of your bedroom. Repainting your wall before getting it fed. Red, black, navy blue color should be avoided. At the time of coloring the room, match the walls color with your furniture, curtains, and carpets. 5: Color the furniture: Now, you need to recolor your furniture. You can use different types of color for your furniture. You can use a single color for all furniture or a different color for different furniture. Normally, you should use wood color, white color, black color or any other shining color. At the time of coloring the furniture, you should try to match the furniture color with your walls, curtains, carpets. 6: Place the bed with related furniture: Now, you should place your bed based on your preference. Some people prefer to place the bed against the wall. Some people prefer to place the bed on the side of the window. Some people prefer to place the bed in the middle of the room. So, you should decide for yourself. If there are free spaces available on both side of the bed, you may place a chair and a small table on one side. This table is set for reading books. On the next side, you can place a storage drawer with a table lamp and flower. You may also plan for utilizing the free space available under the bed. For storing things under the bed you may add a bed skirt. You can buy a bed with all related amenities at https://www.pillowbedding.com/ For placement of bed in the room, you should follow other guidelines also: The bed should not be placed in an area where sunlight shines directly. Avoid placing mirror against your bed. 7:  wood headboard: You can easily buy wood from the market.  Even you can get as a gift from neighbors or relatives. And simply you can make a headboard on the back wall of your bed. 8: Added extra shelves: For Maximizing each and every corner and area of your room, you may add extra shelves. That not cost you much. You can purchase plastic storage bins. You can attach hooks on the back of the door. If you added wooden storage bins, attach hooks on the side of the wooden shelves. You can utilize vertical free space for installing shelves. You may label the bin for a specific item. So, for storing Each and every item, you will get a specific place. This will provide you a organize structure of the room. 9: Stylish bookshelves: Try to decor your bookshelves with some decorative items. For example, if your bookshelves have six racks. Try to decorate the upper two racks with pottery or framed photos. You may use the middle two racks for books. If you have some unattractive items to display, such as DVDs etc, cover it by boxing. You can leave one or two bin of each shelf empty. 10: hanging a shelf beside your bed: It is a simple idea. Does not require much cost. You may tie driftwood with some rope and hang it besides the bed. It provides an apical view of your bedroom. 11: add carpet to the floor: It is also a simple idea. Does not require much cost. You can easily purchase a carpet from a shop or even you can get as a gift from neighbors or relatives. And simply you can cover some portion of your floor by carpet. It provides an epical and stylish view to your bedroom. 12: You can use washi tape to Decor small accessories: You can use washi tape for decorating some accessories. With no cost, it increases beauty to your room. 13: Flower arrangement: The flower is for beautification. You can go to the gardener for purchasing flower with tub. You can make an arrangement on the side of the window. You can also make a garden in front of your room. 14: Arrange a jewelry tree: You can gather dry branches of small trees in a vase over the dressing table. For making the vase more stable, you can fill it with pebbles. You can decorate the vase and tree with different ornaments. Read Also: Things To Do Before Bed For A Perfect Night’s Sleep 5 Ways To Maintain And Decorate The Study Room For Kids A Guide To Finding The Perfect Sofa For Your Living Room Cheap And Simple Tips To Give Your Bedroom A Makeover 5 Ways To Make A Big Statement In Small Bedroom

READ MOREDetails
house painting

5 Interior House Painting Tips

Owning a house which you can modify according to your personal desire, is always something permanent and something incredibly profound. A home with well-painted walls and beams should tell the story of who you are and what you love. New paint with vibrant colors can change your mood, and make your home your favorite place to live in. Interior house painting can be a very intimidating and challenging task if you decide to take it upon yourself. You have two options, to either do it by yourself or hire a professional painting company to look over the project. If you opt with the first choice, these tips and techniques will help you to paint your own home, according to your likings, within a very friendly budget. When you want to paint your Boynton Beach home, be sure to give Gustafson Painting a call. The following steps are a guide on how to paint a house to meet your expectations: 1. Self Choosing Colors: The critical step, to begin with, is to choose a color which you like. Or at least you should have a good idea of what color combination suits your home, i.e. which colors you would like to paint to your rooms and which colors to paint washrooms, kitchen, etc. Select the color palettes and plan out which color combination gives your rooms the vibrant energy. Every color has its functions, e.g. Blue, green and purple are all relaxing colors. Moreover, other deep and shocking colors such as red, pink and yellow can be used in rooms which are mostly in use during the day, giving your rooms a lively, gaudy look. 2. Gathering Tools and Equipment: After this, you have to pick all the tools and equipment which are needed for painting the house; which includes sanding and scraping tools, wire brush, respirator, paint rollers, plastic sheets to cover the carpets and your valuable stuff, work gloves, drop cloth, ladder and scotch tape. This will ensure you are ready and won't have to leave your task in between, to search for something. 3. Repairing Damaged Parts: Once you have organized everything, the next step is to remove any dirt and dust buildups from the walls by using a pressure washer. After this, you can apply epoxy filler to cracks and fractures by using a putty knife. Allow it to let it dry. Once this is done, fill the gap around windows, doors, and ceilings to ensure a better coat of paint. When this is dried up, then feel the wall with your hand to ensure if there are any uneven spots left behind. Then, apply the primer to prepare the walls for paint when all damaged parts are repaired. 4. Brush the Walls: Before painting the walls with a roller, you should brush the walls. To brush the walls, mean to paint the corner of walls, ceilings, and trims. You can choose from paintbrushes which come in many shapes and sizes. The traditional method to paint the walls through brush is by the use of metal cans, which can be very difficult for you to carry along with the brush and can result in poor results. But nowadays, there are proper paint pails which will make the whole task a lot easier for you. 5. Ready to Paint Ahead! Finally, you are ready to paint with the rollers. But wait, before this you should mix a primer with paint to give a fresh and everlasting look. If you paint without using a primer, then the paint would peel off. For this, you have to scrap all the paint away, clean the surface before applying the first coat and after that, apply the second coat of your own choice. This is one way when you do not use a primer. But if you are using a primer with paint, then it will not cause any problem even if the first coat is not applied. And the most important order of painting as suggested by the experts of house painters in San Diego is that you should paint the trim first, then ceilings, and then walls. It will provide better adhesion throughout and will enhance the ability of the topcoat. Another pro tip is that don’t forget to open the windows and doors of your house during painting, as it provides better ventilation and the paint dries off quickly and efficiently. At the end of the painting, do the cleanup. Wash all the brushes and other stuff which you have used in the process. At last, give your house a final touch by placing all of the favorite furniture in place, to give your dream house a new look! With these interior house painting tips from the most experienced of the San Diego painting company, you will get pro results for your residence! Read Also: Find The Right Painters For Your Ann Arbor Home This Painting Season 5 Factors To Consider In Choosing The Right Floor Colors Roofing Painting Contractor Leads: Four Questions To Ask Before Hiring One

READ MOREDetails
Homemade Mosquito Trap

How to Make a Homemade Mosquito Trap

Though mosquitoes are little creatures on earth, they disturb not only human beings, but others are also biting. A homemade Mosquito Trap can reduce the problem of your health disorder due to mosquito bites. They can inject a few viruses which can cause great damage to us. Some diseases may result in you lying on the bed for days whereas others may have an untold health impact on your overall health. But you can get rid of these annoying creatures by adapting some steps. There are various ways to drive these little vampires away. They may be hazardous for your health as they emit harmful chemicals. There are environment-friendly ways too to drive them away. According to my, homemade mosquito trap is the best mosquito trap among them. And, in this article, I am going to assist you on how to make a homemade mosquito trap at home easily. Homeowners, as well as commercial establishments, should realize the dangers of mosquitoes. There are many serious dangers and diseases that you can end up contracting. From malaria, and dengue to encephalitis, not only can it ensure that you stay bedridden for weeks, but in extreme cases, it can prove to be life-threatening. This is why you need to look at the best mosquito trap to help you keep these dangerous insects away from yourself and your family at all costs. Dump and wetlands are the main sources of mosquitoes' breeding place. So, make sure there are no spaces inside or outside your house where water is logged or dump areas. If you find any, try to clean them fast before they increase their number immensely. Carbon dioxide is a gas that attracts mosquitoes and following carbon dioxide traces; they find their victims out to bite us. We leave carbon dioxide at the time of our inhaling. How does a homemade mosquito trap work? Cool! The concept is very simple, and anyone can do it without any hassle. In this trap, a plastic water bottle is needed to make it. In it, there is a mixture of yeast and sugar. When the yeast consumes the sugar, it started to produce carbon dioxide continuously. As the little bugs attract carbon dioxide, they fly in the water bottle and get stuck. After a few times, they die inside. This is the basic concept of making and executing a trap that can attract mosquitoes. After clearing the main concept of the trap, I would like to describe to you the ways of making the mosquito trap. To do the entire process, all you need are a few materials along with a water bottle (a maximum of 2 liters can do the job perfectly). So, let’s get started…. Materials you need: An empty 2 liters plastic water bottle Scissors or box cutter or razor knife Duct tape A marker (red or black will do) ¼ cup brown sugar 1 cup of hot water (need to make it cool later) 10-gram brewer yeast As you have arranged all the materials mentioned above, it is time to start the next steps. Cutting the water bottle to make a funnel: With the help of scissors or a box cutter, you can cut the bottle at the desired point. To make it easier, you can use a marker to make a circle on the bottle where it needs to be cut. You should cut the bottle 4 inches from the lid of the bottle. Do it carefully as there are no unfinished zigzag edges that may cause harm to your hands. Now, if you put the top part of the bottle facing down, it should look like a funnel through which mosquitoes will enter. Water, brown sugar, and brewer yeast: With the measuring cup, take 1 cup of water into a pot and boil. Allow it a few moments to be cool and then pour brown sugar with the water to make a mixture. You should wait a few moments to dissolve the sugar. When it dissolved, add yeast to the mixture and let it be cool again. Make sure you have put the mixture into the lower part of the bottle (bigger part). Now place the top lid onto the bottle facing down so that it can make a funnel. Use duct tape to wrap the uneven edges as they can harm your hands while moving. The trap is ready for the action: As the funnel to trap mosquitoes is almost ready to use, and the yeast is ready to consume sugar to produce carbon dioxide, the play begins. Keep one thing in mind that carbon dioxide will produce as long as the yeast eats all the sugar up. After that, it will not work as a trap. In this case, you can reuse the trap again and again. The yeast may take only two weeks to eat up all the brown sugar and end producing carbon dioxide. But you should not worry about it as you can replace all the materials, again and again, to rejuvenate the trap for attracting the little vampires. In this way, drive the annoying mosquitoes away and keep your surroundings these little bugs-free to lead a healthier and happier life. Now, you can enjoy the summer vacation sitting on your armchair at the time of sunsetting. A homemade mosquito trap can ease the chances of your disease rate. If you do not want to get your hands dirty or do not have time to invest in the creation of such tools, there is an easy way out. You can always look at some cost-efficient and affordable residential mosquito removal services that guarantee peace of mind and great hygiene for your home. Read Also: 10 Pest Control Tips To Keep Pests Away This Summer What You Should Expect From A Pest Control Visit

READ MOREDetails