

Top 10 MySQL GUI MacOS

Published on: 08 December 2022 Last Updated on: 09 December 2022
MySQL

Databases are the primary data storage location for all software applications. For instance, when someone conducts a web search, logs into an account, or completes a transaction, a database system maintains the information so users can retrieve it whenever they choose.

A relational database, on the other hand, organizes data into tables, rows, and columns. Furthermore, it combines tables and creates a link between the data, making it simple to acquire insights into the relationship between multiple data points.

Among the different relational databases, MySQL is the most popular. It supports different OS like Linux, Windows, and even macOS (Apple). In addition, it powers several popular web applications, including Twitter, Netflix, Uber, and Facebook.

There are several MySQL GUI for macOS. However, this blog article will discuss the top 10 MySQL GUI Clients for MacOS.

1. dbForge Studio for MySQL

dbForge Studio for MySQL

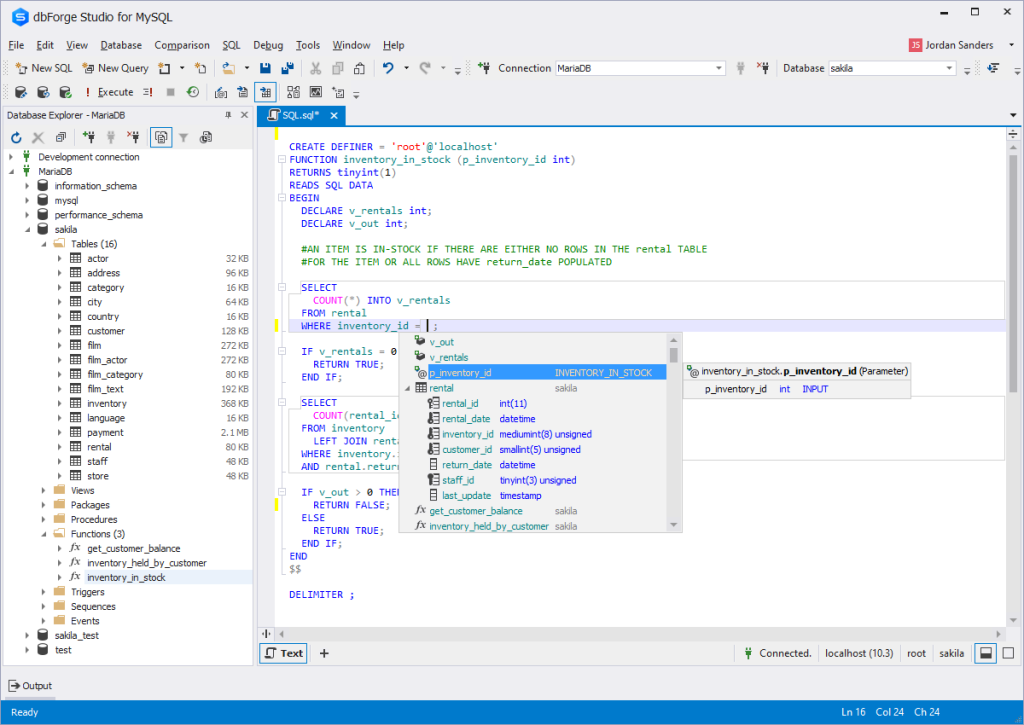
dbForge Studio for MySQL is a MySQL GUI for macOS. It is used to create, maintain, and design databases.

dbForge Studio for MySQL allows you to build and execute queries, develop and debug stored procedures, and manage database objects.

Furthermore, it has a user-friendly UI and consists of intelligent coding features like code completion, enabling you to write SQL queries easily and effectively.

PROS

  • Code completion
  • Automatic run-time query
  • Visual Query Builder, which helps you create queries using drag-n-drop
  • Simple to debug
  • Simple backup and restoration

CONS

  • The free edition has limited functions
  • It is compatible with only MySQL and MariaDB
  • dbForge Studio for MySQL cannot be used offline.

Price: 30-day free trial, $179.95 for a perpetual license of the premium edition.

2. TablePlus
TablePlus

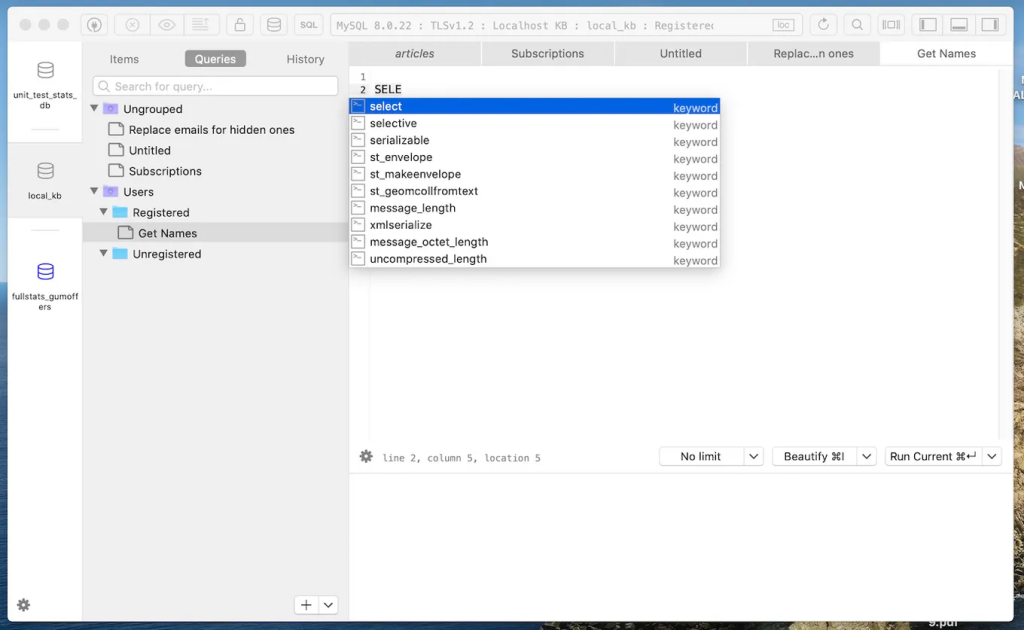
TablePlus is a native MySQL GUI application with an easy-to-use interface. Its native architecture enables speedier processing of SQL queries. As a result, you can quickly build, query, edit, and save databases.

Furthermore, TablePlus has an appealing user interface that enables you to manage numerous relational databases at the same time, such as MySQL, PostgreSQL, SQLite, Microsoft SQL Server, Redshift, MariaDB, and others.

PROS

  • It executes queries in split seconds
  • It consists of a simple UI
  • It only consumes a little space - about 180MB to install
  • no code query features
  • you can connect to multiple databases simultaneously
  • code formatting features

CONS

  • The free version limits you to 2 opened tabs and 2 opened windows
  • No rollback button

Price: $79, $99, and $49 for basic, standard, and custom license, respectively.

3. DBeaver
DBeaver

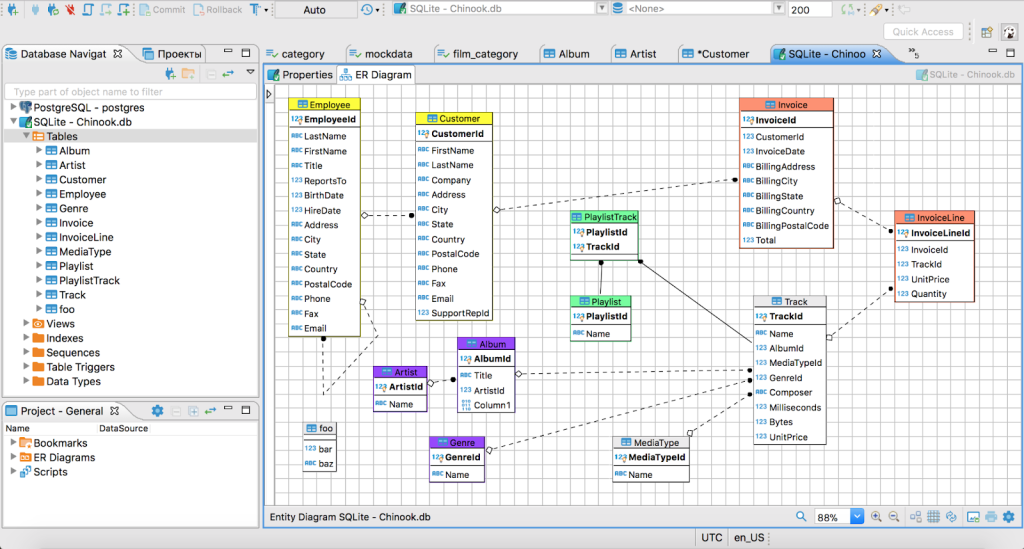
DBeaver is a graphical database administration tool for database developers and administrators. It is a free and open-source tool that supports popular DBMSs like MySQL, PostgreSQL, MariaDB, SQLite, and Oracle. Aside from MacOS, it also works on Windows, Solaris, and Linux.

DBeaver is highly functional and user-friendly. It consists of the typical features one should expect from a GUI database management tool. Features like code completion, code formatting, data editing, database analysis, SQL editor, and so on

PROS

  • Can connect and work on different databases simultaneously
  • It has easy navigation through the Schema object tree
  • It saves coding time through code completion

CONS

  • The free edition has limited functions
  • It consumes a lot of RAM space
  • You cannot install it without Java

Price: The community edition is free, and the Enterprise edition is $10/month.

4. Sequel Ace
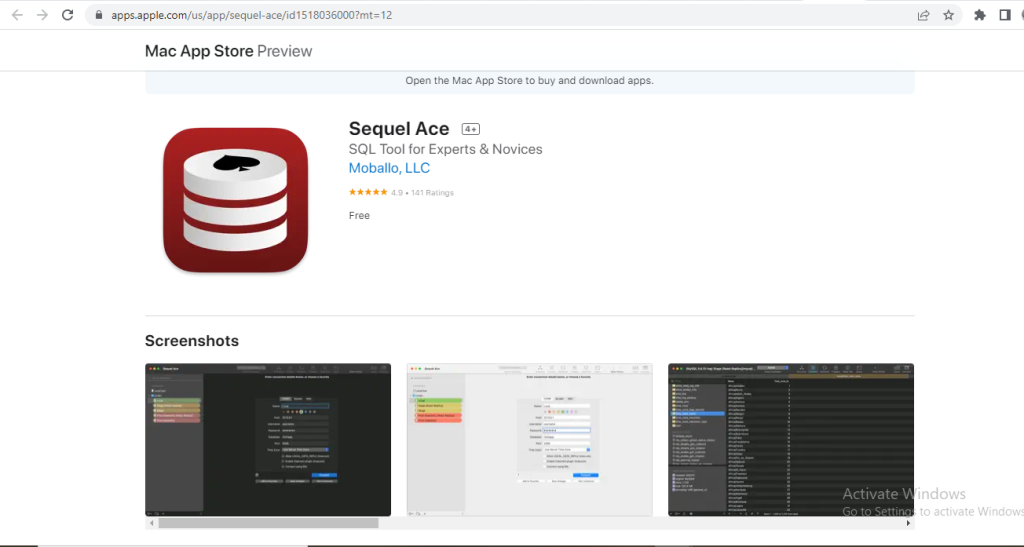
Sequel Ace

Sequel Ace is a popular Mac database management tool for MySQL and MariaDB databases. It serves as a replacement for the longtime MacOS tool - Sequel Pro.

Sequel Ace allows easy writing of custom queries, easy accessibility to all your databases, and a filtering system to find what you need quickly.

PROS

  • It rarely crashes
  • It is fast and easy to install
  • It has flexible connectivity

CONS

  • It does not support multiple result tabs for multiple queries
  • The query editor window is slow

5. SQLPro Studio
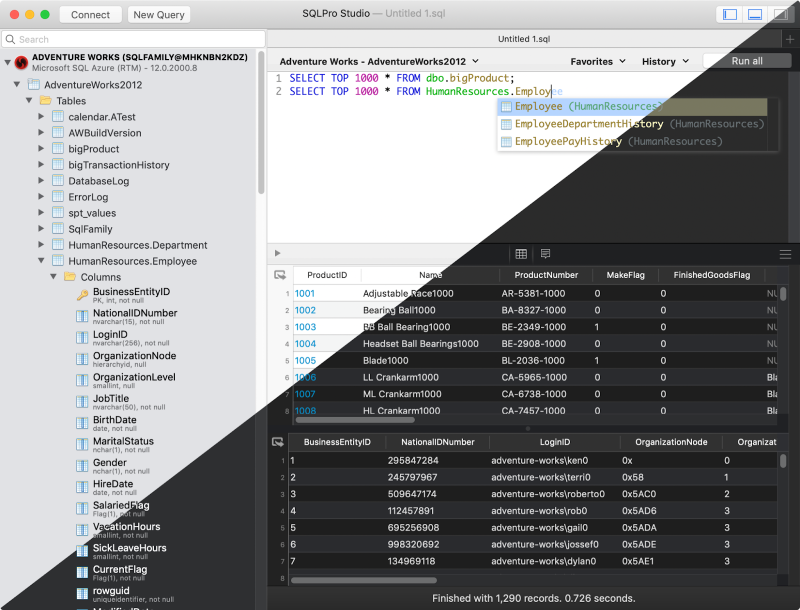
SQLPro Studio

SQLPro Studio is a high-end database management software for Postgres, MySQL, Oracle databases, and Microsoft Management Studio.

It is well-known for its smart features, such as syntax highlighting, the ability to execute several queries simultaneously, autocomplete, keyword inclusion, and exporting files as CSV, among others.

PROS

  • The table filters are easy to use
  • It can install plugins
  • You can easily connect it to local Docker containers

CONS

  • It is a little bit slow
  • It does not have NoSQL DB management
  • It crashes randomly.

Price: $99.99 per year.

6. DataGrip
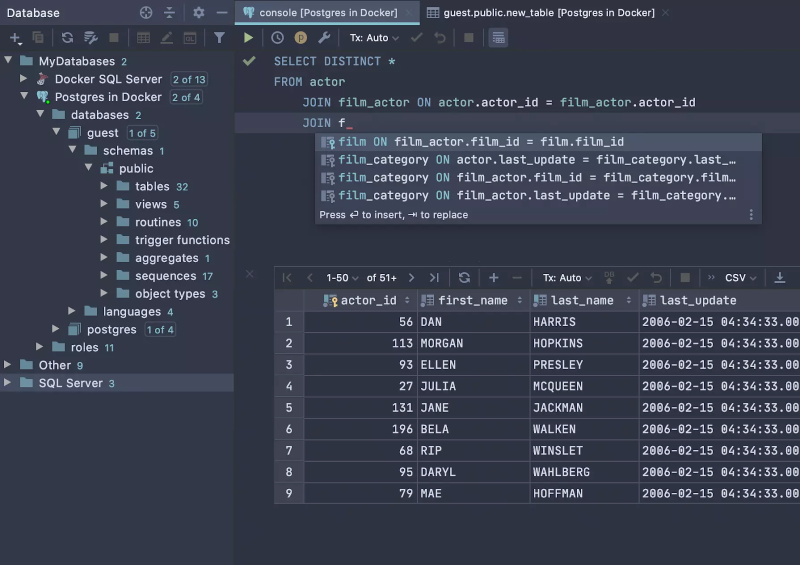
DataGrip

DataGrip is a multi-engine database management tool. It is compatible with MySQL, PostgreSQL, Microsoft SQL Server, Oracle, Sybase, SQLite, and so on.

DataGrip is characterized by many amazing features, such as code auto-completion, bug detection, and version control integration, among others. In addition, it provides a query console for performing and profiling queries.

PROS

  • The interface is user-friendly and very easy to understand.
  • The support is substantial, and the tool deployment is highly authentic
  • You can manage multiple databases simultaneously.

CONS

  • It consumes too many computer resources, which slows down its performance.
  • If you plan using of MySQL DB only, its functionality is poorly

Price: $199 per year

7. Beekeeper Studio
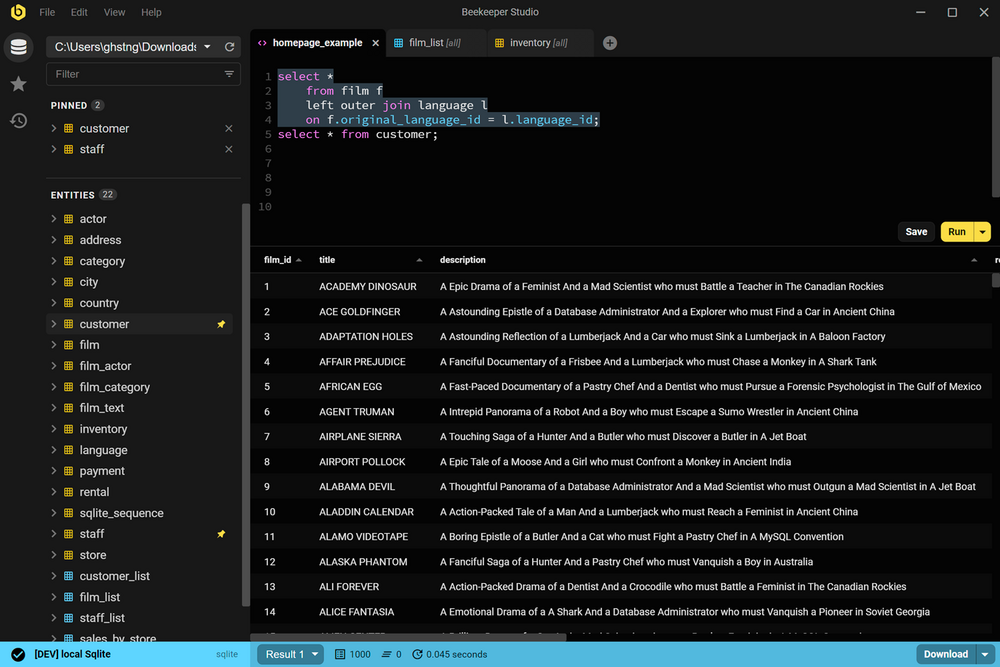
Beekeeper Studio

Beekeeper Studio is an open-source SQL editor and database management tool for MacOS, Linux, and Windows. It has a friendly user interface and is very easy to understand. Also, Beekeeper studio is GPL licensed, which makes it free to use.

The tool is characterized by various smart features, such as a tabbed interface for multitasking, keyboard shortcuts, query history, code auto-completion, and syntax highlighting, among other features.

PROS

  • It has keyboard shortcuts
  • It enables users to multi-task
  • You can use the tool without the internet
  • You can save your queries to visit them later

CONS

  • It takes a while to load multiple tables in a database
  • The UI could be better

Price: $99

8. Adminer
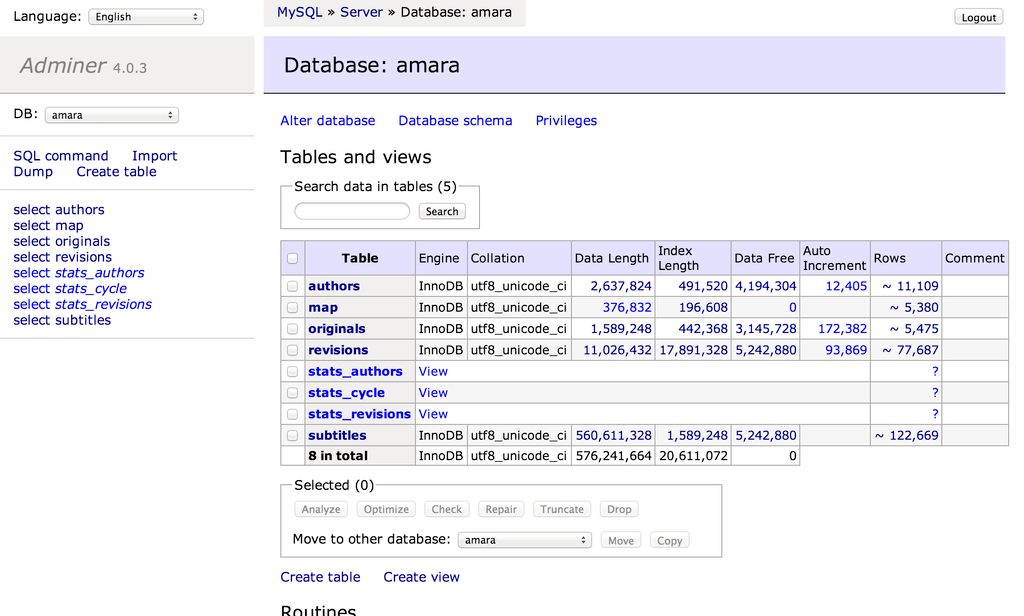
Adminer

Adminer is a PHP-based database data editing tool that is both simple and user-friendly. It is appropriate for general users because it allows for high-level data manipulation.

Adminer was previously known as phpMyAdmin. It does, however, have a simpler and more user-friendly layout.

PROS

  • The security features are top-notch
  • It is fast in executing queries
  • It restricts the number of connection attempts to prevent cyberattacks

CONS

  • The user interface could be more user-friendly
  • It is not easy to move database schemas across the workspace

Price: it is free

9. Navicat
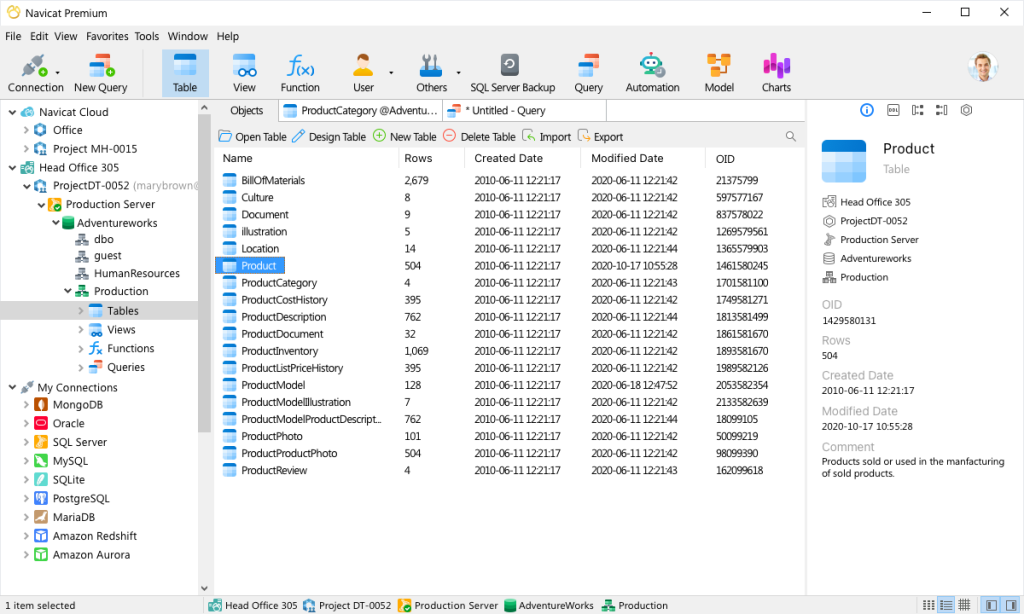
Navicat

Navicat is a graphical front-end database administration tool that allows you to connect to several databases simultaneously, including MySQL, MariaDB, SQL Server, Oracle, PostgreSQL, and SQLite.

Navicat allows you to create and manage database objects, move data between databases, synchronize, and deploy updates.

Furthermore, its efficient functionality allows you to quickly complete complex jobs, such as importing a large number of file data into a database table without interruption.

PROS

  • It is beginner friendly
  • It runs SQL queries very fast
  • You can easily move data across different tables and databases.

CONS

  • The subscription is very costly
  • It has a short free trial period (14-day free trial)

Price: $69.99 monthly subscription, $1399 for a permanent license.

10. Querious
Querious

Querious is a new MySQL database management software for MacOS. It is precise and simple to use, giving you complete control of your work.

Furthermore, Querious is beginner-friendly and comes with smart features that enable users to view, edit, search and structure their data how they deem fit.

PROS

  • A simple user interface
  • It executes queries quickly
  • Complete control over user privileges
  • It rarely crashes

CONS

  • Autosuggestion can only suggest table names
  • It only supports MySQL
  • It is available only on MacOS

Price: $25.

Read Also:
Arnab is a professional blogger, having an enormous interest in writing blogs and other jones of calligraphies. In terms of his professional commitments, He carries out sharing sentient blogs.

View all posts

Leave a Reply

Your email address will not be published. Required fields are marked *

Related

The Importance of Electrical Infrared Thermography Inspections

The Importance of Electrical Infrared Thermography Inspections

The world runs on electrical systems, and many things would stop without them. When something goes wrong, people only notice how critical electrical systems are. They must be safe, reliable, and effective, and electrical infrared thermography inspections ensure they are. Regular Infrared thermography inspections are very important preventive maintenance for electrical systems. Electrical thermal imaging is utilized for these inspections, which can further detect all the potential issues early on. Moreover, it helps to prevent them from escalating into serious problems.  This very provocative approach is useful for the improvement of safety, reduction of energy costs and further extending equipment lifespan. What is an  Electrical Infrared Thermography Inspection? Technicians can uncover heat patterns and electrical systems through an infrared thermography inspection. This non-invasive technology detects temperature variations and possible problems behind walls, under floors, and in ceilings.  The problem may be a loose connection, an overloaded circuit, or a faulty component that could lead to significant issues. The inspection allows these problems to be caught early before they become expensive repairs or cause accidents or injuries. This technology is accurate and safe because the individual completing the inspection never comes into contact with the electrical system. By finding inconsistencies and heat distribution, they can uncover potential problems before they escalate. The technology is used in structural systems, mechanical systems, medicine, and environmental science. So how does it work? The trained technicians use these electrical infrared thermography cameras to capture all the images. This is also called a thermogram that shows surface heat variations. Infrared thermography can detect all issues, such as faulty electrical connections, overloaded circuits as well as bearing failures. Electrical problems can cause costly shutdowns, severe property damage, and, lastly, business interruption. Infrared thermography can help prevent all these issues by identifying problems before they even become serious. How Does Infrared Find Electrical Problems? Infrared cameras, or thermal imagers, can be called special eyes that "see" heat. Everything around emits some heat, and this camera detects the heat and pictures it according to the difference in temperature. So, how do these help in diagnosing electrical issues? Component Temperatures At Greater than Normal Operating Levels: As the electrical components are overstressed, faulty, or defect-prone, they usually produce temperatures above those obtained at normal operating temperatures.  An infrared camera would catch this type of abnormal temperature that can indicate some issues before there is a fire breakout or equipment failure. Loose Connections: Wires or terminals not properly connected are a source of resistance that leads to heating. Infrared cameras can spot these loose connections, thereby preventing arcing, sparking, and fire. Overloaded Circuits: If a circuit draws more current than its rating, the wires and elements in the circuit get so hot. Infrared cameras will spot such overloaded circuits that might create dangerous conditions. There are a few advantages that you can achieve, such as: Early Detection: Early Detection-Infrared cameras are used for the diagnosis of problems at an initial stage, and hence do not require huge repair services. Safety: Upon the identification of possible fire hazards through infrared cameras, safety features in domestic, commercial as well as industrial environments improve. Reduced Downtime: Infrared cameras quickly identify problems, reducing equipment downtime and keeping businesses running smoothly. (In the next section, I will be discussing the major benefits of Electrical Infrared Thermography) In summary? The infrared camera is an indispensable instrument in the inspection and fault-finding of electrical systems. The cameras produce the necessary effects which are useful in detecting a fault without necessarily damaging the equipment. The Benefits of Electrical Infrared Thermography Inspections As previously mentioned, electrical infrared thermography inspections are highly beneficial because they catch problems early before they become significant issues. Electrical systems are exposed to continuous wear and tear, which can lead to degradation. Improper installation and environmental conditions can also cause problems within these systems. The technology captures thermal images to uncover abnormalities. The technician can conduct this inspection without halting the system. This inspection is often part of a more extensive preventative maintenance program, helping reduce unexpected downtime while extending the lifespan of costly electrical parts. Problems are fixed before they escalate. System performance improves when regular inspections are conducted. These inspections ensure the electrical system is performing at optimal levels. The business owner saves money by not paying for costly repairs or early replacements. Furthermore, efficient systems use less energy. These thermal inspections ensure the safety of electrical systems. Electrical fires can quickly cause significant damage to a property. The inspections ensure that all components work as intended. The technician also identifies hazardous hot spots to be corrected before catastrophe strikes. Business owners must comply with safety and operational standards, and thermography inspections help them achieve this goal. Conducting these inspections reduces the risk of the company being fined or encountering a legal or liability issue. It also shows that the company remains committed to safety and operational excellence, which can help its reputation. Furthermore, these inspections may lower insurance premiums because they show that the business complies with these standards. Common Uses  Industrial plants often use thermography inspections to monitor machinery and panels and ensure they aren't overheating. Commercial buildings benefit from these inspections because they confirm all electrical systems are performing optimally.  On top of that, homeowners may request a thermography inspection to ensure no electrical shorts could harm their families or properties. Utility companies also use this technology to monitor their power lines and transformers. Contact a licensed electrician today to schedule a tomography inspection. The technician reviews the system's layout to determine which parts need to be inspected. Then, when the system is operating, they use a specialized camera to scan the electrical panel circuits and other equipment. The thermal images captured by this camera are analyzed to identify hot spots and heat distribution issues. Upon completion of this review, the technician alerts the owner to any potential problems so they can be rectified and the electrical system can be safe again. Read More: Business Advice: Stepping Stones For A Startup Owner 4 Ideas for Gifting Presents That Support Small Businesses

READ MOREDetails
Slide film

Top Ways Why It’s Important To Convert Your Film To Digital

There are many reasons why it's important to convert your film to digital. These benefits include saving time, improving image quality, and preserving your memories. Slide Film Lasts Forever If you are looking for a way to preserve your photos, you may want to consider preserving your old slides. Unlike negative film, which needs to be printed differently, slide film is stored forever and can be viewed for many years without loss of color or contrast. Most slide film is daylight balanced and provides excellent grain. Color slide film is typically found in a 50 to 400 ISO range. It can be developed at home or in a lab. The E-6 process is also available for the color film but is more sensitive to temperature than the B&W processes. The color of a slide is determined by the film type you choose and will depend on the sun's position and the amount of light in the room. A bright day will yield the best results, but you can use unexposed film with decent results. Slides can be scanned straight, or they can be cross-processed. However, cross-processing can produce a variety of odd colors. Some people use Instagram filters, which are created by cross-processing. To get the most out of your slides, it is important to understand how to clean them. This is the first step towards preserving them. You can buy slide film cleaner to apply to the entire slide. Once you've cleaned the slide, let it air dry. One common problem with expired slides is that they can become stained with dust and debris. Mold can grow on them, as well. These can lead to a number of problems, including uneven grain, spotting, and streaking. You can store the slide in a dark closet, but a better option is to place it in a box with a lid. In this way, you'll be able to protect the slide from moisture. When it comes to storing slides, a lot depends on how long you intend to keep them. If you plan on displaying them, it is recommended to clean them after you take them out of the box. If you're planning on scanning your slides, you'll need to have a scanner that can handle the image. The more pixels, the larger the print can be. Preserves Memories If you are in need of a quick and easy way to preserve memories then the best bet is to transfer film to digital media. A digital video or file will allow you to watch your video or picture whenever you like. It is also a safe way to store and share your digitized memories. You can also convert old films or videos to DVDs for a safer and easier way to access your memories. The first step in the process is to consider where you have stored your videos or pictures. Old media can degrade over time, making it difficult to retrieve and play back your favorite memories. However, digital media is more durable, allowing you to safely store and preserve your precious memories. In addition, a digital copy of your old memory is easier to share with others, and it is more likely to remain intact for future generations to enjoy. Digital files can be stored on your computer, hard drive, or in the cloud. Using a flash drive or USB device is a great way to transfer your digitized memories from your hard drive to someone else's. As you can see, preserving your old home movies is an important part of preserving your memories. Converting your films to DVD or digital media allows you to easily share and view your memories, and to have them for years to come. By using a professional media conversion service, you can ensure that your memories are properly preserved. While it is true that converting your films to digital media is not the easiest task, it is not the most complicated either. In fact, it is quite simple to do. Just be sure to follow these simple steps to ensure that you make the most of your old photos and video. The biggest benefit of digital conversion is that you can now safely share your memories with anyone you choose, anytime you want. In addition, digital files can be shared over the internet, which makes it possible to share your favorite videos or pictures with friends and family. Improves Image Quality The film-to-digital transfer is no longer a novelty. Its many advantages include reduced storage costs, the ability to view images in their original form, and a plethora of viewing options. However, it still requires a light source and exposure in a camera. Luckily, there is a plethora of companies offering the film to digital conversion services. Although there is no single best way to go about the process, a bit of careful thought will ensure a successful and memorable transfer. A little research will also ensure a hassle-free experience. This is particularly true if you are converting an existing home theater system. You might even be able to enjoy your favorite movie on the cheap. For instance, a quality 8mm film to digital transfer is around $5 per foot of film. In addition, you may be able to save a bundle by opting to convert it to a DVD. Alternatively, you can have your favorite films and television shows transferred to Blu-ray Discs, which are available for less than a hundred bucks. One of the most difficult parts of the film to digital transformation is deciding which software to use. Fortunately, there are a number of companies that offer the most up-to-date technology, and the most competitive prices. Most of them offer a money-back guarantee and are available in a wide variety of formats. Choosing the best provider will ensure a smooth transition from old to new-school cinematic experiences. From there, you can decide whether or not you want to stick with one medium or move on to the next. Read Also: A Digital Asset Management Solution Overview Saves Time If you want to preserve your family's cherished memories, consider converting film to digital. There are several ways to accomplish this, and the process doesn't require much of your time. In fact, you can convert your film into DVDs or files on your computer, and you can even send them via email or through the cloud. You don't have to buy special storage for your movies, and you can share them with your friends and family members. Unlike digital formats, film and VHS tapes aren't going to last forever. They degrade by up to 20% every 10 to 25 years. This means that if you don't want to lose your old footage, you need to start transferring your films to digital files as soon as possible. If you've been storing your films on an old reel, you may need to invest in a converter box. The best ones will be able to accommodate various formats, including 16mm, Super 8, and 35mm. When you're ready to begin, you'll need to connect your device to a PC or Mac. Once the conversion is complete, you'll be able to store your films on your computer or flash drive. It's important to keep in mind that your film can also collect dirt, fingerprints, and other elements. So, you need to clean it out before converting it. Also, make sure you back up your files on an external hard drive or a cloud service. Taking the time to transfer your films to digital files can help ensure your favorite memories are protected and will stay that way. It can also save you a lot of space in your home. Depending on your budget and the type of digital format you choose, you can have your video converted to a DVD or stored on a hard drive. If you're unsure about whether or not your video will work, you can hire a professional to convert your movie for you. Some companies even offer a free conversion kit, which can be a great option if you don't have the money to spend on conversion. Converting your film to digital can be a fun and nostalgic experience. But, it isn't as simple as it sounds. Before you start, you'll need to scan the negatives. Read Also: Top 5 Electronics Gadgets To Buy From Amazon US EaseUS Data Recovery Wizard Free, The Best Free Software For Data Recovery

READ MOREDetails
Server Hosting

Everything You Need to Know About Dedicated Server Hosting

Are you tired of sharing the same server with other websites? The number of visitors to your website is growing, and you fear that your website will slow down. Of course, you need more storage space as your website needs are outgrowing the present shared hosting plan. It’s time that you have thought about subscribing to dedicated server hosting. With a dedicated hosting plan, you can have entire server space for your eCommerce store or website and applications - it is dedicated to you exclusively.     You don’t have to share your server and its resources with others. Instead, it allows your business to have an optimal workload and be in complete control of it. With several dedicated server hosting providers online, you can find a suitable one with the best plans for both managed and self-managed servers. Upgrading from shared hosting to dedicated server hosting offers ultimate experience, reliability, scalability, security, and high performance.  What Is Dedicated Server Hosting? When you hire a physical server for your website to use to itself, you call it dedicated hosting. Other than not having to share the space with other websites, you don’t share the RAM, bandwidth, and disk space with others. You can optimize the server depending on your business needs. By choosing the best hosting provider, you can have the ultimate dedicated server power, which can deal with the heaviest workloads. They can also support you with advanced hardware and protection against malware for guaranteed performance.  With dedicated hosting, you can choose any server management level, like managed, managed-pro, and self-managed. Through managed and managed-pro servers, the service provider takes care of the application installation, upgrades, backups, email configurations, patch management, and technical support. As with managed pro servers, you get additional services related to the customization of database software and installation of anti-malware tools.  By opting for unmanaged hosting, you are provided only the initial software setup, and the rest of the things are managed by you based on your requirements.    Some Benefits Of Choosing A Dedicated Server Plan Your business is developing and your website receiving more and more organic traffic. right? This is the right time to upgrade your hosting plan to a dedicated server for completer access to system resources and benefits. Some prominent benefits include: Overview: High speedInstall anything you wantHave advanced securityQuick scalability 1. High speed With a single-tenant infrastructure, your website will experience high speed. There are no other websites to slow down your website when there are traffic spikes. You also get to benefit from some hosting providers offering the fastest storage using SAS technology that spins the disk at 15000rpm. It helps load web pages ten times faster than before.  Your website’s performance will affect when traffic spikes and if you fail to use an appropriate hosting service. With a dedicated server, you can easily deal with sudden traffic spikes and avoid site downtime and revenue loss.  2. Install anything you want With complete root-level access, you are permitted to install any plug-ins, library, applications, and server components. Thus you can change the hardware and software configurations by adding more storage space, processing power, and bandwidth and customize the server to suit your website requirements.  3. Have advanced security If you want customers to come again to your website, you need to ensure that your website is secure. Opting for a dedicated hosting service, you get to have advanced security. Most hosting service companies offer Distributed Denial of Services (DDoS) protection, which safeguards your online store or website from downtime.   4. Quick scalability A dedicated server allows you to shift to a larger server space, as well as a smaller space, seamlessly without moving files and reconfiguring applications.  To conclude, if your business profits from shifting to a dedicated server, you should consider it. Additionals: SEO Website Design Tips for Small Businesses7 Advantages of Using Website Design TemplatesThe Beginners Guide To Dealing With Website DowntimeHow do you choose an SEO-friendly theme for your website?

READ MOREDetails