Positive And Negative Effects Of Portobello Mushrooms: Tasty Treat Or Health Hazard?

Published on: 19 October 2023 Last Updated on: 04 September 2024
negative effects of portobello mushrooms-

Although mushrooms have been used in cooking and customs for over a millennia, their popularity has increased recently. Previously unfashionable and difficult to market, portobello mushrooms are now in high demand all across the world.

These big, meaty mushrooms taste fantastic when grilled, stuffed, or used as a meat substitute in burgers and sandwiches. They also have a delightfully rich flavor.

But do portobello mushrooms have any health benefits over other foods? What are the negative effects of portobello mushrooms? Here we will talk about different methods to incorporate portobello mushrooms into your diet and their positive and negative aspects.

What Are Portobello Mushrooms?

What Are Portobello Mushrooms
Image Source: tastingtable.com

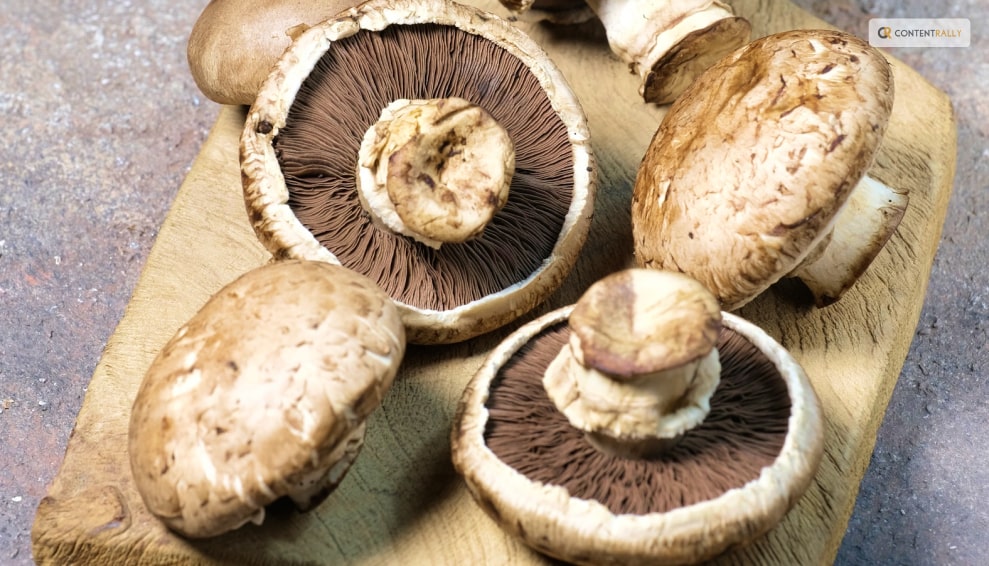
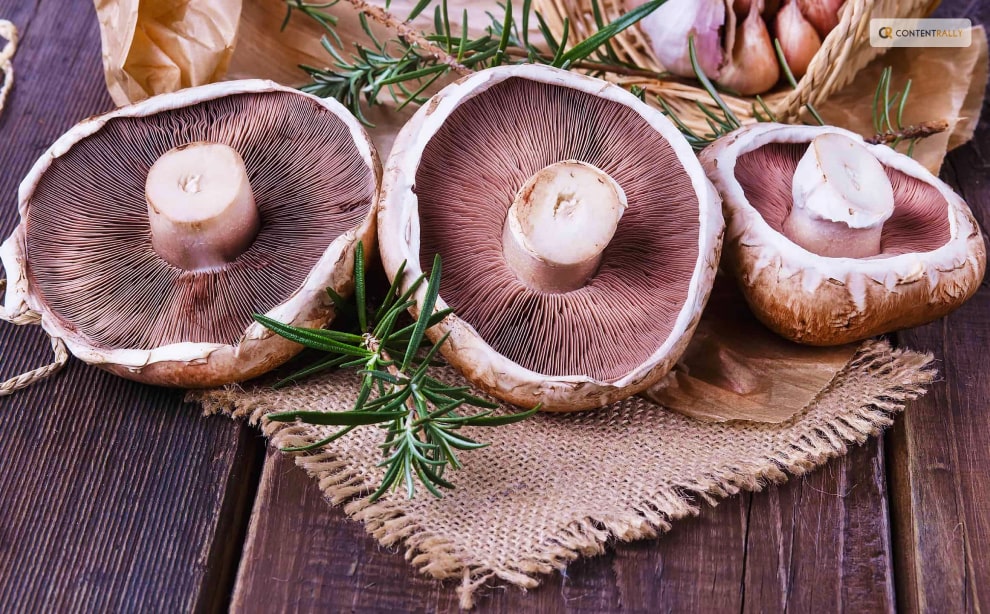
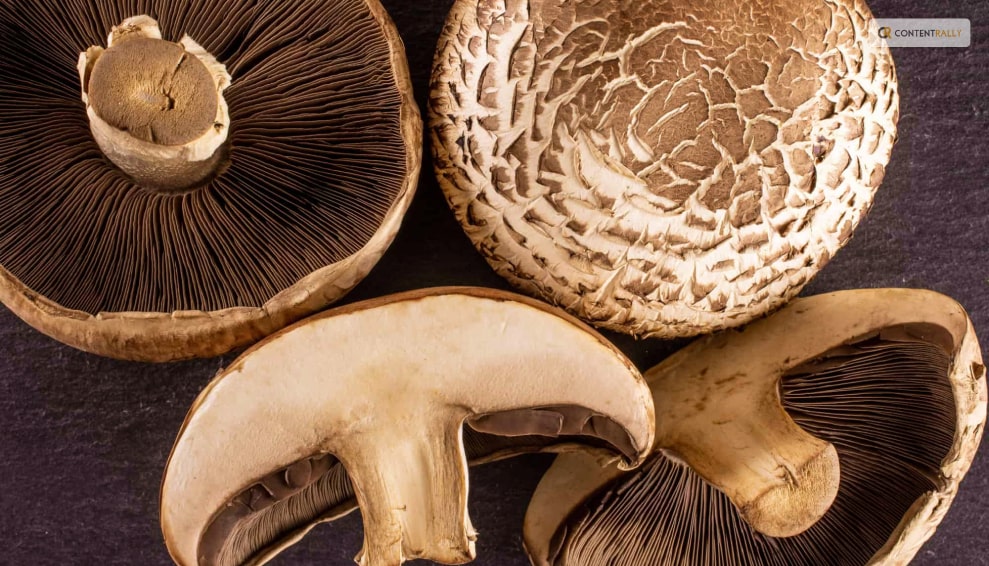
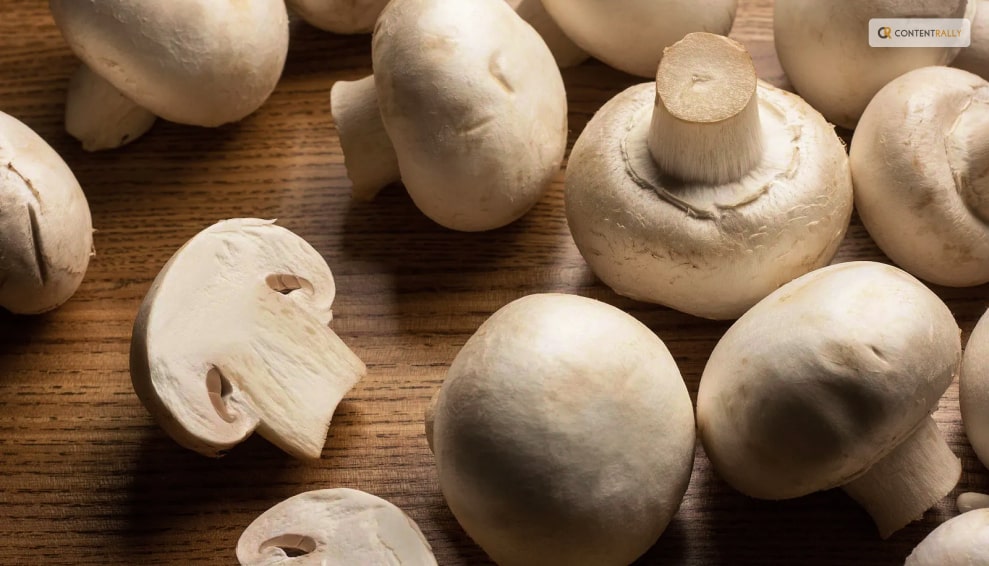
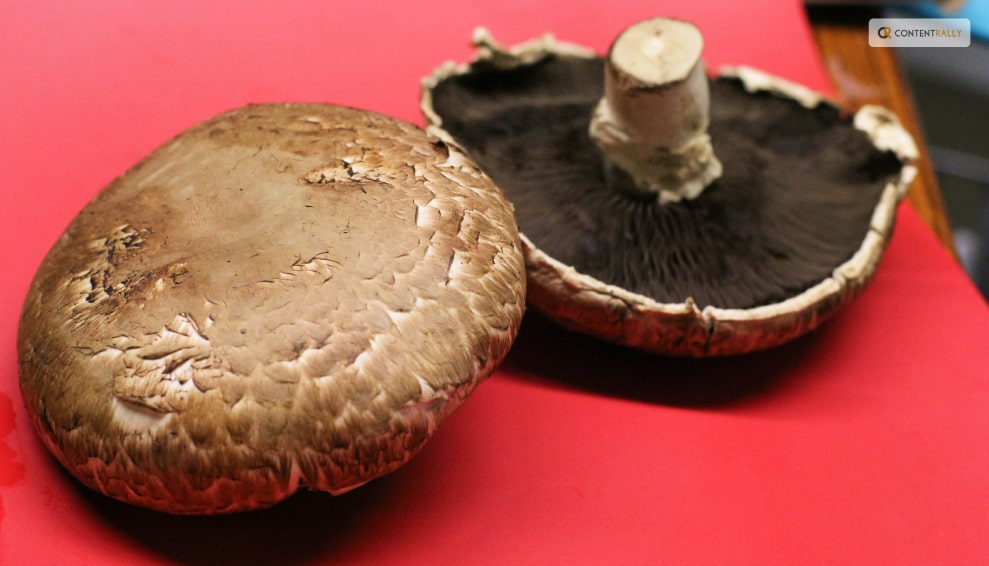
The delicious Agaricus bisporus fungus, which also produces cremini and button mushrooms, is the source of these large mushrooms. Actually, despite being in various stages of development, all of these mushrooms are the same. The biggest and darkest of the three mushrooms, portobellos are the most mature. They can occasionally reach a width of around 6 inches and have a deep brown color.

Large-scale portobello mushroom cultivation is famous all over the world. These mushrooms, however, are from the meadows of Eurasia and North America in the wild.

They have a less spongy texture than other mushrooms. These mushrooms have a meatier texture which makes them a good substitute in vegan and vegetarian meals.

Portobello mushrooms are generally thought to be a fantastic source of important nutrients that are good for your body. It is believed that portobello mushrooms are rich in beneficial plant-derived nutrients like B vitamins, selenium, potassium, copper, and selenium. If they are exposed to UV radiation while developing, they can also be a rich source of vitamin D.

Mushrooms were initially not acceptable to the general public and to persuade people to add them to their shopping baskets- voluntarily. In order to make that happen they were given the rather glitzy-sounding name Portabella in the 1980s.

Today, 90% of all mushrooms produced in the USA are portobello mushrooms. They are also a common addition to recipes by professional chefs at restaurants and for recipes cooked at home.

Next time you see these delectable mushrooms you’re shopping and they’re labeled portabella rather than portobello, don’t worry—they’re the same!

Many people think that mushrooms, in general, offer a number of health advantages. The same is true of portobello mushrooms, which are a rich source of protein, fiber, and important vitamins and minerals.

However, it is important to remember that there has been little research on the health advantages of portobello mushrooms. It cannot be suggested for consumption without necessary caution.  

Benefits Of Portobello Mushrooms

Benefits Of Portobello Mushrooms  
Image Source: a-z-animals.com

Here are three positive health benefits of having portobello mushrooms based on popular research:

  1. Portobello mushrooms are an excellent addition to any diet because they lower fat and calories, like all mushrooms. Portobello mushrooms have a low calorie and fat content of 22 per 100 grams. They also contain 2.11 and 1.3 grams of protein and fiber.
  1. High concentrations of B vitamins riboflavin, niacin, and pantothenic acid enrich portobello mushrooms. They are essential for many bodily functions, like energy production and the metabolism of macronutrients.
  1. According to research, portobello mushrooms are rich in potassium, which is essential for maintaining muscle health and strength. 128g of cooked portobello mushrooms contain 440mg of potassium. It is roughly 9% of the daily adult intake.

Negative Effects Of Portobello Mushrooms

Negative Effects Of Portobello Mushrooms
Image Source: cdn.britannica.com

Like any meal, portobello mushrooms may not be suitable for everyone. The following are a few possible drawbacks of portobello mushrooms:

Allergic Reactions

Portobellos and other mushrooms may cause an allergic reaction in certain people. The degree of allergic reactions can vary. It can range from minor symptoms like irritation and hives to more serious ones like breathing difficulties or anaphylaxis. Consumption of portobello mushrooms can cause a severe reaction if you have a mushroom allergy.

Digestive Problems

Portobellos and other mushrooms contain chitin, a form of carbohydrate. Humans find chitin difficult to digest, and for some people, it can be uncomfortable. If ingested in large numbers or not cooked well, mushrooms can cause symptoms like bloating, gas, or upset stomach.

Risks Of Contamination

If you don’t handle, preserve, and prepare portobello mushrooms correctly, they may become contaminated with bacteria, molds, and other hazardous germs. In this regard, they are much like other mushrooms. Food poisoning from eating contaminated mushrooms can cause symptoms like nausea, vomiting, diarrhea, and abdominal pain.

Medication Interactions

Portobello mushrooms, like several other foods, may have an effect on how some medicines work. For instance, they might impact how some medications and anticoagulants work. To be certain. There are no reported interactions. However, you can talk to a healthcare provider or pharmacist if you are taking drugs.

How To Cook Portobello Mushrooms?

How To Cook Portobello Mushrooms?
Image Source: zardyplants.com

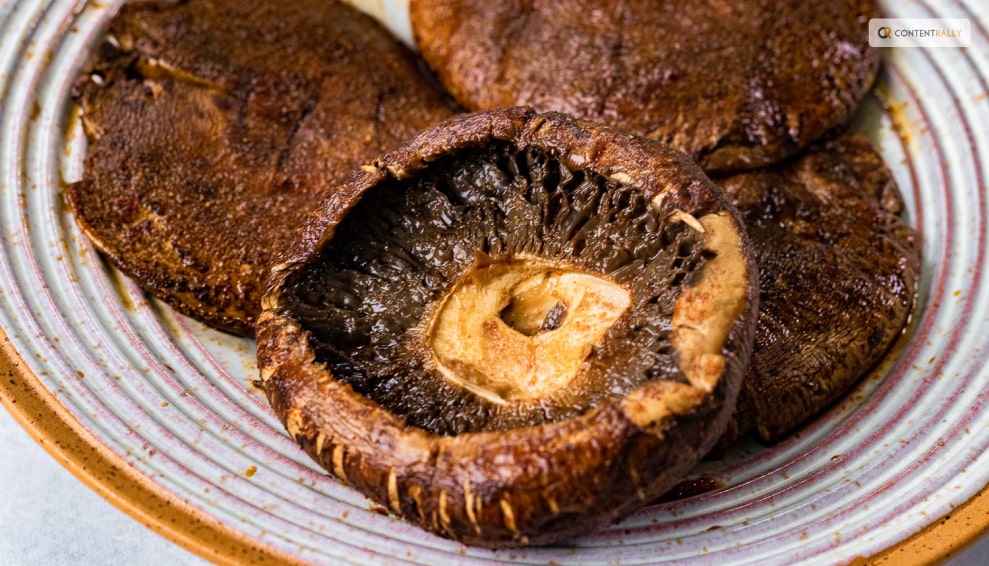
Portobello mushrooms are ideal veggies in a variety of ways, including grilled, stuffed, and fried. However, you can also serve them on their own. They are very popular in Italian recipes like spaghetti and even as toppings on pizza.

In a variety of vegetarian and vegan meals, including burgers and steaks, portobello mushrooms’ are an ideal meat substitute. Here are a few of our favorite methods for preparing delicious portobello mushrooms:

  1. You may substitute a grilled portobello mushroom for a traditional meat burger or eat it alone as a plant-based steak.
  1. To prepare portobello mushrooms for pasta dishes and sauces, put them in a skillet and cook briefly until fork-tender.
  1. Portobello mushroom stuffing is an all-time favorite! Load a generous amount of cheese into the mushroom’s center before baking it in an oven until it turns golden.
  1. Slice up a few of these chewy deliciousnesses. Put them on toast or toss them over for a savory stir fry!

How To Choose The Right Portobello Mushrooms?

How To Choose The Right Portobello Mushrooms  
Image Source: boomieskitchen.com

Pick fresh, firm portobello mushrooms when you’re shopping. Avoid portobello mushrooms that have bruises, or that have soft patches, as they are not suitable for consumption. You must consume fresh mushrooms right away because they are bad for your health when old.

Fresh portobello mushrooms are best when in a paper bag or their original container in the refrigerator. These fresh mushrooms should be kept in an airtight container and kept at room temperature. It will prevent the formation of dangerous bacteria that could cause botulism.

To help avoid cross-contamination, wash your hands both before and after handling portobello mushrooms. Before preparing and eating, immediately wash mushrooms under running water. Other than water, there is nothing else you need to use to clean your mushrooms. Never pre-wash mushrooms since the dampness will hasten their deterioration.

Wrapping Up

So it appears that portobello mushrooms may be more than we originally thought! There are so many good reasons to include portobello mushrooms in your diet. The possible health advantages and their distinctive texture and flavor make them super palatable.

Remember that the negative consequences are not all-encompassing and might not be relevant for everyone. When included in a balanced diet, portobello mushrooms are a generally healthy and safe food option. However, it is advised to speak with a healthcare provider or allergist for specialized guidance if you have known allergies.

Learn More About:

Content Rally wrapped around an online publication where you can publish your own intellectuals. It is a publishing platform designed to make great stories by content creators. This is your era, your place to be online. So come forward share your views, thoughts and ideas via Content Rally.

View all posts

Leave a Reply

Your email address will not be published. Required fields are marked *

Related

slider-img

How to Harvest Potatoes: A Complete Guide from Planting to Storage 

If there is something that I have learned in life, it is about gardening. Well, almost everything if not all. And if there is one thing that took me some time to master, it was knowing how to harvest potatoes at home!  Potatoes are one of the most versatile and popular vegetables in the world. They can be cooked in many different ways, such as boiled, baked, fried, mashed, or roasted. Moreover, they are also rich in carbohydrates, fiber, vitamin C, potassium, and antioxidants. But how do you grow and harvest your own potatoes at home? You see, potatoes are not like cilantro or other plants. These are tubers.  In this article, I will show you everything you need to know about how to harvest potatoes, from planting to storage. So, if that is something that you are interested in knowing, then I have you covered! Keep on reading this blog till the end to learn more...  How to Plant Potato Seeds or Tubers?  The first step in how to harvest potatoes is to plant them. You can start with either potato seeds or tubers. Potato seeds are small, round, and black, and they are usually sold in packets. Potato tubers are the actual potatoes that you eat, and they have eyes or buds that can sprout new plants. You can buy certified seed potatoes from a nursery or garden center, or use organic potatoes from the grocery store.  Here are some if the steps that you must take to plant them:  Planting Potato Seeds  To plant potato seeds, you need to sow them indoors in pots or trays filled with moist potting soil. Place them in a sunny spot and keep the soil moist but not soggy. The seeds will germinate in about two weeks and produce small green shoots. When the shoots are about 3 inches tall, you can transplant them outdoors in your garden or in containers.  Planting Potato Tubers  To plant potato tubers, you need to cut them into pieces, each with at least one eye. You can do this a few days before planting to let the cut surfaces heal and prevent rotting. Alternatively, you can plant whole small potatoes with several eyes. To prepare the soil, you need to loosen it and add some organic matter, such as compost or manure.   You also need to make sure the soil is well-drained and slightly acidic, with a pH of 5.0 to 6.0. You can use a soil test kit to check the pH level and adjust it with lime or sulfur if needed.  Planting Potato Pieces  To plant the potato pieces, you need to dig a trench about 4 inches deep and 12 inches wide. Place the pieces about 12 inches apart, with the eyes facing up. Cover them with 3 inches of soil and water well. As the plants grow, you need to hill up the soil around them to cover the lower stems and prevent the tubers from being exposed to sunlight, which can turn them green and bitter. You can also mulch the soil with straw, leaves, or grass clippings to retain moisture and suppress weeds.  How to Care for Your Potato Plants?  The second step in how to harvest potatoes is to care for your potato plants. You need to water them regularly, especially during dry spells, to keep the soil moist but not waterlogged. You also need to fertilize them every two weeks with a balanced organic fertilizer, such as fish emulsion or seaweed extract. Also, you can add some wood ash or bone meal to provide extra potassium and phosphorus, which are essential for tuber formation.  You also need to protect your potato plants from pests and diseases, which can reduce your yield and quality. Some of the common potato pests are:  Colorado potato beetles, which are yellow and black striped insects that feed on the leaves and can defoliate the plants. You can handpick them and drop them in a bucket of soapy water, or use an organic insecticide, such as neem oil or pyrethrin.  Potato leafhoppers, which are small, green, winged insects that suck the sap from the leaves and cause them to curl and yellow. You can spray them with a strong jet of water, or use an organic insecticide, such as garlic or hot pepper spray.  Wireworms, which are thin, brown, worm-like larvae that bore into the tubers and cause holes and tunnels. You can trap them with pieces of carrot or potato buried in the soil, or use beneficial nematodes, which are microscopic worms that parasitize and kill the wireworms.  Common Potato Diseases  One of the most common reasons why a potato cannot grow or survive is the diseases. If you were wondering what some of these can be and how to deal with them, I have you covered!  Some of the common potato diseases are:  Late Blight: It is a fungal disease that causes brown spots on the leaves and stems, and black or brown lesions on the tubers. It can spread rapidly and destroy the entire crop. You can prevent it by planting resistant varieties, avoiding overhead watering, and removing any infected plants and tubers. You can also use a fungicide, such as copper or sulfur, as a preventive measure.  Scab: This is a bacterial disease that causes rough, corky patches on the tubers. It does not affect the taste or edibility of the potatoes, but it reduces their appearance and storage quality. You can prevent it by planting resistant varieties, maintaining a slightly acidic soil pH, and avoiding excessive nitrogen fertilization.  Potato Virus Y: Lastly, this is a viral disease that causes mosaic patterns, mottling, or yellowing on the leaves, and misshapen or knobby tubers. It can reduce the yield and quality of the potatoes, and it can be transmitted by aphids or infected seed potatoes. You can prevent it by planting certified virus-free seed potatoes, controlling aphids, and removing any infected plants and tubers.  How to Determine When Your Potatoes Are Ready to Harvest?  The third step in how to harvest potatoes is to determine when they are ready to harvest. This depends on the type and variety of potatoes you planted, and the size and maturity you want. There are two main types of potatoes: early and late. Early potatoes are ready to harvest in about 10 to 12 weeks (about 3 months) after planting, and they produce small to medium-sized tubers that are tender and thin-skinned. They are best for boiling, steaming, or roasting.  Late potatoes are ready to harvest in about 15 to 20 weeks (about 4 and a half months) after planting, and they produce large, starchy tubers that are firm and thick-skinned. They are best for baking, mashing, or frying.  Early Harvesting  To harvest early potatoes, you can start digging them up when the plants begin to flower, or when the lower leaves start to yellow. You can use a garden fork or a spade to gently lift the plants and tubers from the soil, or you can use your hands to feel for the tubers under the soil. You can harvest as many or as few potatoes as you need, and leave the rest in the ground until you are ready to use them. You can also harvest some of the young, tender leaves and stems, which are edible and nutritious.  Late Harvesting  To harvest late potatoes, you need to wait until the plants have died back completely, or until the first frost. This allows the tubers to develop a thicker skin, which helps them store better. You can use a garden fork or a spade to dig up the entire row of plants and tubers, or you can use a potato digger, which is a special tool that lifts and separates the tubers from the soil. You need to be careful not to damage or bruise the tubers, as this can cause rotting or spoilage.  How to Dig Up, Cure, and Store Your Potatoes?  The final step in how to harvest potatoes is to dig up, cure, and store your potatoes. This is important to preserve the quality and shelf life of your potatoes, and to prevent them from sprouting, rotting, or shrinking. Here are the steps to follow:  Digging Up  After digging up your potatoes, you need to brush off any excess soil and remove any damaged, diseased, or green tubers. Do not wash your potatoes, as this can remove the protective skin and invite bacteria and fungi. You can wash them just before cooking or eating them.  Curing  You need to cure your potatoes for about two weeks in a cool, dark, and well-ventilated place, such as a basement, garage, or shed. This allows the skin to harden and heal any minor cuts or bruises and enhances the flavor and texture of the potatoes. The ideal temperature for curing is between 50°F and 60°F, and the ideal humidity is between 80% and 90%. You can spread your potatoes in a single layer on a newspaper, cardboard, or wooden crate, and avoid exposing them to light, which can turn them green and bitter.  Storing  You need to store your potatoes in a cool, dark, and dry place, such as a cellar, pantry, or closet. The ideal temperature for storage is between 40°F and 50°F, and the ideal humidity is between 65% and 70%. You can store your potatoes in paper bags, cardboard boxes, mesh bags, or wooden crates, and check them regularly for any signs of sprouting, rotting, or shriveling. You can also store your potatoes in a root cellar, which is an underground or partially underground structure that maintains a constant temperature and humidity. Additionally, you can also store your potatoes in a clamp, which is a mound of straw, hay, or leaves covered with soil, that insulates and protects the potatoes from frost and rodents.  Wrapping It Up!  If you want to know about how to harvest potatoes, I hope that this blog has been of help to you. However, if there are any other queries related to the same, please feel free to let me know. All that you need to do is scroll down till you reach the bottom of the page. Then leave your comments and suggestions in the box below. And I will be there to answer them all for you! Read Also: How to Harvest Lettuce: A Step-by-Step Guide for Fresh and Crispy Salads Everything You Need To Know About Harvesting Basil!

READ MOREDetails
Non-Alcoholic Bitters

5 Things To Consider When Shopping For Non-Alcoholic Bitters

Whether you’re a passionate mocktail mixer, an expert bartender, or just looking to add some flavor to your favorite dishes, non-alcoholic bitters are the perfect way to add a layer of complexity and depth. Not sure where to start? That’s ok. We’ve put together this comprehensive guide on five things you should consider when shopping for non-alcoholic bitters, including their unique health benefits. Here Are Five Prime Things To Consider When Shopping For Non-Alcoholic Bitters Read on as we show you everything you need to know about buying the best non-alcoholic bitters around. 1 - Don’t Mistake Alcoholic Bitters For Non-Alcoholic We'll start with the most obvious point. It's essential to make sure you’re buying non-alcoholic bitters, like the ones that can be found at All The Bitter. Most bitters look alike when shopping at the grocery store, so sometimes it’s hard to tell the difference between the two. Shopping online for non-alcoholic bitters is probably your best bet because these niche stores have exactly what you’re looking for. 2 - Organic and Wild-Foraged Ingredients Make sure that the ingredients in your non-alcoholic bitters are organic and wild-foraged. This means that they haven’t been exposed to harsh chemicals or synthetic additives, so you can be confident that they are as natural as possible. This also ensures that your drink is free from artificial flavors and colors, which can take away from the authentic taste of a mocktail. Mom-and-pop stores do better with this versus big-name brands that can be found at your local grocery store. Let’s face it, handmade is always better than processed. 3 - Beneficial Botanicals And Health Benefits Finally, consider what beneficial botanicals and health benefits each non-alcoholic bitter has included in its recipe. Such as the following: gentian root (helps digestion) dandelion root (a natural diuretic) Burdock root (anti-inflammatory properties) milk thistle seed (liver detoxifier) holy basil (antioxidant effects) orange peel (to aid digestion) ginger root (anti-nausea effects) yellow dock root (rich in iron)I Not only can these ingredients help support well-being, but they also bring an added depth of flavor and complexity to any mocktail – so choose wisely. 4 - Vegan If you follow a vegan lifestyle, you will want to check if the non-alcoholic bitters have been made with vegan ingredients, as some may contain animal products such as honey or beeswax. Even if you’re not vegan, it’s always good to keep vegan-friendly bitters on hand for guests who may follow that lifestyle. 5 - Gluten-Free If you follow a gluten-free diet, check if the bitters are gluten-free before adding them to your cart. While many brands use gluten in their recipes, there are some options available that don't contain gluten at all, so be sure to thoroughly check the label before making a purchase. Consider These Tips When Shopping For Non-Alcoholic Bitters As more people switch from alcoholic drinks to mocktails, there is an ever-growing demand for good quality non-alcoholic bitters. But not all products are created equal. So when shopping for them, make sure you keep these five things in mind. This way, you can guarantee yourself an enjoyable mocktail experience every time. With so many great options available, it shouldn't be too hard to find something perfect for you – happy sipping, and thanks for reading. Read Also: How To Quit Alcohol: Consider Non-Alcoholic Drinks Tips to Follow When Ordering Alcohol Online Delta 8 Vs Delta 9: What’s The Difference?

READ MOREDetails
Sourcing Fresh Seafood Online

The Ultimate Guide To Sourcing Fresh Seafood Online

Today’s fast-paced world has made convenience and quality truly paramount, even when it comes to sourcing the freshest seafood. Fortunately, the rise of seafood delivery services has made it easier to enjoy the ocean's bounty from the comfort of your home. In this ultimate guide, we'll navigate the depths of seafood delivery, helping you make informed choices and enjoy the finest catches from around the world. Discovering The World Of Seafood Delivery Seafood delivery is your gateway to an ocean of culinary delights, whether you're a seafood connoisseur or a newcomer to the seafood scene. With a few clicks, you can access a diverse selection of fresh seafood, from succulent shrimp to mouthwatering lobster, delivered straight to your doorstep. Selecting The Right Seafood Delivery Service When embarking on your seafood delivery journey, choosing a reputable service prioritizes quality, sustainability, and customer satisfaction is crucial. Consider these factors when selecting your seafood provider: Sustainability - Look for services supporting sustainable fishing practices to protect our oceans and ensure a future seafood supply. Variety - Opt for a provider with a wide range of seafood options to satisfy your culinary cravings. Quality assurance - Check if the service offers guarantees on freshness, and find out about their sourcing methods. Customer reviews - Reading reviews and testimonials can provide valuable insights into the experiences of other seafood enthusiasts. Exploring Seafood Selections One of the perks of seafood delivery is access to a vast selection of seafood varieties. From classic choices like salmon and tuna to more exotic options like sea bass and scallops, you can explore a world of flavors without leaving your kitchen. Understanding Seafood Labels And Descriptions To make informed choices, it's essential to understand the labels and descriptions provided by your seafood delivery service. Key terms to look out for include: Wild-caught - Indicates that the seafood was harvested from its natural habitat Sustainably sourced - A sign that the seafood was procured in a way that ensures long-term ecological balance Organic - Denotes that the seafood was raised without synthetic additives or antibiotics Fresh vs. frozen - Consider whether you want fresh seafood or if frozen options are suitable for your needs Placing Your Order Once you've selected your desired seafood items, it's time to place your order. Most seafood delivery services offer user-friendly websites or apps, making the ordering process quick and convenient. Double-check your order details, address, and preferred delivery date to ensure a seamless experience. Delivery And Handling When your seafood delivery arrives, handle it with care. Follow these steps to maintain the freshness and quality of your seafood: Inspecting the packaging - Ensure that the packaging is intact and well-chilled. Storage - Store your seafood in the refrigerator or freezer according to the provider's instructions. Cooking freshness - Plan your meals to use fresh seafood within a few days of delivery for optimal taste and texture. Culinary Adventures With Seafood With your fresh seafood, it's time to embark on culinary adventures. Whether you're grilling, baking, sautéing or steaming, there are countless recipes to explore. From classic seafood paella to spicy shrimp scampi, the possibilities are endless. The Seafood Delivery Experience In your seafood delivery journey, you're engaging in a culinary experience that brings the ocean to your plate. As you explore different flavors and cooking techniques, you'll develop a deeper appreciation for the world of seafood. Seafood delivery services offer a gateway to the bountiful world of fresh seafood. By selecting the right provider, understanding seafood labels, and handling your delivery with care, you can enjoy high-quality seafood dishes in the comfort of your own home. Read Also: How Restaurant Space Landlords Can Be Successful 6 Tips to Maximize Refrigerator Use in Your Restaurant

READ MOREDetails