The Utility of OCR Tools (Optical Character Recognition) in Soda PDF

Published on: 19 April 2018 Last Updated on: 06 October 2020
OCR Tools

OCR (Optical Character Recognition) is a technique that is used to convert the text written on the images of scanned documents, subtitles in a TV broadcast, printed text, invoices, passports, etc. Soda PDF us this technique to helps its users edit the contents written in an image of anything.

OCR Module Tools in Soda PDF :

As we click on the OCR (Optical Character Recognition) module in the soda pdf document, a bunch of tools available in this section will appear on the screen that can help the user in editing the text present in the image.

OCR (Optical Character Recognition) does only one thing at the start, and that is the scanning of the image. After scanning it head towards the editing of the image text portion. All the tools given in this module determine how the OCR engine is going to interact with your document.

Auto and Manual Feature :

The auto and manual feature are very useful for the users of Soda PDF. Once these options select any image in the document, that image lights up and become accessible. This feature works only with the individual image at one time.

The selection of the auto option, helps us see that it will scan the image right away and makes the image editable without making any changes in the rest of the document. The manual feature will also do the same thing as the auto feature do, but the only thing you must decide is the part of the image that OCR will have to scan for you and what parts it ignores.

Page Range and Entire Document :

The page range and the entire document feature will scan the entire pages of your document. It will then create for you a new PDF of the recognized portions of your PDF so that your original document stays intact.

With the page range feature, you can pick any page range and scan it, or you can simply click on the option of the entire document to make a brand-new PDF for you of the whole document right away.

Batch :

Using the Batch feature, you can apply OCR to multiple PDF’s, and when they open up in Soda PDF, you can edit them right away.

From External Image :

You can also create a PDF directly from an external image ready to be edited using the From External Image to browse your computer and chose one.

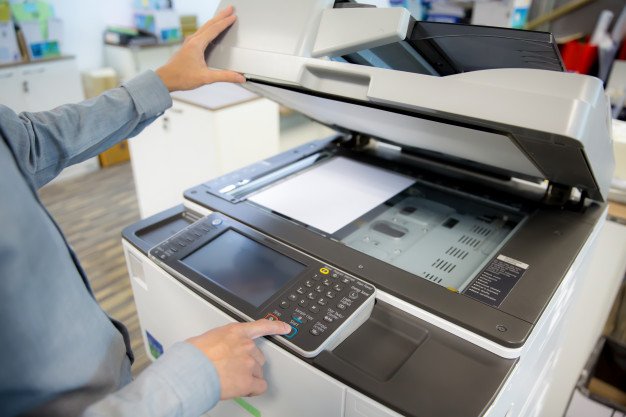
Scan and Recognize :

If you want to use your scanner, you can click on Scan and Recognize option of OCR in your Soda PDF document. This option will create a PDF out of the scanned page. It makes it ready to use immediately and save some of your time.

what OCR (Optical Character Recognition) in Soda PDF does is that it not only helps you edit the entire image but also makes the text in that image editable for you. This is a very simple, yet a useful application of Soda PDF.

Read Also :

Content Rally wrapped around an online publication where you can publish your own intellectuals. It is a publishing platform designed to make great stories by content creators. This is your era, your place to be online. So come forward share your views, thoughts and ideas via Content Rally.

View all posts

Leave a Reply

Your email address will not be published. Required fields are marked *

Related

slider-img

How to Maintain WordPress Website for Free?

WordPress is Awesome! Creating a WordPress website and maintaining a website are two different things. It is very important to keep your internet presence up to date and in good condition. However, maintaining WordPress website can be a tedious task. It is important to be updated with the latest version of WordPress so that it remains safe and secure. There are so many things that can affect your website. It can be anything from losing your website data to hacking your website due to security loopholes. Neglecting a basic to maintain WordPress website regularly can have many consequences like: -Increasing website load time -Bad User Experience - Declining Search engine Rankings Regular maintenance of a website is necessary in order to generate business from it. In this post, we will discuss upon few tips for maintaining WordPress website without any technical assistance. WordPress Updates Keeping your WordPress website updated is really important. Make sure you take a full backup of your site when you update WordPress website. A Newer version of the update includes new features, code updates, security fixes and many more thing. In fact, failure to update is one of the most common reasons why WordPress sites get hacked. Read More:  The 10 WordPress Plugins Every Sucessful Blogger Uses 4 WordPress Plugins To Make Your Blog More Powerful Optimize Website for Better Speed Website loading time is very important. If your website takes too much time to load user will leave the website very quickly. From an SEO perspective Google loves fast loading sites. High-Resolution images can slow down your website loading time. You can use plugins like WP Smash to boost your site loading time by optimizing your images. Similarly, the database can be optimized with plugins like WP clean up. Secure Your WordPress Website Most of the new businesses and bloggers don't give much importance to WordPress Website security. To maintain WordPress Website , you must keep it secure to prevent any hacking attacks. Plugins like ButtleProof security and Limit Login Attempt can help you to keep your site safe. Limit login attempts plugin will limit the login attempt and block the IP of the computer system from which password hacking tries comes. Manage User Account Effectively WordPress website can have multiple users managing the site. You need to make sure other accounts and their passwords are secure enough. Due to the carelessness of the users sometimes it becomes vulnerable to attacks. Make sure your users don’t use “admin” username for your WP account. Try unique username with the lengthy and difficult to break the password. You can also change the URL of your admin panel or login page. Remove Unused Plugins WordPress plugins are a great way to extend website functionality. Using many plugins can affect your website’s performance & security. You only need to keep the plugins that are used on the website and remove the unnecessary plugins. Update Your Portfolio Your website is a virtual catalog for your business. It is really important to keep updating the website. The portfolio is one of the most important pages on the website. You might have done amazing work for your client and it is equally important to showcase it to your website visitor in order to attract new leads & business. Conclusion Maintaining a WordPress website isn’t too hard. With a little effort, you can manage your WordPress website. You might not need an expert every time you want to update or manage the site. What’s more important than seeing your website load faster and search ranking rising quickly? It is worth a little effort to maintain your website. Many WordPress Development Services Companies are available to help you with the WordPress website. Read also: Top Torrent Sites For Games Download 7 Reasons Why You Should Be Using A CDN With WordPress WordPress Developer: Job Profile And Key Responsibilities

READ MOREDetails
slider-img

Questions To Ask When Working With A Web Developer

I've been a web developer for 5 years now. There's quite the learning curve with web design, even AFTER school. You have to deal with customers, you have to manage expectations and deadlines, you have to manage your billing and finances, all of which were not included in the code and design classes that I took. This is just the business side of things, as you can probably tell I'm a little taken aback by it all. But then there's the coding aspect of the business. The coding side of things is where I really excel. I love being a web designer. Making websites look and perform great has really turned into a passion of mine. But I've noticed that a lot of developers out there struggle with a lot of aspects of being a professional web designer. Let's face it, a lot of developers produce work that is not up to par. Either they have designs that are super basic and lame, or the websites are not made to meet your goals and help your business. any of these issues could be bad for a new business that will be relying on their website for leads or a professional presence. I've outlined the following questions to help you better understand what you should be looking for when you are going to work with a web development company or freelancer. As a business owner, It is important that you ask these questions before you pay someone for their services. 1. Do you have live examples I can see? I  am amazed at how most people either have a problem they need solved or they have an expectation or design in mind, but they never ask to see examples. Everyone's idea of "great" is different. It's important to see examples of their work and judge if they would be a good fit for you. If there are concerns, asking the developer questions is a good way to address them. 2. Do you have a degree in web development? When? How do you stay up to date This is an important question, and just as important is asking them when they did if they did. There are a few great selves taught web developers out there, who learned from non-traditional means. The most important information that this question will give you is in the third part. Web development is not a static skill set. It changes fast and often, and someone who has incorporated constant learning about their field into their work or life routine will improve your odds of getting some of the best developers. 3. What kind of web development do you focus on? This can mean a ton of things. But, if you explain your needs, like a high converting website, for example, the right developer for you will already have a few live examples to show you. "yea, I can do that" is not the right answer, the process and skill set for focusing on conversions need to be already developed, as well as deployed, tested, and documented. I hope this will help when you're choosing a web design and development professional to work with. This is a great start towards making sure you get the quality of work you desire and need, as well as getting your website and business goals met. Read More:  Best Office Design Trends For 2018 Top 5 Graphic Design Trends For 2017

READ MOREDetails
Custom Banner

How To Design Your Custom Banner That Works

Whether you want to attract new customers or promote an event, a custom banner can be a powerful way to drive your message. But how do you design one that works? The first step is to consider your marketing goal. Once you know what you're trying to achieve, all of your other decisions will fall into place. Here Are Four Prime Steps To Design Your Custom Banner: 1. Colors When designing a custom banner, you want to be sure to choose colors that will help grab your audience's attention. The wrong colors can make your banner look dull, while too many can take away from your message. When it comes to choosing the right colors for your banner, the best approach is to use bright hues that stand out against a neutral background. These can be anything from radiant yellow to fiery red. A contrasting color like this makes your sign more eye-catching and helps potential customers identify it from a distance. It also helps create a visual hierarchy to help your audience better understand what you're advertising. For example, a fast food chain might use a combination of yellow and red for advertising its products because it's easy for people to recognize and remember. It's also a great contrast to the black background of their logo. You should also consider the type of font you'll be using for your custom banner printing. If your banner is intended for a small business, for example, it might be best to stick with plain text that's easy to read from a distance. If your banner is intended for an event, a more detailed font might be a good choice. However, if you're designing a one-time-use banner, it's best to avoid putting too much information on it. This is because people don't have time to read a lot of information at once, so it's important to keep it brief. Generally, you'll want to have a big font for your primary message and smaller text for any additional information, such as a description of an event or a contact number. The next thing you should keep in mind when choosing colors for your custom banner is how far the colors will be from each other. The farther the colors are from each other, the more likely they'll be to confuse people or distract from your main message. For this reason, it's important to choose a background color that compliments your business theme and a font that's easy to read. A quality online banner printing company can provide you with advice and recommendations for the perfect colors and designs for your business. 2. Typefaces Custom banners are one of the most effective advertising mediums for reaching new customers. But it’s important to design them right. This means choosing the best typefaces and keeping them simple enough to be read quickly by people driving by or walking by your store. The most important thing to remember when designing your custom banner is to choose a font that’s easy to read. There are many different font types to choose from, and selecting the right one can make or break your design. There are five main types of typefaces: Serif, Sans-Serif, Script, Condensed, and Italic. Each has a unique personality and can be used for different purposes. Serif typefaces typically feature slight decorative strokes at the ends of letters, which give them a traditional appearance. They’re popular for brands and products that want to create a sophisticated, classy, and trustworthy image. Another important consideration is the typeface’s weight. Font weights range from thin (also called hairline or light) to black, with a lot of different options in between. Using too thick or too thin fonts can make it difficult for people to read your message, and can even confuse them. Using too light or too dark can also have the same effect, so it’s crucial to know which option is most suitable for your needs. The best fonts for a custom banner are those that are easily readable in all sizes. For example, Verdana is a widely used typeface that’s easy to read on smaller devices. Sans-Serif typefaces are generally preferred for large banner signs that will be seen outdoors. These fonts are usually bold, but they can also come in regular and italic styles. They’re often used for titles and call-to-actions, but they can be a bit on the thin side when it comes to body text. If you’re planning on adding a lot of copy to your custom banner, it may be best to use a font like Quattrocento Sans. If you’re looking for a banner that mimics the look of typewriter letters, Veteran Typewriter is a good choice. This font is easy to read and emulates the typewriter letters that are commonly found in magazines. 3. Backgrounds If you want to make sure your banner is eye-catching, the background is a key component. You can choose from a range of options, including illustrations, color overlays, and custom backgrounds. When choosing a background, keep in mind that the size of the image will affect how it looks when printed on your banner. The best type to use is a vector file since these files can be scaled without losing image quality. It's also a good idea to save your design as a flattened file in Photoshop or Illustrator before sending it to a printing company. Another important consideration is glare. If the background of your banner is too bright or dark, it can cause your logos to appear distorted. You can avoid this by using an off-white color for your background, which will absorb light and minimize glare. It's also a good idea to choose a background that complements the main text and logos on your banner. This will ensure that your brand's colors stand out from the rest of the background, and your logos will pop. A background can also help convey a specific message, such as a call to action. For instance, if your business is based at an unremarkable location, a colorful banner could help you draw attention to your building and services. The right banner will communicate your message quickly and clearly. Whether you're promoting a new event or announcing a product launch, it's important to make your banner easy to read from a distance. This means avoiding fonts that are too chunky and contrasting colors and sizes. To design your custom banner, start by selecting a template from Canva's collection. Once you've done this, you can add images and other elements to your design. Before you start adding your elements, take some time to think about your message and what action you want people to take after they see your banner. This will guide the rest of your design and ensure that your message is clear and impactful. You can use Canva's free templates to get started on your design, or you can create a more professional look with a paid account. The site has thousands of images, so you'll be able to find the perfect one for your banner. You can even search for specific graphics if you'd like to incorporate a specific piece of artwork into your design. 4. Images If you're designing a custom banner for your business, it's important to use images that will grab the attention of viewers. The right images will help your message get across, entice people to visit your site and encourage them to take action. When designing a banner, you can either use a pre-made template or create your own from scratch. There are several factors that go into designing a banner, including color, text size and placement, and image quality. One of the best ways to make your banner stand out is to use contrasting colors. For example, a white background with red or yellow text will draw the eye. This will also make your message pop out in a crowd of competitors' ads. You can also add photos to your banner from the Web by using an online image editor. Kapwing, for example, is a collaborative image and video editing platform that allows you to use copyright-free content from huge image libraries like Unsplash and Pexels. Once you've selected the photo you want to use for your custom banner, resize it to fit your dimensions. You can do this by using the "Resize" button on the toolbar or by manually inputting the appropriate picture sizes. After you've resized the image, it's time to decide on a background color. You can choose a color that fits your brand's colors or another neutral shade that complements your design. You can change the color of your background in several places, including the Banner Styling menu and in your template's guide. When deciding on a background color, be sure to consider the opacity of your banner's text and graphics. A light background will make your text and graphics harder to read and will be less noticeable, while a dark background can help the elements of your banner stand out from the rest of the page. Once you've finished selecting your background color, it's time to add text to your banner. You can add text with the Text tool (the big letter "T" in the toolbar), or by clicking on the banner to access its text editing bar. This way, you can add any text to your custom banner and modify its size, fonts, and colors. Read Also: How To Make Sure You Get The Best Service From Your IT Supplier 5 Content Ideas to Use with Instagram Influencers 5 Benefits of Digitalization in Marketing

READ MOREDetails