5 Myths about Roofing Services to Avoid

Published on: 16 November 2016 Last Updated on: 11 September 2024

Whether you are looking for a comprehensive roof repair service for an old building or a new roof installation, employing a professional commercial & roofing company can help you achieve your investment goals in a cost-effective manner. That being said, due to prevalent misconceptions about roofing services, may commercial property owners overlook the importance of hiring a professional roofer that not only enhance the life of the roof but also adds value to overall property investment. This blog post covers five common myths about commercial roofing companies and their services that commercial property owners must avoid to realize the real benefits of commercial roofing companies.

Myth 1: “Roofing is a one-time investment”

Regular roof maintenance program helps in keeping your roof in shape. It also preserves the roof warranty, as many manufacturers nullify the warranty if they find out that the particular roof lacked proper attention. Additionally, having a proper roof maintenance plan in place helps investors in filing a roof insurance claim.

Roofing services

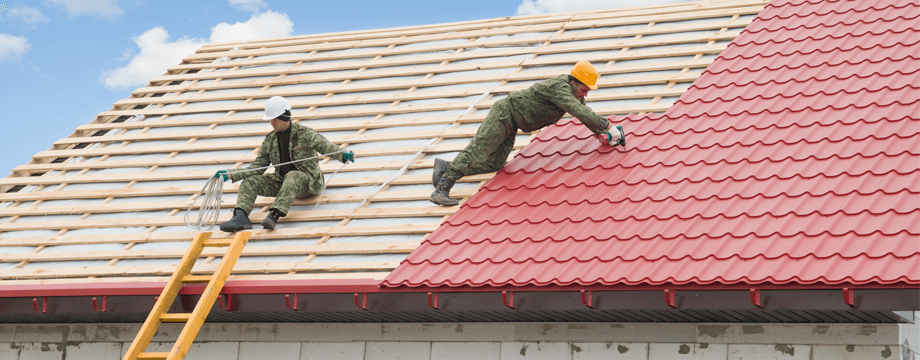
Image source: azhandymanroofing.biz

Myth 2: “All commercial roofing companies are the same”

As a commercial property owner, you should not make a mistake of trusting every local roofing contractor. It is likely that the contractor you hire turns out to be a “storm chaser” who set-up a temporary office in a particular region and then moves to another storm hit location. This, in turn, can affect you in the long run, when you require their assistance for warranty or other services, as they won’t be there for the help. Search for reputable commercial roofing companies that will always be there to assist you at every step.

Myth 3: “Cheap roofing materials can get the job done”

The type of roofing material that goes in your roofing system has a great impact on its long term sustenance. It is, therefore, important to choose the right material suiting your needs, prevalent climatic condition, and the budget. That is when a professional roofer can help you select the right roofing material without having to run from pillar to post.

Myth 4: “Roof repair is a DIY Job”

It is usually less expensive to fix things using a DIY approach, but for a job as complex as a roof repair or installation, DIY is not the right thing to do. The complexity of the project requires expertise, the right set of tools, and safety measures to ensure quality repair or installation. A licensed roofer has required expertise and skills to examine and carry out roof repair in a cost-effective manner.

Myth 5: “Gutters play no role in the roofing system”

You are committing a huge mistake if you overlook the maintenance of roof gutter as part of your roof repair services. While roof shields the home from rainwater, gutters keep the rainwater away from the exterior walls and foundation. Over time, unkempt gutters accumulate debris resulting in clogged gutters that can lead to backward flow of water and ultimately roof leaks.  Therefore, regular gutter inspection, cleaning, and maintenance is a must to prevent roof leaks.

Wrapping Up

Regular roof maintenance is important for all type of commercial units. Don’t let the myths mentioned in this post prevent yours from hiring professional commercial roofing companies that not only enhance the life of your roofing system but also add value to your investment. For more details about roofing services and its benefits, get in touch with a reputable commercial roofing company that can help you keep the best foot forward.

Read also:

Content Rally wrapped around an online publication where you can publish your own intellectuals. It is a publishing platform designed to make great stories by content creators. This is your era, your place to be online. So come forward share your views, thoughts and ideas via Content Rally.

View all posts

Leave a Reply

Your email address will not be published. Required fields are marked *

Related

how to harvest cilantro

The Best Time and Method to Harvest Cilantro for Maximum Flavor and Aroma

One of the most used herbs in the world, cilantro, is also referred to as Chinese parsley or Coriandrum sativum. Fresh and zesty, cilantro gives your recipes a flavor boost. Mexican, Middle Eastern, Indian, Mediterranean, Chinese, African, and even Scandinavian cuisines use it extensively. Even cilantro microgreens are grown from it! Since cilantro itself doesn't keep well and loses aroma and flavor once dried, most people prefer to use it fresh. To have cilantro on hand, you should also have a few plants in the garden. You can harvest the plant for its flavorful cilantro seeds, also known as coriander, even if you don't use the leaves in your recipes. The leaves of the cilantro plants come throughout the spring and summer. Allow them to go to seed at that time since they grow easily in the garden! You must know how to harvest cilantro properly if you want to have a steady supply. Keep reading to find out all you need to know about harvesting cilantro. Harvesting Cilantro: Overview Most people either love or hate the flavor of cilantro leaves. However, you should still think about cultivating a few coriander plants in your garden and saving the seeds for a range of culinary uses. Most people in the US grow this delicious herb for its leaves. But the tasty coriander seeds are also worth harvesting. They have a distinct flavor from cilantro leaves. This fragrant herb of the cool season, cilantro, quickly goes to seed in the long, sweltering summer months. As the plant reaches higher in the sky, its rounded, lobed leaves become feathery. Pretty clusters of tiny white blossoms quickly emerge. Many pollinators are drawn to these nectar- and pollen-rich blossoms, particularly syrphid flies and honeybees. Little round coriander seeds with a kelly green color emerge as the blossoms start to fade. What To Expect from Cilantro? The distinctive flavor of coriander is citrusy and slightly nutty. It goes incredibly well with rice, beans, lentils, and roasted or grilled veggies. You can pick the seeds while they are still young and vibrant green. Or you can wait until they start to turn brown. Since green coriander seed is only found in gardens, it is better to harvest them when they are still green because of their stronger, more distinct flavor. You will not find them in the farmers’ market or the grocery store. If the seeds are kept in a glass container with a lid, then they can be refrigerated for several weeks and frozen effectively as well. Wait until most of the seed turns brown if you want to harvest the mature brown seed for winter grinding or planting next year. Next, trim off a few inches of stalk and the seed heads, then hang them upside down in a brown paper bag. The seeds will drop out of the heads and land in the bag's bottom once they are completely dry. The dry seed should be kept in a dry, cool place in a glass jar with a lid. For optimal flavor, grind it just before using. The flavor difference between freshly ground coriander seed and the pre-ground variety typically found in stores will astound you. Try adding green coriander seeds to dressings and marinades. Frequently adding an equal amount of ground coriander to recipes that call for cumin makes the flavors of the two go particularly well together. How to Harvest Cilantro? The most exciting aspect of growing plants is undoubtedly harvesting. Pick individual cilantro leaves if you plan to use a small amount. It is best to leave at least 1-2 inches of stem above the soil's surface when harvesting larger quantities of cilantro. It is preferable to leave a few lower leaves on the plant to support the herbs until they grow back. To cut the stems cleanly, use harvesting snips, long reach harvesting snips, or sharp, sterilized garden shears. To guarantee that your herbs regrow, it is best to remove only a small portion of the plant at a time. Furthermore, when the cilantro plant blooms and sets seed, the herb may start to taste bitter. So, when wondering how to harvest cilantro, it is preferable to harvest before the plant bolts because the leaves will be less appetizing at that point. When is The Best Time to Harvest Cilantro? When the morning dew has cleared and the sun hasn't set, it's the ideal time of day to harvest a variety of fruits, vegetables, and herbs, including cilantro. This way you can lessen the stress on your cilantro plant and give the fresh stock cuts enough time to dry before dusk, which lowers the risk of illness. Before it bolts, harvest cilantro when it is 6 to 8 inches tall. The flavor of cilantro leaves significantly decreases after they have bolted. The lifespan of the cilantro plants can be increased by careful and routine harvesting. It is crucial, though, to wait for your plant to become established before beginning to harvest. The plant develops numerous long, thin stems as it grows. They are ready to be harvested when the stems are long, and the leaves have a lacy appearance. The cilantro herbs are about ten to twelve inches tall at this point. Gather your cilantro in the spring and into the first part of the summer. Your plants may bolt to seed if summertime full sun conditions prove to be too hot for them. The best time to harvest cilantro is early morning. You can either choose to harvest it once a week or source just individual leaves whenever you need them. Most of the time, it takes about 2-3 weeks for regrowth, so you must harvest accordingly. You must remember that regular cut-and-come-again harvesting is the most ideal while the plant keeps producing foliage. How To Store Fresh Cilantro? Part of knowing how to harvest cilantro is also knowing how to store them. It's best to know how much you should take from the garden before you harvest. You will need to learn how to store cilantro if you do not intend to use the leaves right away to extend its shelf life. There are several approaches to try. Storing Cilantro in Water To keep the cilantro leaves dry, wait to wash them after harvesting. For storage purposes, store the stem ends in a glass or jar with 1 to 1.5 inches of water and refrigerate for a few days. At a minimum, change the water once a day. Use a plastic bag to cover the top loosely to preserve the humidity surrounding the herbs. Storing Cilantro in The Freezer Freezing cilantro is another low-maintenance way to store it. Shake off any extra moisture and rinse the leaves to get rid of any garden soil. Tear the leaves into small pieces and stuff them into ice cube trays, covering the herb with just enough water to barely cover. You can pre-measure if you'd like to ensure that you know precisely how much is in each cube for recipes in the future. After the cubes are completely frozen, place them in a freezer bag. Add as needed to marinade, smoothies, soups, and sauces. You can freeze cilantro for up to six or eight months. Read More: Everything You Need To Know About Harvesting Basil How To Dry Cilantro? There are two methods for drying cilantro. You can use the oven to dry cilantro. Since hot air can greatly affect the flavor of the finished and dried herb, you might want to avoid using heat if you want to enjoy flavorful dried cilantro. Air drying or hanging drying is a better way to dry cilantro. Gather the stems of the herbs into a small bunch and secure them with a string. Place the bunch in a dark, well-ventilated area and hang it upside down. Alternatively, you can wrap the bunch in a brown paper bag to keep the cilantro from getting dusty. After the bunch has been hanging for about a week, begin to check its level of dryness every day or two. It's ready to be crushed or powdered and stored for later use when it crumbles when touched. Cure the cilantro ahead of time to reduce the possibility of mold growth. Put the dried cilantro in a glass mason jar to cure. Open the jar and give it a good shake every day to let fresh air into it and mix the contents. This will assist in achieving moisture content parity. If you'd like, you can also include a moisture-absorbing packet. How To Harvest Cilantro Seeds? You can harvest the coriander seeds even if you don't like cilantro leaves. The plant can grow to 20 inches when it flowers. This requires temperatures above 75 degrees. Pods will form once they have flowered, and the flowers will fade. Before being harvested, these should be green to brown in color. These pods release the mature seed when it's ready. Tie the stems with the seed pods still attached into a bunch. Next, hang them upside down in a paper bag in a cool, dry place to harvest the seeds. With time, the seeds will sprout and drop into the bag. Store your seeds in a dry, cool place in an airtight jar. Unground dried seeds can be kept for three to four years in storage. Before using dried seeds in your recipes, grind them for the best flavor. How To Harvest Cilantro So It Keeps Growing? If you sow cilantro seeds every two weeks from spring until late summer, you can be sure to always have fresh leaves available. We advise chopping them up and firmly packing them into an ice cube tray filled with water. Then, just place the tray in the freezer. These can then be added directly to hot pans when preparing soups or sauces. Or they can be dropped into hot or cold water for cooking or drinking. What To Do If Cilantro Bolts? It's time to collect and preserve your own coriander seeds once your plant produces seeds. Picture each of those tiny white blossoms turning into a flavorful spice for your cooking or seeds for the following year! In addition to being aesthetically pleasing and tasty, cilantro flowers are also excellent pollinators.  There is a short window of time when the growing seasons of cilantro and tomatoes coincide. This proves they go well together. It usually happens that my tomato and pepper plants are just starting to take off when my cilantro plants bolt, sending forth gorgeous white flowers. To maximize the amount of fruit your plants produce for you, beneficial insects that are feeding on your cilantro flowers will collide with your fruiting plants, vibrate their leaves, and assist in pollination. Ladybugs, butterflies, and bees all love cilantro flowers. It truly is a win-win! Choose Slow Bolt Seeds Seek out seed packets labeled "long-standing" or "slow bolt cilantro," as these varieties have been cultivated to endure longer in the garden. You can find your go-to slow bolt seeds that are 100% certified organic from Seeds of Change. Finding a local seed producer is another smart move. Buying local seeds means you'll be growing a climate-adapted variety of cilantro, which increases the likelihood that you'll keep it longer. Harvest Cilantro Regularly Regularly chop your cilantro leaves. This preserves the health of the plant and guarantees that the leaves of this herb are fresh when you use them. Your cilantro will continue to produce new leaves from the center of the plant if you regularly harvest it by chopping off the older outer leaves. Additionally, your chances of cutting off those immature flower stalks increase with the amount of cilantro you harvest. This will aid in postponing any bolting.  Since cilantro is incredibly obstinate, you can delay as long as you can. Cut that thick center stalk as soon as possible. After that, the plant will start to send outside shoots, giving you a little extra cilantro before it eventually bolts completely. For sun protection, surround your cilantro with tall plants. Plant Taller Plants Around Cilantro for Sun Protection Encircle your cilantro with large warm-season plants (like tomato or pepper plants) so that the taller plants can shade your herbs slightly and help keep the soil cooler as the temperatures rise. After all, four to six hours of sun is sufficient for cilantro to grow. To increase the lifespan of your cilantro in the garden, interplant it with larger plants. Wrapping Up You will need to have patience if you want to collect the seeds for your cilantro. Before seeds can be harvested, cilantro needs to blossom. Before harvesting, the resulting seed heads need to be allowed to dry on the plant for a while. Harvesting the seeds is then as simple as shaking them into a paper bag or chopping off the entire seedhead and placing it inside the bag. If you have thoughts to share or questions to ask about how to harvest cilantro, please leave a comment below. We would love to hear from you! Read Also: Asparagus 101: When, How, And How Often To Harvest? Some Facts You Need to Know About Rainwater Harvesting How to Harvest Lettuce: A Step-by-Step Guide for Fresh and Crispy Salads

READ MOREDetails
Unveiling Littleton's Best Lawn Care Services

Uncovering Littleton’s Best Lawn Care Services

Regarding lawn care, Littleton's best services take a strategic and scientifically grounded approach that results in lush, healthy, and beautiful lawns. These lawns become the envy of neighbourhoods, stand out in the summer sun, and sparkle in the winter frost. One may wonder, "What's the secret to such beautiful lawns?" The answer lies in various lawn care strategies, including weed control & fertilisation, liquid aeration, overseed, revive, winter mite control, and weed kill in rock/mulch beds. Weed Control & Fertilization The Importance Of Weed Control & Fertilization Weeds are often the bane of any lawn owner's existence. They are hardy, pervasive, and can quickly overtake a lawn if not adequately controlled. Littleton lawn care services understand that effective weed control combines preventative measures and targeted treatments. Preventative Measures One of the keys to weed control is prevention. Instead of waiting for weeds to sprout and then trying to eliminate them, the best lawn care services take proactive steps to prevent weed growth in the first place. They do this by maintaining the right balance of nutrients in the soil and ensuring that the lawn is thick and healthy to crowd out any potential weed invaders. Targeted Treatments When weeds infiltrate a lawn, targeted treatments eradicate them without damaging the surrounding grass. This is where expert knowledge comes into play. Different weeds require different treatment strategies, and understanding this is crucial to effective weed control. Fertilisation Fertilisation goes hand in hand with weed control. It's all about providing your lawn with the necessary nutrients to thrive. Keeping your property well-fed makes it more resistant to disease, drought, and weed invasions. The best lawn care services understand that a proper fertilisation schedule is critical to maintaining a lush and healthy lawn. Why Liquid Aeration Is Essential Aeration is a technique that helps alleviate soil compaction, allowing your lawn to breathe, absorb nutrients and water more effectively. Traditional aeration methods can be labour-intensive and involve creating physical holes in the yard. However, Littleton's best lawn care services have adopted a more modern, less invasive approach: liquid aeration. Understanding Liquid Aeration Liquid aeration involves the application of a liquid solution that breaks up the soil at a molecular level. This process improves the soil structure and allows grass roots to penetrate deeper. The result is a stronger, healthier lawn with improved drought resistance. Overseed The Art And Science Of Oversee Overseeding is a technique used to fill in bare patches in a lawn and improve its overall density and colour. Overseeding can bring life back to a tired, worn-out lawn by sowing new grass seed over existing properties. Timing And Technique Matter When it comes to overseeding, timing and technique are crucial. The best times to overseed are usually in the spring and fall, when temperatures are moderate, and the new grass has the best chance of survival. The best lawn care services understand this, know the right amount of seed, and the best techniques for spreading it to ensure even growth. Revive Revive: A Rescue Operation Revive is a lawn care technique designed to bring back the vigour and health of a lawn under stress. This could be due to extreme weather conditions, disease, pests, or simple neglect. A Tailored Approach Revive operations must be tailored specifically to the condition of each lawn in Littleton. Littleton's top lawn care services excel at diagnosing issues plaguing properties and creating an effective revitalisation strategy; this might involve altering watering practices, changing mowing methods or applying specific treatments that address disease or pest issues. Winter Mite Control Battling The Invisible Foe Winter mites are an increasingly prevalent lawn pest in Littleton and can significantly damage during the cooler months. Feeding on grass, these tiny predators feed off it resulting in discoloured, thinner properties come spring. Preventing And Treating Infestations Winter mite control involves both prevention and treatment. Lawns can be treated with products designed to deter mites, while watering practices may also be adjusted to make lawns less inviting to these pests. Should an infestation develop, targeted treatments can be utilised to get it under control quickly. Weed Kill In Rock/Mulch Beds Maintaining The Beauty Of Rock/Mulch Beds Rock and mulch beds can be a beautiful addition to a landscape but can also become a haven for weeds. However, the usual weed control methods used for lawns aren't always suitable for these beds. Tailored Weed Control Strategies Littleton's best lawn care services have tailored strategies for weed control in rock/mulch beds. This might involve careful hand-weeding, using landscape fabric to deter weed growth, or the targeted use of weed-killing products that won't harm the desired plants. Conclusion: In conclusion, the secret to a beautiful lawn is professional knowledge, careful technique, and targeted treatments. By understanding and employing strategies like weed control & fertilisation, liquid aeration, overseed, revive, winter mite control, and weed kill in rock/mulch beds, the best lawn care services in Littleton can maintain and create lawns that are indeed a sight to behold. read Also: 5 Reasons Why You Absolutely Must Have Houseplants In Your Life How To Plant Grass Seed On Hard Dirt? – Latest Update 2022 10 Best Bedroom Plants To Buy In 2022

READ MOREDetails
Hardwood Timber Flooring: Gives a Classic Look to Your Home

Hardwood Timber Flooring: Gives a Classic Look to Your Home

Solid hardwood flooring is known for imparting an impressive look. Customers tend to prefer hardwood flooring since decades because it gives not only a unique but a classic look to the room. Hardwoods are usually used for construction purposes such as boat, furniture, flooring, and instrument construction. The hardwood variety is usually obtained from oak, maple, cherry, hickory or pecan trees. Thus, the hardwood timber flooring is known for imparting a sense of beauty to the room and also displays the sign of high status. Styles of Hardwood flooring The most popular hardwood flooring includes Solid hardwood flooring Engineered wood flooring Long strip engineered wood floors Each type of hardwood flooring is different from the others in regards to the advantages, durability, look and pattern. The solid hardwood adds charm, cordiality and value to the room, while the engineered hardwood flooring does not shrink easily and is more durable. The long strip engineered wood floors are known for their unique features, they are designed for the floating installation. The hardwood timber flooring is a magnificent product that can last for generations. However, proper care and regular maintenance are the two most important things that need to be considered when talking about timber flooring. How to increase the performance of the hardwood timber flooring?  Refrain from using hot water as it may cause serious damage to the floor. Use a damp mop by wringing out the extra moisture as this can hamper the flooring and wet patches can develop on the floor surface. Always mop in the direction of the wood grain to remove the entrenched dust more swiftly. Refrain from using harsh chemicals, detergents or floor cleanser; instead, look for cleansers that are mild and are meant for this type of flooring to remove stains. Use gentle nonscratch microfiber mops for cleaning the hardwood timber flooring. Sweep the floor regularly with a soft-bristle broom or vacuum cleaner.  Some more facts about hardwood timber flooring The furniture and the other appliances should be placed after 48 hours from the last coat of varnish on the hardwood timber flooring. The furniture and the other appliances should have protective pads to prevent marks on the floor. The rugs or the carpet can be placed at least after 2 weeks from the last coat of varnish on the hardwood timber flooring. Guard the floor against direct sunlight by using window curtains or by using rugs and carpets. This prevents the hardwood timber flooring from getting discolored. Maintain a normal temperature to prevent gaps and cupping. Ensure that no one uses pencil heel shoes or sharp-pointed heel shoes on the floor as it may create a dent on the floor surface. Trim the nails of the pets in the house to prevent scratches on the hardwood timber flooring. Advantages of hardwood timber flooring Selecting a good quality hardwood timber flooring can last for several years in fact through generations. The hardwood timber flooring is easier to clean and is highly cost-effective. The hardwood timber flooring increases the resale value of the home. Good quality hardwood timber flooring keeps the room warm and cozy and is more hygienic compared to other flooring materials. How to choose hardwood timber flooring?  When choosing the hardwood timber flooring for your home, Check the color and pattern to match the décor of the room. Check the timber wood based on select, standard and feature grade. Check for the coating that can be used based on oil or satin finish. Thus, the hardwood timber flooring is ideal for imparting a classic look to the room. Read More: Additional Ways To Keep Your Home Warm Home Hacks: Stuff You Can Clean In One Hour Or Less How To Make Your Home Look Like A Splendid Hotel? Best 5 Designer Secrets To Make The Most Of Small Spaces

READ MOREDetails