6 Tips for Keeping Your Home Clean (With Pets and Kids)

Home Clean

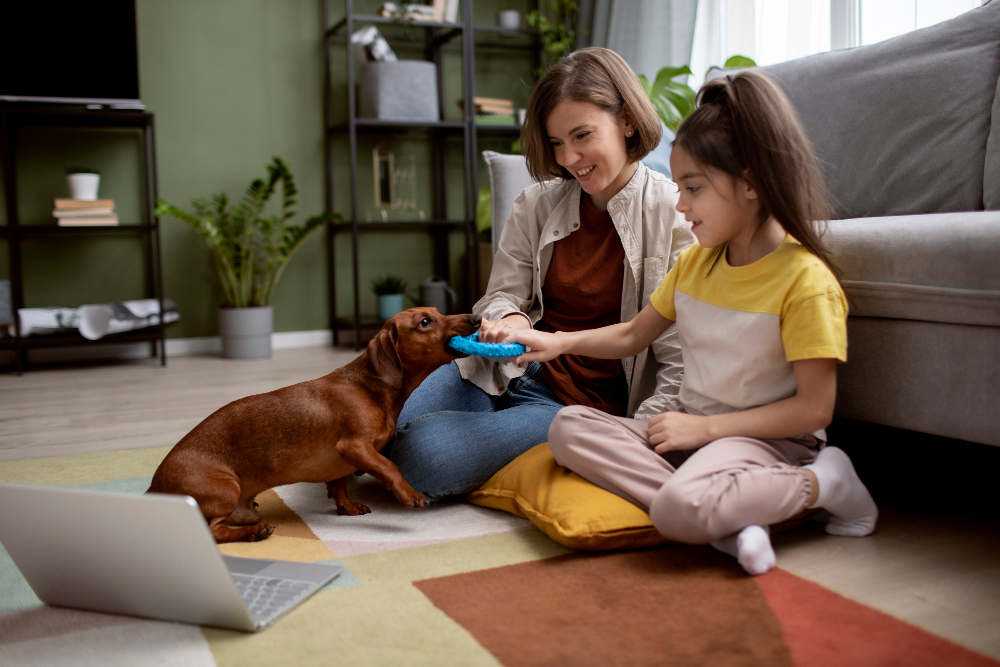
Maintaining a clean house is a difficult task; honestly, no one enjoys removing all the clutter, washing the dishes, dusting, vacuuming, etc. But as much as most of us run away from the chore we all know the importance of housekeeping and how it impacts our health. Things tend to get a bit, well maybe a lot more messy when you have kids and pets added to the picture. Our furry companions love some adventure around the house and tend to spread their food and water around while eating, knock things over and of course the pet hair around the house is another story. But the good news is that even a chore as tedious as cleaning can be made simple by following some hacks and tips, so keep reading as I share some marvelous tips for maintaining hygiene in your house

1. Invest in the Right Tools :

You might not notice but using the right kind of tools can reduce effort and save time. For instance, cleaning pet hair around the house is one of the most challenging tasks. The fur gets everywhere, even gets embedded in the carpet fibers which becomes extremely difficult to remove. Well, the key is to purchase the right type of vacuum that has powerful suction to pick up the pesky pet hair. A robotic vacuum cleaner would be even better since it will save you a lot of effort. Similarly, make sure you have a quality lint roller (it is a life-saver in most situations) or latex gloves when you want to give your furniture or clothes a quick clean-up.

2. Bathe Your Pets :

The secret to a clean house is clean pets since the dirt on your dog will eventually accumulate inside your home. Develop a bathing routine for your pup, be sure not to overdo it since you don’t want to dry out the oils in his skin. Use a good quality dog shampoo while bathing and get your pup regular grooming to reduce shedding. Since dogs that itch shed more hair, use tick and flea repellents for dogs to prevent him from these parasites.

3. Use the Right Type of Furniture :

One of the worst nightmares for any pet-parent is when their furniture has pet hair spread all over, and they are expecting guests over. No one wants their guests to be covered in their dog’s fur! Well, let me tell you that choosing the right type of furniture can make all the difference.  While selecting fabric for your furniture, choose leather/pleather or microfiber as these are easy to clean and the hair doesn’t stick to the material. Ultra suede and Crypton are also excellent choices for furniture as they are stain-resistant.

Pro-Tip: Also stock up some decorative throws and use these to cover your sofa and bed to prevent pet-hair from sticking to the furniture.

4. Wash Pet Bedding :

It is essential to wash your pet’s bed, blankets as these may hide harmful germs which our pets can transfer to other areas of the house. Wash the bedding weekly using a mild detergent without bleach on the hottest settings available.

5. Keep the Pet’s Area Clean :

Our pets do have a specific area in the house where they like to chill or where they eat. Keeping these areas clean might be a difficult task, but regular cleaning will help prevent messes and thereby reduce effort. If you have a pet-bird, the room where the cage is placed is bound to get messy. To make cleaning simple use vinyl carpet protectors on the floor beneath the cage. Invest in a good quality stainless steel cage as they are easier to clean. Also, line it up with cage liners or newspapers to prevent the bottom from getting messy due to food and feces.

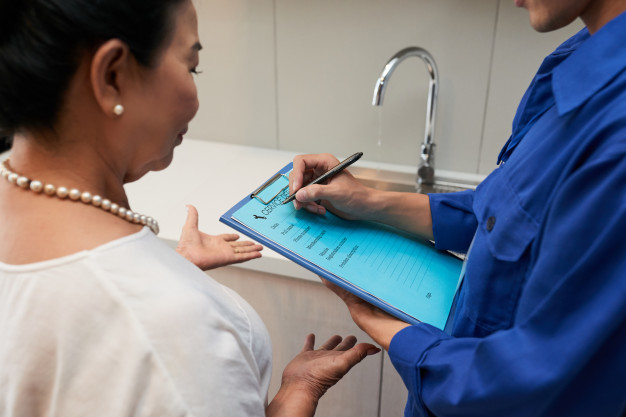
6. Use Pet-Safe Cleaning Products :

Various cleaning agents contain harmful substances such as ammonia or bleach that can be toxic to our pets. While hunting for cleaning products look for ones that are pet-safe, eco-friendly and bio-degradable. If you don’t have these stocked up at home, don’t panic in case of a pet emergency, as you can find some fantastic cleaners inside your house. Baking soda is a great deodorizer to freshen up the carpets and rugs; vinegar mixed with water is an alternative to floor cleaners and can be handy when pet accidents occur.

Read Also :

I enjoy writing and I write quality guest posts on topics of my interest and passion. I have been doing this since my college days. My special interests are in health, fitness, food and following the latest trends in these areas. I am an editor at Content Rally.

View all posts

Leave a Reply

Your email address will not be published. Required fields are marked *

Related

Carpet Clean

How to Keep Your Carpet Clean

With all the indoor and outdoor activities, kids, pets and so many people going through your house, it’s not easy to keep your carpets clean. You keep your shoes on, or often let your guests do it, your kids play and make a mess, your pet shed and make a general mess, and your carpet gets the short end. If you don’t maintain it regularly, the damage is often irreversible. That’s why it’s important to follow a few steps in order to keep your carpet in good condition for as long as possible. Of course, having someone to keep your house clean is always the simplest option, and regular deep cleaning is indispensable, but there is still a lot you can do in meantime to keep your carpet clean and fluffy. Here’s what experts at Deluxe Maid had to say about this topic. No Shoes : This can seem like a nuisance at the beginning, both for your family who lives there, and for the guests who come to visit, but your carpet will be very grateful. It’s already normal and accepted in many houses, but there are still people who find it awkward to ask their guests to take off their shoes. Well, you shouldn’t feel awkward. Provide enough comfortable, clean slippers for everyone and they should have no complaints. With their shoes off, they can feel more relaxed and at home, while your carpet is spared all the dirt, mud, germs, dust and other “presents” the guests usually bring on the soles of their shoes. Your carpet will retain its color for a long time and won’t become all faded and shabby so fast, thus its cleaning and maintenance won’t require so much time and effort. Vacuum More Often : Vacuum your carpet whenever you catch a moment. It would be perfect if you had one smaller, more convenient hand vacuum cleaner which you could use more often, especially, but not only in emergency cases of spilling something. It’s important not to let the dirt grind into the carpet, as it becomes close to impossible to completely clean it. So it’s much better and efficient to vacuum often, even just superficially, and have the deep, detailed vacuuming whenever it’s possible, that’s the way the cleaners Indianapolis residents trust the most do it. Again, it will mean less time and effort, and your carpet will look decent for a longer time. Clean the Spills Immediately :  Regardless if it’s something liquid and sticky that requires rubbing, or some particles that require vacuuming, do not postpone at any cost. If you leave it unattended, there are great chances that you or someone else will step in it, spread it, grind it into the carpet, and simply make it worse. You might forget about it, and if it’s a stain, it will dry and merge with your carpet pattern. And you don’t want that. What’s worse, if you let it happen once, you will easily do the same again, and that’s where the real problem starts. It will gradually destroy your carpet without you even noticing it. So don’t postpone the cleaning, take care of those spills immediately, or you will regret later. Get Some Mats : Your carpet should not be a mat, that’s why it’s important to ask your guests to take off their shoes, as already mentioned. But if you really don’t want to do it, at least make sure you have proper doormats at the entrance to your house or apartment. That should at least reduce and mitigate the dirt spreading and the overall damage. You should have good doormats if there’s the “no shoes” rule in your house, as you probably have a carpet in the corridor as well, and your living room carpet isn’t the only one which needs to be kept clean and in good condition. Read Also :  Best-Corded Vacuum Cleaner Run Cleaning In Dallas: Why A Professional Cleaner Is Better Benefits Of Having A Cordless Vacuum Cleaner At Home

READ MOREDetails
log cabin construction

Timber! 8 Facts About Log Cabin Construction You Should Know

Thought log cabins were a thing of the past? Think again. Today, log cabin construction has become a chic, upscale way to build a modern home with a unique look. In fact, some people have even built high-rise buildings that pull design elements from cabin construction. Log cabins have a solid place in modern architecture. They meld old-fashioned traditions that endure for a reason with popular modern elements like environmentally-friendly designs. Wondering what else you don't know about log cabins? Keep reading to learn more fascinating cabin facts! 1. You Can Calculate Exactly How Many Logs You'll Need How many logs does it take to build a log cabin? Turns out it's all a matter of simple math. For example, by determining the height of each wall, then the height of each individual log, you can calculate how many logs you'll use per wall. From there, it's simple to add up the number of walls in a room to get the total. Of course, other design aspects like the addition of doors or window can make things more complicated. When there's an opening in the wall, it will get flanked by shorter logs, which can increase the total number of logs used. If the roof is built of logs, that will also change the numbers. While you'll want to leave it to the professionals when it comes to deciding how many logs to order, it can still be fun to try your hand at calculating the number of logs in a cabin. 2. You Can Build from a Kit: Did you know that you can order a log cabin kit for a major DIY moment? With a log cabin kit, you don't have to be a pro to have a rustic cabin of your own. Most companies also offer plenty of customer service support, so you'll know where to turn if you run into problems along the way. It also doesn't take a lot of extra tools to work from a kit. Most people can get the job done with just a few basics (think drills and hammers). Since this is a more rustic form of the building, it appeals to many environmentally-savvy consumers. You're not bringing in heavy machinery to pollute the area and disrupt local wildlife. 3. Log Homes Stay Warm: Having trouble keeping warm in the winter? A log cabin just might hold the answer. Wood naturally keeps heat in -- that's why wood furniture tends to feel relatively warm, even if the rest of the room is cold. Many modern building materials, from concrete to sheetrock, get cold fast. This lowers the overall temperature of your home fast. With walls made of solid wood, your home actually soaks up and stores heat, dispersing it into the home over time. This helps your home stay warmer, while you save on heating costs. 4. Moisture Matters: When you're building a log home, one of the keys to success is keeping your logs completely dry. You can actually choose to buy logs with different levels of moisture content. The lower the moisture, the better, because you won't have to worry about what happens when the logs shrink and settle over time. You'll also need to take care to keep your home as dry as possible after it's complete. This can mean installing different design elements (read more here) to keep water away from the walls. Sturdy log cabins often include an overhanging roof or protective landscaping elements. You'll also need to take care to keep other sources of water, like an automated sprinkler, away from the log walls. 5. Log Homes Last a Long Time: There's a reason many historic log cabins from 100 or more years ago remain to this day. This is one of the most durable ways to build a home that will remain sturdy for years to come. Although American architecture doesn't date back so far, you can find homes and churches made of logs in Europe that have stood strong for many hundreds of years. This natural building material offers the perfect balance of strength and flexibility to withstand all kinds of threats. 6. Log Cabins Work Best in Shade: In addition to keeping your cabin away from moisture, you'll want to build it so it's shaded from the sun as much as possible. Sun won't destroy a log home, but it will mean you'll need to re-finish the logs more often to make them last. If you can build in a shady area that's guarded against moisture, your log cabin will require virtually no maintenance at all. 7. Log Homes Save Energy: In log cabin construction, it's super-important that you seal up the spaces between the logs carefully. But as long as that's done properly, you'll have an incredibly energy-efficient home to enjoy. Spaces, where energy can escape, include the connection between individual logs, the space between the foundation and the lower logs, and space between the walls and roof. But when those spaces get sealed, your home will be significantly more energy-efficient than most. The solid wood walls offer great insulation, so keeping your home warm or cool becomes far easier than with other materials. 8. Air-Dried Logs Work Best: Drier is generally better no matter what, but if you have a choice between air-dried and kiln-dried, opt for the first choice. Logs that get air-dried for the proper amount of time have already adjusted to the outdoor environment where they'll be placed. This reduces settling even more because the moisture content of an air-dried log isn't likely to change much further. Kiln-dried logs tend to absorb more moisture when they first get placed outside. Then, as they lose that moisture over time, they'll settle, creating a need for more home maintenance. Will You Try Log Cabin Construction at Home? Whether you build it yourself or hire the professionals, log cabin construction can give you a durable, unique, cozy home that you'll love. These tips will help you plan ahead for the best possible cabin construction. Once you build a log cabin, it's time to decorate the inside! For a rustic look that matches perfectly, try these cork board ideas. Read Also: Best Ways To Maintain A Shower Cabin Why Kiln Dried Wood Is Better For Furniture

READ MOREDetails
Drywall

What You Need To Know About Ceiling Textures And Drywall Options

Drywalls are those construction materials that are used to create walls and ceilings of your home. Not all that but, drywalls also come in handy if you want to create design features like eaves, arches, or any mind-blowing architecrequireigns!!! Do you know the best part about drywalls? These are super easy to install, highly durable, and only require simple repairs when damaged. So drywall is a flat component composed of calcium sulfate dihydrate, typically extruded between thick sheets of facer and backer paper, used to construct interior walls and ceilings. Through this article, I’ll be talking about the ceiling textures and the drywall options you can choose for your home!!! The Ceiling Textures And Your Drywall Options Decorating your home can be a real challenge for many!!! And choosing the right drywall finish or texture can prove to be a hard nut to crack. And it’s very natural to get at a state of indecision if you are handpicking it for your new home or renovation project. There are so many options that it feels like you are “searching for a pearl in an ocean.” Making up your mind about whether or not to go for texturing your ceiling can be a tough job. And even if you choose to texture your ceilings, there are chances you’ll be confused about which one to go for!!!! And remember, getting the drywall right is the first step of tiling projects?”. But No Need To Worry!! This article will guide you to choose the perfect texture and drywall option for your ceilings to look elegant more than ever!! 1. Sheetrock Texture: Old Is Gold Sheetrock ceiling texture is a drywall ceiling texture that has been famous since 1917. The reason this drywall texture is so awesomely renowned is because of the artistic look that it gives to your ceiling And the best part, you don’t need to use and sort of spray paint in this case. You can achieve this texture by using your artistic hand technique and without using any special brushes. This texture is perfect for any room. There are no restrictions of use for this ceiling texture. 2. Stipple Brush Texture: A Test of Your Skill This texture is not as easy as it seems. You need skills for this texture to be created. In order to create this texture, you need a roller and slap brush. The fascinating fact about this texture is it can cover the bumps and holes on your ceiling. And if you have the skills, then this texture can surely make your ceiling look gorgeous than ever!! 3. Swirl Texture: Creativity Taken To A New Level In order to achieve this texture, you need either a roller or sprayer. You can also do this by using a technique called “the basic swirl” method. But one thing that you need to keep in mind is while creating this texture, you’ll need a lot of patience to get the best result. And the difficult part is you need to create the pattern before the mud dries. So make sure to have a helping hand by your side. Overall, the texture can really give that awesome look on your ceilings if you do it in the right way!!! 4. Orange Peel Texture: A Color of Choice The name suggests all, the color of orange skin, but sometimes it’s also called “an eggshell” ceiling texture. If you really love this color, then this can be on the top of your favorite lists. In order to create this texture, you need to apply thin mud to the ceiling using a spray gun set at very high pressure. The more artistic mind you have, the artistic look it has got!!!! 5. Smooth Textures: Choice of Many If you are someone who wants the best at a cheap cost, then this texture is just the right choice for you. Moreover, you don’t need to have much skills to create this texture design. The look of this texture is just mind-blowing, and if you are someone who likes things to be consistently gorgeous, then this is the texture you can have for your ceiling. This texture is effortless to remove and is also perfectly suited for any room. 6. Tree Bark Texture: Beauty of Nature If you are someone who loves nature and wants to bring the reflection of nature inside your home, then this textured style is just the option you can have. This ceiling has the look of a tree. You can create this texture just by using a heavy roller. The texture might look simple, but it’s very artistic and can surely catch the eyes of many. If you have a farmhouse, then this texture will double the beauty!!!!! 7. Slap Brush Texture: Slap The Beauty Out Artistic, gorgeous, beautiful, and elegant are the nicknames you can give to this texture. A complete package of beauty!!!! To get this texture, you’ll be needing a brush with very stiff bristles and thin mud. Firstly, you have to cover your ceiling with mud using a roller, then take the brush and slap the ceiling from the edge. This can be a hard nut to crack because if you don’t get it right on the first shot, the whole ceiling might end up looking messy. 8. Popcorn Texture: Cottage Cheese This texture, also known as the “cottage cheese” or “acoustic” ceiling texture, is probably one of the most famous ceiling textures ever!!! If you look closely, you’ll see it’s kind of a look-alike of “popcorn.” That’s why it’s called “popcorn texture.” In order to achieve the correct texture, you need to use a sprayer to apply to your ceiling. This contains Styrofoam with mud which gives that puffy effect. But it will require you to have a lot of skill to achieve this effect. That’s because the “popcorn texture” is both challenging to apply and remove. I hope this article will help you to know about the needs of ceiling textures and drywall options. And now I believe you’ll be able to get yourself the perfect texture for your ceilings. Read Also: Here’s How to Turn Your Garage into a Bedroom on a Budget! Turn your attic into a living space

READ MOREDetails