Best Places To Use Black Butt Timber

Published on: 01 August 2018 Last Updated on: 31 October 2024
Butt Timber

Are you ready to start your next home improvement project? Perhaps you’re thinking of building a new deck or maybe even replacing the flooring in the interior of your home or office.  Maybe you need a new workbench for the garage? Or has a furniture project for the living room caught your eye? With so many building material options out there, what kind of wood will you use to create whatever your latest masterpiece happens to be? Consider blackbutt timber.

Blackbutt timber is found in Australia and is one of the most commercially available kinds of timber within the area. Blackbutt trees are known for their resistance to heat, which makes them a popular choice of timber in areas where brushfires are common.  The color of the wood ranges from yellow to a pale brown, but occasionally can appear a soft pink, allowing for a variety of unique looks. Read on to find some projects or places in your home or office to use this durable wood.

Decks :

Outdoor decks can be a great place to lounge during the summer months, take in the evening air during the cooler ones, and connect with your family all year. Building a deck with blackbutt timber is a great choice if you’re looking for wood that is durable, heat resistant, and has a density that is a natural deterrent to termites. Considering getting benches or patio furniture for your deck? Blackbutt wood can be used for those things, too.
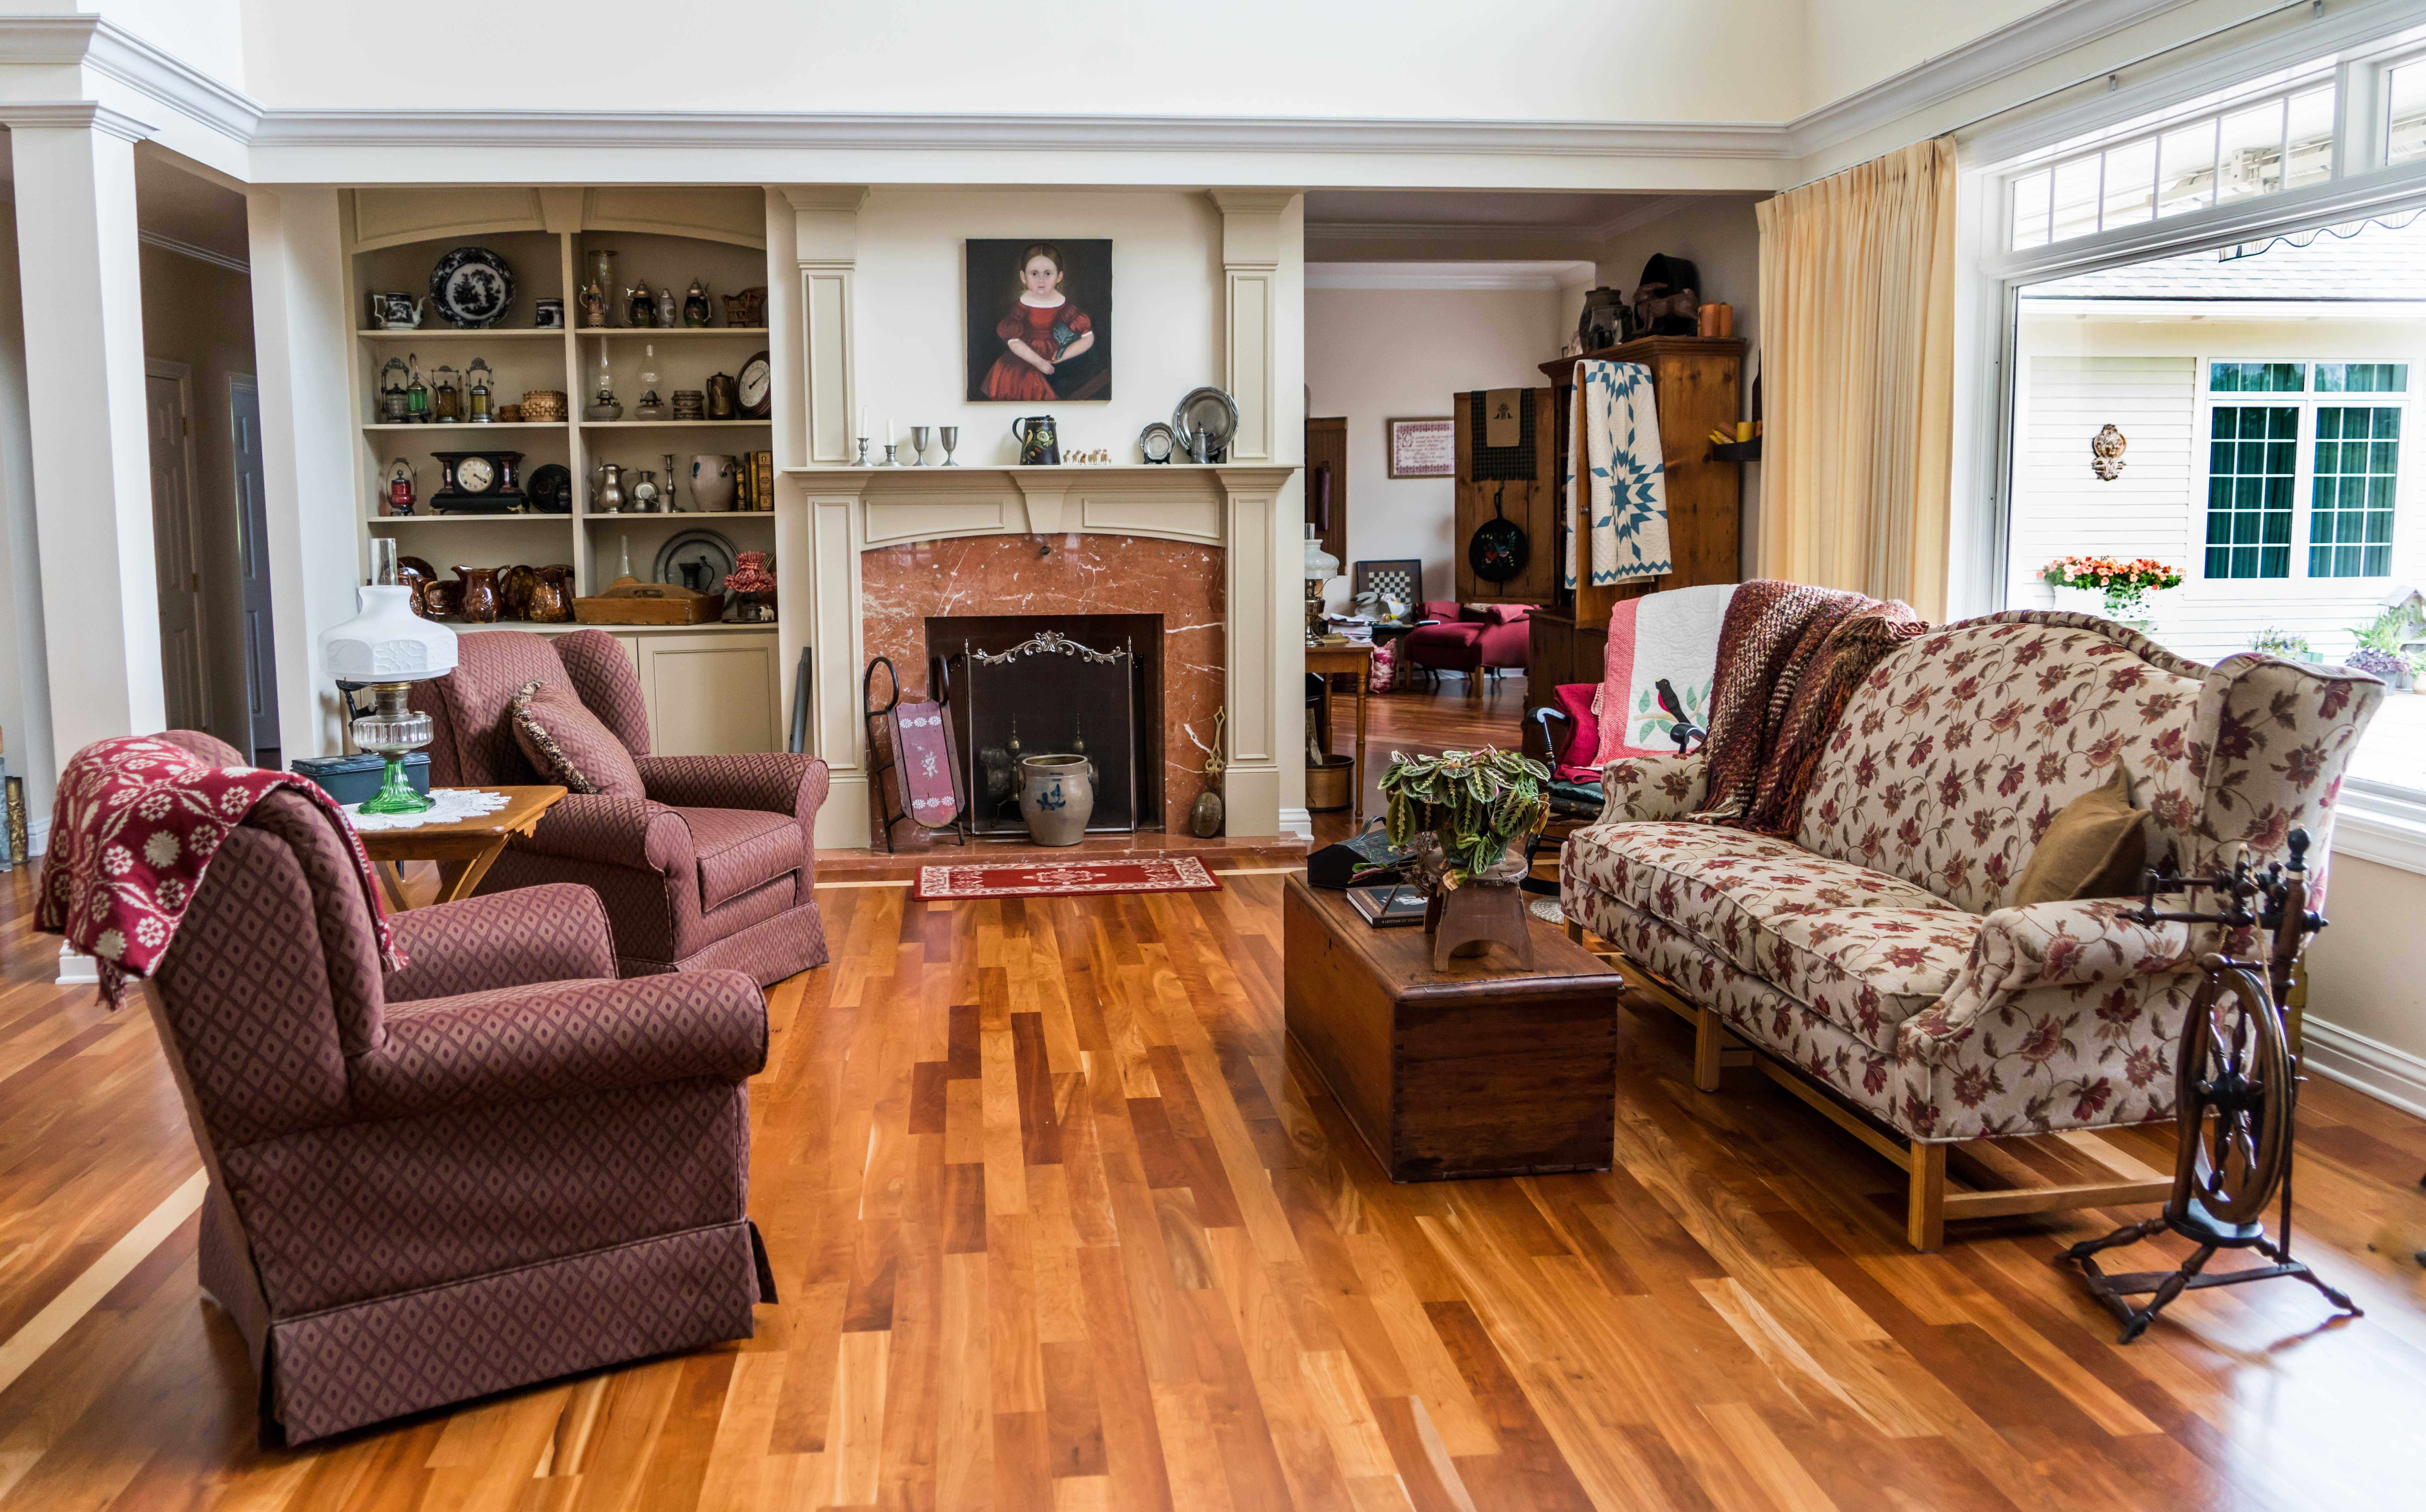
Interior Floors :

Looking to add a bit of class to your home or office? Ready to pull out your carpet and get rid of allergens trapped by the carpet fibers?Need something that can weather the test of time in high traffic areas? Consider using blackbutt timber for hardwood flooring. Durable, hypoallergenic and requiring low-level maintenance, it accepts polish or stains well, adding the perfect touch of color to your home’s interior.

Furniture :

With its hearty strength, blackbutt timber is an excellent choice for building furniture such as bookshelves and entertainment centers suitable for the home or office.  The uniform grain creates a unique look whether you use it as a countertop in the bathroom, to create a new kitchen table, a workbench in the garage, or even an office desk.

Cabinets :

Freshen up the look of your kitchen cabinets. Since this wood stains well, it’s easy to keep it clean from any wayward spills or accidents that occur when preparing the daily meals.

Poles And Building Framework :

 The strength of this timber makes it handy for building framework in houses and for poles or pillars that can be used as a feature in your home or just part of the construction. It can be sanded and cut to whatever length or height your project calls for.

The versatility of the blackbutt tree is what many find so appealing and is what makes it a good choice when considering your project’s timber needs.

Read Also :

Content Rally wrapped around an online publication where you can publish your own intellectuals. It is a publishing platform designed to make great stories by content creators. This is your era, your place to be online. So come forward share your views, thoughts and ideas via Content Rally.

View all posts

Leave a Reply

Your email address will not be published. Required fields are marked *

Related

shag rug

Five Bedroom Rug Ideas – Area Rugs and Decorating Ideas

Do you need an easy and quick solution to overhaul the look and feel of your bedroom? Well, you don’t need to have a lot of money to decorate your bedroom and enhance its overall appeal. A round shag rug can make a whole lot of difference when it comes to adding a little pizzazz and brightening up your bedroom area. A shag rug not only offers a warm surface to walk on but also adds exciting texture, color and personality to your bedroom. To save you time, you might want to explore a few ideas for decorating your bedroom floor. Elevate your bedroom with these five bedroom rug ideas – area rugs and decorating ideas. 1. Use a Room-sized Rug: It is imperative to lay down a large, room-sized rug that covers the most part of the bedroom floor. This works pretty well in bedrooms with vaulted or high ceilings, giving the room a wide open feeling. To achieve this, measure your bedroom’s entire length and width. Then, deduct about 12-24 inches from the measurements or dimensions you got. Buy an area rug that closely matches the size you got from your calculation. 2. Anchor Your Bedroom With a Shag Rug: Using a round shag rug, anchor your bedroom to give a sense of balance and order to space. The adjacent flooring serves as a frame to showcase you're the fine rug. To properly anchor your bedroom, simply center your bed along with area rug in the space. Ensure that each side has equal amounts of exposed flooring. 3. Minimalism is the Key: Minimalism is a popular choice as far as decorating the bedroom is concerned. There is no need to pack a bedroom with plenty of objects and loud colors. You simply need plain-colored walls with a basic, plain rug to pull off this awkward look. Also, complement your area rug with a natural and organic pillow top mattress for ultimate comfort and better sleep. Visit here to learn how do pillow top mattress work. 4. Two Area Rugs Are Better Than One: You can break up the dullness of a large bedroom space by laying down two area rugs that are distinctly different from each other. Two area rugs give your bedroom added interest and color. Pick up two area rugs whose colors and designs are distinctly different. Placement depends upon your furniture and décor, so you are free to try different placements to find the one that best suits your preference. 5. Create the Mood: We all have different moods, and not everyone would wish to have the same mood for their room. Thus, you might want to pick a rug that complements the mood you intend to create in your bedroom. Classic pattern rugs with solid colors are ideal for a traditional-style bedroom. Such rugs make you feel at ease. Alternatively, you can add dots and stripes to make your room look more upbeat. Final Thought Your bedroom might be already cozy, but you can make it cozier by adding an area rug. Rugs add style and warmth to a room. Now, go ahead and decorate your bedroom with these ingenious bedroom rug ideas. Read Also: 5 Ways To Maintain And Decorate The Study Room For Kids 7 Ways To Add Character And Style To Your Home Cheap And Simple Tips To Give Your Bedroom A Makeover A Guide To Finding The Perfect Sofa For Your Living Room

READ MOREDetails
cleaning machine

5 Tips on effectively picking a tile floor cleaning machine

Trying to keep the tile floor clean is like a never-ending chore. It becomes more of a serious headache when you have to use regular household cleaning tools. That's why I have concluded that I need to upgrade my whole procedure After getting major injuries in my knees and elbows. But what can I do to reduce the stress? First thing I did was Replacing the old ineffective brush by an advanced floor cleaning machine. The decision has changed the cleaning routine forever. So if you are like me and looking for buying the best steam cleaner for tile and grout, here are some tips to effectively compare tile floor cleaning machines when purchasing. 1. Adjustable temperature levels: The importance of having an adjustable temperature level cannot be stressed enough. Using a steam cleaner is excellent for sterilizing and deodorizing the floor. The kitchen floor mostly has stains, dirt, and odor. If you clean the tiles with a machine that can boil water up to 356 degrees then the floor will become sparkly clean. But what if you cannot afford that? Well then go for the 310-degree machine. Machines with a higher level of temperature are costly. Sometimes we tend to clean the floor with using too much steam. You can clean faster with more steam, but it leaves a nasty watermark on the tile. So do not go overboard with steam. 2. Pick a machine with a stainless steel boiler: We all learn from the mistake. I learned the hard way. Cleaning machine that has plastic boilers will distort immediately after the second or third use. The cleaning machine may be cheap but if it deteriorates quickly the whole money is wasted. So looking for a machine that has a stainless steel boiler is going to be a wiser decision. Floor cleaning machine that has steel boiler is usually the best steam cleaner for floor tile and grout. Plastic boiler machines are cheapies that are not worth any penny. Also, go for boilers that can take 3 to 4 ounces of water. Steam cleaners use little water to produce the steam that you use. 3. Look for a portable cleaning machine: If you have a big house then cleaning is already a quite burden. If you are getting a cleaning machine to ease your job, sadly it will not help if it's too heavy. A versatile and portable cleaning machine is all you need. If the machine is easy to maneuver, it will make your task easier to clean tiles of the bathroom and kitchen. 4. Vacuum extraction: Our kitchen has spills, bits and pieces of food and what not. Steam cleaners do clean the house, but it does not suck up the dirt. They are good at cleaning the surface, removing tough stains but not good at all for sucking out dirt. Some particular brands have vacuum extraction option with them. It will ease your cleaning job and cut the time into half.  For cleaning with it, first, vacuum the whole area and then go for your steam cleaning machine. 5. Durability: Expecting a couple of years’ service is not too much to ask when you are spending that much money. So look for machines that metal wand and plastic body that are sturdy. There are some things to follow to take care of the machine like using distilled water for steaming and avoid putting pressure on some little parts. Also, keep in mind that cleaning machines are not like your regular traditional cleaning tool. It has a mechanism behind it and costs a lot of money. So make sure it last enough from checking some Best Vacuum for Tile Floors reviews as well. Read More: Benefits Of Having A Cordless Vacuum Cleaner At Home Five Easy Steps When Cleaning Your Mattress Ways To Get Dry Cleaning Services At A Low Price

READ MOREDetails
Drywall

Elevate Your Home With Unique Ceiling Textures

Drywalls are those construction materials that are used to create walls and ceilings in your home. Not all that, but drywalls also come in handy if you want to create design features like eaves, arches, or any mind-blowing architectural requirements!!! Do you know the best part about drywalls? These are super easy to install, highly durable, and only require simple repairs when damaged. So, drywall is a flat component composed of calcium sulfate dihydrate, typically between thick sheets of backer paper, and facer, used to construct interior ceilings. Let’s talk about the ceiling textures and the drywall options you can choose for your home!!! The Ceiling Textures And Your Drywall Options Decorating your home can be a real challenge for many !!! Therefore, choosing the right drywall finish or texture can prove to be a hard nut to crack. And it’s very natural to get in a state of indecision if you are handpicking it for your new home or renovation project. There are so many options that it feels like you are “searching for a pearl in an ocean.” Making up your mind about whether or not to go texturing your ceiling can be a tough job. And even if you choose to texture your ceilings, there are chances you’ll be confused about which one to go for!!!! And remember, getting the drywall right is the first step of tiling projects?”. But No Need to Worry!! This article will guide you in choosing the perfect texture and drywall option for your ceilings to look more elegant than ever!! 1. Sheetrock Texture: Old Is Gold Sheetrock ceiling texture is a drywall ceiling texture that has been famous since 1917. The reason this drywall texture is so awesomely renowned is because of the artistic look that it gives to your ceiling And the best part is you don’t need to use any sort of spray paint in this case. You can achieve this texture by using your artistic hand technique and without using any special brushes. This texture is perfect for any room. There are no restrictions on the use of this ceiling texture. 2. Stipple Brush Texture: A Test Of Your Skill This texture is not as easy as it seems. You need skills to create this texture. To create this texture, you need a roller and slap brush. The fascinating fact about this texture is it can cover the bumps and holes on your ceiling. And if you have the skills, then this texture can surely make your ceiling look gorgeous than ever!! 3. Swirl Texture: Creativity Taken To A New Level To achieve this texture, you need either a roller or sprayer. You can also do this by using a technique called “the basic swirl” method. But one thing that you need to keep in mind is while creating this texture, you’ll need a lot of patience to get the best result. And the difficult part is you need to create the pattern before the mud dries. So, make sure to have a helping hand by your side. Overall, the texture can really give that awesome look on your ceilings if you do it in the right way!!! 4. Orange Peel Texture: A Color Of Choice The name suggests all the colors of orange skin, but sometimes it’s also called “an eggshell” ceiling texture. If you really love this color, then this can be on the top of your favorite lists. To create this texture, you need to apply thin mud to the ceiling using a spray gun set at very high pressure. The more artistic mind you have, the more artistic look it has got!!!! 5. Smooth Textures: Choice Of Many If you are someone who wants the best at a cheap cost, then this texture is just the right choice for you. Moreover, you don’t need to have many skills to create this texture design. The look of this texture is just mind-blowing, and if you are someone who likes things to be consistently gorgeous, then this is the texture you can have for your ceiling. This texture is effortless to remove and is also perfectly suited for any room. 6. Tree Bark Texture: Beauty Of Nature If you are someone who loves nature and wants to bring the reflection of nature inside your home, then this textured style is just the option you can have. This ceiling has the look of a tree. You can create this texture just by using a heavy roller. The texture might look simply, but it’s very artistic and can surely catch the eyes of many. If you have a farmhouse, then this texture will double the beauty!!!!! 7. Slap Brush Texture: Slap The Beauty Out Artistic, gorgeous, beautiful, and elegant are the nicknames you can give to this texture. A complete package of beauty!!!! To get this texture, you’ll need a brush with very stiff bristles and thin mud. Firstly, you have to cover your ceiling with mud using a roller, then take the brush and slap the ceiling from the edge. This can be a hard nut to crack because if you don’t get it right on the first shot, the whole ceiling might end up looking messy. 8. Popcorn Texture: Cottage Cheese This texture, also known as the “cottage cheese” or “acoustic” ceiling texture, is probably one of the most famous ceiling textures ever!!! If you look closely, you’ll see it’s kind of a look-alike of “popcorn.” That’s why it’s called “popcorn texture.” To achieve the correct texture, you need to use a sprayer to apply to your ceiling. This contains Styrofoam with mud which gives that puffy effect. But it will require you to have a lot of skill to achieve this effect. That’s because the “popcorn texture” is both challenging to apply and remove. I hope this article will help you to know about the needs of ceiling textures and drywall options. And now I believe you’ll be able to get yourself the perfect texture for your ceilings. How Can I Remove Old Ceiling Textures Safely? Removing old ceiling textures can be a big job, but it doesn’t have to be intimidating! If you want to update your ceiling and get rid of that outdated texture, I’m here to help. No matter if you have popcorn, stipple, or another type of texture, this process takes a little bit of care, but don’t worry! Here’s a step-by-step guide on how to remove an old ceiling texture without breaking your back or the bank. Step 1: Test For Asbestos Before you get out any tools…safety first!  Remember, many older ceilings (especially those with popcorn texture installed prior to 1980) contain asbestos. Before doing anything else, have your ceiling tested for asbestos. You can hire a pro to test the ceiling or buy a self-test kit. If asbestos is present, halt all work and consult pros immediately. Asbestos removal is not a do-it-yourself job because it poses serious health risks if mishandled. Step 2: Clear The Room If there’s no asbestos present, it’s time to get the room ready. Cover all the furniture. You’d be amazed at how far a fine mist of water, compound, and paint can travel! Also, plastic should be removed from the floors, and tape should be around any ceiling fans or lights that are not being removed. I can personally tell you we didn’t do this. We found dried white dust on our bedspread when we were stripping the wallpaper in our bedroom, and we had to clean up all the residual dust a little too late. It was wild! Step 3: Soften The Texture For Better Finish Here’s where the fun starts! To make that texture easier to remove, you’ll need to soften it. Fill a spray bottle with warm water and mist the ceiling. You don’t want to drench it. If you put too much water on the ceiling, it could end up damaging the drywall underneath. Allow the water to sit for about 15–20 minutes or so, giving it time to penetrate and loosen up that texture material. Don’t rush this step. It’ll only cause more work for you in the long run. Step 4: Clean Your Work Grab a wide putty knife or scraper and start scraping off the texture. Do small sections at a time, and scrape at a shallow angle so that you don’t gouge the drywall underneath. If it’s not coming off well, spray some more with the water bottle and let it sit for a little longer. This step can be kind of messy and time-consuming, but have patience because, in the end, you will have a nice smooth ceiling. Step 5: Patch & Sand Once the texture is gone, you may notice a few dings or dents in the ceiling. Don’t worry! Just fill them with some joint compound, sand it smooth, wipe away any dust and you’re ready for a new ceiling. And that’s it! A fresh, smooth ceiling in no time! Read Also: Here’s How to Turn Your Garage into a Bedroom on a Budget! Turn your attic into a living space

READ MOREDetails