Five Easy Steps When Cleaning Your Mattress

Published on: 09 May 2018 Last Updated on: 08 August 2019
Mattress

It is highly important to clean your mattress on a regular basis. This is because mattresses could become a breeding ground for dust mites, stains, and bad odor. None of which we would want in our homes. Since we spend about a third of our lives sleeping, it’s only proper that the mattress we’re sleeping on is clean.

But mattress cleaning may prove to be an intimidating task, especially if you do not know what to do. Do you wash it or dry it out? What cleaning agents will you use? Are you using the right cleaning techniques? The questions are endless – and overwhelming, too. After all, no one would want to damage an expensive mattress.

To help you out, we have compiled a few tips to make the mattress cleaning experience a lot less daunting. Read on and find out.

Suck Up the Dirt :

Vacuuming your mattress is perhaps one of the easiest ways available to clean it. It may also be one of the most convenient ways. First remove your pillow top, sheets, pillows, and blankets. After doing so, you may then proceed to vacuum your mattress. This will:

Remove any crumbs that may have accumulated from late-night snacking sessions or from movie marathons.

  • Take off any pet hair that may have stuck to the mattress after letting your pet sleep in the same bed as you.
  • Remove any dust that has formed since the last time you took the time to clean your mattress.

Nearly every house would have a vacuum cleaner for general cleaning purposes. If yours does not, then consider getting one, as it is quite a good investment. It makes cleaning not only the rooms of your house a breeze, but it is a big help in cleaning your mattress as well, keeping it as comfortable as possible.

Easy Spot Cleaning :

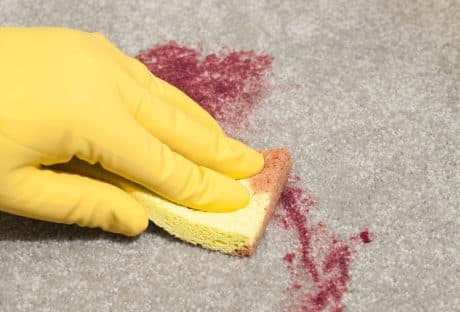
The next thing you can do to clean your mattress is to spot clean it. The type of stains present on a mattress will vary from person to person. Likewise, the best ways to clean these stains vary as well. Here is a quick list of what you should use when you get an unsightly stain on your mattress:

  • Water: Water is a safe bet. It is cheap and safe to use on absolutely everything. It is good as an immediate treatment to prevent stains from setting. It also lessens the effect of dyes but is not 100% effective.
  • Detergents: These can be used for most situations, especially for grease stains. Commonly, people have detergents for laundry and dishwashing at their disposal. You must be careful with the latter, as it could damage the fabric on the mattress.
  • Salt: This one can be found in almost every household. It is effective in removing sweat or deodorant stains. It is also good in lessening red wine and bloodstains.
  • Vinegar or Lemon Juice: These two are amazing tools for removing coffee and tea stains. People have also found them effective against grass stains as well as tape and glue residue.
  • Bleach: Bleach is effective in removing dyes. This means that it is a good bet for make-up and grass stains. This should be used in moderation, as it can damage more delicate mattresses.

People also rely on a combination of hydrogen peroxide, liquid detergent, and baking soda. Simply spray the mixture on a stain and spot clean away. Another easy combination is that of lemon juice and salt. Spread this on a stain and leave it on for at least half an hour. Afterward, just wipe it off.

Remove Foul Odors :

The third step we suggest for the mattress-cleaning process is deodorizing. There are multiple, easy ways for you to do this.

  • Air Dry: Perhaps the easiest and most convenient way to do when you want to deodorize. Simply leave it in the heat of the sun for a couple of hours. This will remove any foul odors and naturally kill bacteria as well.
  • Baking Soda: Simply sprinkle this stuff on your mattress and leave it be for a couple of hours. It is a natural deodorizer that also kills germs. After it has done its job, just vacuum off the excess on the mattress.
  • Lavender: A bit of an extra step, but has proven to be worth it. It does not only remove unwanted odors from your mattress, it also adds a relaxing scent that will help you get a better night’s sleep every night.

While each one of these suggestions is effective in their own right, doing all three would help you achieve better sleep. It may take some more effort on your part, but it will all be worth it.

Clean Your Sheets : 

Washing your sheets is another important step in this process. It’s not enough that your mattress is clean; your sheets should be, too. It is always a good idea to clean your sheets regularly as this would prevent stains from seeping through to the mattress. This will also remove unsightly stains and foul odors. Together with a clean mattress, this will help you wake up more relaxed and energized.

When doing this, it is important to remember the following :

  • The washing machine is your best friend when it comes to washing bulky sheets. A dryer would also help deodorize and kill bacteria with its heat.
  • Read care labels so that you do not cause damage to your sheets especially on sensitive fabrics. Some detergents are very strong and may actually do more harm than good. Some may even make the stain spread instead of removing it.
  • It would not hurt to use a scented detergent to wash sheets. Just know how much and which brand to use. As mentioned before, lavender is a good scent for some more peaceful sleep.

It is recommended that sheets be washed at least once a week. If this is not possible, then at least make sure to change them.

Protect Your Mattress :

Lastly, we would recommend you to protect your mattress. A lot of manufacturers offer mattress covers nowadays. They help prevent future stains from getting on the mattress itself. Not only that, some of them even make the bed more comfortable. As an added bonus, they can easily be thrown in the washing machine with the sheets.

And On That Note…

While this task may seem like it is too much, it really is not. This also has a lot more benefits than just removing stains. If you haven’t tried doing it and you’re scared of trying, ask someone who can help you out. Additionally, a wealth of information is available on the internet. Sometimes, the answers to your questions are a mere mouse click away.

Cleaning your mattress on a regular basis is important. This would help keep germs at bay and remove foul odors. This will also increase your mattress’s longevity. Your mattress will keep you comfortable for as long as possible. All of this would lead to you getting a better night’s sleep in the long run.

Take the first step today and you will thank yourself later. You invested quite well on that mattress; make that investment well worth it. Take good care of your mattress and it will take good care of you.

Read More :

  1. Natural ways to get rid of flea in your lawn.

  2. Home Hacks: Stuff You Can Clean in One Hour or Less.

Content Rally wrapped around an online publication where you can publish your own intellectuals. It is a publishing platform designed to make great stories by content creators. This is your era, your place to be online. So come forward share your views, thoughts and ideas via Content Rally.

View all posts

Leave a Reply

Your email address will not be published. Required fields are marked *

Related

How To Clean Up Blood Stains

Know This: Tips On How To Clean Up Blood Stains on Workplace Accidents

Comply with OSHA Standards : Employers are required to comply with OSHA guidelines and specifically to the Bloodborne Pathogen Standard. Employers must also create Exposure Control Plans. This is the case for any workplaces where employees are in contact directly with blood or other infectious body fluids while on the job. Employees and workers that work in financial institutions and banks do not perform jobs where they have reason to believe they will come in contact with blood. In the event of an accident, these workers must know how to handle cleaning up blood properly. Workers must learn how to use precautions and treat any blood or bodily fluids as if they are contaminated. They must treat them as though they have pathogens or are infected with HBV or HIV. Hepatitis B vaccines should be made available within 10 days of exposure on the job to pathogens. As an employer, you have an obligation to follow the guidelines set forth by OSHA regarding biohazard waste. To be a good citizen, you must comply with all government regulations and make the health and safety of others your priority. What You Need to Clean Minor Spills : Before starting the process of cleaning up blood, be sure you have: Protective equipment for all personnel A registered disinfectant with the ability to clean broad-spectrum pathogens Biohazard bags and labels Brush and dustpan Forceps and tongs Leak-proof sharps containers Disinfectant wipes To clean a blood spill from a surface: Equip Yourself Properly : Use gloves, masks, gowns, and eyewear to protect yourself from splashes. Make sure that your protective gear fits comfortably and has no holes in it. You do not want pathogens to come into contact with your body. Remove : With your brush and dustpan or your forceps and tongs, remove any shards of broken glass from the area. You want to avoid ripping your protective clothing. Put each piece in the leak-proof sharps container. Do not remove them by hand once they are inside. First Cleaning : Use cloth towels to cover the blood spill and let them absorb as much as possible. The disinfectant will not work if blood is on the surface. Once covered and cleaned toss the towels in a bag designed for biohazards. Second Cleaning : Go on to the second cleaning only after the room has been properly ventilated. Pour the disinfectant on the surface and let it stay there for 10 minutes. Then, scrub from the outside to the center using cloth towels. Toss these towels in the biohazard bag after doing the second cleaning. Third Cleaning : Use more towels and disinfectant on the surface. Put these in a biohazard bag when you are through. Leave the surface to dry. Disposal : Dispose of any protective gear and equipment the same way you did the towels. Put them in a biohazard bag. Seal it and place into a second container. Be sure to label the container clearly and call the local health department for instructions on how to dispose of things correctly.  Decontaminate : After doing this, use the registered disinfectant to decontaminate any brooms, buckets, dustpans or other items you can use again. Scrub the tools thoroughly and then rinse with water. Check : Do a final check to make sure no area of your body has been contaminated. Make sure no blood has splashed on your feet or on your shirt. Wash Your Hands : Wash hands thoroughly with water and disinfectant soap.  Disinfectant wipes can also be used if you are not near a sink. Report Incident : This is crucial. Fill out the incident report clearly as soon as the cleanup is complete. File it as instructed, and be sure It is important that you and your employees know how to clean up the blood in your workplace. Get help if you need it from a blood cleanup company. Keep your workers healthy and safe with the instructions in this guide.

READ MOREDetails
Pack For Temporary Storage

More Motivation, Less Distraction: How To Pack For Temporary Storage

You’re among one of the thousands of Americans who find themselves faced with packing for temporary storage. You're not alone... Maybe you're staging your home for a quicker sale, making room for a home office or a temporary classroom amid the Pandemic, or desire the peace of mind that comes from a space that is free of clutter. With so many changes in the worldwide landscape, self-storage has become an asset to homeowners and apartment dwellers. Temporary storage offers flexibility while creating room in your home and free space in your mind. All of those distractions not only lead to lower productivity but also lead to feelings of overwhelm that disempower us from reaching our goals. Feeling encumbered by stuff is a growing trend since so many of us are faced with how many things we actually have during a shelter in place! The good news is that by utilizing temporary storage, you don't have to wait for a bigger home to create that spacious feeling. Whether you're packing for temporary storage due to a transition in your personal life, or just want to free up some space in your home in you home, it can feel overwhelming to do the research necessary to begin the process. How To Pack For Temporary Storage? Here is a full-step guide to pack for temporary storage. read the points below to know everything about it in detail. Clearing some space in your home would also help you concentrate on doing something meaningful to your life. Step 1: Assess the space you have Create a flow in your home.  Your things should fit neatly into the space you have. Although it may be tough to decide what you need, storing things offsite means that your stuff is not gone forever! Get Rid of the clutter! Clutter can be overwhelming to deal with when starting to pack your belongings for storage. Once it's out of the way, it makes the packing process so much easier. Even a few hours of decluttering can make things run a lot smoother. Try getting the family involved, and make it a game! Read Also: Moving home checklist: What you need to know Step 2: Categorize & Inventory Making lists as you categorize your items for temporary storage will make it easier for you to find them as you need them. As you gather items from each category, make a list, or take a photo of what you pack in each box. Label your boxes with a number, and mark your photograph or list with the same number for a visual index. Having a list and documentation is also an asset in the event that an unfortunate or unexpected event should occur and you need to file an insurance claim. Things you use seasonally Your surfboard, your kid's inflatable pool, or your Bermuda shorts won't be of much use when it's snowing outside! Group all seasonal items by season, including decorations, clothing, and footwear together. When these items are packed together, and labeled, it's so simple to swap out a few boxes at the change of season. Sentimental Items You Don't Need Right Away High School Yearbooks, Stacks of your kid's artwork, and other items that have value but are rarely used in daily life can be prepared for temporary storage, so you can access them when you need them! Things You Need, Just Not Right Now Heirloom furniture, boxes of books, or clothes -you're saving for the next baby can all be stored off-site! Step 3: Gather Materials and Pack Following your inventory, pack items of each category together following these instructions for the safekeeping of your items. When packing, it is important to consider that life changes quickly, and although you are packing for temporary storage, you may enjoy the spaciousness this brings and decide to keep your items packed away longer than 3-4 months! Packing items to be stored indefinitely not only safeguards your items but can offer you peace of mind in the event that plans change. Since things often take longer than expected, you can rest assured knowing that your valuable items are safe. Be sure to use sturdy boxes, and always, always make sure the bottom is taped securely shut! Don’t overpack boxes, and make sure boxes can be comfortably lifted and moved. Pack lighter items on the top so they do not crush the contents beneath them. Fill any empty space in the box so it does not collapse. Furniture Clean each piece of furniture, removing any dust, debris, or food remnants. Condition any wood or leather items, and be sure to vacuum all upholstery. Disassemble any furniture. Often the assembly instructions are long gone, so it is helpful to take photos of each step along the way, documenting hardware as you go. When it comes time to reassemble, you can review your photos in reverse, making reassembly a breeze! Use a drop cloth, or moving blankets, wrap your items carefully for transport and storage. While bubble wrap is useful for protecting mirrors and glass, avoid using plastic coverings directly on your furniture. Plastic can trap moisture, which can cause wood to warp and upholstery to mold or mildew. Use only white drop cloths to cover wood or upholstery, as the dyes can bleed in humid environments leading to discoloration of your furniture. Electronics Remove any dust or debris from the item using a dry cloth. If you are storing an electronic device that stores data, be sure to back up any important information before packing it away. Secure packing of electronics is so important! In the event of any bumps or drops, you can be at ease knowing your electronics are secure in their packaging. Remove all cords, and wind them into a circle, securing with a tie. If possible, pack electronic items in their original packaging. If that is long gone, use a box slightly larger than your item, and create a shock-absorbing buffer firmly around the item using packing peanuts or styrofoam. Avoid using any plastics that will trap moisture, and be sure to include several silica packs to absorb any humidity. Always keep your electronics upright. Mark an arrow on the box with the correct direction to ensure that your item is stored and transported safely. Once your device is placed securely in the box, you can place the corresponding cords on top of the packing, and tape your box closed securely. Clothing & Specialty Worn Items Books, Papers, and Photographs Since mold is a common issue when storing books, and papers, it's recommended to ensure they are totally dry. If you live in a humid climate. Paper objects can be stored in smaller, opaque plastic totes to ensure they are kept free from moisture and light, and rodents. Pack larger books lying flat, and store smaller books upright, as you would on your bookshelf. Never store a book on its spine, as it can cause damage to the structural integrity of the book and damage it. Protect your photographs by storing them in an archival album before storing to ensure your photos will be around for generations. To store larger photographs, carefully place them between layers of cardboard, and lie flat. Instruments, Art, and Other Delicate Objects To properly store delicate objects, it is important to have a facility tha is climate controlled, even for temporary storage. Make sure all packing is secure, keeping packing materials out of direct contact with any painted areas, wood accents, or delicate features. You May Also Like: Small Kitchen Storage Ideas Step 4: Finding A Storage Space It can be difficult to conceptualize how much storage space you actually need. Many self-storage websites offer guides that can help you visualize how your things will fit in the space. Some storage units are multi-level, so be sure to ask about accessibility if you need a space that is on the ground level. If you are storing any sensitive items like instruments, electronics, or antiques, be sure to rent a climate-controlled unit. When people think of storage, the image that comes to mind is often a traditional storage facility. While traditional storage is an excellent option for many, there are alternatives that can offer some flexibility, convenience, or some sizable savings. Maybe you have a spare vehicle that never gets used sitting in your garage. Consider storing your vehicle, renting extra space from someone in your neighborhood, or asking a family member or friend to store belongings for you.

READ MOREDetails
Zebra Blinds

Elegance of Zebra Blinds: Functionality and Style

Zebra blinds, also known as transitional shades, have emerged as a popular window treatment option for those seeking a harmonious blend of style and functionality. These versatile window coverings are gaining recognition for their unique design and ability to transform any space.  In this article, we will delve into the world of zebra blinds canada, exploring their features, benefits, installation, and maintenance. Let's embark on this journey to uncover the elegance that zebra blinds can bring to your home. What  Do You Know About Zebra Blinds? Zebra blinds are a modern and innovative window treatment solution that gives homeowners optimal control over light and privacy. They consist of two layers of fabric with solid stripes and alternating sheer, giving them their distinctive appearance. The ingenious design allows you to adjust and control the position of the fabric layers, creating varying degrees of light filtration and privacy. The Zebra blinds are available in different shades, transitional shades, alternating shades and others. These solid bands offer privacy and then block out the lights. It can help you get the soft, diffused glow in your space. These zebra blinds are available in different options. You can fix them in different places, the living rooms, the bedrooms, the home office and others. They offer you a contemporary, modern look that complements the different design styles.  Benefits of Zebra Blinds The Zebra blinds are available in different shades and styles, as we mentioned above. But they are more used for the advantages they carry. Here, we provide you with the advantages that you have with the help of the zebra blinds. So, let's get started with the discussion to have a better understanding of the facts.  1. Light Control Zebra blinds offer exceptional control over natural light. You can perfectly balance a well-lit room and a shaded private space by aligning the sheer and solid stripes. This adaptability is especially valuable for rooms with changing light conditions throughout the day. It requires mention that you need different shades of light for different occasions. If you have control over the amount of lights entering your house, you can undoubtedly be able to regulate the temperature of your home.  2. Privacy Maintain your privacy without sacrificing natural light. Zebra blinds allow you to obscure the view from the outside while still enjoying the scenery outdoors. It's an ideal solution for homes in densely populated areas or those facing busy streets. Among the top requirements that you have, privacy is undoubtedly one of them. From this aspect, the zebra blinds are of great benefit without a hint of doubt.  3. Stylish Aesthetics Zebra blinds are not just functional; they also serve as a stylish design element in any room. Their contemporary look complements various interior styles, from modern to traditional, making them versatile. There are different categories of zebra blinds that define your core requirements. You have to be highly specific about your own requirements. They help you get the best look and feel.  But you can not shift your focus or attention from the aesthetics.  This is the reason they are effective in terms of the overall look and feel of both your zebra blinds and at the same time, the aesthetics.  4. Easy Maintenance Keeping zebra blinds clean is hassle-free. Regular dusting or gentle vacuuming is usually sufficient to maintain their pristine appearance. Their durability ensures they remain an attractive window treatment for years to come. What you simply need is to allocate some minutes, once or twice a week. It will be more than sufficient to provide you with the necessary maintenance.  Installation Installing the zebra blinds has their own fun and, at the same time, their own challenge. You can say that there are both positives and the negatives. But you can not overlook the fact that you, too, have your own requirements.  Installing zebra blinds is a straightforward process that can be done by a professional or as a DIY project. Here's a basic guide: 1. Gather Your Tools To begin, you'll need a measuring tape, a level, a screwdriver, and a pencil.  2. Measure Your Windows Accurate measurements are crucial for a perfect fit. Measure the width and height of your window frame, noting down the dimensions. 3. Mounting Brackets: Attach the mounting brackets to the top of your window frame, ensuring they are level. 4. Install the Blinds Insert the zebra blinds into the mounting brackets and secure them in place. 5. Test Operation Test the blinds to ensure they raise, lower, and adjust smoothly. Another angle of this action is the availability of time. You may not have sufficient time for installation. Or it might be possible that you are not good at it and it's not your among your priorities. Then, in that case, you make the best of professionals. They have a thorough knowledge of the nitty-gritty of the art. They can help you out with the inputs. Maintenance Tips Buying aesthetically appealing zebra blinds will not be enough; you must also focus on maintenance. It involves your daily time investments. You must mop it daily or do it twice or thrice a week. It may be that you don't have sufficient time. But if you can not mange your maintenance, then in that case you must take the help of helping hands, be it the  To keep your zebra blinds in pristine condition, follow these maintenance tips: Regularly dust or vacuum the blinds to prevent dust buildup. Spot clean any stains with a mild detergent and a soft cloth. Avoid using harsh chemicals or abrasive cleaners, as they can damage the fabric. Conclusion In conclusion, zebra blinds offer a unique combination of functionality and style for your windows. Their innovative design can help you control light and privacy effectively while adding a touch of elegance to your living spaces. Whether you're redecorating your home or simply looking for a practical window treatment solution, zebra blinds are an excellent choice. So consider these points while you look to select zebra blinds for your home.  Read Also: Inspiring Window Treatment Ideas Replacement Windows – Benefits of Vinyl Windows 10 Tactics To Maintain Clear Windows

READ MOREDetails