Published on: 26 April 2018
Last Updated on: 24 July 2024
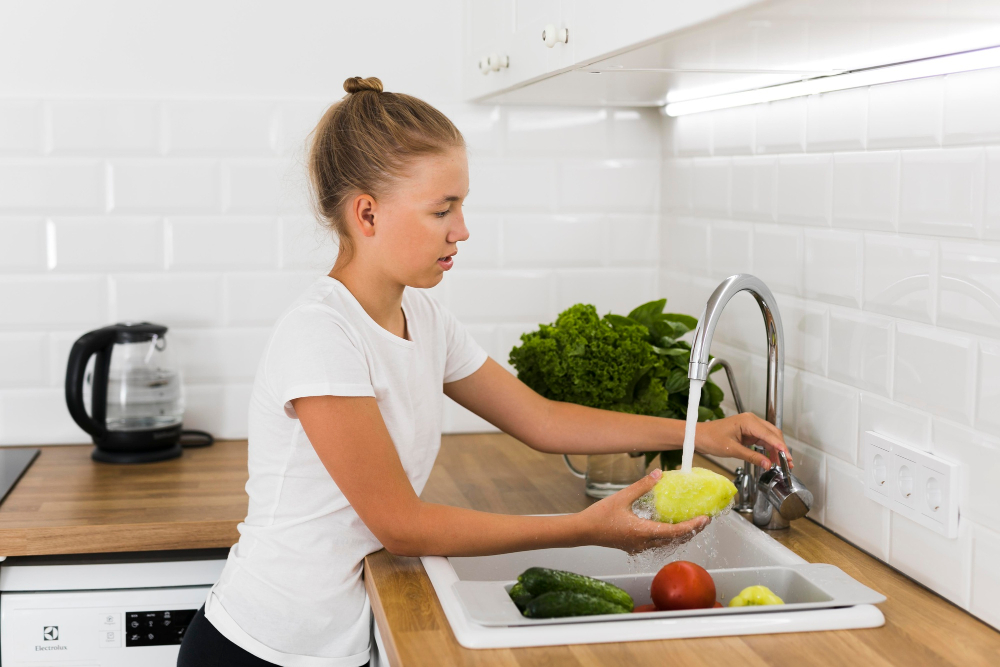
In the design of your kitchen, you’re sure you’re thinking about the style of cabinets, floors, and appliances. What many do not know is that the kitchen sink can have a big role in its design. Although it is only used to wash dishes, rinse food and wash hands, the kitchen sink has an impact on the design of the kitchen. There are many old styles, but also in these last years, a lot of designs and different functions have appeared. And in fact of all the accessories and appliances, the kitchen tap is probably the one we use the most.
It is said that the average family uses the Kitchen Faucets more than 40 times a day. So when you choose a tap you have to be one that at the same time falls well with the design of your kitchen, that does its job well and that it is durable. Now we will see the elements to consider when choosing your future kitchen tap.
What to see in the best kitchen faucets :
Take a look at your current sink to decide if you want to maintain the same design and functions when choosing a new faucet. If you are going to keep the sink, then you have to be able to use the holes that are already on the surface of the sink. From there you can decide if you want to add a spray hose or a dispenser. You can also decide to buy a new sink, especially if you choose a tap mounted on the deck and the current one is mounted on the wall.
When you start your search you will have to make decisions between peak type, height and number of shooters. Many people are opting for the peelable spray system for the type of nozzle, but you can always get a side-mounted spray hose. The height can vary from 10 to 18 inches so choosing the right height will be based on the size of your sink. You can always get cold and hot handles but most of the pull-out faucets have only one handle. The style of the beak is something to consider. The “swan neck” or high arc taps are a trend since it allows more space for cleaning large pots or other tasks.
Everyone will have their own style and sure you too, for example, the chrome-plated brass is a popular finish that many choose. The solid brass keys with ceramic disc valves are used to control the flow of water and this makes it last longer. Again, make sure the kitchen design matches the tap style. The taps can also vary in their angles, curves, and details. When choosing materials and finishes whether nickel, bronze, black, stainless steel, etc., be sure to buy accessories such as soap dispensers from the same collection because if they are from different manufacturers, the finish varies slightly.
For a more durable faucet, choose stainless steel, solid brass or a faucet with a ceramic disc valve. A heavier tap will indicate better quality. The solid brass ones last longer. Faucets with plastic parts do not last, are cheaper and over time you may have to replace it with additional cost. We already saw the tips for choosing a kitchen tap, now I want to emphasize more about some types of faucets and how each one can serve you.
Content Rally wrapped around an online publication where you can publish your own intellectuals. It is a publishing platform designed to make great stories by content creators. This is your era, your place to be online. So come forward share your views, thoughts and ideas via Content Rally.
When carpets are new, they stand out because every fiber is clean and flawless. However, as people walk on carpeting, the condition of its fibers changes, and this makes the pile less appealing. Carpet cleaning Environmental elements can affect a carpet's beauty as well by covering various fibers with microscope contaminants. If you want to keep your carpet in optimum condition in order to maintain its beauty, you'll need to follow 10 steps.
1. Vacuum:
Dust and dirt gradually build up on carpet material. If a dirt or dust layer is very thick, it will make a carpet dull. To extract dust and dirt, clean your carpet with a powerful vacuum twice a month. While vacuuming, push the vacuum horizontally. Then, position the unit so that you can clean the carpet again vertically. The number of passes will vary depending on the carpet's condition. Select the best carpet cleaning technique can make things easier for you.
2. Prevent Mud and Dirt Stains:
Most shoes have grooves that produce mud stains. If mud dries underneath a pair of shoes, it turns into dirt, and these particles can ruin your beautiful carpets. This is why you must place a mat that has stiff fibers near the front door. If everyone brushes their shoes against the bristles before entering your home, the carpets will stay clean. The dense bristles on the mat will wipe away any mud or dirt that lingers on everyone's shoe soles.
3. Clean Spills Quickly:
When someone spills a beverage on your carpet, clean up the liquid fast. If you wait until the beverage dries, you'll have problems removing the stain.
To clean up a spilled beverage, grab a paper towel, and dab it on the carpet fibers. Don't rub the towel on the carpet because you'll push the liquid down into nooks and crannies around threads. Whenever you need help eliminating a tough stain, treat the spot with soapy water. Then, dab a clean paper towel on the stain.
4. Keep Pets Off Delicate Carpets:
Pets that spend a lot of time outdoors shouldn't relax on your carpeting until they take a bath. The big problem is that pets have fur that holds dust and dirt. If contaminated fur touches tall carpet fibers, dirt will transfer onto the carpeting, and some particles may reach the bottom of the pile if a pet rolls or sleeps on the material.
5. Change the Furniture Layout Occasionally:
Furniture that's very heavy can damage delicate carpeting. Typically, the degree of damage is influenced by the length of time that a piece of furniture stays in one spot. The legs on hefty furniture can cause severe damage; they usually create crevices that make carpeting unappealing. In order to keep the fibers springy, simply change the layout of your furniture twice a year.
If you can't move your furniture because space is limited, invest in rugs with patterns that compliment your main carpeting. Place these rugs underneath the heaviest furniture to give your carpet a layer of protection.
6. Pull the Fibers:
Over time, as heavy furniture is pushed around a space, some areas of a carpet will buckle. If a carpet is very weak, ripples will also develop in isolated zones. These problems won't go away until someone pulls the fibers. Whenever you find rippling or buckling, implement procedures to correct the problems before creasing occurs. Creases can make the most attractive carpets less appealing because they create elevated zones that are tacky. To get rid of buckles and ripples quickly, let a seasoned carpet technician tackle the job. A professional can stretch out the carpet safely and efficiently without damaging the material.
7. Paint Interior Zones Strategically:
Paint can ruin a carpet if it drops on its fibers. You'll have to deal with bigger problems if you accidentally smear paint on the fibers or step on a layer of spilled paint. Once pressure is applied to paint, it will adhere to the fibers more efficiently, and the process of cleaning it up will be very challenging.
Whenever you're going to paint the interior walls around your home, you must prepare the space for the job. Place your paint cans and trays on a high counter or shelf so that no one will accidentally spill paint on your carpeting. While painting elevated areas, never coat your brushes or rollers will excessive paint. This strategy will prevent splattering as you apply coats on the high ceilings and walls.
8. Lease Carpet Cleaning Equipment:
Deep cleaning is an essential cleaning job. The equipment makes a carpet beautiful by washing soiled areas with a soapy formula. As the water soaks the fibers with rich soapy water, a brush loosens the dirt by spinning against the carpet material. After a carpet is deep cleaned, no dirt lingers on its surfaces because a deep cleaning unit extracts the dirty water into a convenient tank.
9. Replace Air Filters:
Air conditioning equipment uses ducts that can direct pollution into a home. However, all air duct systems are able to block contaminants before they enter a home using filters. When a filter is dirty, it must be replaced in a timely manner. If you replace your air filter regularly, thin layers of dust won't generate on your carpeting. Filters are the best carpet cleaning technique to make proper use of it. Carpet cleaning can make things easier for you to achieve your objectives.
10. Hang Blinds:
The sun produces very harsh UV rays that can damage delicate carpeting. If a carpet is a light color, intense heat from the sun can create noticeable spots on the carpet. By hanging blinds on multiple windows, you'll shield sunlight and protect your carpeting. Car cleaning can make your ambiance more aesthetic than before.
Read Also:
Run Cleaning In Dallas: Why A Professional Cleaner Is Better
Five Ways To Improve The Air Quality Inside Your Home
Benefits Of Having A Cordless Vacuum Cleaner At Home
Healthy living requires a clean and safe environment, but with the prevalence of many microorganisms such as mold damage, this can be challenging. This is because they are invisible to the naked eye and release spores into the air, which cause major health problems when inhaled.
Mold is a fungus that grows in the form of hyphae, which are multicellular threads. It is composed of microorganisms that can be found almost anywhere. They are useful outside for breaking down garbage and composite materials, but when found indoors, they are extremely detrimental to human health.
Mold damage produces allergic reactions or irritation and must be removed as soon as possible. To stop it from spreading, early detection and removal are essential. Mold remediation or removal is not something just anyone can do. To achieve a proper sanitization of the entire building to avoid the existence of mold, you will need to contact professionals or follow the complete guide about damp wall treatment procedures. This way, you will be sure that your home or office will be properly treated.
Finding a good remediation service is not always a stroll in the park, especially if you have not worked with one before. However, with the right guide handy, you can easily find a professional company that will properly clean and sanitize your building. If you do not know how to find a good company, and you need recommendations on reputable companies to work with, you can visit the Long Beach mold removal company for help.
Types of Molds Damage:
Here are some common types:
Aspergillus
This type does not need much ventilation and can be found in attics, textiles, walls, dry food, and basements. It has a powdery appearance and may be white, green, or gray in color, with dark dots. It has several carcinogenic forms, but when detected within the home, it causes serious respiratory problems.
Cladosporium
This can be found in both warm and cold places. It can also be found on carpets, clothes, wood, and heating and cooling ducts, among other things. The color is usually black, or green.
Alternaria
This fungus has a white background with black dots and can be found near windows, in fabrics, bathrooms, kitchens, air conditioning units, and wallpapers. However, it is commonly found outdoors.
Trichoderma
This fungus is commonly creamy-white in appearance, but as it releases spores, it becomes green. Windows, baths, kitchens, and wood are among its favorite areas.
Penicillium
This type is fuzzy and comes in a variety of colors, including blue, green, and yellow. Basements, insulation, and carpets are all common places to find them. It is usually present anywhere a water-damaged structure is found. Penicillin, an antibiotic, is derived from it. You can learn more about penicillin by reading this article.
Key Materials for Mold Removal
Mold damage removal requires a variety of tools, depending on the size of the fungus and the type of surface to be cleaned. There are natural cleaning methods that may be utilized to get rid of it as well.
Plastic Sheet
A plastic sheet is used to separate the infected region from the rest of the room, preventing spores from spreading. It is used to block openings to air vents, doorways, and the rest of the building.
Biocide
It is critical to use a high-quality cleaning product for removing mold damage. The fungus will only be hidden if you use poor or regular household bleach or cleaning agent. Biocide is particularly effective at killing and inhibiting this bacterium's growth.
Vinegar
Despite its strength, it is quite effective against fungus. Baking soda, hydrogen peroxide, and lemon juice can all be added to it. Wear safety clothing such as goggles, gloves, and a breathing mask when using it. To remove the mixture, wipe the area with a clean moist cloth.
Sodium Bicarbonate
Baking soda, or sodium bicarbonate, has a wide range of applications, including the removal of fungus. It should be sprayed on the damaged surface after being combined with vinegar or water. After spraying, scrub the area with a brush, rinse, and then spray again.
Dehumidifier
This gets rid of the moisture and prevents future growth. It is best used after the cleaning procedure to air the place and remove any remaining moisture, but it can also be used as a preventative strategy. As a solution, a portable one can be stored in a room with an infestation.
If you need tips on how to use a dehumidifier, you can check here: https://www.wikihow.com/Use-a-Dehumidifier
Lemon Juice
This natural cleanser is efficient, non-toxic, and has a pleasant scent. Before spraying it, clean the surface with soap and water. It can also be applied daily to keep fungus at bay. It is an excellent choice because it is both environmentally and pet-friendly.
How to Keep Mold Damage at Bay
Here are some methods to guide you:
Regular Checks
They can be found in open regions, but they can also grow in secret spots. This means that regular inspections of damp, dark areas like basements should be carried out to detect the infestation early before it worsens.
Repair any Leaks
If there is a leak from pipes or faucets, fix it immediately and dry the area. Also, inspect drains and pipelines on a regular basis. Liquid storage areas should also be checked because they can leak from their bottles.
Make Use of Cleaners
While it is necessary to deep clean your home on a regular basis, you should do so with a mold-prevention agent. Natural cleaners such as natural lemon, white vinegar, baking soda, as well as other citrus-based treatments are recommended. In addition to keeping fungi at bay, these solutions leave a fresh smell around the building.
Allow Sunshine In
Mold does not thrive in natural light and fresh air. This means that you have to open the windows and curtains to allow sunshine in. You can also turn on your ceiling fan to prevent the survival of mildew. Keep in mind that mold damage is detrimental to human health and this should guide you in taking the right steps to prevent its growth and survival. You can read articles explaining how mold affects human health for more information.
Wrap Up
Mold growth can pose a danger to human health; therefore, it should be nipped in the bud. Always inspect the bathroom, roof, pipes, and foundation for cracks, leaks, or damages. Delaying treatment as soon as the condition is discovered can worsen the condition and increase the cost of treatment, especially if toxic or black mold is present. This article outlined tips to help you prevent mold damage in a building. Feel free to check them out.
Read Also:
We Buy Houses Companies Saving Homeowners From Foreclosure
Cleaning Your Home with Pets – The Most Common Problems
Hosted Mail Service That Runs on the Cloud
Are you thinking about bedroom decor ideas for this summer? Seems like we have heard your thoughts already!
When we think about summer, we start to paint a picture already: summer berries, enjoying Pimm’s with close ones, and whatnot! But what if I tell you there is another way to enjoy your summer? Yes! Your bedroom.
Summer is a warm hug and a perfect moment to give your bedroom a seasonal look. You just transform the bedroom that captures its vibrancy and calmness.
A well-decorated bedroom enhances your living space. Moreover, it affects your frame of mind and happiness levels. However, summer is the right time to refresh and revamp your bedroom decoration.
This period offers an opportunity to introduce lighter shades. With warmer weather and longer days, transform the place into a serene summer retreat.
Here are some creative summer bedroom decor ideas to help you bring the summer’s feeling into your room:
Bedroom decor ideas to update your home for summer
When I was a kid, I always saw Mum making a huge deal of changing bedsheets into linens during summer. We even had summer special lighting and curtains. My mum used to love decorating the bedrooms based on the seasons.
I feel like this has been passed on to me. Be it my college dorm or my present bedding, I always try to change the settings.
Today, I will share a few bedroom decor ideas to help you decorate your room this summer.
Choose Lightweight Bedding
Switching to lightweight bedding is one of the best decisions for this season. Heavy duvets and thick blankets offer warmth during winter months. But during summer, they make a house stuffy and uncomfortable.
So, go for materials such as cotton or linen that breathe and keep one cool during hot summer nights. Some of the options include light quilts or plain cotton sheet sets. These options provide comfort and create a relaxed and casual atmosphere in the room.
Consider Coastal Decorations
Coastal decor can be included in your bedroom to bring the beach’s essence. The idea behind this is that coastal décor reminds people about being on holiday. Their bedrooms feel like they have escaped from everything else around them.
They feel completely new again, full of ocean freshness and air seasoned by relaxation.
If you want an ocean theme, you can start with soft blues and sandy beige. I recommend ending your decoration with crisp whites to give it a more vacation vibe. You can also provide textures like rattan or driftwood. That’d be a nice, desirable addition to it.
Alternatively, one can hang pictures of oceans, beaches, and coastal landscapes on their walls. This will give the impression of the summer holiday they went on vacation. So, whenever you enter the room, you will feel like you are at your favorite resort.
Choose a Summer Color Palette
If you switch to a summer color palette, your bedroom atmosphere can change. In summer, colors should be light, bright, and cheerful.
For instance, there are some shades like sunshine yellow, green, and pastel pink, which, when integrated into your space, make you happy and energized again.
You do not have to repaint the whole room to adopt a summer color palette; small changes make all the difference. For example, adding colorful throws at the end of the bed or changing pillow covers might be enough.
Sometimes, even new pieces of vibrant artwork may also help refresh your space here and there, depending on how far you want to go with it.
Don’t forget the walls
To maintain your summer theme, you can choose light and airy paintings and photographs. Now, if you want my suggestions, I recommend you go for floral photos. Crafted pieces in spring or summer palettes can also help your bedroom look more cozy and summerlike.
Add Decorative Pillows
Decorative pillows can freshen up the bedroom for the summer. They do more than add a pop of color; they introduce new textures and make rooms look warm and cozy.
Therefore, when considering which pillows to buy for your summer home, think about colorful items that reflect the right mood for the season.
However, some pillow designs have been made specifically for this period, so you have to pick such ones on our website. These could be tropical print themes, floral prints, or nautical motifs, among others, but not limited to them.
Furthermore, texture should also be considered when purchasing these items. These may consist of cotton, flaxen, or light velvets, which, in most cases, give them deeper emphasis.
Add Summer Florals
There’s something about vibrant blooms that reminds us of summer. You can bring nature indoors and make your room smell amazing by incorporating flowers. Several options include summer florals in your bedroom, ranging from real bouquets to flower patterns.
So begin by putting a vase full of fresh flowers on top of a nightstand or dressing table. All you need to do is select those that are flowering during this time, such as peonies, sunflowers, or daisies.
Not only will the attractiveness and fragrance included in one package make it feel special. If you don’t want live plants, then go ahead and purchase artificial ones, which are still good since forever may never come anyway.
Bringing It All Together
These suggestions can help you create a cohesive summer look in your bedroom. Start with a neutral palette and then gradually add summer elements.
You could begin by changing your bedding and slightly embellishing it with some pillows. Then, choose a few coastal décor items and anything else on your color scheme during summer. Last but not least, include some summer blossoms in your design stage.
The idea is to create an environment that feels light and breezy and has all the charms of summertime.
Do not hesitate to try out different combinations until you find one that suits your style best while keeping things fun and summery in your bedroom retreats at all times.
Conclusion
Redecorating the bedroom for the hot season may be an exciting project. This will involve selecting lighter linens, going nautical, settling on colors for warmer months, including extra cushions, and involving more summer florals.
Get started today, turning your bedroom into an ultimate haven for this year’s warmest period! Lastly, if anyone wishes for any decor-related things such as pillows, curtains, and many other bedding materials, then consider checking out the Latest Bedding.
They have quality products, such as stylish ones, that can bring dreams concerning what kind of decorations are expected in homes every weekend over the summer holidays.
Continue Reading:
Everything You Need To Know About Harvesting Basil!
Exploring The Ways Domestic Lifts Enhance Mobility And Access
How To Approach Home Maintenance With A Focus On Well-Being