Published on: 26 November 2018
Last Updated on: 13 December 2021
It seems like a thing of the future; something reminiscent of sci-fi films set on spaceships, complete with large, omniscient motherboard computers. But having a smart home controlled by virtual voice command technology is very much a thing of the present. With the release of Apple’s Siri technology in 2011, the virtual assistant game was changed. The ability to give commands verbally to an in-device personality, Siri, opened the door for easier, more productive living. Now with Amazon and Google joining the race, and other companies following suit, there’s suddenly a whole heap of new virtual assistant options.
Moving away from purely phone/tablet based assistants, the market now includes home-based alternatives. Google Home or Amazon’s Echo (complete with assistant Alexa) allows users to turn their space into “smart homes”, wherein with a simple verbal command, they can instruct their assistant to perform all kinds of tasks around the home, such as turning lights on and off.
There are also some things you should be careful about. According to Lendi smart home can be targeted by hackers since the whole house is connected via Wi-Fi or Bluetooth.
Some of the best things include While upgrading Smart Home:
Controlling lights
Changing a home’s temperature
Playing music
Opening/closing garage doors
There are loads more options you can choose from, and third-party capabilities you can put in place (Amazon’s Alexa can perform over 10,000 tasks!), like creating lighting sensors, or scheduling changes to your lights, alarms, and thermostat.
Virtual voice assistants also signal a massive change in the lives of people living with disabilities or illness. The chance to utilise voice commands to perform everyday tasks removes the barrier that mobility issues and physical impairment create. For able-bodied people, virtual assistants are a cool new way to increase productivity and promote convenience. Consider then the massive improvement this technology can make in the lives of people living and thriving with disabilities. The extra support can be life-changing. All in all, another point scored for the virtual assistants’ pros list.
So, the basic gist is that having your house properly set up as a smart home is awesome and opens you up to a heap of benefits. However, setting the system up can be confusing.
You’ll largely need to consider two things:
Choosing your assistant:
The main players that hold the monopoly on the smart home/virtual assistant market are Amazon’s Alexa, Apple’s Siri, and Google’s Assistant. They all have their pros and cons, and your choosing which one suits you best is ultimately a matter of personal preference. They all offer easy-to-use voice commands, but there are several different things to consider when deciding on an assistant:
Price
Capabilities (what can you do/control?)
Compatibility with Android or Apple products
Ease of set-up (how long and difficult is it to get running?)
Ease of use (Is it perceptive and easy to talk to?)
Assistant’s intelligence (How easily and well it can answer questions.)
Choose your hardware:
After deciding on your virtual assistant, you’ll need physical hardware to support it. Each different assistant offers different options, like the Amazon Echo. They too have their pros and cons. There are also different models of each hardware device, so there are multiple cost, sound and utility options. Your hardware largely depends on which assistant you choose, so that will also narrow down your options.
The last important thing to think about when considering the purchase of a virtual voice assistant is your internet’s performance. If you’re having to use your phone’s personal hotspot at home because your connection is slow and temperamental, perhaps think about changing your home internet’s carrier or plan. You’ll need to choose a reliable broadband connection to run and use your assisting device, and you may need to research bandwidth, and how this affects how well your devices stream content and perform commands.
Content Rally wrapped around an online publication where you can publish your own intellectuals. It is a publishing platform designed to make great stories by content creators. This is your era, your place to be online. So come forward share your views, thoughts and ideas via Content Rally.
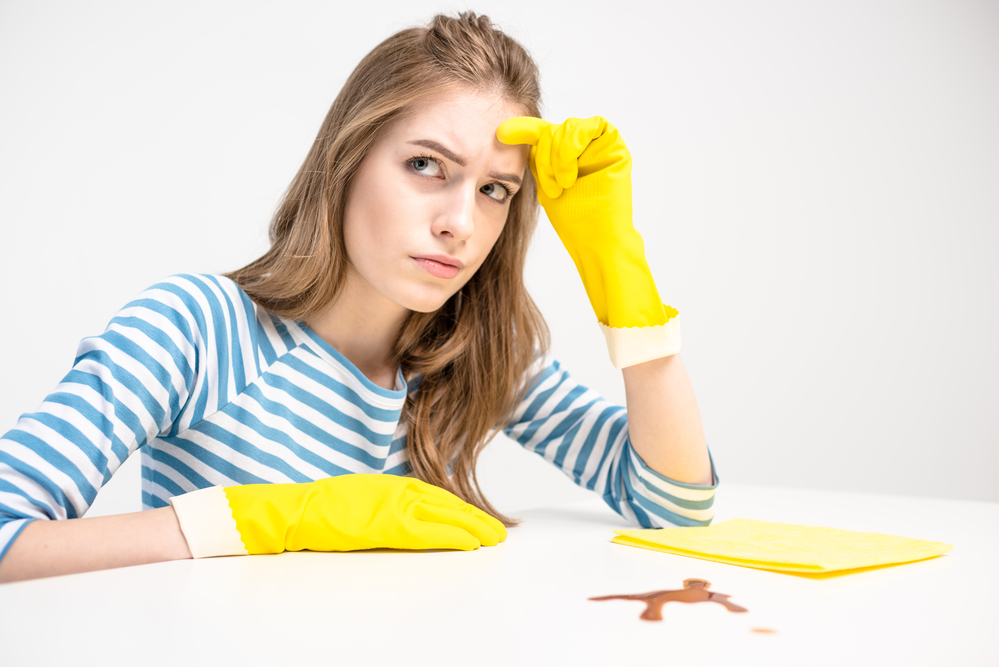
Maintaining a clean and organized workplace is a must for your well-being and productivity. However, it is no secret that office cleaning is a daunting task.
There are so many things you need to consider, not to mention different areas and surfaces require different cleaning methods. Often, different methods require different cleaning equipment and cleaning supplies.
In this entry, we will share with you the best practices and processes that the best commercial cleaning services use in their office cleaning service. Here's a commercial cleaning checklist to keep your workplace spotlessly clean.
The basics of office cleaning services
Before diving into the checklist, it is important that you understand the basic processes of commercial cleaning and how commercial cleaning companies deliver these practices.
Most of these things are pretty self-explanatory. However, there is a reason why professional cleaners from commercial cleaning companies are efficient in their job – they know how to do things right. Knowing these practices will help you understand how to do them right too.
Dusting
Dirt, dust, and allergen particles accumulate quickly. If not removed from the business premises, these particles can get mixed into the indoor air and cause various health problems such as allergies, respiratory problems, headaches, etc.
Commercial cleaning plans for office cleaning often include exhaustive dusting of all surfaces. This includes desks, shelves, electronics, windowsills, etc. A good commercial cleaning company uses microfiber cloth and a feather duster to remove dust effectively and safely.
Vacuuming
Vacuuming is the most efficient way to keep workplaces clean. It removes dirt, dust, and various outdoor debris from carpets, mats, rugs, etc.
The advantage of hiring cleaning services is that a commercial cleaning company has access to industrial-grade and powerful vacuum cleaning machines that can truly and efficiently remove dirt, dust, and various debris.
Nevertheless, when vacuuming your workplace, include cleaning the hard-to-reach areas, such as under the desks, tables, and chairs. Since they are hard to reach, these spots often trap foreign debris.
Mopping
Mopping is the best way to keep hard floors clean and shiny. It removes dirt, dust, and grime buildup from the floor. However, there is more to mopping than simply sliding the mop head back and forth on the surface of the floor.
When mopping the floor, use a cleaning solution that is recommended for the type of floor you have.
To ensure that all areas are covered, you need to mop in a back-and-forth motion.
Trash removal and disposal
No building maintenance will ever be complete without taking the trash out.
When removing trash from your commercial premises, make sure to replace the bin liners as well. And when replacing the liner, make sure you clean the interior of the trash bin.
Commercial cleaning services often include weekly disinfection of the trash bin. This is incredibly important in preventing bacteria buildup and odour in your trash bin.
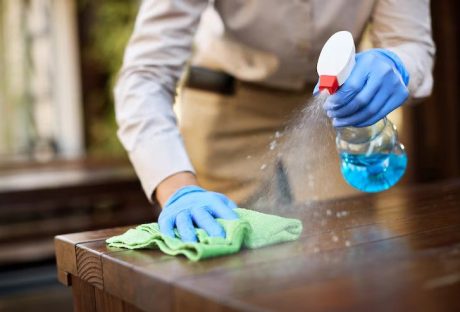
Disinfecting surfaces
Another crucial aspect of commercial cleaning is surface disinfection. Disinfecting surfaces helps prevent the spread of disease-causing germs and bacteria in the workplace.
When disinfecting your workplace, make sure you use a disinfectant spray or antibacterial wipes to clean surfaces. This includes desks, chairs, tables, countertops, light switches, office appliances buttons, and doorknobs. Commercial cleaning services often include disinfection and sanitation of surfaces in their cleaning service.
Also, commercial cleaners, in particular, pay close attention to high-touch areas and surfaces, which are often breeding grounds for bacteria. These surfaces include hand railings, elevator buttons, light switches, and more.
Bathroom cleaning
Bathrooms are often the dirties and smelliest areas for commercial spaces. With that said, it is not surprising that they have become breeding grounds for bacteria and germs.
When cleaning bathrooms, make sure you clean and disinfect high-touch spots and items such as faucets, sinks, toilets, and even mirrors.
Commercial cleaners often include towel replacement, hand soap refill, and bathroom supplies restocking to ensure your office bathrooms are clean and convenient to use.
Breakroom cleaning
The breakroom is where employees often gather to chit-chat, eat their food, drink their beverages, and rest. For this reason, breakrooms can become breeding grounds for bacteria and germs. Thus, when taking care of your breakrooms, make sure you include the appliances, countertops, sink, tables, and chairs.
Glass window cleaning
Often, business owners neglect their windows, thinking they cannot clean surfaces they can’t reach. This is particularly true for tall building establishments.
Professional commercial cleaners, however, have access to the right cleaning equipment and materials you need for a thorough and efficient window cleaning. They have tall ladders, power washers, longer hoses, and the right safety equipment and gears for a thorough clean.
Floor care
Floors, whatever type of flooring material it uses, must be swept daily to remove dirt and debris. Moreover, make sure you use the right floor cleaner that is recommended for the type of flooring material your business premises has.
Carpet and upholstery cleaning
Carpets and rugs are basically dirt traps. Aside from completing the look of a certain room, carpets function as dirt traps to minimize and even stop dirt and dust from entering the premises.
While regular vacuuming can help, most office vacuums are not strong enough to rid carpets of deep-seated stains and bacteria. This is why commercial cleaning services invest in high-quality equipment so they can tackle difficult cleaning jobs like deep carpet cleaning.
And like carpets and rugs, upholstered furniture is dirt, dust, and allergen traps too. Regular vacuuming of upholstery removes foreign debris. However, to ensure your carpets are actually clean, fresh, and disinfected, you can ask professional cleaners to take care of them.
Most commercial cleaning service companies would suggest deep cleaning for carpets and furniture upholstery once or twice a year.
Air vent cleaning
Another incredibly important process for comprehensive commercial cleaning services includes air vent cleaning.
Air vents accumulate allergens, dust, and foreign debris over time. When there is too much buildup of these particles in your air vent system, your indoor air quality will drop, leading to health issues such as respiratory problems such as asthma attacks.
The Ultimate Commercial Cleaning Checklist for Your Workplace
Daily Tasks:
Desk and Surfaces
Wipe down your desk and other surfaces daily with a disinfectant spray or wipe to remove any dirt, dust, or germs.
Trash
Empty your trash can daily, and ensure all rubbish is disposed of correctly.
Floors
Sweep or vacuum your floors daily to remove any dirt or debris.
Kitchen/Breakroom
Clean and sanitize all surfaces, including countertops, sinks, and appliances, daily.
Weekly Tasks:
Dusting
Dust all surfaces, including shelves, pictures, and light fixtures.
Glass and Mirrors
Clean all glass surfaces, including windows and mirrors, to remove any fingerprints or smudges.
Upholstery
Vacuum all upholstery, including chairs and couches, to remove any dirt or debris.
Disinfecting
Disinfect all high-touch areas, including doorknobs, light switches, and handles.
Floors
Mop or steam-clean your floors weekly to remove any stains or buildup.
Monthly Tasks:
Windows
Clean your windows inside and out to let in more natural light and improve the appearance of your workspace.
Carpets
Have your carpets cleaned by professionals to remove any deep-seated stains and odours.
Deep Cleaning
Perform a deep clean and complete disinfection of your entire workspace, including hard-to-reach areas and appliances.
Office Equipment
Clean and sanitize all office equipment, including computers, printers, and phones.
Restrooms
Thoroughly clean and sanitize your restroom, including the toilet, sink, and floors.
Seasonal Tasks:
Outdoor Maintenance
If you have an outdoor space, clean and maintain it seasonally to keep it looking its best.
HVAC Maintenance
Have your HVAC system inspected and cleaned seasonally to ensure proper airflow and reduce allergens.
Furniture Maintenance
Have any upholstered furniture professionally cleaned seasonally to extend its lifespan?
The Takeaway
As you can see, office cleaning is not a one-time thing. It is a continuous never-ending process. You can save yourself from all these troubles and opt for professional office cleaning instead.
Cleanworks cleaning services is one of the few professional commercial cleaning companies that actually deliver the highest quality professional service. They have been in the industry of professional commercial cleaning for more than two decades, thus they have the track record to say they have “been there, done that”.
Cleanworks cleaning services have a fully trained, extensively experienced, and completely equipped cleaning team to handle all sorts of cleaning. Their office cleaners are fully insured and up-to-date with the latest local cleaning requirements and COVID cleaning guidelines.
Call Cleanworks commercial cleaning services now and get free quotes for your commercial cleaning needs. Their professional staff will be more than willing to help you.
Read Also:
Why Is A Janitorial Service For Commercial Establishments?
10 Pro Tips To Minimize Commercial Door Repair & Maintenance Cost
The Hidden Damages In Workspaces: 5 Steps To Reduce The Risk Of Workplace Injuries!
In small bedroom house plans, a one-bedroom house plan is for individuals who want to live alone due to some reasons. Small bedroom plans can be done according to the couple’s interests and their preferences on behalf of the limited space. Get useful inspirations about one-bedroom house plans, which have great importance for small families or couples.
In small home planning, normally guest houses, accessory dwelling units, and retirement home ideas are best. Living in all-bedroom house plans normally represents budget-friendly ideas that require less maintenance. There are several reasons to choose the small house plans.
Why Are People Driving To One Bedroom House Plans?
Choices of the different options for perfect bedroom house plans depend upon the personal interests of the people and their preferences to proceed with standards approaching styles. Every time the big space in your bedroom designs plans is not necessarily.
Modern people, especially those leading a fast life, are more likely to choose a small cozy, well-ventilated, balanced interior room as their bedroom.
Here are some advantages of the small one-bedroom house plan for the modern fast-forwarding people.
The less square footage planning can be done with the help of experienced and well-acknowledging experts who know planning very well.
Some people live alone due to their job purpose, so they need small bedroom house plans instead of large spaces. So buying small house plans and design small living houses can be cost-effective for such people who want to live alone and take an interest in living in a peaceful environment.
Less maintenance and fewer expenses are required for modern 1 bedroom house floor plans to meet your objectives as well as to live with peace.
You do not need to waste money on the decorations of unused home areas. Because the small house plans can cover the empathy space and match your interest’s levels, the compact house plans are minimizing the cost of unused decorative items.
Planning of a single person or living with your spouse can be a cost-effective and wise decision-making plan to achieve your objectives and to approach with smart choices to get the best and verified response at the time of your needs.
One Bedroom Design Is Always Meet Up the Objectives
One-bedroom homes are considered more effective and safer as compared to multiple-story homes. Due to having lots of expensive materials, bigger home plans are not considered the best and perfect as small homes.
Bigger homes are for the luxury life, and more space means more time for maintenance. And fewer working professionals have extra time during your working age. This is the main reason working professionals and students always keep voting for the one-bedroom house plans.
Here are the points which make the one-bedroom house plans the most robust one.
1 The bedroom house plan is an instant and reliable source for interested communities to meet their objectives and then proceed with easy and simple approaching plans.
Get some help from professional house planners who have the experience to design small homes. Getting started with small house plans with efficient house design can be cost-effective and a nice plan to proceed with smart choices.
One-bedroom home ideas need less space but proper planning to design homes according to the interests and trust levels of the interested people.
Style of 1 bedroom house plans can always impress its residents to meet with their objectives and then proceed through fast and easily accessible resources.
You have to know how to get satisfied and how to match up with your innovative interior interests. The straightforward strategies are always the most effective way to improve your modern small bedroom house plans.
Conclusion:
From the modern-day aspects, the small is beautiful. This is the reason the tiny house and one-bedroom house concepts are introduced. Good ventilation, well Insulated, Thermal Windows, and Airtight Construction can play a vital role in meeting your objectives.
There is a massive range of ideas and valuable inspirations that can proceed to approach the intelligent feature small bedroom house plans and make sure how to get satisfied from the practical, inspiring feature plans.
Read Also:
Five Bedroom Rug Ideas – Area Rugs and Decorating Ideas
3 Tips on How To Plan The Best Cheap and Fabulous DIY Bedroom Makeover
Seven Simple Ways for Achieving Cozy Bedroom Environment
There is a lot that we need to prepare for while living in this world.
Growing up, most of the things we did were focused on preparing us for the future. Our education is a prime example of such a plan, and it has given us a lot of opportunities as we grow older.
Now that we are adults, we learn to face problems before it even starts. It can be anything from our daily lives, like planning ahead of our week. Calculating each moment of our lives in order to manage it better has been one of our continuous goals.
However, there are so many moments in our lives that we cannot prepare for at all. For example, the weather these days is truly unpredictable.
How Does Unpredictable Weather Affect The Roof?
It can rain in the morning, and then the sun will scorch you in the afternoon. It might be summer on normal days, but the air feels like it is winter. There are a lot of weather anomalies that are happening every day in our world right now. It affects all o
ur lives, even in the littlest way possible. Your schedule, for example, can be affected by unexpected bad weather. Canceling your plans seems like the best option, even though you don’t want to. Some of your plants in the garden can also be affected.
Not every vegetation is hard enough to stand the unpredictability of the elements. The weather can also affect our house. See how it works here: abc.net.au.
There is nothing more important in managing a household than cleaning the house itself. It is one of the most tiring things you can do during your rest days. Yet, it is a very important task since it keeps our home livable.
Cleaning our own homes should be an integral part of every household. It acts as a productive activity for children before they go out and play. The parents can also plan out how the house will look like from the inside out.
It can also be considered as bonding time for the whole family if you want it to be more enjoyable. You can even use this time to check for any kind of repair needed around the house.
One of the most vulnerable parts of the house is the roof. It is very obvious since it protects the entire structure from any harm above. It also helps ventilate your whole house along with the ceiling. However, most roofs are always under siege by the elements.
The unpredictability of the weather does not help maintain our roofs either. Click here to see why cleaning every season is important. Should you clean your roof?
Probably not.
This leads to more damage and can affect the interior of your household. This leads to more problems, which can be really bothersome at any point in our lives. However, you can always look for solutions.
You can always hire a professional roofer to solve these problems. They are usually well-trained and can spot a problem on your roof with ease. Roofers can repair and help maintain the quality of your roof.
Some companies even offer a free roof inspection for their clients. If needed, they can help you install a new roof as well, especially if the damage is extensive. Hiring them may cost you money, but it will save you all your time and effort.
You don’t even need to worry about the repair anymore, as they will do it for you. Check out the dome of the roofing experts around your area and see which ones you like best.
Why Should You Pay Special Attention To The Condition Of Your Roof?
Before you do anything rash, remember that doing the roof repair on your own can be a bit challenging and dangerous. On one hand, it saves you a lot of money since you do not need to pay for the labor anymore.
You can also customize your roof to your heart’s content. However, you need to have the talent and skill to repair your own roof. Accidents may happen and can lead to more expenses for your family.
Always choose the best equipment and materials for your roof repair. Most websites these days offer reviews on different products for your roofing needs, so try checking that out as well. As usual, it will depend on your choice whether you will hire or do it all yourself. The only aspects that should always matter are your safety and security.
Related: How Often Do You Need A Roof Inspection?
Disadvantages Of DIY Roof (...or any) Repair
Doing roof repairs on your own can seem like a good idea at first. After all, it saves you money, right?
But before you grab that ladder and start working, consider some of the drawbacks of going the DIY route.
Safety Always Comes First
First off, safety should always be a top priority. Roof repairs can be dangerous. If you're not experienced and do not have the right (professional) safety gear, you’re putting yourself at risk of falling, especially when dealing with high or steep roofs.
Then, there are unpredictable slippery surfaces, uneven footing, and handling tools at heights, which make the task even riskier. One misstep, and you could end up with injuries that lead to hospital bills, which would definitely be more expensive than hiring a professional in the first place.
They are not DIY Quick Fixes (...IT IS A ROOF!)
Another important factor is time. Roof repairs aren't quick fixes. Especially for someone who isn't trained.
What might take a professional a few hours could take you all weekend, or worse, a week. The time that could be spent on more productive activities might be wasted on a project that becomes more complicated than expected.
You Require A Certain Skill
Additionally, you require a certain advanced level skill level. Roof work isn't as simple as patching a hole or replacing a tile. There’s a science to understanding the structure, how water flows, and ensuring everything is sealed properly.
Without the right knowledge, you may unknowingly create bigger issues, leading to leaks or even structural damage over time.
What About the Tools?
Let’s not forget about materials and tools. If you’re doing the repair yourself, you'll need to purchase all the materials and specialized tools needed for the job.
However, professionals usually get discounts on these supplies, and they already have all the tools, which could save you a lot of money in the long run.
In the end, while the DIY route may seem appealing, the risks often outweigh the benefits. Your safety, time, and the quality of the repair are all factors that deserve careful consideration. So, before you commit to fixing your roof alone, weigh your options carefully.
Read Also:
5 Signs The Roof In Your Edmonton House Needs A Repair
Roofing Painting Contractor Leads: Four Questions To Ask Before Hiring One
What Are The Services Offered By Roofing Companies?