How Cleaning Helps Us Feel Better and Why We Don’t Do It

by

26 November 2018

Home Improvement

Cleaning Helps

From the moment you wake up in the morning until you go to bed, your days are filled with mostly routine stuff with preferably less out of the blue moments that force you to leave your comfort zone.

No matter what you expect or hope to do this day, it is very important to have a plan and be organized, to set small task you know that can be done, and feel satisfied and happy afterward.

This sort of task-reward plan helps you feel more in control over your life and more confident to try different stuff. No matter how good it feels, people easily fall out of that habit and return to their aimless daily grind.

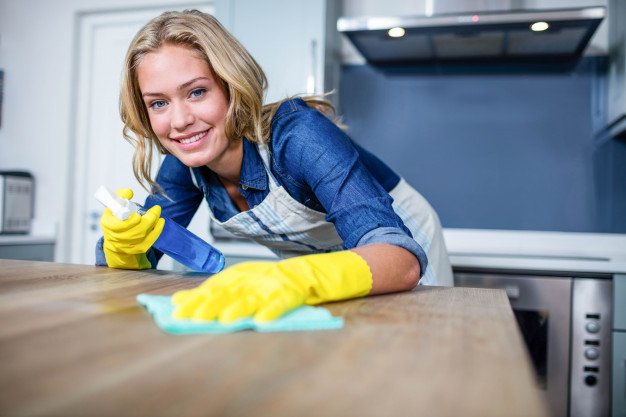
We talked to guys at Happy Cleans to try to understand how cleaning, as a form of organization, can make us feel better.

Hoarding:

It is in our society’s DNA to continuously buy and consume products. We just want more stuff and we don’t really care if there’s enough room at home or if that particular item is really necessary.

One day you realize that you are surrounded by a bunch of stuff you don’t know what to do with, yet there’s this emotional attachment that just won’t let you let go.

You feel relieved when you get rid of things you no longer need because cleaning has therapeutic properties as well. Maybe it’s an old vase that’s been sitting in the corner gathering dust, boxes of old magazines, or old clothes you haven’t touched in years.

Whatever it is and however you choose to dispose of it all, there is always the feeling of a restart. You’d be giving your home, and indirectly yourself, a fresh start and more room to breathe.

Lack of time:

This is the most common excuse people grasp for when facing their filthy home when they leave for work in the morning.

Cleaning is not an easy task. It takes a decent amount of time and energy, but excusing yourself with the lack of time is not the solution you are looking for.

Work, family, hobbies, these are all prioritized over cleaning, but being well organized by spending an hour, thirty minutes or less every day doing some cleaning, will show great results and the feeling of accomplishment of working towards a clear goal every day will help reduce stress and make you feel better about yourself.
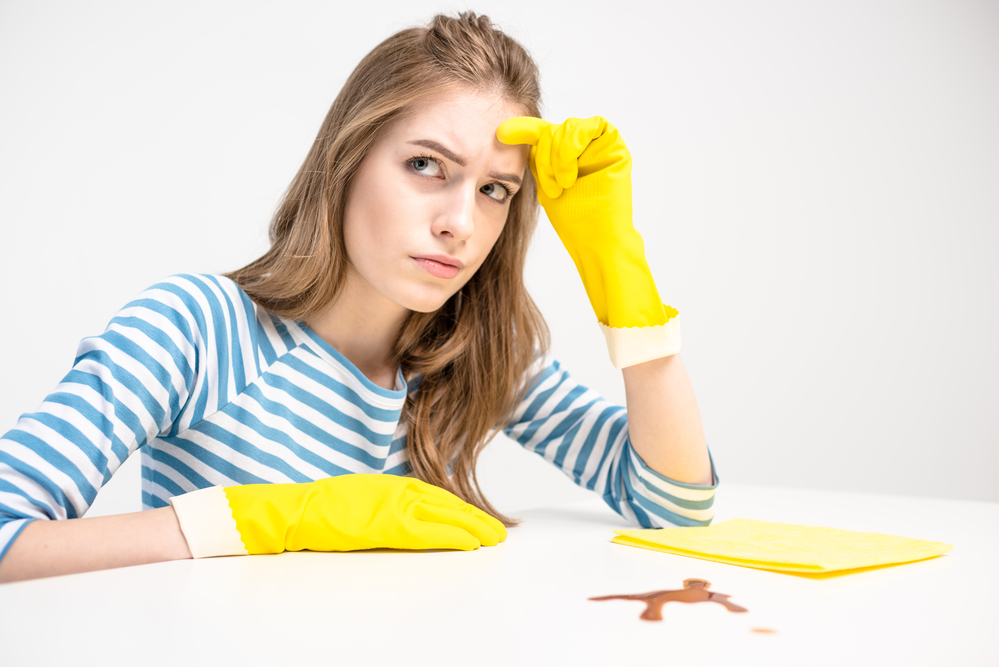
Laziness:

It’s a great feeling when you are finally able to sit down in your clean home and just enjoy the sight. Don’t let that wave of good emotions trick you into remembering old habits. Before you notice, your home will return to that undesired state of neglect you worked so hard to change.

What you can do is just keep the trend of doing less cleaning but more frequently. This should be your new routine, you could also start doing dishes right after a meal or not leave dirty socks on the floor to camp for a few days, etc.

Don’t fall into passive state where you feel like you keep hitting a wall, so you choose to rather not do anything. Start with your home, the energy you spend there will boost your physical and mental health.

This flow of positive energy will come in handy when dealing with the rest of your daily tasks and smile about it, which consequently means that you’d be eager to do some more cleaning and feel rewarded for your effort. It’s a circle of positive energy and a way forward.

Read Also:

Feature Image: Source

Content Rally wrapped around an online publication where you can publish your own intellectuals. It is a publishing platform designed to make great stories by content creators. This is your era, your place to be online. So come forward share your views, thoughts and ideas via Content Rally.

View all posts

Leave a Reply

Your email address will not be published. Required fields are marked *

Related

Study Room

5 Ways To Maintain And Decorate The Study Room For Kids

If your kid has lost interest in his studies then get his attention back to studies by making the study room comfortable and attractive. A well-organized study room can prove to be a sort of enthusiasm for your kid. It will encourage the kid to spend more of his time in studies. If the room is painted with his favorite color and themed with personalized artwork using some 3D effects then the study room will become the most desired place of your kid. There are a few ways that are quite economical and very creative in decorating a study room. 1. Choosing the Right Place to Study: Select the right space in your house that can be used as a study place. A room should have a window for cozy feelings. Fresh air is really important to make the mind active. A room should be in a silent zone of the house, keeping all the distractions aside. It will prove to be very healthy for learning. Our mind concentrates more in a calm atmosphere. So, be wise in selecting the study place for your kid. No matter how small space is, a good interactive change in managing the things properly will yield your effort. For small places, things are managed on the minimalist theme. 2. Organize the Furniture: Make the set of shelves in that room where you can organize the books on the shelves nicely. It will help in developing the habit of organizing the things in your kid’s nature. Maintaining the stationary and books is handy for your kid while studying. Proper furniture like a chair and table gives a professional look to their study room. A comfortable chair and the perfect sized table will give some relaxing feel while you are working for hours on them. There are now study desks designed specifically to grow with the kids - check out these kid’s study tables (made in Singapore). They are comfortable, cheap, and artistically designed. Manage things according to space. It will be more suitable if you put the things according to the size of that room. Be wise in selecting the wall for bookshelves, then the number of bookshelves according to the size of the wall. Don’t make it seem flooded with shelves as space should be in view. Make it look spacious. 3. Prepare an Attractive Study Planner: Make an attractive planner of their study routine, put that on the openers and change that planner accordingly. Make the notes of motivational quotations on their desk. It will help motivate your kid even more. Put some inspirational words as bookmarks on their desk. You can also make some attractive charts of inspirational thoughts and about the ambitions and goals of your kids. Like if he wants to become an astronaut, set the theme of galaxy and stars and put the words of achievers on their openers. This will help in getting your kid’s attention in his study room. 4. Plan Activities to Add to the Room: Place a whiteboard on the wall. This will help your kid in assuming his room as a classroom where he can be a teacher for a while. This will inspire him to study more as a teacher of that imaginary class. Your kid can spend hours with this indoor activity of learning. You can plan more creative activities to get him to inspire with studies. Learning should be fun; it will ease the process of converting a heavy workload into progressive learning. All you need is to grab their attention by using different sort of interactive things. 5. Add Creative Art Work: Give the room a touch of personalized art according to your kid’s interest. The theme should be very enchanting. And set the room with proper lighting because experts suggest keeping the room bright if you want to be more energetic and active. Bright lights dodge your mind to stay active for more time.  You can also use some vibrant colors on the background wall. Colors are the activators if they are used wisely according to your kid’s choice. Study room should depict the taste and interests of your kid as your home decor shows your personality. By adding simple innovative ideas, you can simply change the concept of boring study rooms. You will be surprised to see that your little efforts can works magic for them. Once you get done with the right setting, you will be surprised to see that your kid likes to spend hours in his study room. Study room will become his favorite place. Your little effort will help him a lot. And all of this will pay off when your kid will achieve his goals. Read Also: 4 Emerging Trends In The Education Sector 5 Innovative Ideas To Lend Your Bedroom With More Space

READ MOREDetails
Homemade Carpet Cleaning

10 Trends About Homemade Carpet Cleaner You Should Know

There are a lot of do-it-yourself enthusiasts in the world. It’s because there are so many things you can make on your own without having to purchase expensive products. There are many homemade solutions that work just as well, if not better than anything you could buy from a store. The 10 trends below are homemade carpet cleaning solutions that can help you in a bind. 1. Food Stains: Dropping something like ketchup on your carpet can be frustrating because of its bright color and the concern that you’ll never fully remove the stain. There are many ways to remove this type of stain. A preferred method is to use a paper towel and a detergent made from liquid soap. After combining the detergent with water, dab it onto the stain gently and allow it to sit for 20 minutes. Then use another paper towel to remove excess water. You can also use a vinegar and water solution for this type of stain. Sometimes food stains are stubborn, so you might need to use the solution more than once. 2. Beverage Stains: There are so many different beverages that can be problematic when spilled on the carpet. This includes juice, coffee, wine, and just about anything else that has a dark color. A great way to remove beverage stains from carpet is by using a cloth soaked with warm water and blotting the area until the substance is completely removed. Sometimes water alone will remove the liquid if it’s taken care of immediately. However, there’s a chance that you’ll need a strong solution, which can also be made at home. You can simply add an equal part of white vinegar to the water before dabbing it onto the carpet. 3. Oil Stains: Oil stains on the carpet can come from a lot of different sources. Sometimes it’s from using creams and lotions that end up on the carpet. Perhaps there are stains from butter or some type of cooking oil. Many types of oils can be removed with a solution made from either liquid detergent and water or vinegar and water, depending on your preference. Once you’ve made your preferred solution, press down with a clot on the stain for just under a minute. It’s important not to scrub because that will enlarge the stain. 4. Tracked in Mud: It’s inevitable that mud will be tracked into your home, especially if you live in an area of the world where there is a lot of rain. That’s usually when you end up entering your home with shoes covered in dirt and mud. Depending on how much mud has been tracked in, the first step might be to sweep up or vacuum the area to eliminate as much mud as possible before applying a solution. Then you’ll need to create a solution with liquid detergent and warm water. This solution should be dabbed onto the carpet numerous times for less than a minute. You should be able to see the difference, but a true assessment will take place after it dries. 5. Chewing Gum: Removing gum from carpet can be tricky, especially if it’s been stuck for a while. A great way to remove it is by placing an ice cube onto the gum until it is completely frozen, which might take a few minutes. You can then break the frozen gum for removal. You’ll then need to use the homemade carpet cleaning solution of your choice to clean any remnants. 6. Pet Accidents: There are few things as concerning pet accidents that seem to occur just before you have company. A great way to remove both any stains and odor is with a vinegar and warm water solution. This mixture should be pressed into the carpet on the location of the accident. The amount of vinegar used depends on the stain, but equal parts of both vinegar and water will usually suffice. 7. Ink Stains: Don’t be intimidated by ink stains. Although they are sometimes difficult to remove, it is possible. Liquid detergent and hot water mixture is the best place to start. You can blot this solution onto the carpet with a cloth, let it sit for two minutes and then use paper towels to dry it. You may need to repeat this process. 8. Strong Odors: Removing odors from the carpet will usually start with vacuuming to ensure you’ve removed any dirt and particles that might be causing the odor. Once that’s done, you can sprinkle baking soda onto the carpet to freshen things up. The baking soda should be left overnight before vacuuming again. 9. Natural Fiber Carpets: Sometimes natural fibers are easier to clean, but they might require extra care. A highly effective solution that can be used for virtually any type of stain on natural fibers includes about two tablespoons of ammonia and a cup of warm water. You can also make a solution with a half cup of vinegar and the same amount of water. Whether or not you choose to use a spray bottle or a bowl is up to you. When using a spray bottle, be sure to spray lightly. 10. Synthetic Fiber Carpets: Removing stains from a synthetic carpet can be handled in several different ways. Prepare a solution that you can pour onto a cloth and gently apply to the carpet. It’s best not to pour the solution directly onto the carpet. You can try a cup of white vinegar mixed with two cups of water to remove the stain for a natural option. You can also try using any liquid detergent that you like combined with warm water. The mixture is half a teaspoon of detergent and two cups of water. These are all great ways to remove different types of carpet stains. You can also get help removing tough stains at carpestology.com.au. Read Also: Five Easy Steps When Cleaning Your Mattress 10 Ways To Preserve Your Carpet’s Beautiful Design

READ MOREDetails
Vanity Size On Bathroom Design

The Impact Of Vanity Size On Bathroom Design And Functionality

Today, clothing sizes often lead people to believe they are smaller than their actual size. This is called “vanity sizing”. For instance, "a size 8 dress today is nearly the equivalent of a size 16 dress in 1958," according to a report.  Because clothing can create the illusion of a slimmer appearance, many people now desire larger bathrooms as well. The trend of vanity sizing is influencing the design and functionality of bathrooms. From wider toilet stalls to more spacious showers, bathrooms are being changed to match people's distorted self-image. What is Vanity Sizing For Bathrooms? Vanity sizing is when something is made bigger than normal to make people feel better about themselves. Just like size 6 jeans that actually fit someone who usually wears size 8 jeans. In bathrooms, vanity sizing means making the room and fixtures bigger than what works for real bodies. Such as extra-wide shower stalls, two-person bathtubs, or oversized sinks. They make us feel skinnier, but take up a lot of space! Factors To Consider When Choosing Vanity Size The main thing you should consider when choosing your vanity is the size of your bathroom which is a major factor in changing the look and feel of your bathroom. So, carefully review common bathroom vanity sizes and measurements before selecting. Look at the data below that shows the common vanity width that fits the bathroom sizes:  Data Source: Forbes 1. Consider Floor Space Will counters, cabinets, and toilets still squeeze in if you supersize your bathroom? Make sure giant fixtures don't crowd out other necessary stuff! 2. Watch Door Openings Too That cool two-person tub won't do you any good if it gets stuck trying to fit through the bathroom doorway! Double-check entrances. 3. Check Plumbing Locations Expanding your bathroom means dealing with pipes inside walls too. Make sure water lines still reach sinks or toilets when they move. 4. Price For Extreme Upgrades Going big in bathrooms means spending big bucks too! Make sure your wallet can handle all that bonus tile, lighting, high-tech toilets, and other swanky stuff before pulling the trigger.   5. Future Homeowners Too What seems huge and perfect for your family now may scare off buyers down the road. Keep future practicality for the next folks in mind. 6. Consider Resale Value Even if you adore your 47 jet massaging tub, will someone else want to pay big money for your over-the-top bathroom later when you sell? 7. Extra Cleaning Responsibilities The bigger the bathroom, the longer the cleaning day takes! Make sure you want to put in elbow grease for giant showers and his ‘and her everything.   8. Watch Wet Floor Safety Oversized sinks and tubs mean leaks or splashes cover larger areas. Pay attention to slip-proof surfaces so no one goes crashing down.   9. Visiting Guest Comfort Even if space permits, older relatives may feel uneasy navigating a huge bathroom with their walkers or canes. Consider all who will use it. 10. Separate Private Toilet Room Rather than one giant open space, smaller vanity bathrooms with a separate water closet for the toilet allow privacy. Choosing The Right Vanity Size For Your Bathroom’s Look The dimensions of your bathroom vanity change how open, crowded, or balanced your space appears. An overgrown vanity makes small rooms feel stuffed. But one too tiny turns your bathroom into a messy pile-up of products without enough organizer drawers or counter area. Here’s how to get vanity sizing just right for your ideal bathroom design style:   In Itsy Bitsy Bathrooms When dealing with snug powder rooms or half baths, keep your vanity narrow in the 24 to 30-inch range so it doesn’t hog up the entire floor. Any wider starts making moving around impossible! Select wall-mounted styles instead of boxy cabinets to save precious inches. Or opt for floating vanities that have air rather than chunky boxes below to give the illusion you have more breathing room.  Another decorating trick for a petite bathroom is going big with mirrors or using reflective tiles and chrome finishes. When tiny rooms sparkle and shine, they seem to double in size instantly! Just avoid dark paint shades, clutter, and heavy fabrics that make small salons feel even more closed in.   For Middle-of-the-Road Bathroom Sizes   If your washroom dimensions fall somewhere in that just-right not-too-big, not-too-small middle zone, standard vanity widths from 30 to 48 inches tend to fit nicely without limiting movement. This gives your average family plenty of surface space to spread out self-care must-haves each morning and store all those lotions and potions in handy drawers below.   When organizing your cabinet and counter goods, be sure to keep at least 9 to 12 inches of space around the vanity perimeter. You’ll still need elbow room to get in there for clean-ups without bonking walls, doorway frames, or light switches! Beyond functional inches, defining your vanity area with cool lighting designs or eye-catching tile shapes helps contain the space in a neat square for a balanced, soothing aesthetic.   When You’ve Got Room to Spare Lucky enough to be working with a big old bathroom complete with soaring ceilings and a giant footprint? Then you’ve got options to install his and her double-wide vanities ranging from 60 to a whopping 72 inches. This creates the dramatic appearance of dual stations without the need for significant construction to physically divide your spacious room into two separate spaces. FAQs:- Q1. What is the standard width of a bathroom vanity? Ans: The standard width for a single-sink bathroom vanity is 24 to 48 inches. For a double sink vanity, it’s 60 to 72 inches. Q2. How do I choose the right vanity size for my bathroom?  Ans: Consider your existing bathroom size, number of users, and required storage space when selecting the ideal vanity. Allow proper clearance between the vanity and walls.  3. What are some common mistakes to avoid when choosing a bathroom vanity size? Ans: Avoid sizing too small and creating limited functionality or choosing an oversized vanity that makes the bathroom feel confined. Failing to measure properly and allowing adequate wall clearance are also common mistakes. Conclusion Vanity dimensions significantly influence the visual enhancement and practical use of any bathroom. By factoring in room size, user needs, and required storage, you can achieve an optimally designed and functional space that suits your lifestyle beautifully. By paying attention to critical measurements and clearances, you can avoid common mistakes. With some planning and foresight, you’ll love your new bathroom for years to come. Additional Reading: 3 Best Indoor Plants For The Dining Room Stunning Bathroom Vanities For An Instant Makeover Storage Units Your Ultimate Guide To Organized Living

READ MOREDetails