Published on: 06 February 2021
Last Updated on: 26 December 2024
Selaginella lepidophylla, or resurrect plant, is a desert plant that belongs to the Spikemoss family, Selaginellaceae. Across the desert of Mexico and the United States, you will find this plant. However, it is considered that the desert of North Africa is the native place of this plant.
It is also called the False Rose of Jericho. The creeping stems of this plant grow horizontally, and the leaves are like scale.
What Is A Resurrection Plant?
Any poikilohydric plant that is able to survive extreme dehydration is called a resurrection plant. These plants can survive without water for several months and even for years.
For example, the Rose of Jericho, which is native to the North African deserts, is an example of the resurrection plant. The scientific name of this plant is Anastatica hierochuntica.
Overview Of The Resurrection Plant
Common Name
Resurrection plant, Rose of Jericho, false Rose of Jericho, stone flower, dinosaur plant
Botanical Name
Selaginella lepidophylla
Family
Selaginellaceae
Plant Type
Perennial
Mature Size
2-6 in. tall, 3-6 in. wide
Sun Exposure
Full
Soil Type
None needed
Hardiness Zones
10
Native Area
North America
Some Interesting Facts About The Resurrection Plant
Here are some interesting facts about the resurrection plant that will surely amaze you.
Scaly Stems
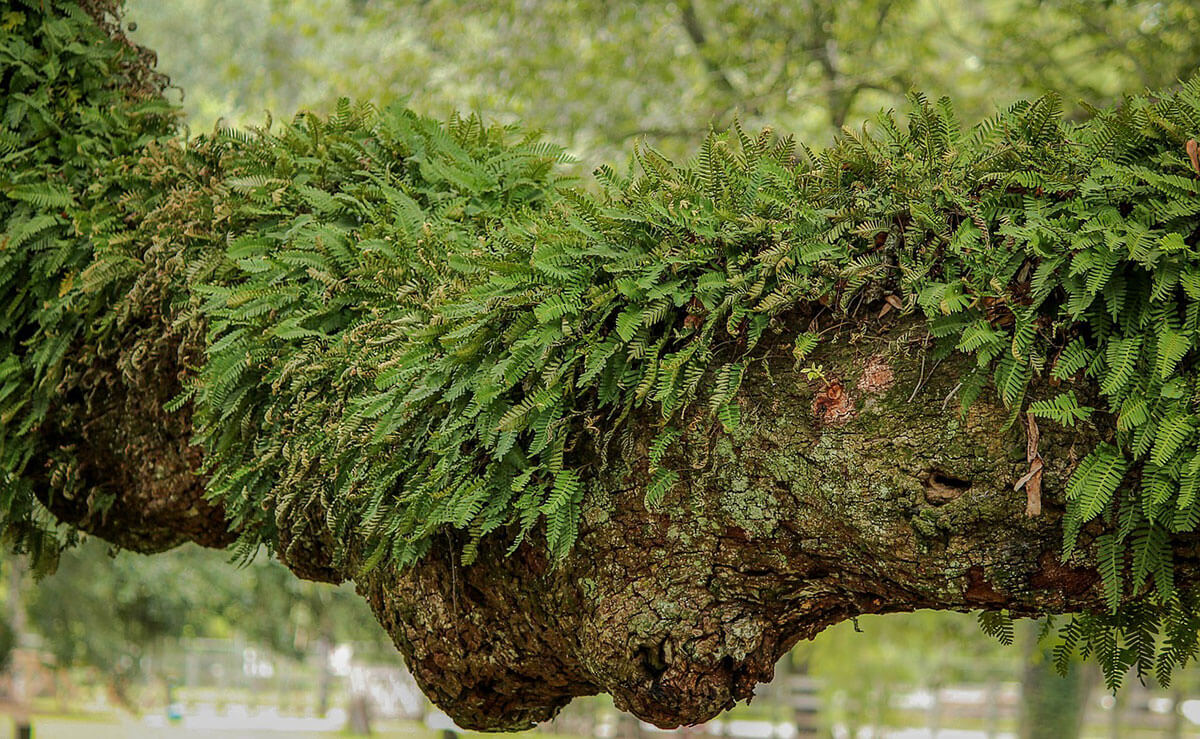
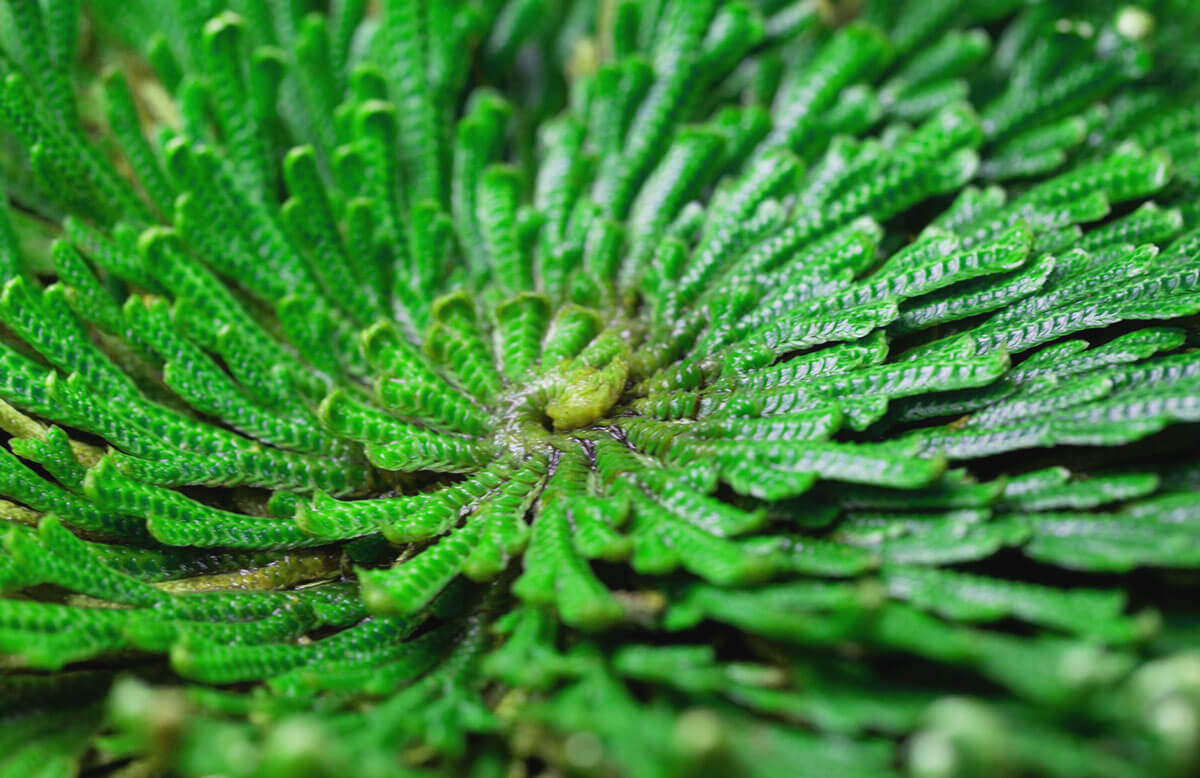
These plants have scaly stems that are arranged in the form of a rosette. A few stems that the resurrection plant produces always grow close to the ground. The entire plant covers a diameter of less than only 1 foot. Just like other plants, this plant also uses its roots in order to extract nutrients and water from the ground.
Resurrection plant is a primitive plant that falls between the category of ferns and mosses. You can not see any leaves on the resurrection plant. All you will find are small, scaly extensions of stems that look like junipers.
Absorb Water
After rainfall, the resurrection plant quickly absorbs the water and enters the phase of rapid growth. As this plant is unable to accumulate water in the roots and stems, once the soil dries out, it also dries shortly. The dry plant curls up into a tight ball with a very small amount of water that is stored in the center. Though the curled ball looks like it is dead it is only dormant. During the whole period of dormancy, the plant minimizes metabolic activities and can last a few years or till the time of the next rain.
Reviving Ability
Due to its reviving ability, this plant is called a resurrection plant. This plant is able to rehydrate. Once it is exposed to moisture, after a few hours, it unfolds its stem and reactivates its metabolism. After it absorbs the water, the stem starts swelling and unfolds itself. Even if the stems do not have any live protoplast within them, this will indeed happen. “Siempre Viva,” which is another name for the resurrection plant. The phrase mentioned earlier means “everlasting.”
Reproduce Sexually
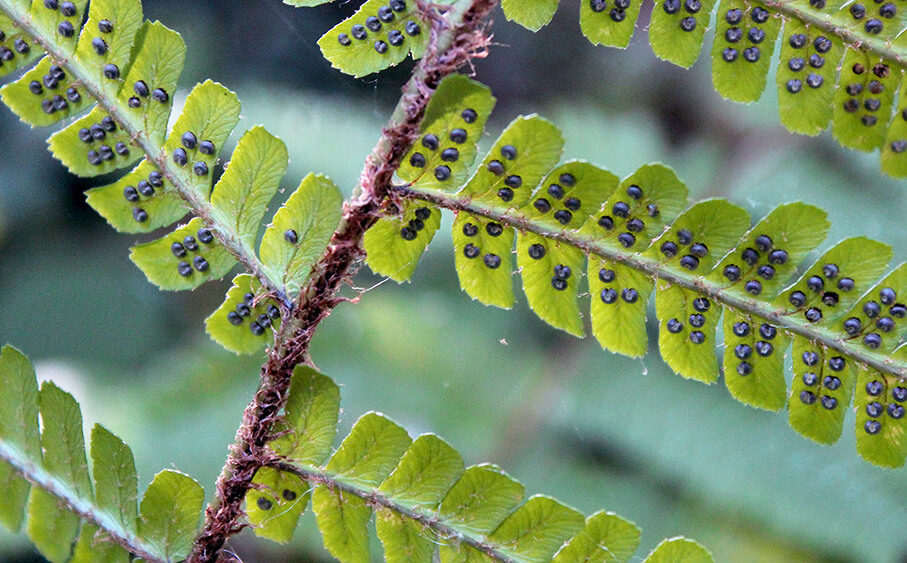
Resurrection plants do not produce flowers, fruits, and seeds. This plant reproduces sexually. Strobili, which is a club-like structure and produced via spores. 400 million years ago, this plant appeared on the planet. Most of the ancient lycopods were giant plants.
But as a result of climate change, all of them became extinct. Small lycopods like resurrection plants have managed to survive without any morphological changes till the modern days.
Dinosaur Plant
Another name for the resurrection plant is the “Dinosaur plant" because it has lived side by side with dinosaurs. Tea made from the resurrection plant can treat sore throat and the common cold due to its antimicrobial properties. The resurrection plant is the longest-living plant on earth.
Does the Resurrection Plant Need Soil?
When you will buy a resurrection plant online or from your nearest nursery on the resurrection plant for sale, you will receive a brown ball of dried moss. This brown ball of moss does have roots, but the roots are not attached to anything. So, in order to grow, this miracle plant does not need soil.
Similar to a hydroponic system, when there is no water or moisture for a really long time, the plant will curl into a ball and turn brown with a diameter of around 6 to 10 inches. which generally has a height range of 15 to 35 centimeters. This plant is very convenient in terms of taking care of and growing.
Can a Resurrection Plant Die?
From the earlier discussion, it may be clear that this plant is really hard to kill. You can simply put the plant in the dark corner of a room without water. But once you bring it out and leave it in water, it will get relieved once again. There is one way to kill this plant. That is overwatering. You can leave this plant in water for a few days, and it will start rotting, and eventually, it will die.
How to Grow the Resurrection Plant?
In order to grow and to care for a resurrection plant, all you need are:
A broad and shallow container that should not have any drainage hole.
Another wide container that should have drainage holes.
For spreading at the button, gravel or pebbles.
Distilled water at room temperature.
A bright but shady place.
And lastly, a dried resurrection plant.
Process
First, fill the wide and shallow container that has no drainage system with water. Do not fill it wholly. Put in two-thirds water.
Place pebbles or gravel up to the waterline. Now, put the dried resurrection plant on the pebbles. For a completely dry and brown plant, it will take around 3 to 4 hours to turn green.
Now, take the wide container that has drainage holes and spread the gravel or pebbles upto the level of water. Mix peat moss. Add humus and sand and spread it on the pebbles. Now, place the resurrected plant on the top.
Do not place it in direct sunlight. Instead, place it in a shady place that has a temperature of higher than 40 degrees Fahrenheit.
Once you notice the plant is getting brown, continue to water it.
Conclusion
This plant is super convenient for plant lovers who can not afford much time to take care of plants. Due to its relative properties, this plant can come back to life just after receiving water. That is why this brown dry ball of moss is so popular among plant lovers.
Mashum Mollah is the feature writer of Search Engine Magazine and an SEO Analyst at Real Wealth Business. Over the last 3 years, He has successfully developed and implemented online marketing, SEO, and conversion campaigns for 50+ businesses of all sizes. He is the co-founder of Social Media Magazine.
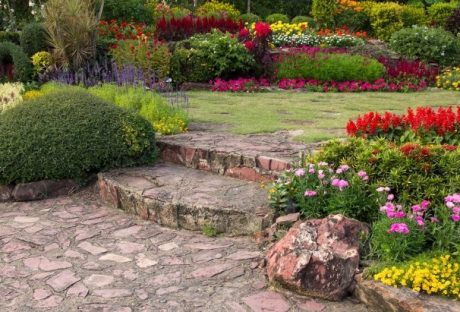
Gardening is a delightful hobby that requires patience and perseverance. Everyone can make mistakes while planting, whether you're a seasoned grower or a novice.
However, with careful planning, you can avoid these common errors. As the spring season approaches, now is the perfect time to start planning your garden and prepare for planting.
Gardening is not only a fun pastime. It also rewards you with fresh, homegrown produce and a fragrant outdoor space to enjoy your meals. Therefore, find a neighborhood nursery, get your favorite plants, and start an amazing journey amidst nature!
While knowing when and how to begin your gardening journey might be challenging, the outcome is worth the effort.
In this article, we shall help you with some major tips to help you on this green journey. Keep reading!
Gardening Tips For Beginners
A relaxing hobby can help you cope better with the stress and disappointments in life; gardening is the best solution. Therefore, gardening can be one of the best ways to channel your time in a positive direction.
When you plant a sapling and watch it grow over time, it helps you connect with the innocent joys of life. It stimulates the nurturing nature within you. Therefore, gardening helps you heal mentally and enhance your well-being.
Given below are some of the most important tips that you will need to follow at the beginning of your gardening endeavors—
1. Select The Right Spot
To get your vegetable garden off to a good start, selecting the perfect area is crucial.
This spot must receive a minimum of six hours of sunlight each day. Insufficient sunlight can lead to stunted growth and reduced crop yields.
When choosing your garden location, take note of areas that receive the most sunlight. Next, you must try to situate your garden bed near a water source.
Therefore, your plants can easily access the necessary nutrients for healthy development.
By considering these factors, you'll be on your way to a successful and thriving garden.
2. Choose The Right Plants
It is often difficult for beginners to understand what plants are right for their garden. There are several factors that affect the type of plant you must consider—
Weather conditions: To choose the right plants for your garden, consider factors like temperature, humidity, and sunlight at your place. Moreover, the weather conditions also affect the soil type and maintenance requirements.
Water availability: When selecting plants for your garden, it's important to consider their water requirements. Moreover, your garden’s drainage ability can also affect the growth of plants.
Attention and care requirements: Consider attention and care requirements when choosing plants for your garden. Some plants need more maintenance than others.
Therefore, assess the time and effort you are willing to invest and choose accordingly. Knowing the specific care needs of different plants will help them thrive in your garden.
Start with low-maintenance succulents and cacti if you're new to gardening. These plants need little attention and help you get hooked on the hobby.
These plants store water in their leaves or stems. Therefore, they are perfect for those who regularly forget to water their plants.
Succulents come in different shapes and sizes, while cacti range from small, round shapes to tall, columnar forms.
3. Choose Between Seeds And Saplings
When starting your gardening journey, you must choose seeds or saplings.
Seeds are the most cost-effective option and offer a wider variety of plant choices. However, they require more time and effort to grow. Moreover, seeds will need proper conditions for germination and nurturing.
On the other hand, saplings are pre-grown plants that can be directly planted into your garden.
Saplings are more expensive than seeds. However, they save you time and effort as they are already established and have a higher chance of success.
Therefore, the choice between seeds and saplings depends on your personal preferences, budget, and level of gardening experience.
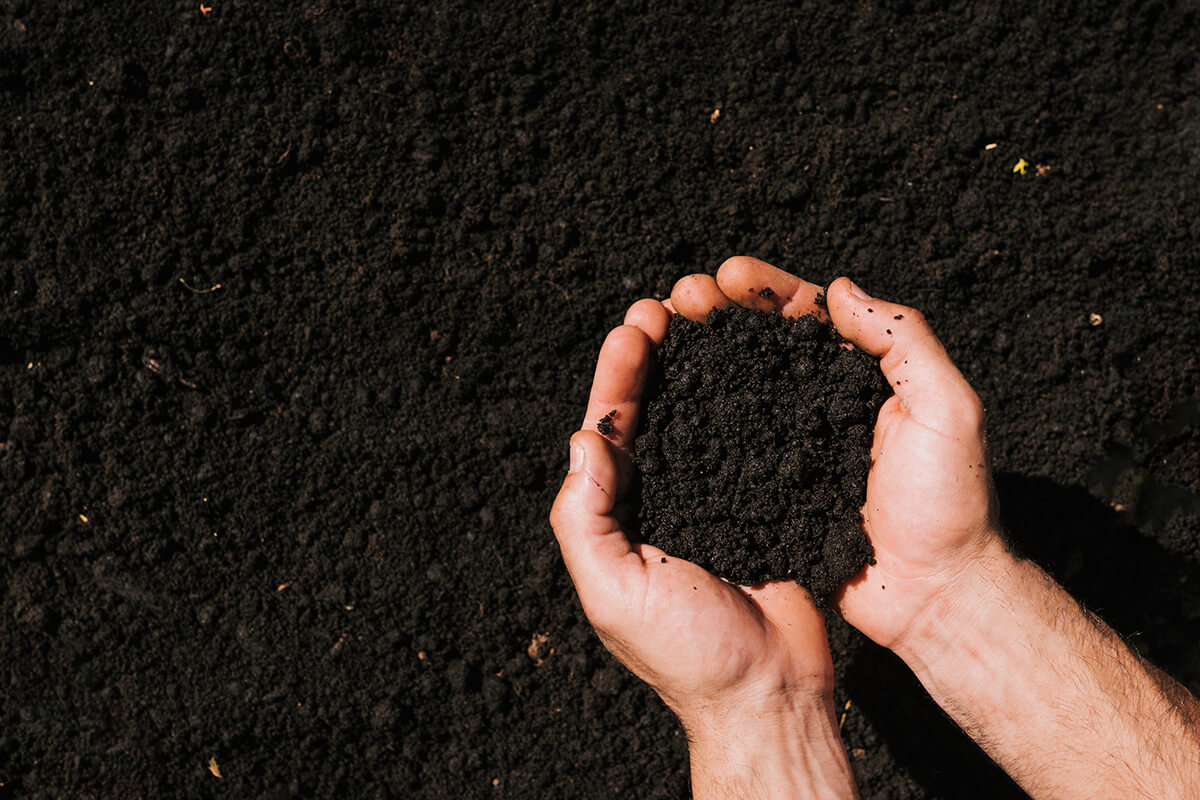
4. Know How To Make Your Soil More Fertile
It is important to enhance the structure of your soil and improve its drainage and moisture-holding capacity.
Therefore, you can improve the health of your soil by using compost, leaf mold, or well-aged manure, which is a great option.
These organic materials act as a sponge and help retain water and nutrients, ultimately benefiting plants' growth.
However, it is important to avoid using fresh manure. It can harm your plants. Moreover, fresh manure might contain harmful bacteria and pathogens. These pathogens can cause serious diseases, and their high nitrogen content may burn the plants' tender roots.
Therefore, it is recommended to compost the manure for at least 6 to 12 months before using it on your plants.
This breaks down the harmful bacteria and pathogens and also makes the nutrients in it more available to the plants.
5. Select The Right Pots
If you don't have enough space for gardening, you might want to try container gardening.
It's a fantastic way to grow a wide variety of plants, including fruits, vegetables, herbs, flowers, berries, and shrubs.
However, when you opt for container gardening, you must select a pot that's big enough for your plant to grow in. Moreover, the pot should also have enough room for the roots to spread out and grow comfortably.
Also, it's highly recommended to use potting soil specifically formulated for plants grown in containers. This soil type has all the nutrients and drainage that potted plants require to thrive.
Additionally, it helps prevent problems such as over and under-watering, which can be common when gardening in containers.
By following these tips, you'll be able to enjoy the benefits of a thriving container garden, even if you have limited space for traditional gardening.
Happy Gardening!
As you look ahead to the future, don't forget to plan for moments of relaxation and enjoyment in your garden.
Picture yourself sitting in a cozy seating area, surrounded by lush borders and colorful blooms. Imagine the laughter and conversations you'll share with friends and family over a meal or a cup of tea.
Anticipate the joy of watching birds flock to your feeder and delight in their playful antics. Therefore, with a little planning and effort, your garden will become a haven of beauty and tranquility for the future.
Read Also:
10 Best Foliage Plants To Buy In 2024 – Must Read!
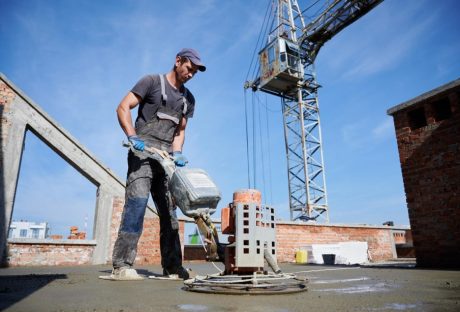
Choosing the right concreting solutions is a cornerstone in the journey of constructing or renovating your home. It not only guarantees durability and structural integrity but also elevates the aesthetic appeal of your living space. Concrete, with its unmatched versatility, stands as a pillar in residential construction, marrying the qualities of strength, longevity, and design flexibility.
As we delve into the realm of concreting solutions suitable for various facets of home construction, from the foundational elements to decorative finishes, it becomes evident how these solutions significantly enhance both the functionality and appearance of our homes.
Understanding Different Types of Concrete
Concrete comes in various forms, each suited to specific applications in home construction. Here's a look at the primary types:
Standard Concrete: The foundation of most construction projects, known for its strength and durability, suitable for driveways, sidewalks, and structural foundations.
High-Strength Concrete: Offers enhanced durability and load-bearing capabilities, ideal for areas requiring superior strength.
Lightweight Concrete: Used where less structural mass or better insulation is needed, it provides thermal efficiency and is easier to work with.
Decorative Concrete: Enables aesthetic customization for home exteriors and interiors through options like colored, stamped, or polished concrete.
Benefits of Concrete in Home Construction
The benefits of using concrete in home construction are manifold. Its durability stands up to extreme weather, heavy traffic, and the wear and tear of daily life, ensuring structures that last generations. Concrete's thermal mass contributes to energy efficiency, helping maintain consistent indoor temperatures and potentially lowering energy costs. Moreover, its versatility allows architects and builders to explore creative designs, molding concrete into various shapes and finishes to complement any architectural style.
Innovative Concreting Techniques for Homes
Innovative concreting techniques, such as stamped concrete, polished concrete, and concrete overlays, push the boundaries of traditional concrete applications, offering homeowners unique ways to enhance the aesthetic appeal of their exteriors and interiors.
Stamped concrete introduces textures that mimic natural materials, while polished concrete floors bring a sleek, high-gloss finish to any room. Concrete overlays provide a fresh look for existing concrete surfaces without the need for complete replacement, making them a cost-effective option for renovations.
Choosing the Right Concrete for Your Project
Selecting the appropriate concrete for your endeavor requires a thorough assessment of your project's unique demands, whether it's for construction or renovation. This entails evaluating the visual goals you aim to achieve, the structural requirements essential for stability and safety, and the adaptability of the materials to the specific climate conditions in your area. Additionally, financial considerations are pivotal in this selection process.
The cost implications of various concrete types and their associated finishing methods can significantly influence your final decision. Engaging a Perth concreter, such as Project Concrete, ensures expert guidance in navigating these considerations, guaranteeing that your choice aligns with both your aesthetic preferences and budgetary constraints.
Maintenance and Care for Concrete Surfaces
Maintaining concrete surfaces is straightforward, involving routine sealing to protect against moisture and stains, regular cleaning to preserve appearance, and prompt repair of any cracks or wear to prevent further damage. Such care ensures the longevity and beauty of concrete installations, contributing to the overall value of your home.
Disadvantages Of Concrete For Home
When building concrete slab foundations, constructors are aware of the reason why it needs to be freezed. Apart from the worry that the foundation might crack, there is also concern about cost savings. One thing that you might not have to worry about at all is when you use concrete for your home, it is quite safe.
There is no problem when it comes to the base of the house and how it might decrease the risk of damage with regards to the instances of buying or building a home with concrete. There are several benefits which we have already mentioned, however, there are some drawbacks as well.
You need to go through the disadvantages of using concrete so that you can consider all pros and cons. This will help you in understanding the need for concrete or should you choose another option when building a home.
Read about the drawbacks that are described below in detail. You can decide on your own regarding making the choice of whether or not you would like to choose concrete as your choice for the house site!
Labor
Not everyone knows how to use concrete and accordingly, they know how to implement the concrete and tools that will help in building concrete structures.
It is quite common to understand that you will need to learn about how concrete works and efficiently work on looking for laborers.
These laborers must know how to use concrete and the tools or else it might be difficult especially when the process is expensive!
Cost
Using concrete is one of the most expensive ways of building a house! There is labor, material costs, transportation costs and market competition. When evaluating the conditions based on which you are building a house, there can be serious concerns regarding the expenses of a traditional home.
Several factors influence the way your house is built! I agree that there are long term benefits to the use of concrete however, it can significantly impact your costing and budgeting when building a house.
Pests
With concrete becoming the foundation of your house, there can be a chance that there can be pests such as roaches and termites. Considering the house is closer to the ground, the insects and pests can easily enter through the walls accessing the infrastructure of the house.
It will severely impact the woods across the house along with concerns if you sit on the ground!
Heating And Cooling
If there is a unit for air-conditioning or there is a furnace installed, there is a high chance that it will affect the concrete. These devices when installed in the ground floor will take up room directly impacting your purpose.
Slab Cracks
One of the most potential concerns when using concrete is that there can be cracks in the concrete! Now that we have already discussed about it being costly, it can be expensive to repair the house especially when there are cracks.
It will look bad! Do you wonder how these cracks have developed? Earthquakes, frozen ground or tree roots are common concerns due to which the cracks in the concrete appear.
Conclusion
In conclusion, concrete offers a versatile, durable, and aesthetically pleasing solution for home construction and renovation projects. By understanding the different types of concrete, their benefits, and the innovative techniques available, homeowners can make informed decisions that meet their structural and design needs.
Whether laying a new foundation, upgrading a patio, or seeking durable and stylish flooring options, the right concreting solutions can significantly enhance the livability and appeal of your home, ensuring it stands the test of time.
Learn More About:
10 Points To Remember If You Are Building A Residential House
Home Decoration At Its Best: 7 Key Ideas To Recreate Your Home
Making Your Home Strong From Within: Tips To Build A Sturdy House
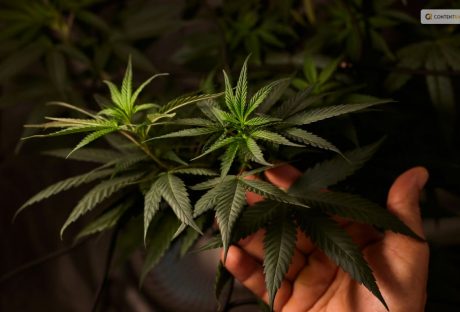
If there is one thing that most people try to know after searching for the legalities of growing weed, it is about “how to harvest weed?”
If this is something that you are searching for, I have you covered!
You see, weed, or marijuana, is a controversial plant to talk about. You might want to grow it for medicinal and recreational purposes. But the “What if people...” thoughts might put you off! This is because harvesting or growing weed is not like harvesting potatoes. There are several other things associated with the same. So, having someone like Stoned Genie can always come in handy!
But don’t you worry, my friend! If you are trying to search for the best ways to harvest weed, both indoors and outdoors, you need to look no further! Keep on reading this blog till the end to learn more...
Is Growing Marijuana Legal?
Marijuana, also known as cannabis, weed, pot, or ganja, is a plant that contains several psychoactive compounds. It can alter one's mood, cognition, and perception. Marijuana has been used for several reasons and purposes for thousands of years, ranging from medicinal to spiritual.
But its legal status has been a matter of debate and controversy in many countries. So, is growing marijuana legal?
The answer depends on where you live, how much you grow, and what you use it for. In some countries, such as Canada, Uruguay, and South Africa, growing marijuana for personal use is legal or decriminalized as long as you follow certain rules and regulations.
In other countries, such as the United States, Australia, and the Netherlands, growing marijuana is legal or tolerated in some states or regions but illegal or restricted in others. In many countries, such as China, India, and Saudi Arabia, growing marijuana is illegal and punishable by harsh penalties, regardless of the amount or purpose.
Various factors, such as the potential benefits and harms of marijuana use, the social and cultural attitudes towards marijuana, the economic and political interests of different groups, and the international treaties and agreements on drug control influence the legal status of marijuana.
The legal status of growing marijuana is also subject to change as new laws and policies are enacted or revised and further research and evidence are presented.
Growing marijuana is a complex and controversial issue that has no simple or universal answer. The best way to find out if growing marijuana is legal in your area is to consult the relevant authorities and sources, and to be aware of the risks and consequences of your actions. Remember, just because something is legal, does not mean it is safe, ethical, or advisable.
When Should You Plant Weed?
Spring is here, and you know what that means: it's time to get your marijuana seeds ready for planting outdoors.
This is the most important crop of the year because you can get the biggest harvest of all.
Some old-timers like to plant their seeds on the first full moon of March. They say this way, the seeds get some light at night and don't grow too tall too fast.
But sometimes, it's still too chilly in March, and not everywhere has the same weather. If you live in a colder place, your plants will grow slower and suffer from the cold and the wind. They will be weaker and more likely to get bugs and diseases
So, what should you do in this case?
Well, you can wait a month or two longer. A seed that sprouts in a nice climate from April onwards will grow bigger and better than one that sprouts in March in the same place
But growing plants for so long is not easy.
You must watch out for all kinds of things: bugs, diseases, nutrients, transplanting, pruning, training... It's a six-month-long job requiring constant attention
Things to Keep in Mind
If you want a good quality and quantity of weed there are several things that you need to keep in mind. Want to know what they might be? I have you covered! Here are some of the things that you'll need:
Fertilizers for growth and flowering: You can choose whatever fertilizers you like, organic or chemical. Organic ones, like humus, guano, and flower boosters, will give you a tasty and aromatic weed, but less of it. Chemical ones, like those from specific brands, will give you more buds, but less flavor.
Insecticides for insects like whiteflies, mites, or thrips: It's better to use them as a prevention, so you don't get any nasty surprises.
An anti-fungal product that works well against powdery mildew: Propolix or other chemical products are good, but you have to use them from the beginning.
Bacillus Thuringiensis: This is for caterpillars and other worms. Use it as soon as the flowers start to show, which is when these critters start to show up. Around May/June.
Stakes or wires to support the branches during the flowering stage.
Soil and Other Conditions to Grow Weed or Marijuana
It's obvious that this is the most common grow medium, probably because it's easy to find and has some nutrients already in it. Weed grown in soil is also more delicious and fragrant. And, no, it's not hard to grow in soil – just plant your (favorite) strain in the soil, and you're good to go.
That's it. Of course, there are different kinds of soil, and some are better than others. High-quality potting soil will make your life easier and faster. You might also want to add some extra nutrients to make your weed grow better.
Or you can make your own super soil. If you decide to buy soil, we suggest you go for the best brands, or at least those with a good soil mix. They should have things like earthworm castings, alfalfa meal, humic acid, etc.
Can You Grow Weed Without Soil?
Want to try something different? Go soilless. You'll see some quicker growth (and bigger harvests). And, conveniently, growing weed in soilless mediums is pretty similar to growing it in soil. The only difference is that you'll have to give the nutrients yourself because soilless mediums don't have any. Some examples of soilless mediums are coco coir, vermiculite, perlite, etc.
What About Hydroponic Grows? Is it Complicated?
No, hydroponic growth is not complicated. It's as easy as picking your setup (hydroponic system), getting your nutrients, and sprouting your seeds. And you'll get some amazing benefits: super-fast growth, huge yields, and super-strong weed.
Sounds good, right? Don't believe everything you hear because some information can mess up your growth. But with the right setup and care, you can be sure of a plentiful harvest.
What It Needs to Survive and Thrive: How to Grow Weed Plant?
If you want to grow the best weed possible, you need to know your plant well. Here are some of the main things that a weed plant needs to thrive, and how it works.
Light
Light is the fuel that drives photosynthesis and growth in a weed plant. The fan leaves are like solar panels that absorb light. The more light you give your plants, the more buds they will produce.
But be careful not to give them too much light. If you grow indoors, keep your lights at a safe distance from your plants, or you might burn them and ruin your nugs. And if your plants get too hot, they will dry out faster and need more water and attention.
Weed plants usually need at least six hours of sunlight a day when they grow outdoors. This is called “full sun”. When they grow indoors, they usually get between 12 and 18 hours of artificial light a day, depending on their stage of growth.
Weed is a photoperiod plant, which means that the amount of light it gets every day affects when it flowers and makes buds. Outdoors, this happens when the days get shorter in the fall. Indoors, you can make this happen by changing the light cycle from 18 to 12 hours a day.
Water
Water is essential for all plants, including weed. Water provides hydrogen for photosynthesis, and also carries nutrients from the soil to the plant through the roots, and throughout the whole plant.
Water also helps the plant stay firm and flexible, by creating pressure on the cell walls. This allows the plant to bend with the wind or reach for more light.
Plants also lose water through their leaves, like humans sweat, to cool down. This is called transpiration, and you can see it as droplets on the leaf tips.
This may sound obvious, but you only need to water the soil or the medium where your weed plant grows, not the leaves or the plant itself. We suggest that you water a lot, but not too often, rather than a little, but more frequently. This way, the roots can dry out a bit and get more oxygen from the soil.
Nutrients
A marijuana plant needs several nutrients to grow and flower. The main nutrients it needs are:
Nitrogen: Nitrogen helps a weed plant grow during the vegetative phase, when it makes more mass, stems, branches, and leaves. It is part of chlorophyll, the green pigment that helps the plant use light for photosynthesis.
Phosphorus: Phosphorus is important for storing and using energy, as well as for root growth and bud development. It helps the plant take up nutrients and build its structure.
Potassium: Potassium helps with many of the plant’s metabolic activities, such as respiration, transpiration, and enzyme activation. It also helps the plant fight off diseases and pests.
Calcium: Calcium is a minor nutrient, but it still plays a role in keeping the plant’s cell walls intact, and helping the plant absorb other nutrients.
Magnesium: Magnesium is part of chlorophyll, and helps the plant make glucose from photosynthesis. Without it, the plant can’t turn light into energy.
CO2
Plants breathe in CO2 through tiny holes in their leaves called stomata. During photosynthesis, plants turn CO2 into glucose, which they use to grow and flower.
Some indoor growers use a “CO2 burner”, which is a device that adds a little bit of CO2 to the air, to make the plants grow faster and bigger. But this is usually too much for home growers.
Wind/airflow
Wind or airflow is good for your plants, because it brings fresh air and CO2, which they need to grow.
Airflow also prevents mold and diseases, by removing moisture from the inside of the plant, so it doesn’t get too wet. You can also use a technique called scragging, which spreads out the branches and lets more air in.
Wind or airflow also makes your plant stronger and healthier, by making its stalks and branches thicker and sturdier. When a plant bends with the wind, it produces a hormone called auxin, which stimulates growth.
What to Keep in Mind While Harvesting Weed?
You probably know that different strains of weed need different amounts of time and sun to grow well. Sativas, which come from places near the equator, like a long and sunny summer to get fully ripe.
Indicas, which come from colder and harsher places, are usually faster to finish. But there are exceptions, of course. Some indicas are slow and some sativas are quick.
The best time of day to cut down your outdoor plants is in the morning, before the sun gets too strong. You don't want them to be wet from dew, but you also don't want them to be exposed to too much sunlight, which can ruin their flavor.
You can also harvest at night when it's cooler, but the morning is better because the plants are fresher and haven't been under the sun all day.
1. Watch the weather
As your buds get bigger and heavier and the season changes from summer to fall, the weather can change too. Depending on where you live, you might get some cold snaps or rainstorms.
These are not the end of the world, but you do need to pay attention to the weather and maybe decide on the spot when to harvest your plants, balancing their ripeness with the risk of losing them.
2. Harvesting in Lower Temperatures
According to sources, most weed plants can handle a light freeze—28-32°F for up to three hours—without any problem. But a hard freeze, anything lower or longer, can be a disaster.
Frost can make ice crystals form in the plant cells, hurting them. The leaves will look droopy and then turn dark and crunchy. The worse the frost, the more damage to the plant.
Remember that plants in pots are more sensitive to temperature changes than plants in the ground, so they are more likely to get frost damage.
3. Rainy Harvests
Rain is not a big deal by itself, but it depends on how long and how hard it rains. If it's going to stop soon and dry up fast, you can leave your almost ready plants outside. But if the rain is going to stay, mold is waiting—better to harvest sooner than later.
Covering your plants can help, but the air will still be humid. You can use some tall stakes and a tarp to cover them, but make sure to take them off when the rain or cold is over. In this way, the plants can warm up and breathe.
When to Harvest Weed Plant?
The type of plant growing determines when to harvest cannabis. Sativa, hybrid, and indica are the three primary kinds of cannabis seeds. Are you curious about the best time to harvest marijuana?
Let me break it down for you!
Sativa strain plants typically take longer to mature and give off a stronger cerebral height. However, Indica plants yield larger blooms and a more sedative, paralyzing high.
When an Indica and a Sativa are crossed, hybrids that enable flowers to have both traits are created. While Sativa cultivars blossom in 10 to 16 weeks (about three and a half months), Indica varieties flower in 8 to 10 weeks (about two and a half months) on average.
The cannabis plant can be found in hybrid form halfway between the two main species. It is important to understand that flowering times might vary based on environmental factors like temperature and duration of day.
Thus, the questions of when and how to harvest cannabis remain unanswered. Knowing what you want to achieve with your cannabis plants can help you decide when to harvest them.
Let's say you are growing cannabis for therapeutic purposes. Is there a unique method for harvesting cannabis in this case? If so, it is imperative to harvest the plant at the height of its cannabinoid content.
But if you are cultivating cannabis seeds for fun purposes, then it is best to harvest marijuana at its peak maturity.
How to Harvest Weed?
Once you've decided when to harvest your cannabis, it's critical to understand how to harvest cannabis plants correctly. It's simple to harvest cannabis; you just need to cut the stem off at the root. But it's best not to pull the branch out of the ground since this could damage it and reduce its yield.
It is crucial to properly dry the cannabis after harvesting it before stocking it. Hanging it upside down in a room with lots of ventilation and little light exposure is the best method to accomplish this, like a wardrobe. In order to efficiently dry cannabis, proper ventilation is necessary because it inhibits the growth of mold.
Before you proceed to store it, ensure that you let your cannabis rest for some time. This can range anywhere from three to seven days. This is a great way to ensure that the leaves are dried and ready for you to store.
Wrapping It Up!
In case you were searching for the best ways on how to harvest weed, I hope that this blog has been of help to you. If there are any other queries related to the same, please feel free to let me know. All that you need to do is scroll down till you reach the bottom of the page. Then leave your suggestions in the box below. And I will be there to answer them all for you!
More Resources:
Choosing a Medical Marijuana Dispensary
Marijuana Addiction Treatment: 5 Steps to Avoid Relapse
What Are Tarpenes? How Do They Work? – Cannabis Guide
Medical Marijuana Can Take New Dimensions in the Treatment of Pets