Published on: 06 April 2021
Last Updated on: 27 December 2024
If you are a person who loves to wear makeup, then you must know every bit about makeup. In fact, there are many women who are conscious and very particular about makeup. However, they might know about Smashbox Primer.
On the contrary, there are other women who apply makeup, but they skip a few makeup products because they do not feel the need to use every makeup product. Just as a foundation, there is another makeup product that keeps the makeup intact.
It is the primer that holds the makeup for a longer period of time. At the same time, you can get a smooth finish to your makeup. If you want to use a good quality primer, then you should buy Smashbox primer from the acclaimed online fashion site. On the online fashion site, you will get a top-quality primer that will pep up your appearance.
Demand For Primers:
There was a time when women did not use primers. Hardly any woman used to apply primer on their face. With the popularity of primers in the current days, women have understood the right use of primers which has made primers one of the favored cosmetic products by many women.
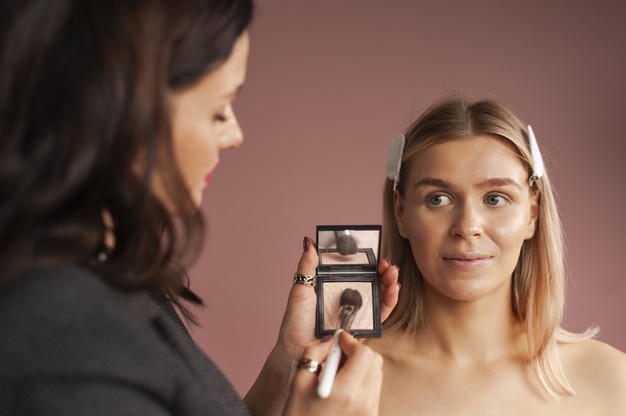
For many good reasons, primers are used by many women in the present day. There are countless women who do not know the purpose of using primer. Some women skip the use of primer because they think it is not important for them. In order to smoothen the skin, primer is used. When you use a primer, your skin appears to be even and polished.
Before applying makeup to your face, you should use a primer. It is the primer that blurs the blemishes, fills in the pores, and provides smooth skin. A primer helps adhere to makeup properly. If you want your makeup to last longer, then you must use a primer before applying makeup.
Pick The Right Primer: Smashbox Primer
Primers can be of various types. You need to select a primer as per your skin type. You can get primers in gel form as well as silky form. Primers can be colorless or tinted. You can get primers for your eyes as well as for your face.
You need to make sure that the primers should go well with your skin tone. The main purpose of the primers is to give you a flawless look and a smooth finish and to make the makeup last for long hours. Cover the visible pores on your skin with face primers. Also, to get an even-toned and polished look, face primers are the best.
Nowadays, you can get a primer for your dry skin and oily skin. Make sure to apply primer before the foundation to get flawless-looking skin.
Smashbox Primer: Why Is It The Better Option?
The following are the major features of Smashbox Primer that you must know about:
Smashbox Primer comes in a tube that is reflective and squeezable. However, previously, it was a transparent tube. But, now, this upgrade makes the primer look better and more attractive.
The nozzle in the Smashbox Primer’s tube is slim. Hence, it dispenses the primer in the right amount.
The packaging also consists of the ingredients of Smashbox Primer. Moreover, it also gives you direction on how to use the product. Additionally, the tube also shows a consumer study of how many women tried the product.
However, the best thing about Smashbox Primer is its formula. Despite having a slightly thicker consistency, it mixes well.
In addition to that, the clear hue of the primer dries down fast. Hence, it shows that the primer is suitable for all types of skin tones.
One of the best things about this formula is that all you need is a small amount. Hence, when you are starting out with Smashbox Primer, start with a pea-sized amount. Then, add more if you think it is necessary.
How To Choose A Good Primer? – Factors To Consider
Here are the factors you must consider before you choose a good primer for your skin:
Skin Type:If you have dry skin, you need to hydrate it. In this case, you must use a cream primer. However, if you have oily skin, use a gel primer to give it a shine. On the other hand, if your skin is prone to acne, choose a primer that has salicylic acid. This will help you with blemishes.
Texture and Consistency: Make sure that the texture and consistency of the primer are not too thick. This will result in a lack of mixing ability.
Sun Protection:A good primer must be able to protect your skin against the harmful rays of the sun.
Reviews: Before you buy a primer, check online reviews to find out what other users are saying. Additionally, you must also take recommendations from a skin-care expert.
Buy The Mattifying Face Primer:
You do not have to look for any other stores to get a face primer when you have the best oil-free and mattifying Smashbox primer from the online fashion site. You can use the face primer on your face without worrying about side effects. Using this effective face, primer will control oil on your face for up to the right hours and will also reduce the visible pores.
Your face will not look oily, and you will not get breakouts or clogged pores after using the face primer. Purchase the recommended face primer to get a fresh and glam look.
Do you have more suggestions on how to use Smashbox Primer as a beginner? Please share your opinions and experiences in the comments section below.
A passionate writer and an avid reader, Soumava is academically inclined and loves writing on topics requiring deep research. Having 3+ years of experience, Soumava also loves writing blogs in other domains, including digital marketing, business, technology, travel, and sports.
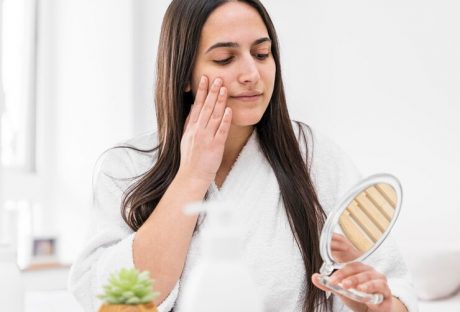
In the quest for youthful and vibrant skin, many individuals seek effective ways to combat sagging or loose skin. Whether it's due to the natural aging process, weight loss, or other factors, skin tightening has become a popular choice to rejuvenate one's appearance.
In this article, we will explore the world of skin tightening, discussing various methods and considerations to help you make an informed decision. The desire for firm and radiant skin is universal.
The good news is that there are numerous methods available to help you achieve just that. Skin tightening is a procedure designed to restore and enhance the tightness of the skin, resulting in a more youthful and rejuvenated appearance.
What Is Skin Tightening?
Skin tightening toronto is a cosmetic procedure that aims to enhance the elasticity and firmness of the skin. It can be performed on different areas of the body, including the face, neck, abdomen, arms, and thighs. This process helps reduce sagging, fine lines, and wrinkles, providing a more youthful and refreshed look.
Causes Of Skin Laxity
Before we delve into the methods of skin tightening, it's essential to understand what causes skin laxity in the first place. Several factors contribute to this condition, including:
Aging: As we age, the production of collagen and elastin, two vital proteins responsible for skin tightness, decreases.
Weight Loss: Rapid weight loss can lead to loose skin, as it doesn't have enough time to adapt to the new body shape.
Sun Exposure: Prolonged exposure to UV rays can break down collagen and elastin fibers in the skin.
Natural Methods For Skin Tightening
If you're looking for non-invasive ways to tighten your skin, you're in luck. There are several natural methods you can try:
Proper Nutrition
A well-balanced diet rich in vitamins, minerals, and antioxidants can help improve skin elasticity. Foods like fruits, vegetables, and lean proteins can make a significant difference.
Hydration
Drinking an adequate amount of water keeps your skin hydrated, promoting better elasticity and a healthier complexion.
Facial Exercises
Certain facial exercises can help tone and tighten the muscles beneath the skin, reducing sagging and fine lines.
Non-Surgical Skin Tightening Procedures
For those looking for quicker and more dramatic results, non-surgical skin tightening procedures are available. These include:
Radiofrequency Therapy
This procedure uses radiofrequency waves to stimulate collagen production, leading to tighter skin.
Ultrasound Therapy
Ultrasound waves penetrate deep into the skin, promoting collagen growth and skin tightening.
A popular example of this is the Sofwave treatment, which targets the mid-dermis to lift the brows, neck, and under-chin area.
Laser Skin Tightening
Laser treatments target specific areas, improving skin texture and tightness.
Surgical Skin Tightening Options
When non-surgical options don't provide the desired results, surgical procedures can be considered. These include:
Facelift
A facelift is a surgical procedure that lifts and tightens the skin on the face and neck, reducing wrinkles and sagging.
Tummy Tuck
A tummy tuck, or abdominoplasty, is a surgical procedure that tightens the abdominal skin and muscles.
Arm Lift
An arm lift, or brachioplasty, is a surgical procedure that removes excess skin and fat from the upper arms, resulting in firmer arms.
Considerations Before Opting For Skin Tightening
Before undergoing any skin tightening procedure, it's crucial to consider the following:
Consult with a qualified dermatologist or plastic surgeon to discuss your goals and expectations.
Understand the potential risks and side effects associated with each procedure.
Evaluate the cost and recovery time involved in the chosen method.
Pros And Cons Of Skin Tightening
While skin tightening procedures offer many benefits, there are also drawbacks to consider. It's essential to weigh the pros and cons before making a decision.
Pros:
Improved skin tightness and youthful appearance.
Boosted self-confidence.
Minimized wrinkles and fine lines.
Cons:
Potential side effects, such as redness and swelling.
Cost can be prohibitive for some individuals.
Results may not be permanent.
Recovery And Aftercare
After undergoing a skin tightening procedure, proper aftercare is crucial. This may include keeping the treated area clean, avoiding excessive sun exposure, and following the doctor's instructions for the best recovery possible.
Long-Term Results
The longevity of skin tightening results varies depending on the chosen method and individual factors. It's essential to maintain a healthy lifestyle to prolong the effects.
Conclusion
Skin tightening procedures offer a remarkable solution for individuals looking to rejuvenate their appearance and regain the confidence of their youth. Whether you opt for non-surgical or surgical methods, the key is to make an informed decision in consultation with a qualified professional. With proper care and consideration, you can achieve firmer, more youthful skin and embrace a more confident you.
Read Also:
11 Foods You Must Incorporate Into Your Diet For Great Skin
8 Home Remedies To Banish Acne Scars And Discoloration For Good (Info-Graphic )
In the life of almost every person is extremely important. This is true because we live in a society where we often have to try to integrate into society. Hairstyle is an important part of how we will impress others. And hair volume indicates that you have a healthy body and mind.
For many, his hairstyle is a huge problem as it needs regular care. It is also worth noting that now there is an era of social networks, where everybody regularly shares a lot of content, and a special place is occupied by photos.
Users post regularly with their selfies and of course, everyone wants to look as irresistible as possible. And here it does not matter what kind of hair you have: short, long, thin, or thick. Something can always go wrong - and your care for yourself can be immediately spoiled.
How To Get An Excellent Hair Volume On The Photo?
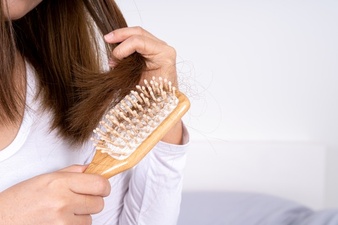
Every day we wake up, we go to the shower, and we use shampoo, which can give our hair volume and can even achieve certain results. After all the effort, the person hopes that the effect will last as long as possible. Having healthy hair is the first quality.
If you do not have healthy hair, the second option is to use applications which are increasing the volume of the hair.
No doubt regular care for your appearance is extremely important, but there are situations when it is definitely not possible to correct your hair correctly. In such situations, a good photo editor is likely to be indispensable when it comes to a new post on his web page.
The market for such resources has long been crowded, there are many professional programs and a lot for amateurs.
Install The Beauty App
We can see thousands of apps opening a digital store, but only a few can satisfy our request. For most of us, it will be indispensable that the speed of execution is fast.
Not every photo editor can boast the quality performance of their work because it is necessary that the photo is returned out naturally, without obvious signs of interference in the appearance.
Not everyone is ready to try the mastery of Photos. Training can take a lot of time, which we do not always have.
Especially when we already have a snapshot that needs editing immediately. Quite interesting functionality that can help has the application RetouchMe on retouchme.com/service/add-hair-volume.
It’s great to have a place where you can get professional support for the shortest possible time. We will be able to get the desired result from people who master the design in 5-20 minutes.
Use Your Smartphone Features
The main thing is that everything happens on our smartphones, and there is no need for a laptop or desktop computer. It becomes possible to get any volume of hair without going to the stylist, to bring our hairstyle to perfection when it is needed «here and now».
Of course, you need to download the program from the digital store. Next, we have to use a special editor to increase the volume of hair or any other function, depending on what needs to be corrected. After all, we send the image for processing - and very soon we get the result.
Even if we lay a little on the pillow, our hairstyle can lose the appearance we sought. The main thing here is not to be upset and remember that the modern world is full of technologies that can help us. You can get a great photo by combining self-care and a quality photo editor.
Most likely, many will be pleased that you do not have to visit the barbershop more than necessary, wasting a lot of their time and money. Everyone can be allowed to express themselves for a minimum investment. Such applications will, first of all, help to become confident and know that their pages on the social network will only be great photos.
Read Also: Hairstyles for Wedding Party and Braid for Weddin
But Above All Having A Great Hair Is The Best Solution
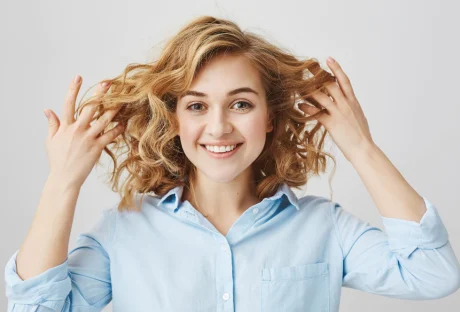
If you want to have excellent hair volume, then there are hundreds of applications online. But no matter what applications you are using, you actually do not get healthy hair.
But if you want to have a picture-perfect look, the best solution is to enjoy the volume of the hair through the best hair care routines. What types of applications are you using? Do not forget to share your opinion through the comment sections and let us know about your opinion.
Read Also:
5 Gorgeous Hairstyles For A Perfect Date Night
6 Stunning Long Hairstyles For Oval Faces
Why Hairdressers Love Rose Gold Colour
Stage makeup might be the new norm. However, the 1920s flapper makeup is nothing short of a sensation.
Artists see it as a timeless token of expressive beauty, style, and sensational glamour. Let’s check out the main touch points of the artisanal and aesthetic flapper makeup.
No doubt the 1920s looks were iconic. So, it’s worthwhile to understand the styles that inspired flapper makeup. We can also try to explore the twenties’ spirit that was depicted through the bold makeup looks. After all, expressing the inner self is the prime function of beauty.
Before we know in detail, can you tell what flapper makeup was precisely? Well, long eyelashes, neatly defined brows, and scarlet lips are the tokens defining flapper makeup. That’s not all. The advent of rosy cheeks for that doll-like look can also be credited to the 1920s.
What Defined Flapper 1920s Makeup?
Eager to get into the crux of flapper makeup? Modern makeup enthusiasts are obsessed with the right nude look or depicting a sensational minimalist look. But the 1920s saw makeup and beauty differently.
Remember the characters from The Great Gatsby? The youthful quest of character and dollish overtones dominated the thoughts of the 1920s artists.
Today, you won’t celebrate such layered makeup. Instead, models proposed in angled foundations with neatly chiseled jawlines are today's front runners. Moreover, the heavy blushed, and brighter skin toning of flapper makeup has found a replacement in the contoured makeup of today.
So, the basics of the flapper makeup look is getting dolled up with makeup. Since the makeup was ceremonial, events like dancing and night parties were so. Many of you may think- What about nails? Trust me, your favorite ombre nail designs 2024 versions would not have made any mark in that look.
The face was still the epitome of beauty.
Types Of Flapper Girl 1920s Makeup
There were many flapper styles during the 1920s. In our imagination, the bold 1920 makeup girl would have liked some of these flapper styles:
1. The Classic Decor
Dark and smoky eyes dominated this look. Remember the goth scenes with grim female characters? Yes, you’re thinking right. Sharp eyebrows, blood-red lips, and pale white complexions complemented the classic flapper makeup look.
2. The Bob
Rain or shine, girls would go gaga over a playful twist. The definition of the bold flapper makeup completed with the faux bob.
Short hair was the norm of the day. No commitment. Just do a contemporary transition and have fun!
3. The Cost-Effective Version
Flapper makeup had a cost-effective version, too. If you don’t want your flapper makeup experiment to cause a hole in your pocket, here’s your solution. Firstly, grab any light foundation.
Go for the wet n wild photo focus matte/gloss liquid foundation. It costs $5.47 and is available in classic, beige, and other shades. You can also go with the e.l.f. Flawless Finish Foundation. The latter would be better for the glossy, bold look.
It covers uneven skin tones like MAC, The Whoo, or any in that category. Remember, the foundation is the basis of the cost-effective flapper makeup.
Secondly, your primary role is to create smoky eyes using your regular eyeshadow palette.
Lastly, go for a cheap radiant red lipstick for those popping red lips. BAAM! Your pocket friendly flapper makeup looks completed in 30 minutes or so.
4. The Zombie Flapper Makeup Look
Today, I suggest a mattifying primer with a matte foundation, contour for cheeks, and dark shades for eye sockets. Of course, a makeup setter spray to top it up. But do you want to know how a 1920s makeup flapper would look like?
Complement your flapper style with an authentic macabre look. Create a makeup base to begin with. After that, create defining under-eye circles, draw cracks, and apply fake blood in patches and splashes on your skin.
Could you spot the difference? The 1920s flapper is so much more high definition than today’s looks. That’s the beauty of the bold makeup sensation we’ve left behind.
How To Use 1920s Flapper Makeup: Tutorial
The prime element in your 1920s flapper look would be how you groom your eyes. The eyes are an actual package here. Similarly, I’m talking about eyebrows, lashes, lids, and under-eye.
Secondly, you must draw bold lips. No extraordinary treatment. But well-defined bright lipstick.
Lipstick
However, I find that MAC’s Locked Kiss Transfer Resistant Creamy Matte would be an iconic lipstick I’d choose for realistic flapper makeup. After all, you must make your lips feel soft, thick, and plushy yet neatly chiseled.
Mascara, eyeliners, eye shadows, etc
After that, we will focus on the eye section. First, apply your eye shadow. You will find film stars staging dark eye shadows at that time. I also feel that the darker eye shadows preserved the real essence of the flapper makeup.
It’s not the twenty’s spirit if it’s not bold and defining! For parties, most women flaunted their dark, smoky eyes. I was so hooked on that look.
Indeed, my suggestion for eye shadows would be the same.
Secondly, we will focus on the eyeliner. Start by drawing a thin line with your eyeliner. Let the top lash line be smudged; use a thin eye shadow brush. However, something still seems incomplete.
Complete your eyeliner effect with an added eye shadow shade on the eyeliner.
Caution: The to-eye shadow layer should only go down the point once the smudged eyeliner liner is marked. Otherwise, you won’t be able to conceal the extra eye shadow.
I prefer the NYX eye pencils for the above. However, you can go with the brand of your choice.
Thirdly, I would suggest a lash mascara brush. Brush your mascara more towards the center of your traditional long eyelashes. Don’t focus much on the sides.
Brow Pencils
Finally comes the eyebrows. The typical choice would be long and thin eyebrows. Meanwhile, don’t forget to use brow pencils to perfect your brows. Certainly, thin, chappy, or sparse eyebrows won’t make sense if we’re speaking flapper makeup here.
However, there’s something more important here. Don’t draw a clean eyebrow arch. Rather, slop downwards. Most experts would not go any further. However, I am skeptical about the look and more about the finish. So, I would like yur blush to be perfect as well.
Don’t taper the blush. Instead, try to give it a rounded appearance. After all, the blush is the crux behind the more youthful look.
Other than the face, hands and feet also mattered in the 1920s. Back then people knew what is pedicure. The introduction of hemlines popularized nail care and pedicure trends. But nail makeup was not highly defined. So, they did not know what is builder gel.
Related: Get Part Ready In No Time with These Hair And Makeup Hacks!
The Flapper Era: A Cultural Revolution
The flapper makeup is no less than a revolutionary look. It was the prime movement that resulted in the rise of a subculture. When a group of young people wished to defy social norms and sexual definition, they chose the flapper over minimalist makeup.
Moreover, flapper makeup was a strong connotation of the fact that 1920s women were trying to break free. They needed to make accurate, bold statements that came in the first look.
Flapper makeup looks aligned with style, approach, and cultural tastes. For example, flappers liked jazz. They also had bold lifestyles.
Key Elements Of Flapper Makeup
That’s easy. Flapper makeup uses all high-definition components. So, there was minimal layering in the makeup.
Firstly, the flapper's makeup is incomplete without dark and smoky eyes.
Secondly, a pale white skin tone is a definition look for a flapper.
Don’t go by the racial connotation of the makeup essentials. After all, these elementary things defined a revolutionary generation.
After dark eyes, flappers could not feel complete without firm lips and blush.
Iconic Flapper Makeup Products
Here are the main kits you would find in the makeup box of any flapper:
1. A heavy-duty mascara
2. Sets of long eyelashes
3. White toners, foundations, contours, etc. for base makeup
4. Eyelash curler
5. Eye pencil
6. Lipstick
7. Powders for touch up
Flapper Makeup Techniques
I have defined the flapper makeup essentially briskly already. So, I will talk about five master flapper makeup techniques only-
1. Have thin and long eyebrows and use a kohl liner for the best effect
2. Don’t forget false lashes.
3. Create a smoky eye effect as it would suit you
4. Plumm red, burgundy or any rich shade of red would do good
5. Carry Face powder
Flapper Makeup In Modern Culture
Days have changed. People don’t prefer the bold look that may seem prosthetic to the modern generation. However, bold makeup was an expression of revelation from shackles for women back then.
So, it’s natural that the essence of flapper makeup still exists today. If you’re curious too, here are two unmistakable things that have become timeless.
Firstly, the smoky eyes look. Women still use the smudgy and messy eye-shadowed look for that bold statement.
Secondly, we see the cupid’s bow lips quite often. That is another gift of the flapper makeup era.
If you want to know more about flapper makeup or want to offer tips, comment your doubts or queries in the following section. I will check the comments in no time!
Additional Resources:
Polish Your Creativity: A Colorful Journey into Self-Care With Nail Polish
Smashbox Primer: Use It To Make Your Makeup Last Longer
Essential Eye Care Tips That Can Improve Eyelash Hygiene


 Here are the factors you must consider before you choose a good primer for your skin: