Published on: 12 August 2021
Last Updated on: 10 January 2025
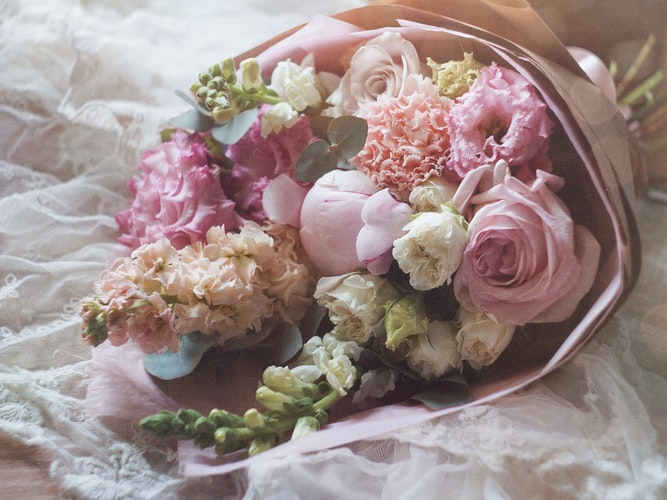
While many of us give flowers to celebrate things like birthdays, graduations, and other happy times, flowers can also be given in times of mourning where sympathy is required. This sympathy flower etiquette can be a great way to show you care about someone and are there for them. In the past, sympathy flowers etiquette was the symbol of care and protection.However, you also need to tread lightly; when it comes to delivering sympathy flowers. There are certainly some etiquette-related rules to keep in mind. If you don’t think of these, you could end up offending someone or making the situation worse. To help you with that, this blog post is going to go over everything you need to know about sympathy flowers etiquette.
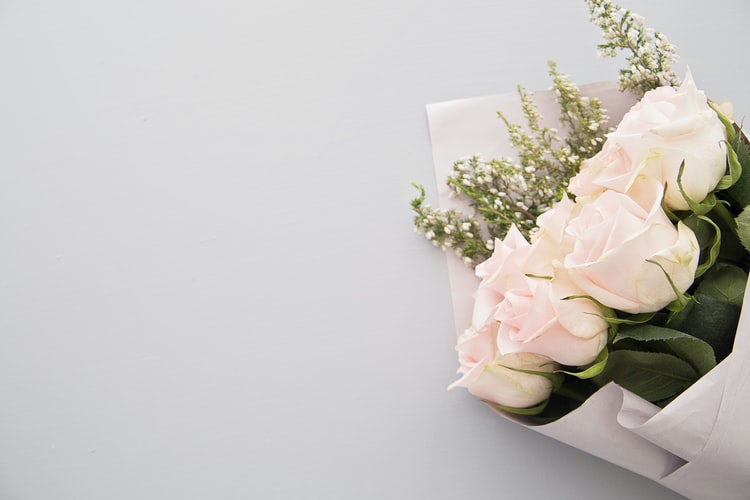
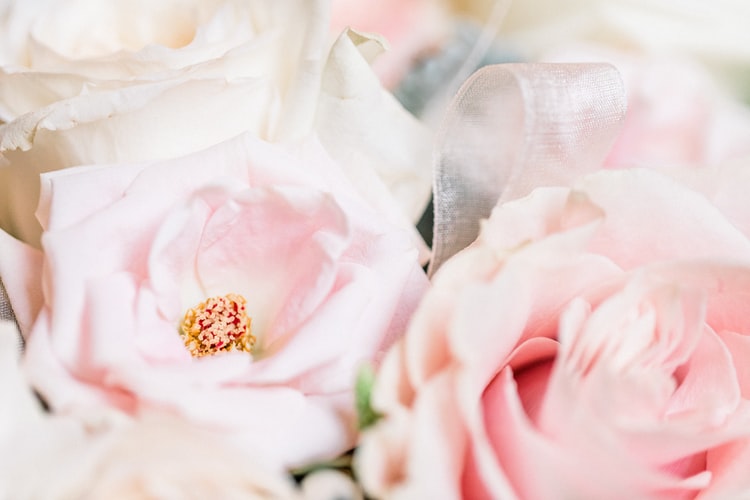
Send The Right Symbolic Flowers
As you probably know, there are many different types of flowers out there. They can vary a ton in terms of color, size, and even their scents. However, not all are appropriate for every event and greet with sympathy flowers etiquette. You need to be sure to choose the right ones. In general, you want to hold off from giving flowers that are too bright and “happy,” like bright red roses or tulips. Bright pinks, purples, and other vibrant choices are often not a good idea, either.Instead, opt for flowers that are a little more muted and pale. They can still be colorful, just not as bright and intense as flowers given during happier occasions, and white is used for sympathy flowers etiquette. Of course, sometimes these rules can be broken, but a pale white or other soft tone is often a safe bet.Also, familiarize yourself with the different meanings behind flowers, as that can help you decide which to give. Some can symbolize hope, sorrow, gratitude, and a variety of other emotions. Oftentimes, the right flower can show off what you are trying to say without you even having to say a word.You may go throughLove in the Air with the Beautiful Flowers
Include A Hand-Written Note
Flowers themselves are nice to give but aren’t all that personal in nature. They can look pretty, but without something a little extra, people may forget who they are from in a matter of hours. Being sympathetic is all about showing your support and being there for someone else. Take the time to write a little message or note on a card and deliver it along with the flowers and for the sympathy flowers etiquette.Leaving this blank is not a good look and can show you didn’t put the time or effort into the gift. As for what you should write on the cards, that is up to you. It should be something that is heartfelt and respectful and should show how much you care. Keep it short, simple and make sure it is sincere and empathetic.Always begin with a few words of condolence and then a little personal anecdote or story relating to the situation or individual. Then, end the letter with some support and encouragement to show you will always be there for them with proper sympathy and etiquette.You may go throughSend Flowers to Congratulate your Dear Ones on Their Achievements
Faith Can Impact The Role And Importance Of Flowers
Another part of sympathy flowers etiquette to keep in mind comes down to the faith or religion of the recipient. Different faiths may have different rules about flowers. Some faiths may see certain flowers in different ways than others, while others may not even see flowers as a sympathetic gift at all. So always be sure to do a bit of research to ensure you are not offensive to their culture or religion.For example, funeral flower etiquette can vary significantly from one faith to another. While they are acceptable in the Roman Catholic faith and can be sent to the wake, the funeral home, or even a house, for a Jewish funeral - flowers are not acceptable.If the recipient and their family are not faithful people, this may not be as important, but it is always a good idea to consider what is appropriate. Also, just because a particular individual isn’t faithful, don’t assume that their family isn’t.
Conclusion:
Sympathy flowers and the sympathy flowers etiquette can be a kind way to show your support and sympathy to a friend, family member, or co-worker. By keeping this etiquette-related information in mind, you will be able to ensure you can be as respectful and understanding as possible.Read Also:
Content Rally wrapped around an online publication where you can publish your own intellectuals. It is a publishing platform designed to make great stories by content creators. This is your era, your place to be online. So come forward share your views, thoughts and ideas via Content Rally.
If you need to move from one place to another from work or for any other relatively urgent reason, chances are you don’t really have much say in what season you will be moving. However, if you can choose, you should think carefully about which is the Best Season to Move.
In order to get some inside info, we asked Miracle Movers to share their insight from their years of experience in moving in all seasons, even notorious Canadian winters.
The Best Season to move:
Spring
Early in spring, the price quotes you can expect from moving companies will be somewhat cheaper, since the peak season starts somewhere in mid-May. That means that if you can nab an April date with fair weather, you basically get the best of both worlds – your move will be relatively cheap, and you won’t have to contend with extreme weather (be it hot or cold).
On the other hand, you will have to schedule your move in advance, and knowing the weather that far in the future might be impossible. Additionally, if you have children, spring is peak exam season. Putting your children through the stress of moving in this period is something you should think twice about.
Summer
The proverbial best season to do pretty much everything is the summer. Some research has found that homes sold in the summer fetch higher prices, so that might be an incentive to consider a summer move. Furthermore, the weather in most places promises to be fair most days, so picking any date will likely result in a nice day. With the summer break, your children will not only not have to worry about school, they will also be available to help you – get them to pack their own things.
When it comes to the downsides of a summer move, one of the most obvious ones is that everyone will pick summer, making your favorite moving companies pretty tightly scheduled – meaning the prices will be higher and their availability will be limited. Finally, extreme weather such as heatwaves and hurricanes in certain regions may also give you pause.
Fall/Autumn
Despite the stereotypical idea of a foggy and rainy season, the fall is actually generally a nice season with plenty of nice days that are ideal for outdoor activities, moving among them. Depending on your region, you may find that the fall is the most suitable season for a strenuous activity outdoors. Additionally, lower prices of homes in the fall may be better for you if you’re buying a home.
Finally, if you move in the early fall, you will be all set in your home by the holiday season with Thanksgiving and Christmas in your new home.
A major drawback of a fall move is that the school starts then, so moving just as your children start the school year may be less than ideal. With changing schools, leaving friends behind, it’s a lot of stress.
Winter
Finally, winter is the season when the least moves occur, especially in the regions where heavy snow is common. That, however, means that your move is likely to be much cheaper compared to other seasons. Additionally, with less work, moving companies will probably have more time to adapt to your schedule.
On the other hand, the biggest problem with moving in the winter is certainly cold. Furthermore, you may also need to insulate your boxes and protect them from the cold and water to prevent any kind of damage to your things while moving.
Ultimately, whichever season you pick, there are clear advantages you will get, and some disadvantages that you will have to contend with. Make sure to pick the season which suits your needs.
Read Also:
Factors To Consider While Preparing For A Move
Moving home checklist: What you need to know
7 Helpful Tips During an Emergency Moving Process
4 Questions To Ask From Your Home Relocation Company
Top 10 Reasons You Should Visit Honduras
The bride’s bouquet must have the best design that enlivenes the overall theme of the wedding. It ties together the design, decor, and style of the outfits.
The variety of flowers and the design of the bouquet can be very different. They are just as there is no single wedding style.
So, we asked the florists of FiftyFlowers store, which sells bridal bouquets online, to tell us about wedding bouquets. What wedding styles are best to combine them with, and what flowers to choose for the composition.
Bridal Bouquet Styles
Wedding bouquets can take a variety of forms: some brides prefer not to overload their hands with a huge bouquet. Again some care about shape and color, and others want to look original and memorable.
Florists distinguish the following styles of bridal bouquet design:
Posy bouquet. This bouquet is one of the most common and classic. For its arrangement, round-shaped flowers with the use of stems of the same length. Tightly tied together and practically without additional foliage or filler flowers, the posy bouquet looks understated yet romantic and glamorous.
Round bouquet is another classic style of bridal bouquet. It consists of flowers with stiff stems. Notable examples include roses or ranunculus, which the florist gathers tightly in a dome shape.
Cascading bouquet, formed from orchids and vines or foliage tendrils, looks very elegant and spectacular. In this bouquet, the main flowers in the centre are surrounded by a waterfall of climbing flowers. They flow smoothly to the floor.
Pageant bouquet. Long-stemmed flowers, such as calla lilies or delphiniums, create this bouquet. Since the bouquet is thin and long, the bride keeps it in the crook of one arm. The second one remains free. A pageant bouquet is great for a vintage-inspired wedding. And if it uses a lot of greenery, then it has a boho style.
Nosegay bouquet suits brides who do not want to overload their delicate look with large floral ensembles. It consists of only a few stems of flowers of the same species. They serve as just a simple accent without drawing attention to itself.
The asymmetric bouquet is quite unusual. It can be a composition of flowers of different lengths or with an accent on one side. Such bouquets usually use flowers of several shapes, types, and colors, which are accompanied by foliage or greenery.
For outdoor ceremonies, a crescent-shaped bouquet is ideal. The curve is achieved with falling foliage or cascading flowers on both sides and complements the bride's romantic, natural look.
Related: Tips To Help You Plan Your Long-Awaited Wedding
How to Compose the Perfect Bouquet for a Wedding?
Often, roses, peonies, or tulips are used for wedding bouquets, but there are no restrictions on the color or type of flowers. It all depends on what tone you want to set along with the bride, the color scheme of the wedding, and the time of year. The bouquet should look proportionate in the hands of the bride, without overshadowing her or looking too petite.
If you decide to assemble a bouquet yourself, try not to make it clumsy. Try to match the flowers in it. To do this, you can use the bridal bouquet online ordering function on the FiftyFlowers website, where you can conveniently sort flowers by color.
Some flowers look very beautiful in the bride's bouquet, but because of the strong scent, it is better not to use them. Even if you love lilies, lilacs, or jasmine, imagine that you and your guests will have to inhale their aroma throughout the day. This can cause headaches or allergies.
If you are not afraid to deviate from tradition, you can pick up one large flower, a floral wreath, or hook a boutonniere on your hand.
Read Also:
Tips for Having a Weed-Friendly Wedding
The Essential Services You Must Hire For Your Upcoming Wedding Day
Ethnic Wedding Attire: 3 Tips To Wear The Traditional Dhoti-Style Maharashtrian Saree
Hello there, fellow cannabis enthusiasts! Today, I'm excited to take you on a flavorful journey into the world of homemade cannabis gummies. If you've ever wanted to try your hand at crafting these delectable treats, you're in the right place.
Want to know how to make cannabis gummies? I have you covered! In this blog, I will walk you through the process step by step, from selecting the right strain to infusing your gummies with the perfect dose of cannabis goodness. So, roll up your sleeves (pun intended), and let's get cooking!
Before We Dive In: A Word On Cannabis Strains
Choosing the right cannabis strain for your gummies is crucial. Each strain offers a unique flavor profile and effect, so consider what kind of experience you're aiming for.
Personally, I like to use a hybrid strain for a balanced blend of relaxation and creativity. Indica strains can be too sedating for some, while sativa strains might make you a bit too chatty. A hybrid is often the sweet spot.
How To Make Cannabis Gummies: A Step-By-Step Guide That You Need!
Before we start with the steps, there is one thing I would like to make clear. While making cannabis gummies at home offers numerous benefits, it's essential to approach the process responsibly, especially if you are new to cannabis edibles.
Start with lower doses, be patient, and remember to comply with local laws and regulations regarding the preparation and consumption of cannabis-infused products.
Now that it is done, let’s get started!
Step 1: Gather Your Ingredients And Tools
Before you start whipping up your cannabis-infused gummies, make sure you have everything you need. Here's a list of what you'll require:
Cannabis tincture or cannabis-infused oil: This is the star of the show, providing THC or CBD goodness.
Flavored gelatin packets: Choose your favorite flavors for a delightful twist.
Unflavored gelatin: This will give your gummies the right texture.
Sugar: For sweetness, of course!
Water: To mix everything together.
Silicone molds: These will help shape your gummies.
A saucepan and a whisk: To heat and mix your ingredients.
A dropper or syringe: For precise dosing.
Step 2: Calculate Your Dosage
Getting the dosage right is crucial. We want those gummies to provide a blissful experience, not send us to the moon! Start by determining how much THC or CBD is in your tincture or oil and calculate the dosage per gummy. For beginners, I recommend starting with a lower dose (around 5-10mg) and gradually increasing it as needed.
Step 3: Prepare Your Molds
Before you dive into the cooking process, prepare your silicone molds. Lightly coat them with cooking spray to prevent sticking later on. This step will ensure your gummies pop out effortlessly once they're set.
Step 4: Mix Your Ingredients
Now, let's get cooking! In your saucepan, combine the flavored gelatin packets, unflavored gelatin, sugar, and water. Stir everything together until it forms a smooth mixture. It should be free of lumps and evenly blended.
Step 5: Infuse With Cannabis
This is where the magic happens! Add your cannabis tincture or infused oil to the mixture. The dosage you calculated earlier will guide you here. Use a whisk to ensure the cannabis is evenly distributed throughout the mixture. Keep the heat low to avoid overheating the cannabis, which could affect its potency.
Step 6: Heat And Stir
Place your saucepan over low heat and continue to stir. You want to gently heat the mixture without boiling it. Keep stirring until all the ingredients are fully combined, and the mixture becomes smooth and shiny. This should take about 7-10 minutes.
Step 7: Fill Your Molds
Once your mixture is ready, use your dropper or syringe to fill the silicone molds. Take your time and be as precise as possible. This will ensure that each gummy has the correct dosage, and they'll all look fantastic!
Step 8: Let Them Set
Patience is key at this stage. Allow your cannabis gummies to set at room temperature for at least 30 minutes. You can speed up the process by placing them in the refrigerator, but be careful not to freeze them.
Step 9: Pop And Enjoy!
The moment you've been waiting for has arrived! Carefully pop your gummies out of the molds and behold your homemade cannabis-infused creations. Store them in an airtight container in a cool, dark place to maintain their freshness.
The Beauty Of Homemade Cannabis Gummies
There's something truly special about crafting your own cannabis gummies. You have full control over the ingredients, flavors, and dosages, ensuring a personalized experience every time. Plus, it's a fun and rewarding process that allows you to experiment with different strains and flavors until you find your perfect match.
Now that you've learned the art of making cannabis gummies, the possibilities are endless. Whether you're treating yourself or sharing with friends, these homemade delights are a delightful way to enjoy the benefits of cannabis in a delicious and discreet form. So, go ahead, put on your apron, and let your culinary creativity shine in the world of cannabis-infused treats!
Benefits Of Making Cannabis Gummies At Home!
Making cannabis gummies at home offers several benefits, which contribute to their popularity among cannabis enthusiasts. Here are some key advantages:
1. Control Over Ingredients:
When you make cannabis gummies at home, you have full control over the quality of ingredients. You can choose organic, non-GMO, and natural products, ensuring that your gummies are free from undesirable additives or artificial flavors.
2. Customizable Dosage:
One of the most significant advantages is the ability to customize the dosage. You can precisely measure the amount of cannabis you want in each gummy, allowing for consistent and accurate dosing. This is particularly important for medical cannabis users who require specific doses for their conditions.
3. Choice Of Strain:
Homemade gummies let you select the cannabis strain that suits your preferences and desired effects. Whether you want a relaxing Indica or an energizing sativa, you can tailor your gummies to your specific needs.
4. Variety Of Flavors:
You can experiment with an array of flavors, creating gummies that cater to your taste preferences. Whether you prefer fruity, sour, or herbal flavors, you have the freedom to get creative and craft gummies that delight your palate.
5. Cost-Effective:
Making your own cannabis gummies can be more cost-effective than purchasing pre-made edibles. You can buy cannabis flowers or extracts in bulk, which often offers better value for money, and create a substantial quantity of gummies.
6. Quality Control:
Home preparation allows for better quality control. You can ensure the cleanliness of your equipment and environment, reducing the risk of contamination. This is particularly crucial for individuals with allergies or dietary restrictions.
7. Privacy And Discretion:
Crafting your cannabis gummies at home offers privacy and discretion. You can enjoy the therapeutic benefits of cannabis without drawing attention to yourself or your cannabis consumption.
8. Fun And Educational:
The process of making cannabis gummies can be enjoyable and educational. It provides an opportunity to learn about the science of cannabis infusion and cooking techniques. It can be a fun activity to share with friends or loved ones.
9. Experimentation:
Homemade gummies encourage experimentation. You can try different recipes, ratios, and infusion methods until you find the perfect formula that suits your preferences and needs.
10. Longer Shelf Life:
Keep With proper storage, homemade cannabis gummies can have a longer shelf life compared to store-bought edibles. You can keep them fresh for an extended period, allowing you to enjoy them at your own pace.
Wrapping It Up!
In case you were searching about how to make cannabis gummies at home, I hope that this blog has been of help to you. If there are any other queries related to the same, feel free to let me know. All that you need to do is scroll down till you reach the bottom of the page, Then leave your comments and queries in the box below. And I will be there to answer them all for you!
Learn More About:
Why Cannabis Is Good For Health?
How To Make Your Own Cannabis Topicals?
Things To Consider While Buying CBD Gummies Online
Cannabis Can Help In The Fight Against Drug Addiction


 As you probably know, there are many different types of flowers out there. They can vary a ton in terms of color, size, and even their scents. However, not all are appropriate for every event and greet with sympathy flowers etiquette.
You need to be sure to choose the right ones. In general, you want to hold off from giving flowers that are too bright and “happy,” like bright red roses or tulips. Bright pinks, purples, and other vibrant choices are often not a good idea, either.
Instead, opt for flowers that are a little more muted and pale. They can still be colorful, just not as bright and intense as flowers given during happier occasions, and white is used for sympathy flowers etiquette. Of course, sometimes these rules can be broken, but a pale white or other soft tone is often a safe bet.
Also, familiarize yourself with the different meanings behind flowers, as that can help you decide which to give. Some can symbolize hope, sorrow, gratitude, and a variety of other emotions. Oftentimes, the right flower can show off what you are trying to say without you even having to say a word.
You may go through Love in the Air with the Beautiful Flowers
As you probably know, there are many different types of flowers out there. They can vary a ton in terms of color, size, and even their scents. However, not all are appropriate for every event and greet with sympathy flowers etiquette.
You need to be sure to choose the right ones. In general, you want to hold off from giving flowers that are too bright and “happy,” like bright red roses or tulips. Bright pinks, purples, and other vibrant choices are often not a good idea, either.
Instead, opt for flowers that are a little more muted and pale. They can still be colorful, just not as bright and intense as flowers given during happier occasions, and white is used for sympathy flowers etiquette. Of course, sometimes these rules can be broken, but a pale white or other soft tone is often a safe bet.
Also, familiarize yourself with the different meanings behind flowers, as that can help you decide which to give. Some can symbolize hope, sorrow, gratitude, and a variety of other emotions. Oftentimes, the right flower can show off what you are trying to say without you even having to say a word.
You may go through Love in the Air with the Beautiful Flowers
 Flowers themselves are nice to give but aren’t all that personal in nature. They can look pretty, but without something a little extra, people may forget who they are from in a matter of hours. Being sympathetic is all about showing your support and being there for someone else. Take the time to write a little message or note on a card and deliver it along with the flowers and for the sympathy flowers etiquette.
Leaving this blank is not a good look and can show you didn’t put the time or effort into the gift. As for what you should write on the cards, that is up to you. It should be something that is heartfelt and respectful and should show how much you care. Keep it short, simple and make sure it is sincere and empathetic.
Always begin with a few words of condolence and then a little personal anecdote or story relating to the situation or individual. Then, end the letter with some support and encouragement to show you will always be there for them with proper sympathy and etiquette.
You may go through Send Flowers to Congratulate your Dear Ones on Their Achievements
Flowers themselves are nice to give but aren’t all that personal in nature. They can look pretty, but without something a little extra, people may forget who they are from in a matter of hours. Being sympathetic is all about showing your support and being there for someone else. Take the time to write a little message or note on a card and deliver it along with the flowers and for the sympathy flowers etiquette.
Leaving this blank is not a good look and can show you didn’t put the time or effort into the gift. As for what you should write on the cards, that is up to you. It should be something that is heartfelt and respectful and should show how much you care. Keep it short, simple and make sure it is sincere and empathetic.
Always begin with a few words of condolence and then a little personal anecdote or story relating to the situation or individual. Then, end the letter with some support and encouragement to show you will always be there for them with proper sympathy and etiquette.
You may go through Send Flowers to Congratulate your Dear Ones on Their Achievements
 Another part of sympathy flowers etiquette to keep in mind comes down to the faith or religion of the recipient. Different faiths may have different rules about flowers. Some faiths may see certain flowers in different ways than others, while others may not even see flowers as a sympathetic gift at all. So always be sure to do a bit of research to ensure you are not offensive to their culture or religion.
For example, funeral flower etiquette can vary significantly from one faith to another. While they are acceptable in the Roman Catholic faith and can be sent to the wake, the funeral home, or even a house, for a Jewish funeral - flowers are not acceptable.
If the recipient and their family are not faithful people, this may not be as important, but it is always a good idea to consider what is appropriate. Also, just because a particular individual isn’t faithful, don’t assume that their family isn’t.
Another part of sympathy flowers etiquette to keep in mind comes down to the faith or religion of the recipient. Different faiths may have different rules about flowers. Some faiths may see certain flowers in different ways than others, while others may not even see flowers as a sympathetic gift at all. So always be sure to do a bit of research to ensure you are not offensive to their culture or religion.
For example, funeral flower etiquette can vary significantly from one faith to another. While they are acceptable in the Roman Catholic faith and can be sent to the wake, the funeral home, or even a house, for a Jewish funeral - flowers are not acceptable.
If the recipient and their family are not faithful people, this may not be as important, but it is always a good idea to consider what is appropriate. Also, just because a particular individual isn’t faithful, don’t assume that their family isn’t.