How To Design Your Custom Banner That Works

Published on: 06 March 2023 Last Updated on: 29 July 2024
Custom Banner

Whether you want to attract new customers or promote an event, a custom banner can be a powerful way to drive your message. But how do you design one that works?

The first step is to consider your marketing goal. Once you know what you’re trying to achieve, all of your other decisions will fall into place.

Here Are Four Prime Steps To Design Your Custom Banner:

Design Your Custom Banner

1. Colors

When designing a custom banner, you want to be sure to choose colors that will help grab your audience’s attention. The wrong colors can make your banner look dull, while too many can take away from your message.

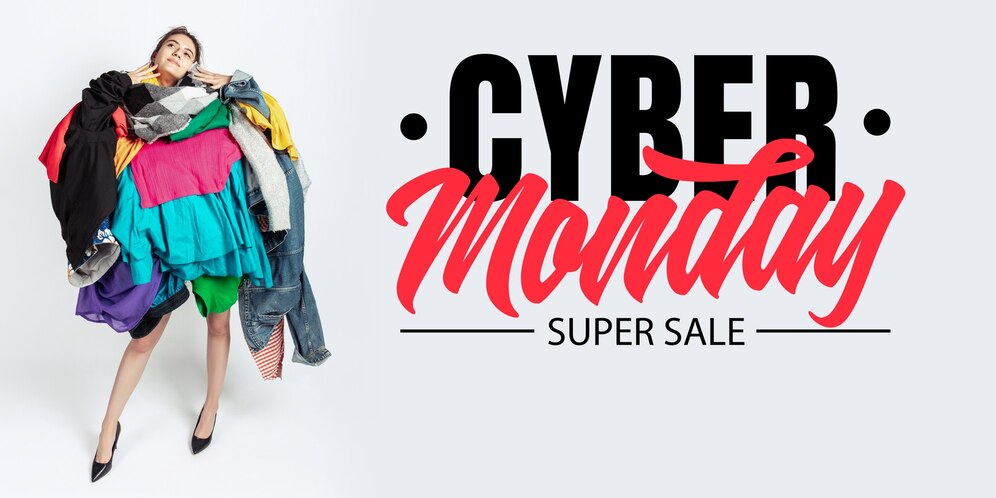
When it comes to choosing the right colors for your banner, the best approach is to use bright hues that stand out against a neutral background. These can be anything from radiant yellow to fiery red.

A contrasting color like this makes your sign more eye-catching and helps potential customers identify it from a distance. It also helps create a visual hierarchy to help your audience better understand what you’re advertising.

For example, a fast food chain might use a combination of yellow and red for advertising its products because it’s easy for people to recognize and remember. It’s also a great contrast to the black background of their logo.

You should also consider the type of font you’ll be using for your custom banner printing. If your banner is intended for a small business, for example, it might be best to stick with plain text that’s easy to read from a distance.

If your banner is intended for an event, a more detailed font might be a good choice. However, if you’re designing a one-time-use banner, it’s best to avoid putting too much information on it.

This is because people don’t have time to read a lot of information at once, so it’s important to keep it brief. Generally, you’ll want to have a big font for your primary message and smaller text for any additional information, such as a description of an event or a contact number.

The next thing you should keep in mind when choosing colors for your custom banner is how far the colors will be from each other. The farther the colors are from each other, the more likely they’ll be to confuse people or distract from your main message.

For this reason, it’s important to choose a background color that compliments your business theme and a font that’s easy to read. A quality online banner printing company can provide you with advice and recommendations for the perfect colors and designs for your business.

2. Typefaces

Custom banners are one of the most effective advertising mediums for reaching new customers. But it’s important to design them right. This means choosing the best typefaces and keeping them simple enough to be read quickly by people driving by or walking by your store.

The most important thing to remember when designing your custom banner is to choose a font that’s easy to read. There are many different font types to choose from, and selecting the right one can make or break your design.

There are five main types of typefaces: Serif, Sans-Serif, Script, Condensed, and Italic. Each has a unique personality and can be used for different purposes.

Serif typefaces typically feature slight decorative strokes at the ends of letters, which give them a traditional appearance. They’re popular for brands and products that want to create a sophisticated, classy, and trustworthy image.

Another important consideration is the typeface’s weight. Font weights range from thin (also called hairline or light) to black, with a lot of different options in between.

Using too thick or too thin fonts can make it difficult for people to read your message, and can even confuse them. Using too light or too dark can also have the same effect, so it’s crucial to know which option is most suitable for your needs.

The best fonts for a custom banner are those that are easily readable in all sizes. For example, Verdana is a widely used typeface that’s easy to read on smaller devices.

Sans-Serif typefaces are generally preferred for large banner signs that will be seen outdoors. These fonts are usually bold, but they can also come in regular and italic styles.

They’re often used for titles and call-to-actions, but they can be a bit on the thin side when it comes to body text. If you’re planning on adding a lot of copy to your custom banner, it may be best to use a font like Quattrocento Sans.

If you’re looking for a banner that mimics the look of typewriter letters, Veteran Typewriter is a good choice. This font is easy to read and emulates the typewriter letters that are commonly found in magazines.
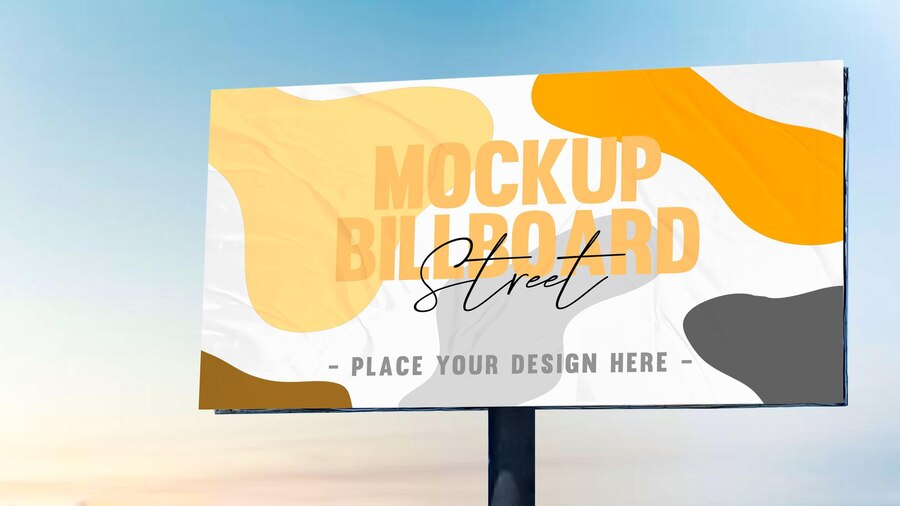
3. Backgrounds

If you want to make sure your banner is eye-catching, the background is a key component. You can choose from a range of options, including illustrations, color overlays, and custom backgrounds.

When choosing a background, keep in mind that the size of the image will affect how it looks when printed on your banner. The best type to use is a vector file since these files can be scaled without losing image quality. It’s also a good idea to save your design as a flattened file in Photoshop or Illustrator before sending it to a printing company.

Another important consideration is glare. If the background of your banner is too bright or dark, it can cause your logos to appear distorted. You can avoid this by using an off-white color for your background, which will absorb light and minimize glare.

It’s also a good idea to choose a background that complements the main text and logos on your banner. This will ensure that your brand’s colors stand out from the rest of the background, and your logos will pop.

A background can also help convey a specific message, such as a call to action. For instance, if your business is based at an unremarkable location, a colorful banner could help you draw attention to your building and services.

The right banner will communicate your message quickly and clearly. Whether you’re promoting a new event or announcing a product launch, it’s important to make your banner easy to read from a distance. This means avoiding fonts that are too chunky and contrasting colors and sizes.

To design your custom banner, start by selecting a template from Canva’s collection. Once you’ve done this, you can add images and other elements to your design.

Before you start adding your elements, take some time to think about your message and what action you want people to take after they see your banner. This will guide the rest of your design and ensure that your message is clear and impactful.

You can use Canva’s free templates to get started on your design, or you can create a more professional look with a paid account. The site has thousands of images, so you’ll be able to find the perfect one for your banner. You can even search for specific graphics if you’d like to incorporate a specific piece of artwork into your design.

4. Images

If you’re designing a custom banner for your business, it’s important to use images that will grab the attention of viewers. The right images will help your message get across, entice people to visit your site and encourage them to take action.

When designing a banner, you can either use a pre-made template or create your own from scratch. There are several factors that go into designing a banner, including color, text size and placement, and image quality.

One of the best ways to make your banner stand out is to use contrasting colors. For example, a white background with red or yellow text will draw the eye. This will also make your message pop out in a crowd of competitors’ ads.

You can also add photos to your banner from the Web by using an online image editor. Kapwing, for example, is a collaborative image and video editing platform that allows you to use copyright-free content from huge image libraries like Unsplash and Pexels.

Once you’ve selected the photo you want to use for your custom banner, resize it to fit your dimensions. You can do this by using the “Resize” button on the toolbar or by manually inputting the appropriate picture sizes.

After you’ve resized the image, it’s time to decide on a background color. You can choose a color that fits your brand’s colors or another neutral shade that complements your design. You can change the color of your background in several places, including the Banner Styling menu and in your template’s guide.

When deciding on a background color, be sure to consider the opacity of your banner’s text and graphics. A light background will make your text and graphics harder to read and will be less noticeable, while a dark background can help the elements of your banner stand out from the rest of the page.

Once you’ve finished selecting your background color, it’s time to add text to your banner. You can add text with the Text tool (the big letter “T” in the toolbar), or by clicking on the banner to access its text editing bar. This way, you can add any text to your custom banner and modify its size, fonts, and colors.

Read Also:

Arnab is a professional blogger, having an enormous interest in writing blogs and other jones of calligraphies. In terms of his professional commitments, He carries out sharing sentient blogs.

View all posts

Leave a Reply

Your email address will not be published. Required fields are marked *

Related

Speeding Up WordPress File Handling

Fast Track to Uploads: Speeding Up WordPress File Handling

In the bustling realm of WordPress, a swift and seamless user experience is paramount. And nothing sets the tone quite like rapid file uploads. Picture this: your website visitors eagerly await engaging content, but sluggish file handling dampens their enthusiasm. In this blog, we delve into the pivotal role of fast upload files in elevating WordPress usability. It will help us upload file fast on WordPress. We'll unravel the vexing challenges that often throttle upload speeds, from server limitations to bulky media. Enter the Filestack WordPress Plugin – a potent solution primed for advanced file management to upload file fast. Brace yourself for insights that propel your WordPress uploads into the fast lane. Hence, fostering unparalleled user satisfaction. What Are The Methods To Assess The Speed And Efficiency Of File Uploads? Assessing the speed and efficiency of file uploads involves several methods. One common approach is measuring upload time. It calculates the duration it takes to transmit a file to a server. Bandwidth utilization is another method. It involves analyzing how much of the available network capacity is utilized during the upload. Throughput evaluation involves assessing the amount of data successfully transferred per unit of time. Network latency measurement helps identify delays in data transmission. Tools like Ping, Traceroute, and online speed tests also provide insights into upload performance. For more information, please visit the website, This Vid. What Are The Bottlenecks In The Current Upload Process? The current upload process faces several bottlenecks that hinder efficiency and user experience. Network limitations often result in slow transfer speeds. Hence, frustrating users and delaying content sharing. Inadequate server infrastructure further compounds the issue, leading to processing delays and interrupted uploads. File format compatibility issues create additional obstacles. Furthermore, it necessitates time-consuming conversions. Cumbersome user interfaces and authentication procedures add complexity. Hence, discouraging seamless uploads. What Is The Impact Of File Size And Format On Upload Speed? File size and format significantly influence upload speed. Larger files require more time to transfer. Hence, causing delays and straining bandwidth. Complex formats require additional processing before uploading, further slowing the process. Optimizing file sizes and using efficient formats can enhance upload speed. Hence, ensuring smoother data transmission. How To Optimize The Server Environment For Faster Uploads? To optimize a server environment for faster uploads, start by meticulously analyzing server configurations and settings. Fine-tune parameters such as upload limits, buffer sizes, and timeouts. Implement server-side optimizations like compression and caching to expedite file processing. Utilize asynchronous processing and parallelism to handle concurrent uploads efficiently. Opt for high-performance storage solutions and consider Content Delivery Networks (CDNs) to distribute load. Regularly monitor server performance. Hence, diagnosing bottlenecks and adjusting configurations accordingly. How To Enhance Network And Connection Speed? Enhancing network and connection speed involves various strategies. Optimizing router placement, updating firmware, and reducing interference is vital to improve bandwidth and stability. Content Delivery Networks (CDNs) expedite file transfers by distributing content across multiple servers globally. This minimizes latency and accelerates data retrieval. Optimizing network protocols like TCP/IP and HTTP enhances data transmission efficiency. Prioritizing Quality of Service (QoS) settings for critical applications, employing data compression, and minimizing background processes further amplify network performance. How To Utilize Asynchronous And Parallel Uploads? Asynchronous upload techniques within WordPress can significantly enhance user experience and optimize performance. Asynchronous methods upload files in the background. Hence,  allowing users to continue their tasks uninterrupted. To further expedite the process, parallel uploads can be employed. Hence, enabling multiple files to be transmitted simultaneously. Concurrency challenges meet through efficiently managing upload queues. Hence, ensuring seamless handling of simultaneous requests. Combining asynchronous and parallel strategies accelerates upload times and ensures smooth user interactions. Why Do We Need File Compression And Format Considerations? File compression is pivotal in our digital landscape, offering multifaceted benefits. Primarily, it slashes upload times by condensing data without compromising quality. This is crucial for seamless data sharing, a cornerstone of modern communication. Alongside compression, selecting judicious file formats is equally vital. Opting for efficient formats expedites transfers, which is especially vital when bandwidth is a constraint. How To Integrate Filestack WordPress Plugin? The Filestack WordPress Upload plugin facilitates hassle-free file uploads from local and cloud drives. Simply insert the [Filestack shortcode] into your post to define where the file should appear. Display files promptly, benefiting from the optimized page load time courtesy of Filestack CDN. Crop and edit images within the uploader or use file transformations to enhance media assets programmatically. Store files in Filestack's cloud storage or your preferred location. Filestack features seamless integrations, multi-file and large file uploads, in-app image transformations, asynchronous uploads, integrated CDN, and cloud storage compatibility. Installation Process Follow these steps to get started: Place the plugin folder into the /wp-content/plugins/ directory. Activate the plugin via your WordPress dashboard's 'Plugins' menu. Input your Filestack API Key. Use the shortcode [filestack] within a blog post or page to showcase the upload button. Alternatively, click the Filestack button in the Media section to initiate file uploads. Opt for "Insert Into Post" to add the CDN resource seamlessly. How To Perform Real-Time Monitoring And Performance Measurement? Real-time monitoring and performance measurement are critical for optimizing upload performance. Employing dedicated tools and plugins helps track upload speed, promptly identifying bottlenecks. Leveraging performance analysis tools allows real-time visualization of data throughput and latency. Regularly analyzing these insights enables data-driven decisions for enhancing upload speed. Swift interventions can be made, such as optimizing network configurations or upgrading hardware. Continuous monitoring ensures sustained improvements, creating a cycle of refinement. Read Also: The Best WordPress Plugins For Marketers Conclusion In the fast-paced digital landscape, optimizing WordPress file handling is paramount. Upload speed enhancements become a reality through diligent monitoring and strategic employment of performance analysis tools. Real-time insights illuminate bottlenecks. At the same time, continuous monitoring fosters a cycle of refinement. By embracing data-driven decision-making, organizations unlock the potential for rapid improvements. This dynamic approach ensures efficient uploads, fostering a seamless user experience and bolstering website credibility. Embracing the fast track to uploads becomes a strategy and a necessity for WordPress success. FAQs How Can I Upload Files Faster? Optimize network settings, use compression, and employ efficient file formats for faster uploads. How Can I Send 25 GB Files For Free? Utilize cloud storage services like Google Drive or WeTransfer for sending large files up to 25 GB for free. How Can I Send 100GB Of Files For Free? For free, use cloud storage services like Google Drive or Dropbox to send large files up to 100GB. How Can I Transfer 100GB Of Files Faster? Utilize high-speed internet, compression, and dedicated file transfer tools for swift and efficient 100GB transfers. Read Also: 4 WordPress Plugins to Make Your Blog More Powerful

READ MOREDetails
web design

Functionality – an important aspect of good web design: Sydney digital marketing services for your growth

The success or failure of any website is determined by its usability, functionality, and visual design. Keeping webpage visitors engaged and stimulating them to interact is a leading task for designers and web developers. If the visual components are balanced and exist in harmony, it inspires confidence. Also, with great and user-friendly web design, Sydney business owners can easily gain the following goals: win loyalty and establish clear communication with the target audience; become the leader in the industry; inform and inspire potential buyers; increase profitability; work with negative reviews, improving your promotion and advertising strategy; enter new markets. But the task of developing a highly-effective web resource doesn’t seem to be a straightforward one. Here are some valuable tips on building not just a web page that represents your business, but an indispensable tool to increase sales, overcome Australian competition, and grow your brand. Top web design features Internet users value: 1. The first impression matters Everything begins when a user enters your website. Thus, determining how users will interact with site content is just as important as taking care of the visual appeal of your pages. It’s all about a competent arrangement of colors, fonts, and elements on a page without unnecessary and distracting attention details. The key principle is to deliver only the needed information to the viewer. With the right visuals, you promote interactivity. With professionally written content, you will be able to highlight the features of your product or service. And by placing high-quality images, animations, infographics, and photos, you will fuel your overall marketing efforts. But remember, excessive visuals can harm your strategy, so apply graphics wisely. 2. Simple navigation enhances SEO From a user point of view, the navigation of the site should be intuitive. Then visitors can easily find exactly what they need, and search engines can index your pages without obstacles. After all, a disoriented visitor will simply go to your business opponents. Usability significantly affects a site's ability to rank higher in search results. If functionality and convenience won't be ignored, visitors will have a good impression of the brand. Also, the ranking algorithms will definitely take into account these two crucial for SEO aspects. 3. Build trust through the color scheme Pick colors that evoke the desired emotions in your visitors. For example, blue is associated with trustworthiness and professionalism, while red causes enthusiasm and joy. Beautiful and aesthetic pleasing web design with bold colors catch the minds and motivate for making instant purchases while weaker colors create contrast and strengthen the perception of the material. 4. Web design approach with mobile-first in mind.  If you want your site to be a stable source of organic traffic, invest in content optimization. Unresponsive websites won’t be able to hold mobile users until they will be ready to buy. Losing traffic due to poor mobile-friendliness leads to a decrease in sales. Prioritize the mobile-first factor and you will reach the top. 5. Slow loading speed alienates While slow sites kill conversions and your online reputation, faster sites obtain more clients, handling harsh competition environment.   Seeking solutions to boost site functionality and retain more customers, you should rely only on proficient web design Australian services offered by web agencies like Shtudio. Delivering powerful web creations through digital innovative tools, you will get impressive online marketing solutions, and more than just a website. Read Also: Questions To Ask When Working With A Web Developer 6 Things To Know Before Choosing Web Hosting For Your Website

READ MOREDetails
SEO-friendly theme

How do you choose an SEO-friendly theme for your website?

When it comes to giving your website a very attractive look and functions, themes play a unique role. Website templates let you design your site one way, which can help you to gain all the important elements in one place. The theme you are picking has a large impact on how your customers will interact with you over your website. Well, beauty and functions are not everything that you should consider about a site's theme. You must have a look at its SEO aspects which will help your website to gain a better performance potential. Hence it is advisable to pick a theme that is SEO friendly from the very beginning. So what are the factors that you must consider while picking an SEO-friendly theme? Have a look. Speed potential: Speed is the first thing that you must have a look at while picking a theme. Google mostly prioritizes those themes which have better loading speed. In case your website loading speed is slow, then it can impact your website traffic. A theme that is heavier with plenty of elements can slow down your website. In turn, it will affect your overall site's performance and ranking. Thus, while choosing an SEO-friendly theme, you must check out its size. Go for an optimized theme with better load speed to improve your ranking performance. Get your services from SEO New York who is an expert in getting you the best kind of themes. Plugin Compatibility Plugin compatibility is one of the essential parts of any website. They add better functionality to your site and, at the same time, reduce your coding effort. Even though installing too many plugins can slow down your site, using a good theme can reduce that pain point. Before you select a theme, make sure it supports all the popular plugins. It is better to check all the documentation and features of the theme before you purchase. Compatibility over browsers The more your website becomes browser-friendly, the more it will get accepted by a large audience base. Hence you must consider whether the theme you have picked is browser friendly or not. Your website must be visible and attractive from every browser. In case a particular browser does not support the theme code of your website, then it might not load properly, which will make the design appear in a skewed form. Hence, it had to be cross-browser compatible. Mobile friendly It is needed not to say how compatible mobile devices are when it comes to offering a searching benefit on the move. Since billions of people rely upon mobile devices to browse important things, you must design your website to become suitable for it. It is better to go for a theme that is highly mobile responsive that will benefit your SEO. Responsiveness  Responsiveness is something that every user demands from a site that they are browsing. The responsiveness of a website is highly dependent on a theme. Apart from the desktops, the website must be able to get accessed from a varied range of devices. To offer a seamless experience to your customer, you must look at the responsiveness of a theme that will not at all hamper the performance of your website. Consider Reading: Small Business SEO Website Design Tips Clean code A website is made of plenty of codes. In case your codes are quite poorly written, then it can highly affect the security and speed. Also, it will affect your resources. Hence the same is also applicable for your WordPress themes. A good theme that you can choose must include a clean code that can make your website SEO highly secure and reliable. Also, it will offer less downtime. A theme with clean code will boost your page loading speed, and at the same time, it will boost up your SEO ranking. Customer-friendly navigation A theme must have a unique kind of navigation ease that can guide your visitors quite easily on your site. View all of your details on your template navigation so that you can give your users a unique experience. The proper amount of CTA buttons, quick hamburger menus, site map, etc., can give your site a unique look and great kind of performance. At the same time, it will help the site crawlers to understand your page better and index it faster. Conclusion It is always better to go with the themes which have a higher potential to offer you the ultimate of performance accuracy. Thus you should go for a theme that uniquely delivers all the above-mentioned features to leverage the SEO of your site. Read Also: Best SEO Practices Melbourne Businesses Should Follow SEO Agencies Are the Experts at Improving Your Website Content The Top SEO Tools for 2021

READ MOREDetails